As more organizations adopt Proxmox VE as a cost-effective alternative to VMware ESXi, migrating existing virtual machines has become a common task. Because the two platforms use different virtualization architectures and disk formats, importing an ESXi VM into Proxmox requires proper migration methods. This guide explains four practical approaches, from exporting OVA/OVF files and converting VMDK disks to direct disk migration and using Vinchin Backup & Recovery, helping you choose the best option based on your environment and migration needs.
Understanding ESXi vs Proxmox Architecture
Before starting the migration, it's helpful to understand the key architectural differences between ESXi and Proxmox VE.
VMware ESXi is a proprietary Type-1 hypervisor that uses the VMFS file system and typically stores virtual disks as VMDK files. Virtual machines are managed through vCenter Server or the ESXi Host Client, making it a popular choice in enterprise environments.
Proxmox VE is an open-source virtualization platform built on Debian Linux. It combines KVM for virtual machines and LXC for containers while supporting multiple storage backends such as local storage, LVM, ZFS, Ceph, and NFS. Instead of relying solely on VMDK files, Proxmox commonly uses raw or QCOW2 disk formats.
Understanding these differences helps minimize compatibility issues after migration.
Pre-Migration Checklist
Proper preparation helps ensure a smooth migration and minimizes downtime. Before importing an ESXi VM into Proxmox, check the following:
1. Back up the virtual machine
Create a full backup before migration so you can quickly recover if any issues occur.
2. Check OS compatibility
Most modern Windows and Linux systems are supported, but older operating systems may require additional drivers or BIOS/UEFI adjustments.
3. Verify storage capacity
Ensure the Proxmox host has sufficient storage for the imported VM and future growth.
4. Record the VM configuration
Note the VM's CPU, memory, disk layout, network settings, firmware (BIOS/UEFI), and boot order so they can be recreated in Proxmox.
5. Remove unnecessary snapshots
Delete or consolidate old snapshots to reduce disk size and simplify the migration.
6. Update VMware Tools (Optional)
Updating VMware Tools before exporting the VM helps ensure a clean shutdown and a more consistent disk state. After migration, replace VMware Tools with VirtIO drivers and the QEMU Guest Agent.
Method 1: Export OVA/OVF from ESXi and Import to Proxmox
One of the simplest ways to migrate an ESXi VM is by exporting it as an OVA/OVF package and importing the virtual disk into Proxmox. It preserves the VM configuration while packaging the virtual disks into transferable files.
Steps:
1. Shut down the VM in ESXi.
2. Export the VM as an OVA or OVF package.
3. Transfer the exported files to the Proxmox host using SCP, SFTP, rsync, or another file transfer method.
For example:
scp myvm.ova root@proxmox-ip:/var/lib/vz/template/
4. Create a new VM in Proxmox.
5. Import the VMDK disk into the new VM:
qm importdisk 100 myvm.vmdk local-lvm
Replace 100 with your VM ID and local-lvm with your target storage.
6. Attach the imported disk to a VirtIO SCSI controller, configure the boot order, and start the virtual machine.
Method 2: Convert VMDK to QCOW2 Using qemu-img
For administrators who prefer command-line tools or need greater flexibility, converting the VMDK disk directly into QCOW2 is another popular option.
The qemu-img utility supports conversion between multiple virtual disk formats, including VMDK, QCOW2, RAW, VHD, and VHDX.
Steps:
1. Copy the VMDK file from ESXi to the Proxmox server.
2. Convert the disk:
qemu-img convert -f vmdk source.vmdk -O qcow2 destination.qcow2
If you prefer a raw disk image:
qemu-img convert -f vmdk source.vmdk -O raw destination.raw
QCOW2 supports snapshots and thin provisioning, while RAW generally offers slightly better performance.
3. Create a new VM in Proxmox without adding a virtual disk during the wizard.
4. Import the converted disk:
qm importdisk 100 destination.qcow2 local-lvm
Alternatively, move the disk manually into the target storage if your storage backend supports it.
5. Attach the imported disk and start the VM.
Method 3: Direct Disk Migration
For large virtual machines, directly copying the VMDK from the ESXi datastore to Proxmox can save time and avoid creating intermediate OVA files.
Steps:
1. Enable SSH on the ESXi host.
Navigate to Host > Manage > Services and enable the SSH service if it’s not already running.
2. Copy the VMDK file from the Proxmox server:
scp root@esxi-ip:/vmfs/volumes/datastore1/MyVM/MyVM.vmdk /tmp/
Or use rsync for better resume capability during large transfers.
rsync -av root@esxi-ip:/vmfs/volumes/datastore1/MyVM/ /tmp/MyVM/
3. Import the disk into Proxmox:
qm importdisk 100 /tmp/MyVM.vmdk local-lvm
4. Attach the imported disk and configure VM settings.
Method 4: Migrate VMware ESXi to Proxmox with Vinchin Backup & Recovery
Manual migration methods work well for a small number of virtual machines, but they become increasingly time-consuming when migrating dozens or hundreds of workloads. For enterprise environments, using a professional backup and migration solution can significantly simplify the process.
Vinchin Backup & Recovery provides agentless backup and instant recovery for over 15 virtualization platforms, including VMware and Proxmox.It supports flexible backup strategies with full, incremental, and differential backups. Its built-in cross-platform VM migration allows you to restore VMware backups directly to Proxmox without manually converting VMDK files or rebuilding virtual machines, significantly reducing migration time and effort.
The migration workflow is straightforward:
1. Create a backup job for the source ESXi virtual machine.
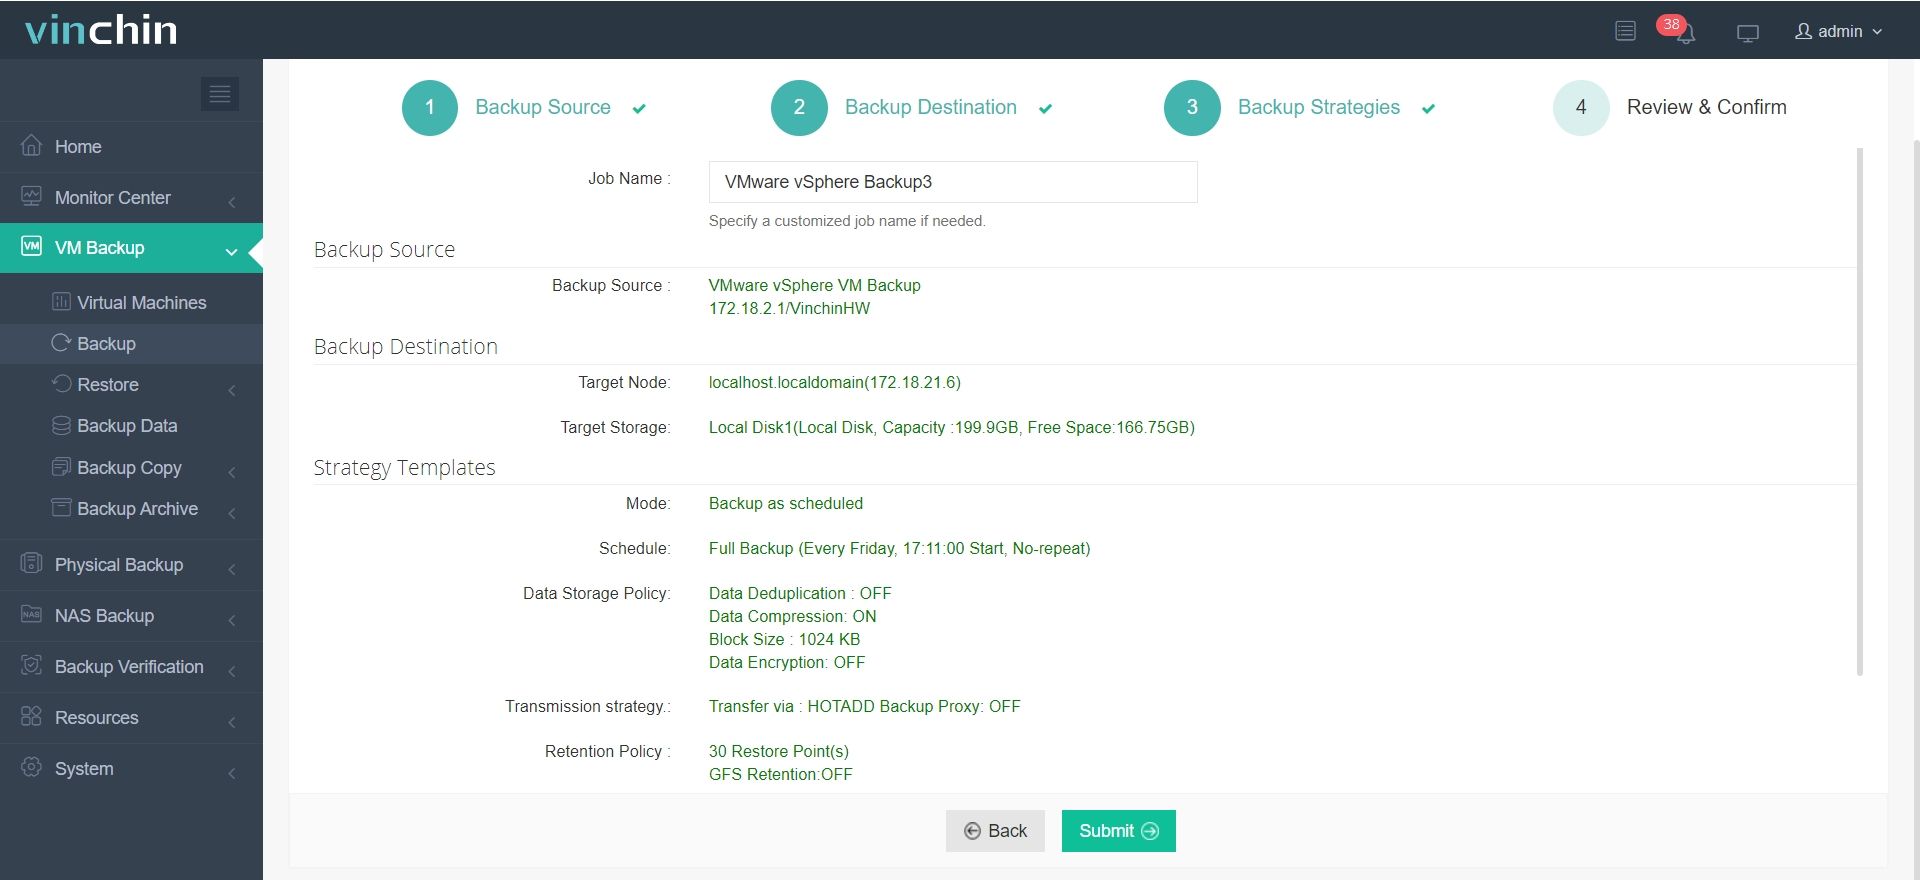
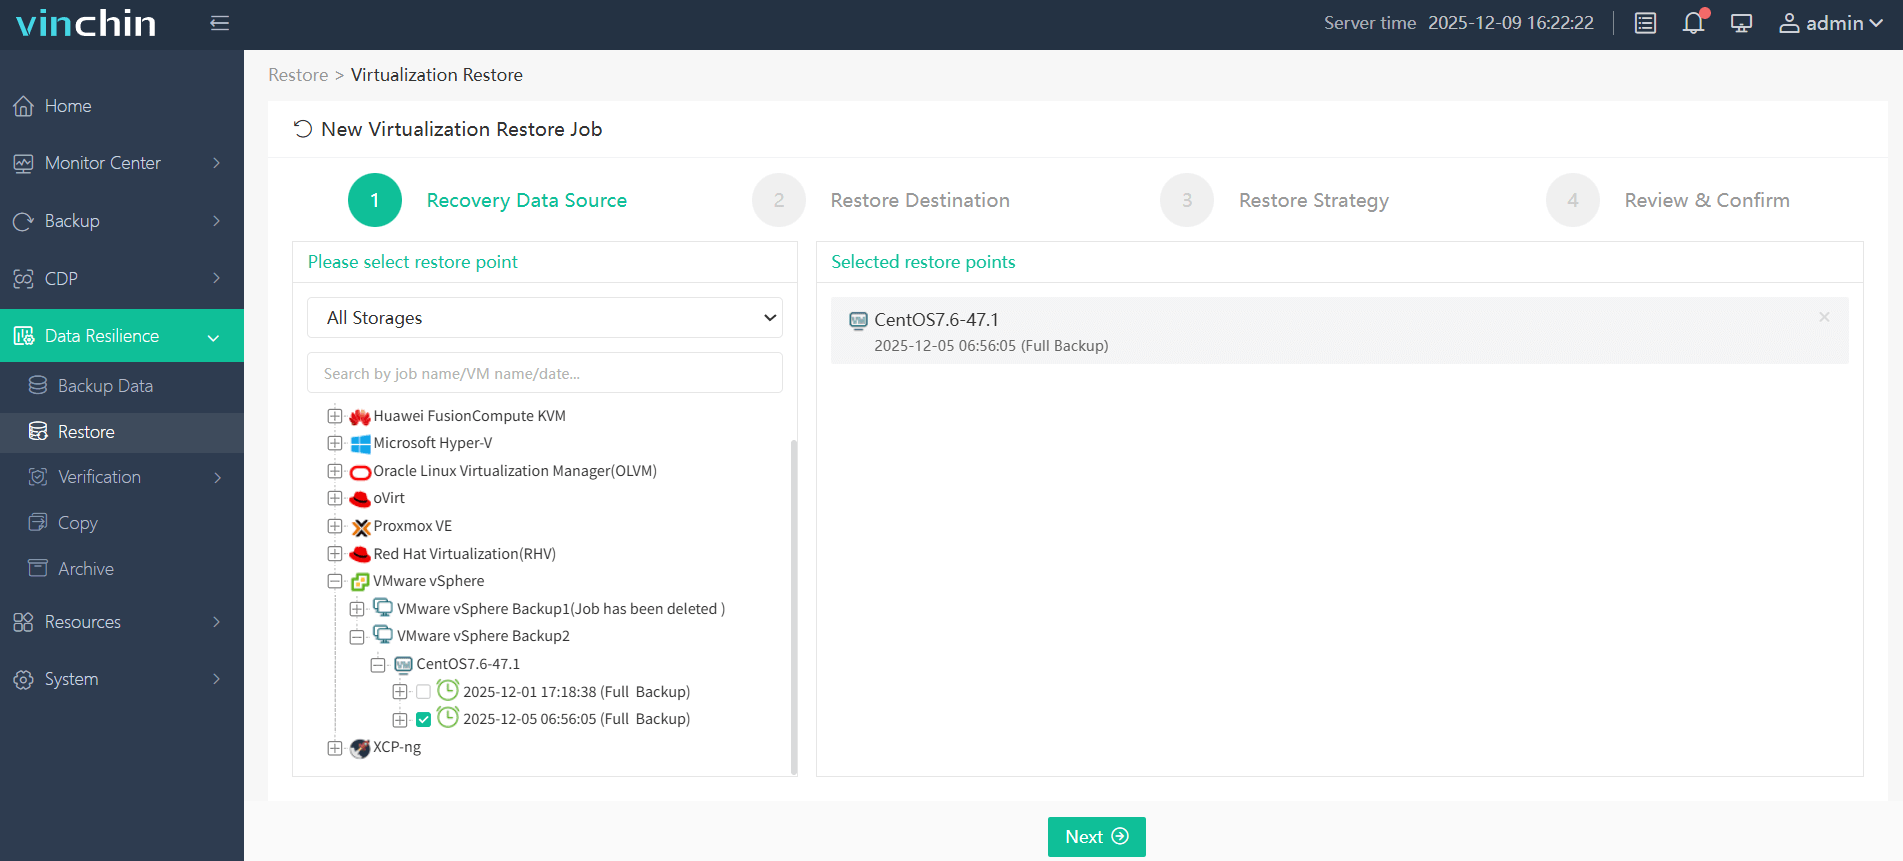
2. After the backup is complete, go to the Restore page and select the backup you created as the restore point.
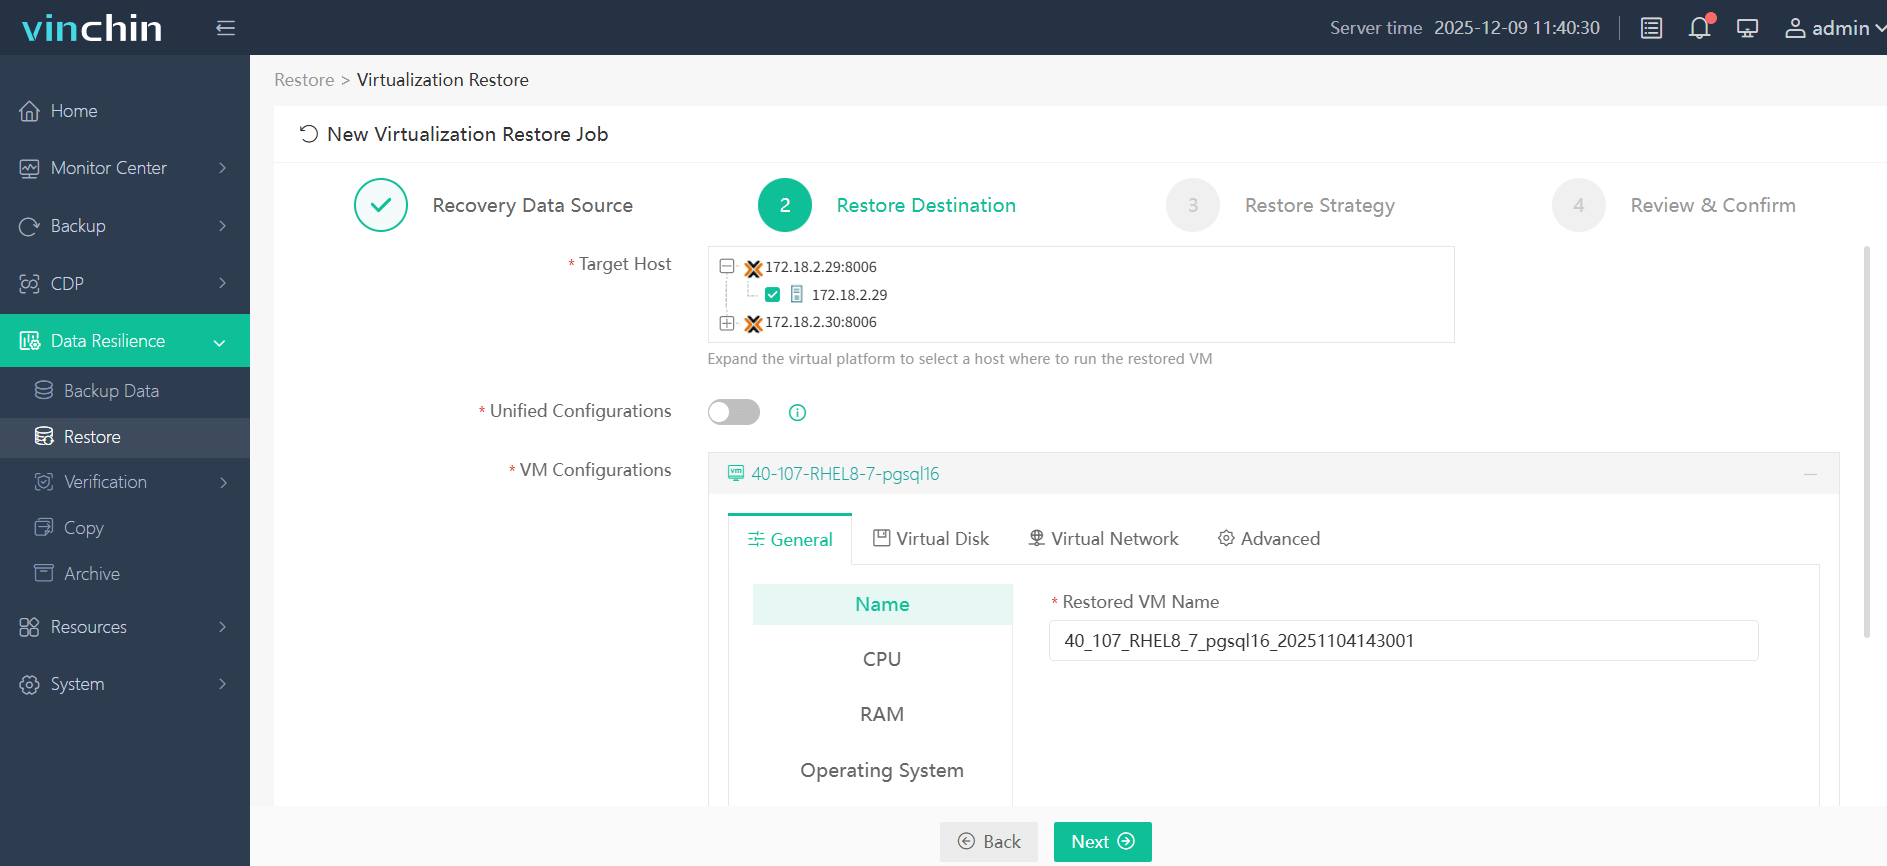
3. Select the Proxmox host as the target destination, then configure the VM settings as needed.
4. Choose whether to restore the VM immediately or schedule the restore for a later time.
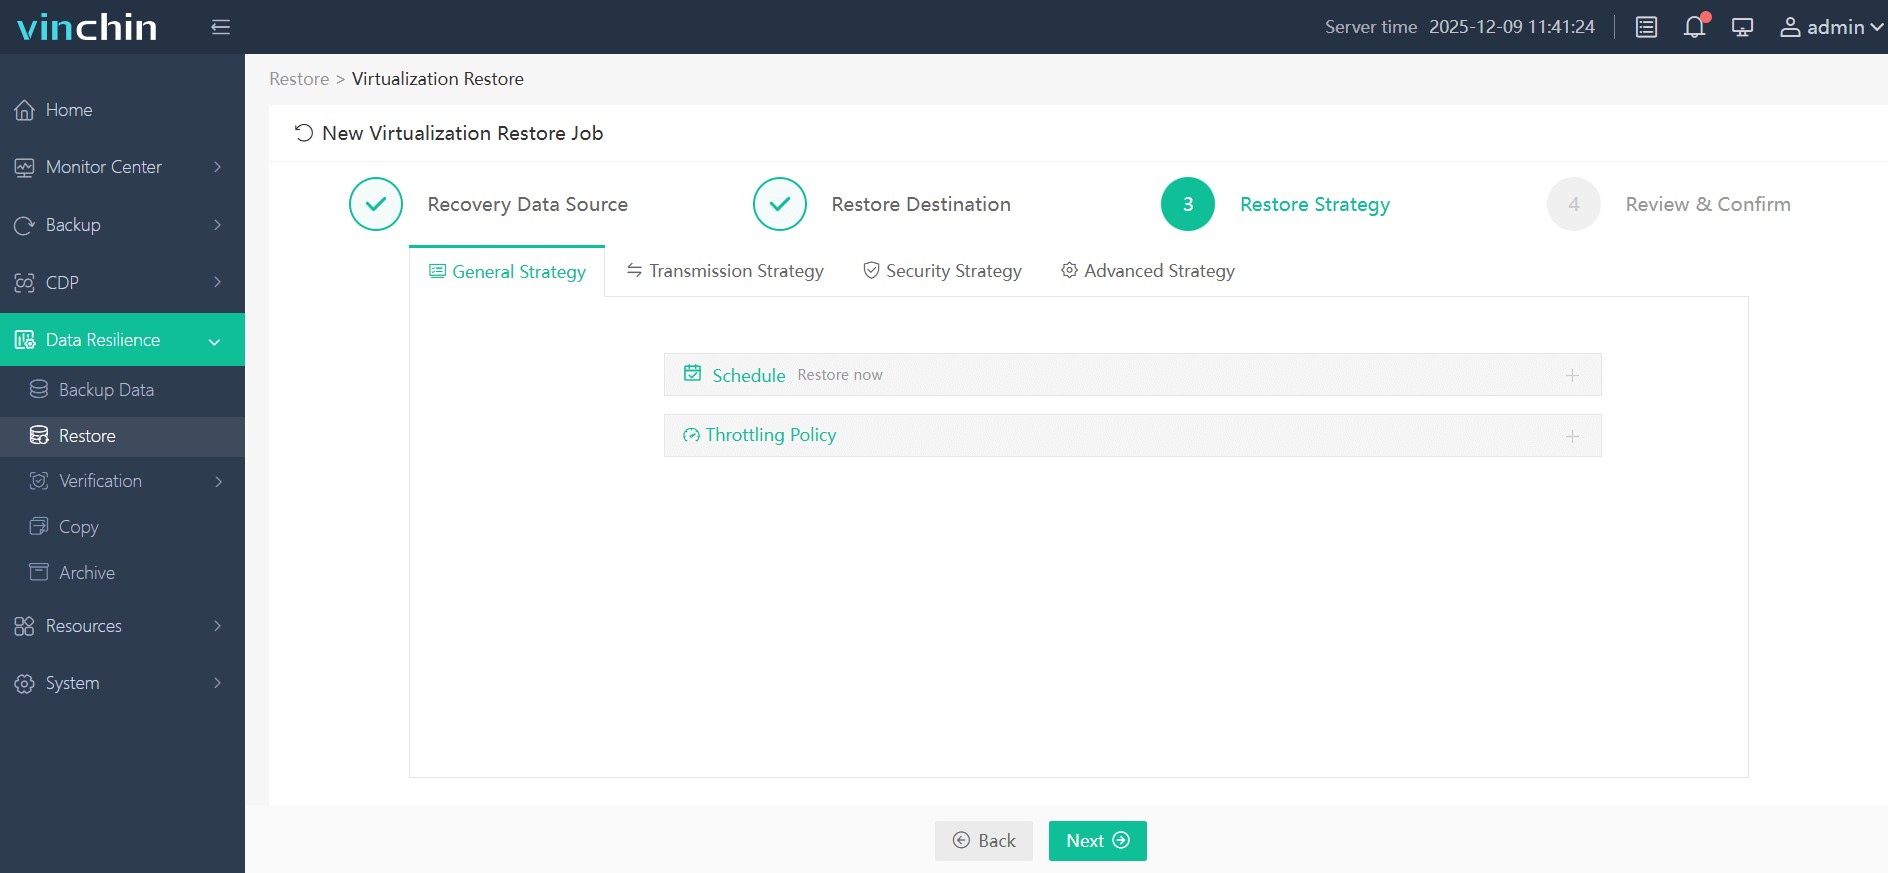
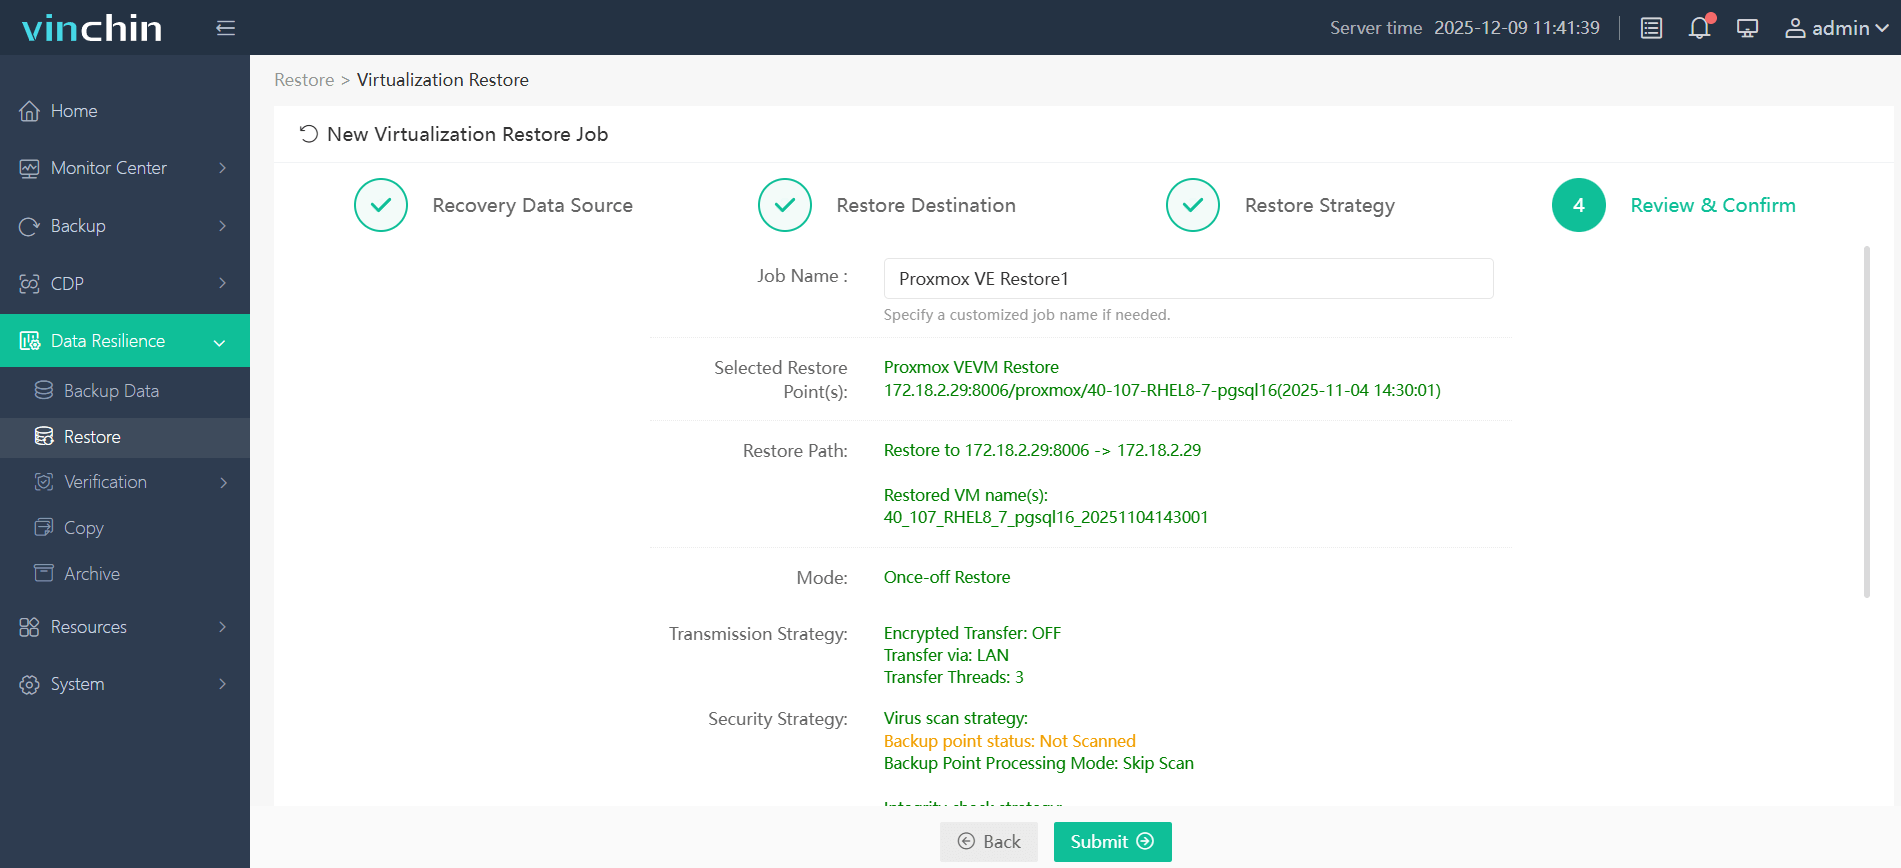
5. Review the configuration, click Submit to start the restore task, and verify that the VM boots successfully after the job is complete.
Vinchin Backup & Recovery is trusted by enterprises worldwide and is committed to delivering reliable data protection for virtualized environments. Download the free 60-day trial to explore its features and help protect your critical data from loss and cyber threats.
Bonus Tips for Post-Migration Deployment
After successfully importing the virtual machine, several post-migration tasks should be completed before placing the workload into production.
1. Install VirtIO drivers
For Windows virtual machines, install the latest VirtIO drivers to improve storage and network performance. Linux distributions typically include the necessary drivers by default, although updating the initramfs may be required in some cases.
2. Install QEMU Guest Agent
The QEMU Guest Agent enables better communication between Proxmox and the guest operating system, supporting features such as graceful shutdowns, IP reporting, and backup consistency.
3. Verify network connectivity
Confirm that the virtual NIC is attached to the correct bridge, update network settings if necessary, and verify communication with other systems.
4. Check application functionality
Boot the operating system and verify that critical services, databases, and business applications are functioning correctly.
5. Remove VMware Tools
After confirming the VM operates normally on Proxmox, uninstall VMware Tools and replace them with the QEMU Guest Agent and VirtIO drivers to avoid potential conflicts.
6. Create a new backup
Once the migration has been validated, create a fresh backup under the new Proxmox environment to establish a reliable recovery point.
Import ESXi VM to Proxmox FAQs
Q1: Can Proxmox import VMDK files directly?
Yes. Proxmox can import VMDK virtual disks using the qm importdisk command. Depending on your storage backend, you may also convert the VMDK to QCOW2 or RAW before attaching it to the virtual machine.
Q2: Which disk format is better for Proxmox: QCOW2 or RAW?
QCOW2 supports snapshots, thin provisioning, and compression, making it ideal for most deployments. RAW generally delivers slightly better I/O performance and is often preferred for performance-critical workloads.
Q3: Do I need to reinstall the guest operating system after migration?
No. In most cases, the existing operating system can boot normally after the virtual disk is imported. You may only need to install VirtIO drivers, update boot settings, or adjust firmware options.
Q4: Why won't my migrated VM boot in Proxmox?
Common causes include incorrect boot order, BIOS/UEFI mismatches, missing VirtIO drivers, incompatible storage controllers, or incomplete disk conversion. Reviewing these settings usually resolves most boot issues.
Sum Up
Migrating an ESXi VM to Proxmox can be achieved using OVA/OVF export, qemu-img, direct disk migration, or Vinchin Backup & Recovery. Choose the method that best fits your environment, and always back up, verify compatibility, and test the migrated VM to ensure a smooth and reliable transition.