Changing the size of a virtual machine disk is a common task in Proxmox VE administration. You may need to expand a VM disk when storage runs low or shrink it to reclaim unused space and optimize storage resources. While increasing disk size is straightforward, reducing it requires extra planning to avoid data loss. In this guide, you'll learn how to safely change the size of a Proxmox VM disk, including both expansion and shrink scenarios, along with important considerations before making any changes.
Pre-Checks Before Changing VM Disk Size
Before you start, make sure the following prerequisites are completed.
Create a full VM backup or snapshot to prevent data loss in case of unexpected failures.
Check the current disk format (is qcow2, raw, or LVM-thin), as resizing behaviour depends on storage type.
Decide VM power state: shut down the VM for safest operation, or confirm if online resize is supported.
Verify filesystem type inside the VM (ext4, xfs, NTFS), since each requires different resizing tools after disk changes.
Confirm storage performance and stability, especially in production environments, to avoid interruption during resize operations.
How to Expand VM Disk Size in Proxmox VE?
Expanding Proxmox VM disk size is a common and relatively safe operation when additional storage is required. Complete it through the web interface or the command line, then extend the guest OS so it can use the new space.
Method 1: Using the GUI
The easiest way to increase disk size is via the Proxmox web interface:
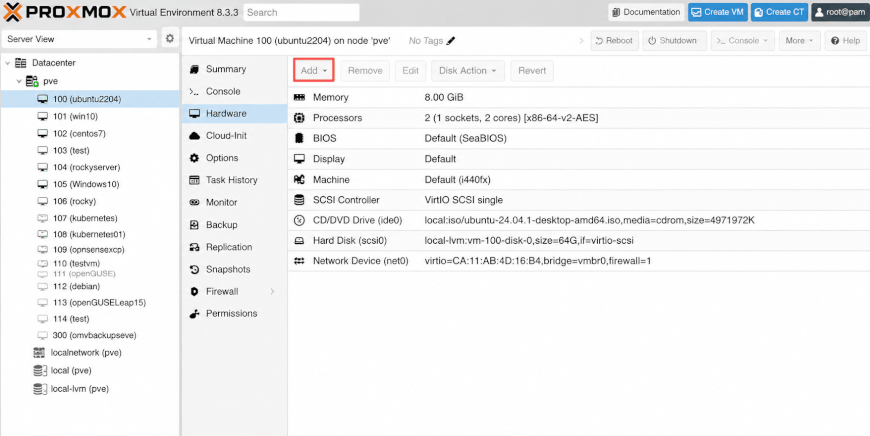
1. Navigate to Datacenter > Node > VM > Hardware
2. Select the target virtual hard disk
3. Click “Resize disk”
4. Enter the additional size (e.g., +20GB)
5. Confirm and apply changes
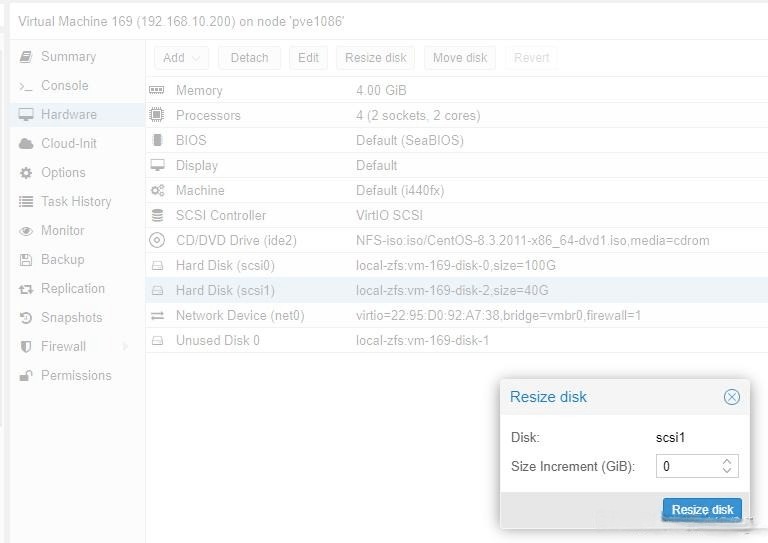
Once completed, Proxmox will immediately extend the virtual disk at the hypervisor level. This method is recommended for most users due to its simplicity and reduced risk of syntax errors.
Method 2: via CLI
For advanced users or automation scenarios, the command line method provides more flexibility:
qm resize <vmid> scsi0 +20G
Parameters explained:
<vmid> is the ID of the target virtual machine.
scsi0 is the virtual disk to resize (replace it with the appropriate disk identifier if necessary).
+20G specifies the amount of storage to add.
After execution, you can verify the updated disk size in the Proxmox GUI or by using disk inspection tools inside the VM.
Method 3: Extend Disk Size Inside Guest OS
After expanding the virtual disk, extend the operating system so it can recognize the new space.
Linux (ext4 / xfs):
Use growpart to expand the partition
resize2fs /dev/sda1
xfs_growfs /
Windows:
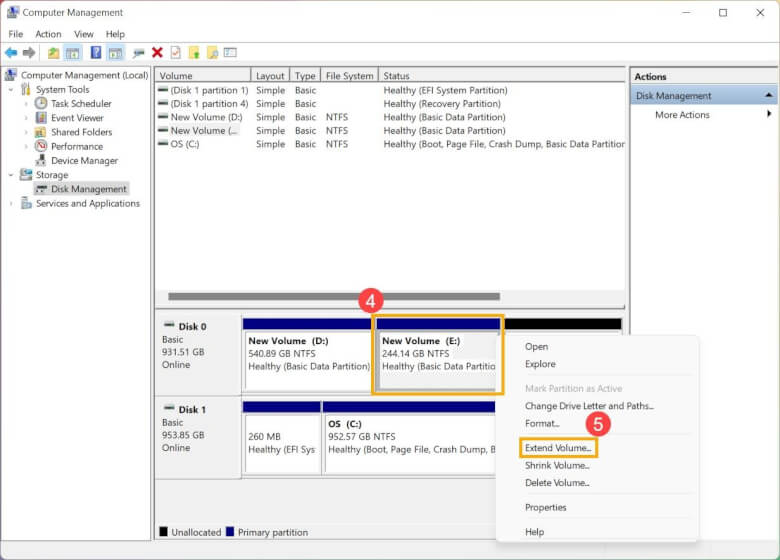
1. Search “Computer Management” in the settings, and choose “Run as administrator”;
2. Open Disk Management and locate the expanded volume;
3. Right-click and choose Extend Volume.
Key Notes: Expanding a disk in Proxmox only increases the virtual disk size. To make the additional space usable, you must extend the partition and filesystem inside the guest OS. For production environments, resizing while the VM is powered off is recommended, and the result should always be verified after completion.
How to Shrink Proxmox VM Disk Size?
Important Warning: Shrinking a VM disk size in Proxmox is officially not supported in-place like expansion. The process is risky because it can lead to data loss or filesystem corruption, and even the virtual machine may fail to boot if not done correctly. To safeguard this operation, you need to:
take a full backup or snapshot before proceeding
Verify free space inside the guest OS
Prefer cloning or migration instead of shrinking when possible
Recommended Safe Method
The safest approach is to create a new smaller disk and migrate data instead of directly shrinking:
1. Create a new smaller virtual disk in Proxmox;
2. Attach it to the VM as a secondary disk;
3. Boot into the guest OS;
4. Use tools like rsync, robocopy, or disk cloning utilities to transfer data;
Linux guest:
# Mount source(old) & target(new) disk partitions
mkdir /mnt/old /mnt/new
mount /dev/vda1 /mnt/old
mount /dev/vdb1 /mnt/new
# Full system sync (exclude virtual system dirs)
rsync -aAXv --progress --exclude={"/dev/*","/proc/*","/sys/*","/tmp/*","/run/*","/mnt/*","/lost+found"} /mnt/old/ /mnt/new/
Windows guest:
robocopy D:\ E:\ /MIR /Z /R:5 /W:10 /NP
5. Update /etc/fstab or boot configuration if needed;
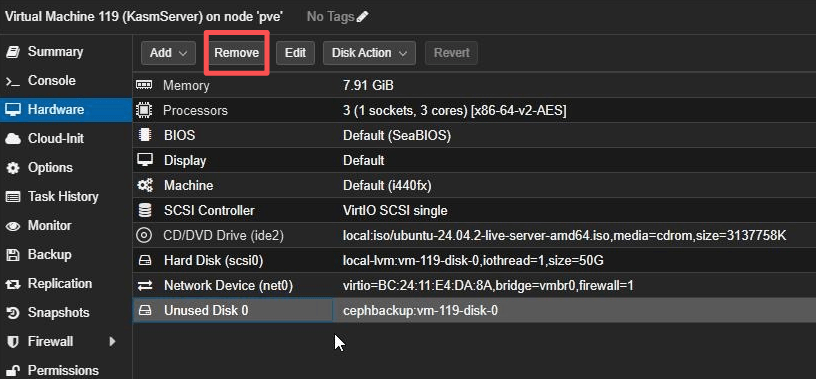
6. Remove the old large disk after confirming everything works.
This method avoids filesystem-level risk and is the preferred production approach.
Common Issues & Troubleshooting
After resizing a VM disk, the virtual disk and guest OS may not stay in sync. Here are the most common issues and their fixes.
1. Disk Resized but OS Not Showing Space
Fix: The virtual disk has grown, but the partition or filesystem has not. Extend the partition and filesystem inside the guest OS.
2. Filesystem Cannot Expand
Fix: The partition may not have been resized, or the filesystem requires a specific expansion tool. Resize the partition first, then expand the filesystem.
3. LVM Not Detecting New Space
Fix: LVM does not automatically recognize additional capacity. Run pvresize, then extend the logical volume and filesystem.
4. VM Not Booting After Disk Change
Fix: Incorrect boot settings or disk changes may prevent startup. Check the boot order and repair the bootloader if necessary.
5. Permission or Storage Mismatch
Fix: The storage backend may not support resizing, or your account lacks sufficient permissions. Verify storage compatibility and user privileges before retrying.
Back Up Critical Data Before Resizing Disk with Vinchin
Since both incorrect expansion and shrinking carry risks such as data loss and business disruption, it is essential to create a full backup of the VM disk before resizing to ensure data consistency and safety. Vinchin Backup & Recovery is dedicated to providing robust data protection and flexible backup strategies for small and large-scale enterprises.
Vinchin is compatible with over 15 virtualization platforms, including VMware, Proxmox, Hyper-V, XenServer, and OpenStack. It also supports automated and scheduled backups, helping to save significant time and effort. In addition, its built-in encryption, deduplication, and ransomware protection provide a strong security layer for backup data, ensuring immutability and maintaining data consistency.
With Vinchin’s intuitive web interface, it’s easy to back up Proxmox VM data:
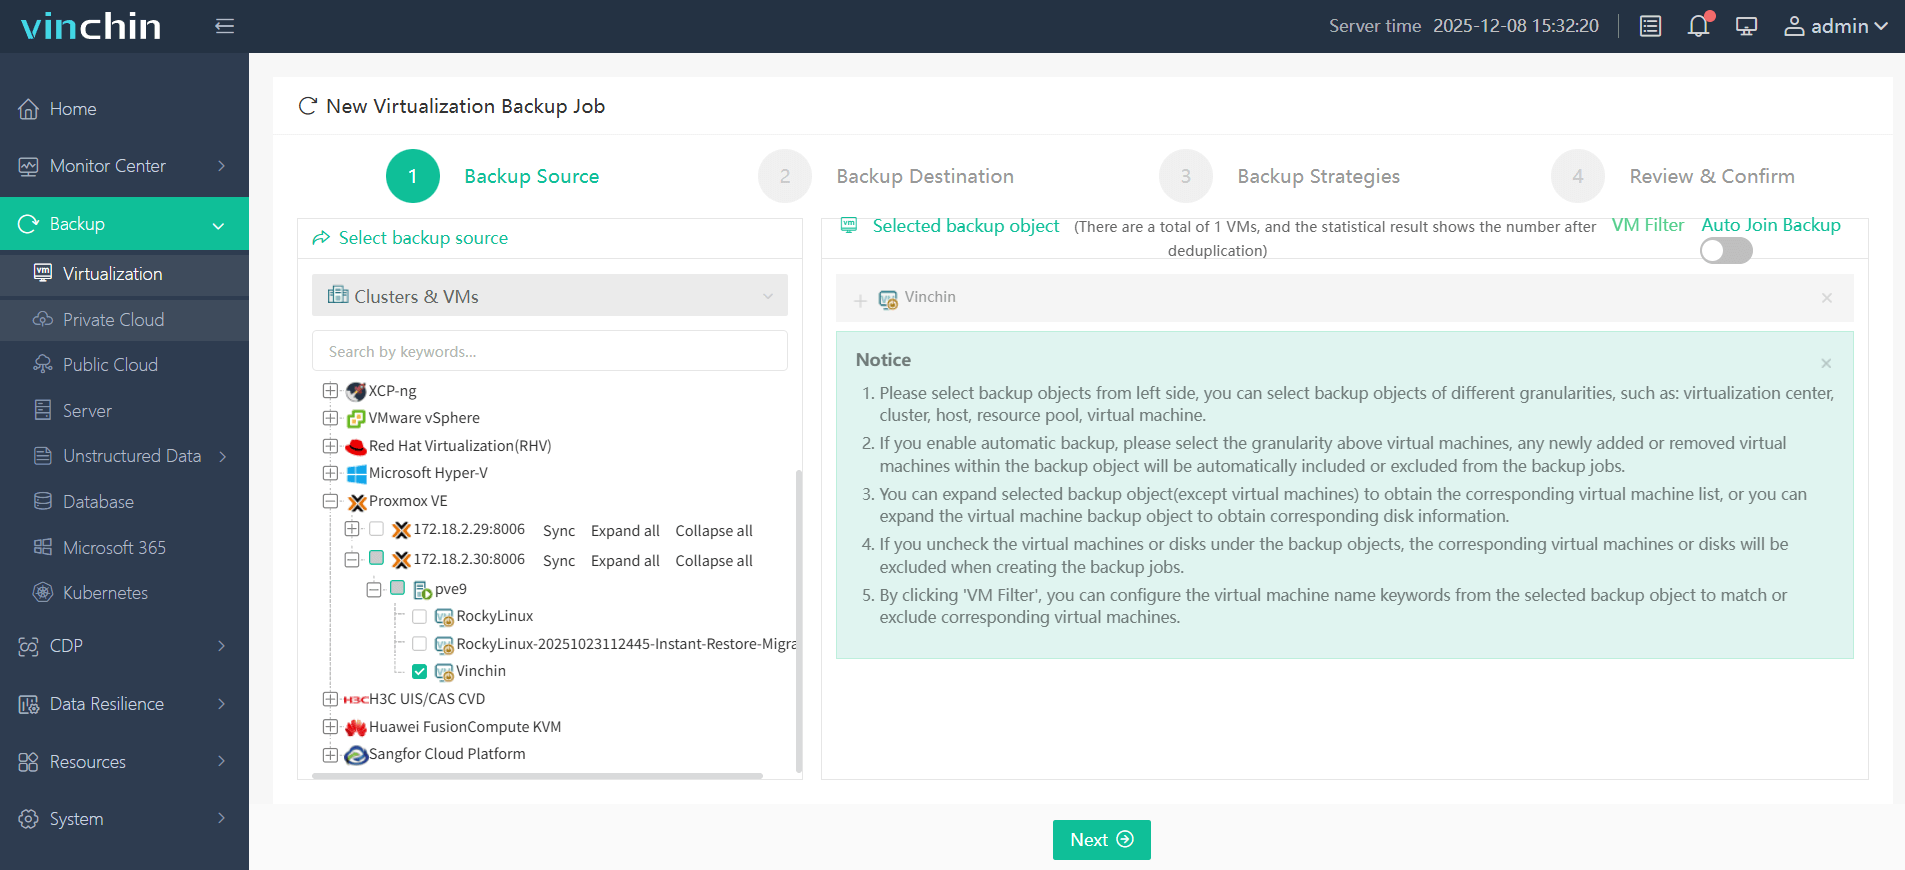
1. Navigate to Backup > Virtualization, expand the host list, and checkmark the Proxmox host as the backup source.
2. Then, choose the target backup storage from local disks, NFS shares, or iSCSI block storage, and specify the target node as well.

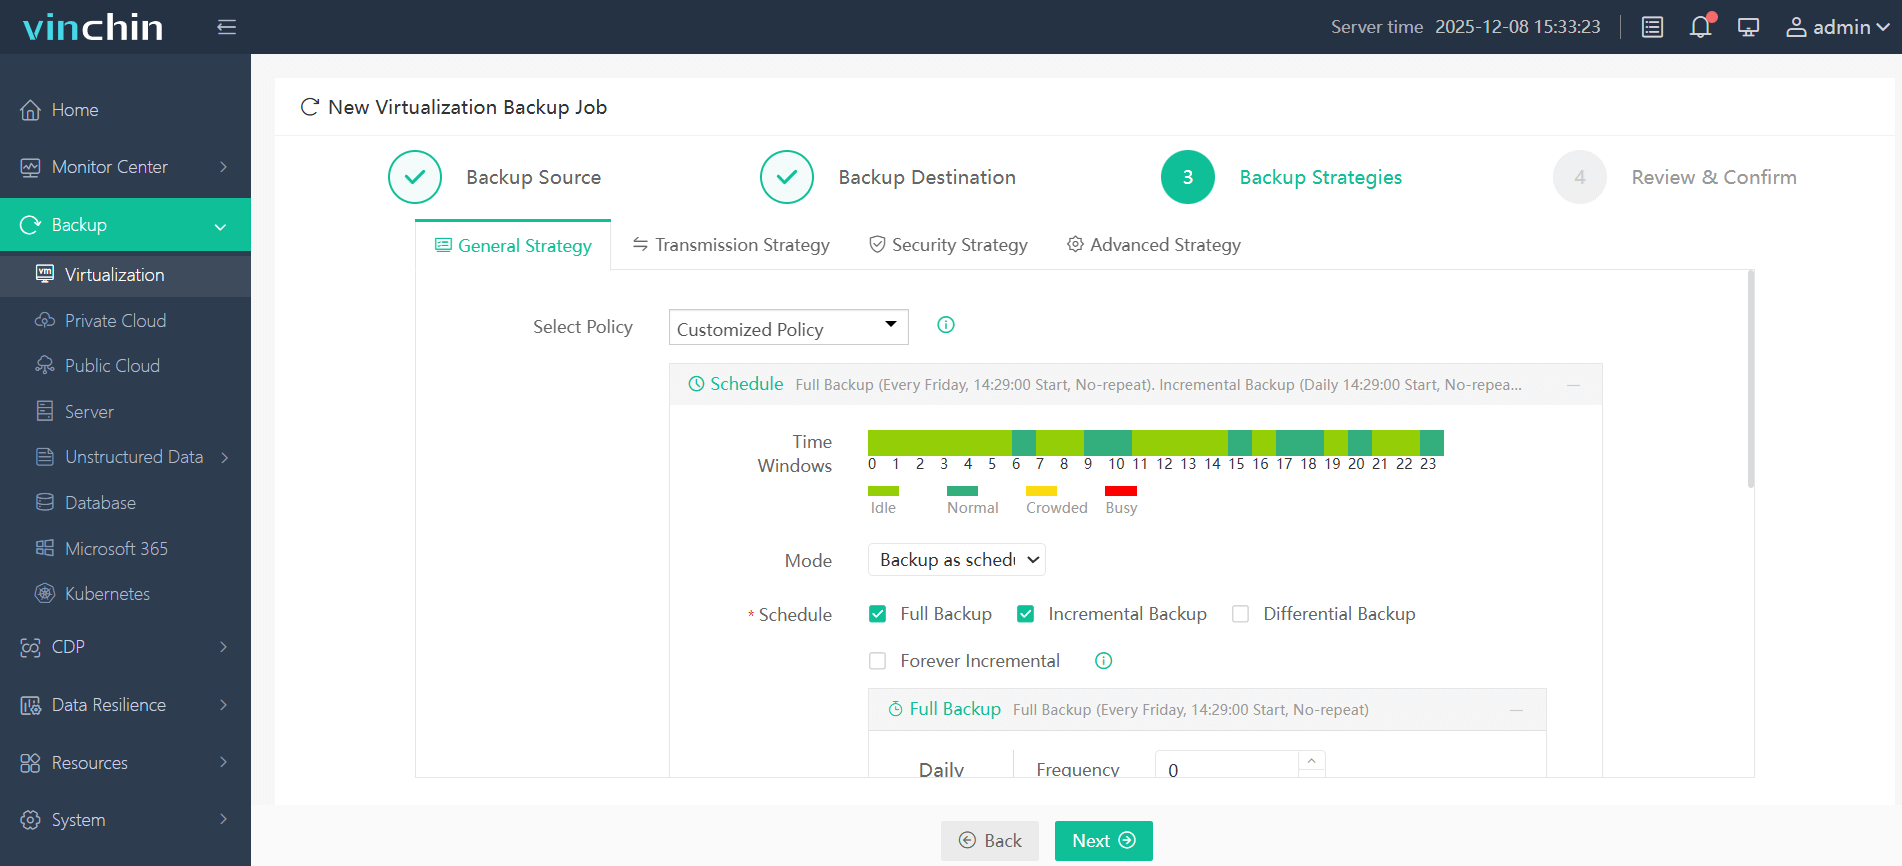
3. Customize the backup strategies, set a time window to schedule the backup task or run it instantly, and also choose the backup plan (incremental, full, differential), retention policy, and other options.
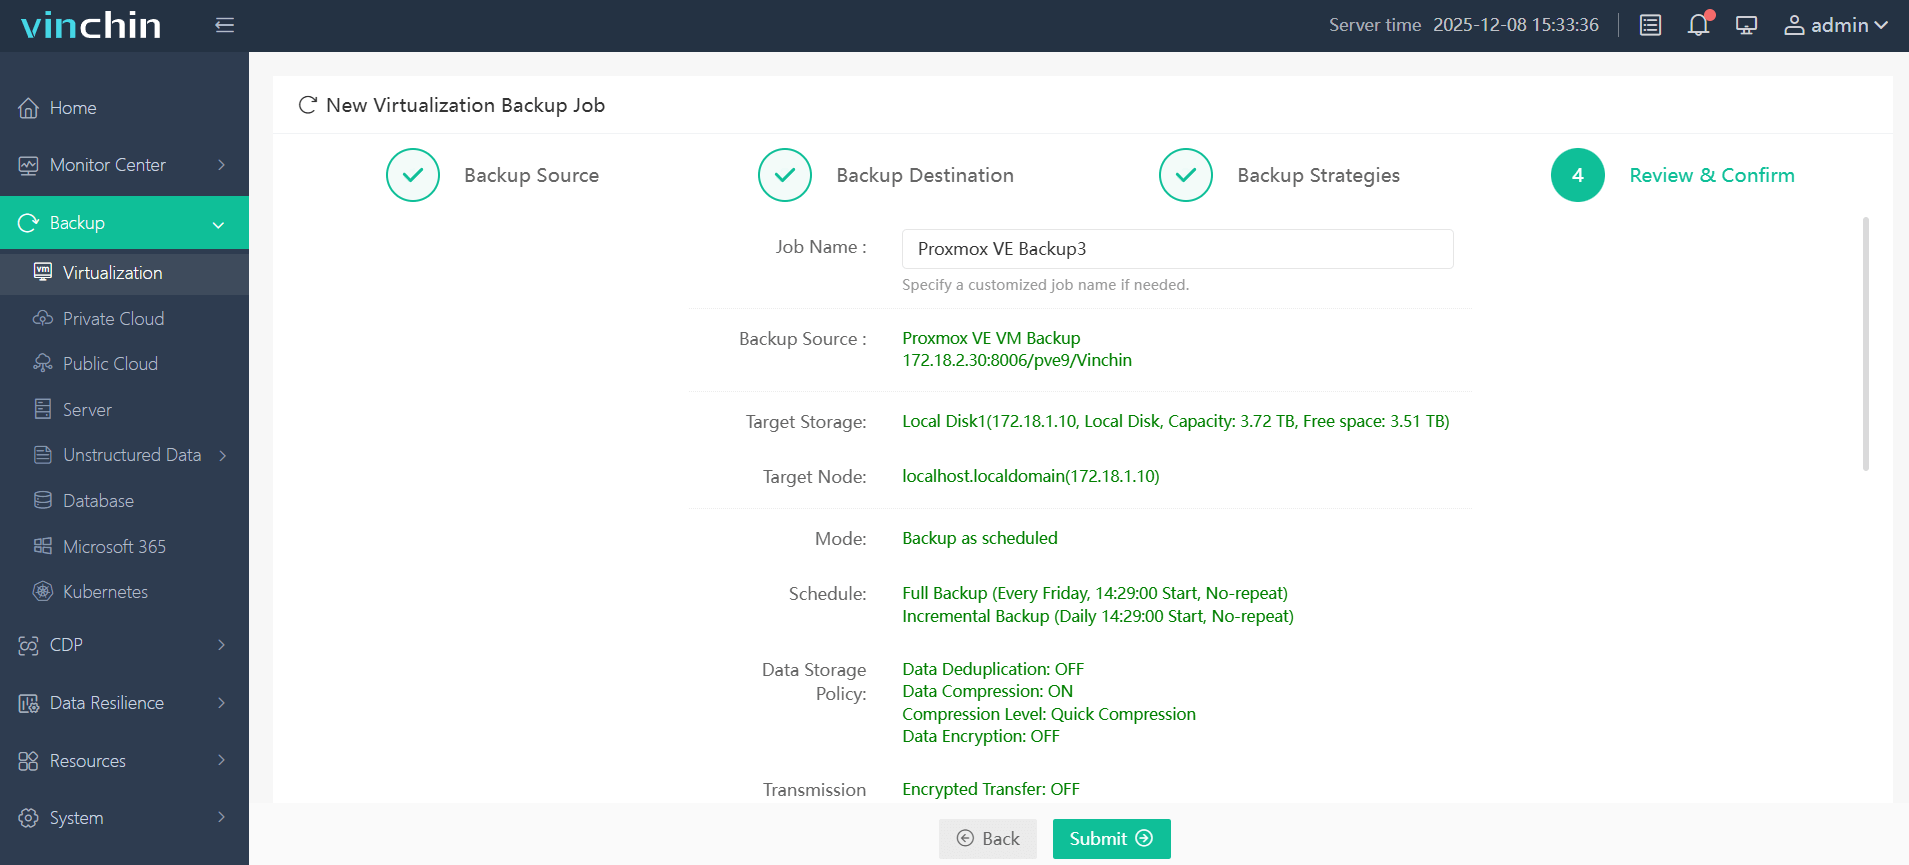
4. Review all the settings you chose, and click Submit to initiate the current job.
Vinchin Backup & Recovery is a reliable backup solution with strong data protection capabilities. Click the Download button below to start a 60-day full-featured free trial and enhance the protection of your business data.
Proxmox Change Size of VM Disk FAQs
Q1: Can I resize a Proxmox VM disk without shutting down the VM?
Yes. Proxmox supports online disk expansion for many storage backends and guest operating systems. However, the guest OS must still extend its partition and filesystem before the new space becomes usable. For production workloads, shutting down the VM first is generally safer.
Q2: Which storage types support disk resizing in Proxmox?
Most commonly used storage backends, including LVM-Thin, ZFS, QCOW2, and RAW images on Directory Storage, support disk expansion. Available features may vary depending on the storage type and configuration.
Q3: Does resizing a VM disk delete data?
No. Expanding a virtual disk does not normally affect existing data. However, resizing partitions or shrinking disks always carries some risk, so creating a backup before making changes is strongly recommended.
Q4: How can I verify that the disk resize was successful?
After resizing, verify both the virtual disk and the guest OS. On Linux, you can use commands such as lsblk, fdisk -l, and df -h. On Windows, check the updated capacity in Disk Management.
Closing Words
Changing a Proxmox VM disk size is a routine task, but it should always be performed carefully. Disk expansion is usually quick and straightforward, whereas disk shrinking involves additional manual steps and carries a higher risk of data loss. Creating a full VM backup before resizing is the best practice. With Vinchin Backup & Recovery, you can protect your VMs with automated backups and restore them quickly if anything goes wrong, ensuring a safer and more reliable disk resizing process.