Learn about OVF File
OVF (Open Virtualization Format) is an industry-standard packaging format developed by the Distributed Management Task Force (DMTF).
An OVF package typically contains:
Detailed Steps to Migrate OVF to Proxmox
Below are the most practical and commonly used methods with detailed steps to import OVF to Proxmox.
Prerequisites Checklist
Complete these preparation steps to avoid hours of troubleshooting:
1. Check Proxmox version: Run pveversion on the host. GUI import requires v8.3 or newer; old versions rely solely on CLI.
2. Confirm sufficient storage space: The temporary staging folder needs free space equal to the full size of your virtual disks. Check storage with pvesm status.
3. Install requires tools: qeum-img comes preinstalled. For GUI OVA uploads run apt update && apt install unzip -y.
4. Record the source VM’s firmware: Note if the original VM uses SeaBIOS (legacy BIOS) or UEFI to match boot settings in Proxmox.
5. Back up or snapshot the source VM: Create a restore point before exporting to avoid permanent data loss.
Method 1. GUI Import (Easiest)
Proxmox 8.3 added native one-click OVA/OVF import to the web interface, designed for users unfamiliar with command lines.
Important Warning
This feature is exclusive to Proxmox VE 8.3 and above. All earlier versions must use the CLI workflow.
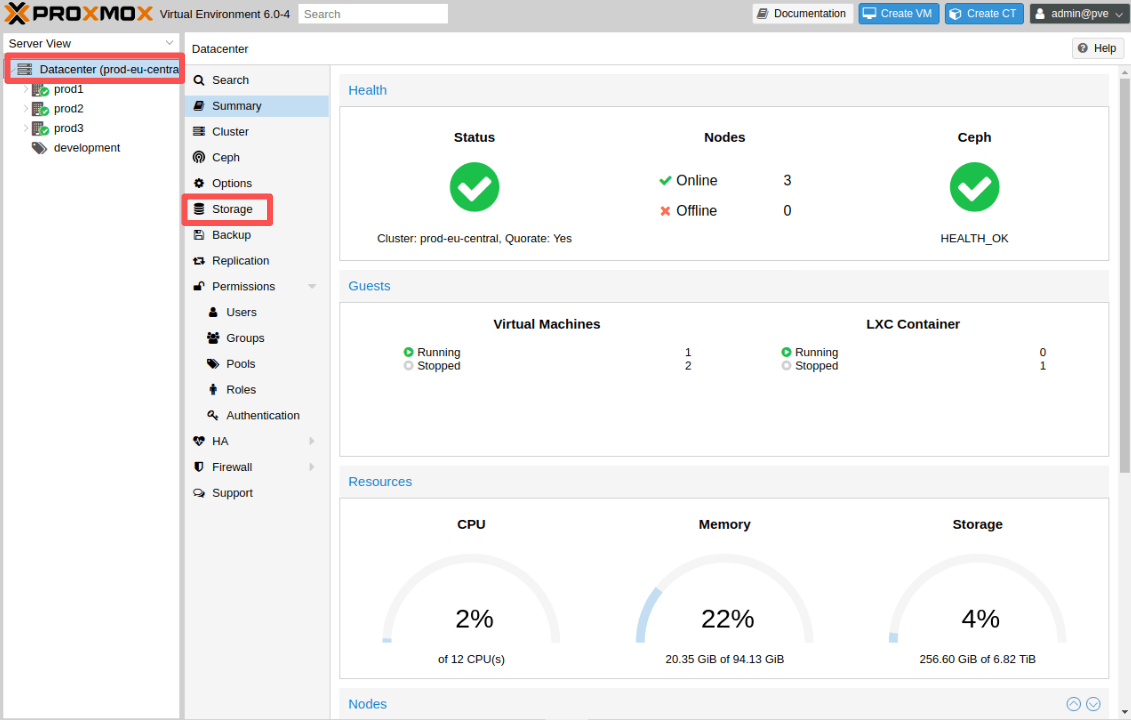
1. Log in to the Proxmox web console and open Datacenter > Storage from the left menu.
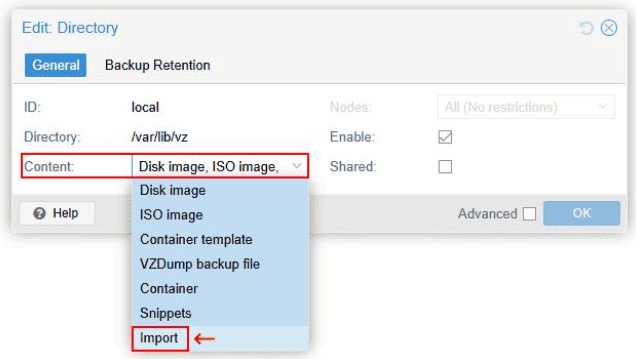
2. Double-click a file-based storage pool. In the Content dropdown, tick the Import box and save changes.
3. Navigate to your enabled storage pool and open the new Import tab. Upload an OVA file from your local computer or paste a remote download URL.
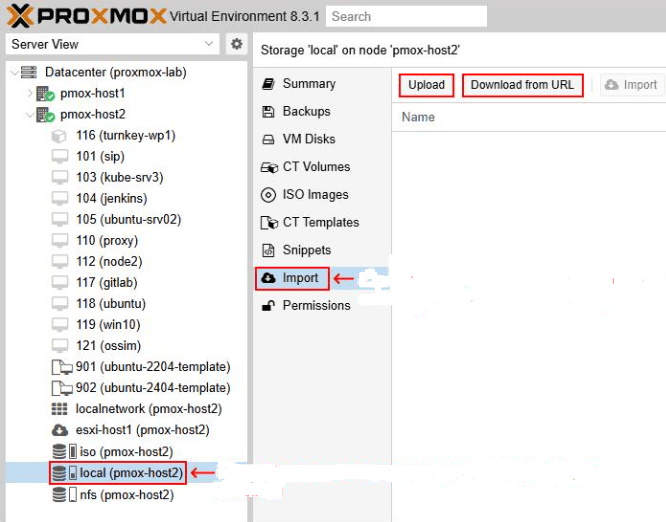
4. Once the file upload finishes, select the OVA/OVF file and click Import to launch the setup wizard. The tool auto-reads hardware specs and generates a new VM.
5. Review and adjust critical settings: CPU cores, memory allocation, boot priority, network bridge, and BIOS/UEFI firmware before powering on the VM.
Method 2. qm importovf CLI Command (Recommended for Production)
The qm importovf utility is Proxmox’s long-standing, most reliable migration tool for production environments. It parses OVF definitions, creates VM configs, and converts disk images in one unified command, with better resilience for large virtual disks and unstable network transfers than the GUI importer.
1. Transfer OVF/OVA Files to Proxmox
Copy via SCP from the source hypervisor:
scp myvm.ova root@proxmox-host:/tmp/
Direct export from VMware ESXi with ovftool:
./ovftool vi://root@<esxi-ip>/<vm-name> /tmp/export/
2. Extract OVA Archives
OVA files are compressed TAR packages; extract to retrieve the .ovf descriptor:
cd /tmp tar xvf myvm.ova # Extracted output files: myvm.ovf, myvm-disk1.vmdk, myvm.mf
3. Run Dry-Run Validation (Mandatory Best Practice)
Test the import workflow without modifying storage or creating VMs to catch missing disks, invalid configs, or manifest errors:
qm importovf 101 /tmp/myvm.ovf local-lvm --dryrun
4. Execute Full Import
Select an unused VMID, target storage pool, and disk format:
# File storage (qcow2 with snapshot support) qm importovf 101 /tmp/myvm.ovf local-lvm --format qcow2 # Block storage (ZFS/LVM raw disks) qm importovf 101 /tmp/myvm.ovf local-zfs
5. Post-Import Hardware Optimization
Adjust CPU and storage controllers for maximum performance:
qm set 101 --cpu x86-64-v2-AES --scsihw virtio-scsi-single
For Windows VMs: Temporarily switch disks bus to IDE/SATA to boot, install VirtIO drivers, then revert to VirtIO SCSI.
Method 3. Manual Disk Conversion with qeum-img
Use this fully manual workflow when qm importovf fails to read corrupted/malformed OVF files, or you require complete custom control over disk placement and VM hardware. This method also handles multi-disk VMs and VMware-proprietary OVF extensions more consistently.
1. Extract OVA and inspect source disk details
tar xvf myvm.ova qemu-img info myvm-disk1.vmdk
This command shows total disk size, actual used space, and source format for storage planning.
2. Convert VMDK VMware disks to Proxmox-compatible qcow2/raw format
# -p flag displays live conversion progress bar
qemu-img convert -p -f vmdk myvm-disk1.vmdk -O qcow2 myvm-disk1.qcow2
3. Create an empty VM shell matching the source hardware specifications
qm create 102 \
--name myimportedvm \
--memory 4096 \
--cores 2 \
--net0 virtio,bridge=vmbr0 \
--scsihw virtio-scsi-single \
--ostype l26
Use win10/win2022 for Windows guest operating systems with the --ostype flag.
4. Import converted disk files to Proxmox storage
qm importdisk 102 myvm-disk1.qcow2 local-lvm
This adds an unattached “unused disk” entry to the VM; repeat for additional disks.
5. Attach disks and configure boot priority
# Attach primary disk with discard optimization
qm set 102 --scsi0 local-lvm:vm-102-disk-0,discard=on
# Set boot sequence
qm set 102 --boot order=scsi0
# Add UEFI EFI disk if source VM uses UEFI firmware
qm set 102 --bios ovmf --efidisk0 local-lvm:1
6. Power on the VM and verify boot functionality
qm start 102
Open the Proxmox console to observe boot behavior and resolve any launch errors.
Efficient Tool: Simplify Migration and Protect Proxmox VM
Manual OVF imports work well for small environments, but enterprises often require bulk VM migration, cross-hypervisor migration, backup before migration, and minimal downtime. That's where Vinchin Backup & Recovery becomes valuable.
Backup is critical before any changes. With Vinchin, it can provide backup solution, and also provide migration solution between supported platforms. In addition to enabling seamless migration, it can protect data before and after the migration through backups.
The following shows you how to protect your Proxmox environment:
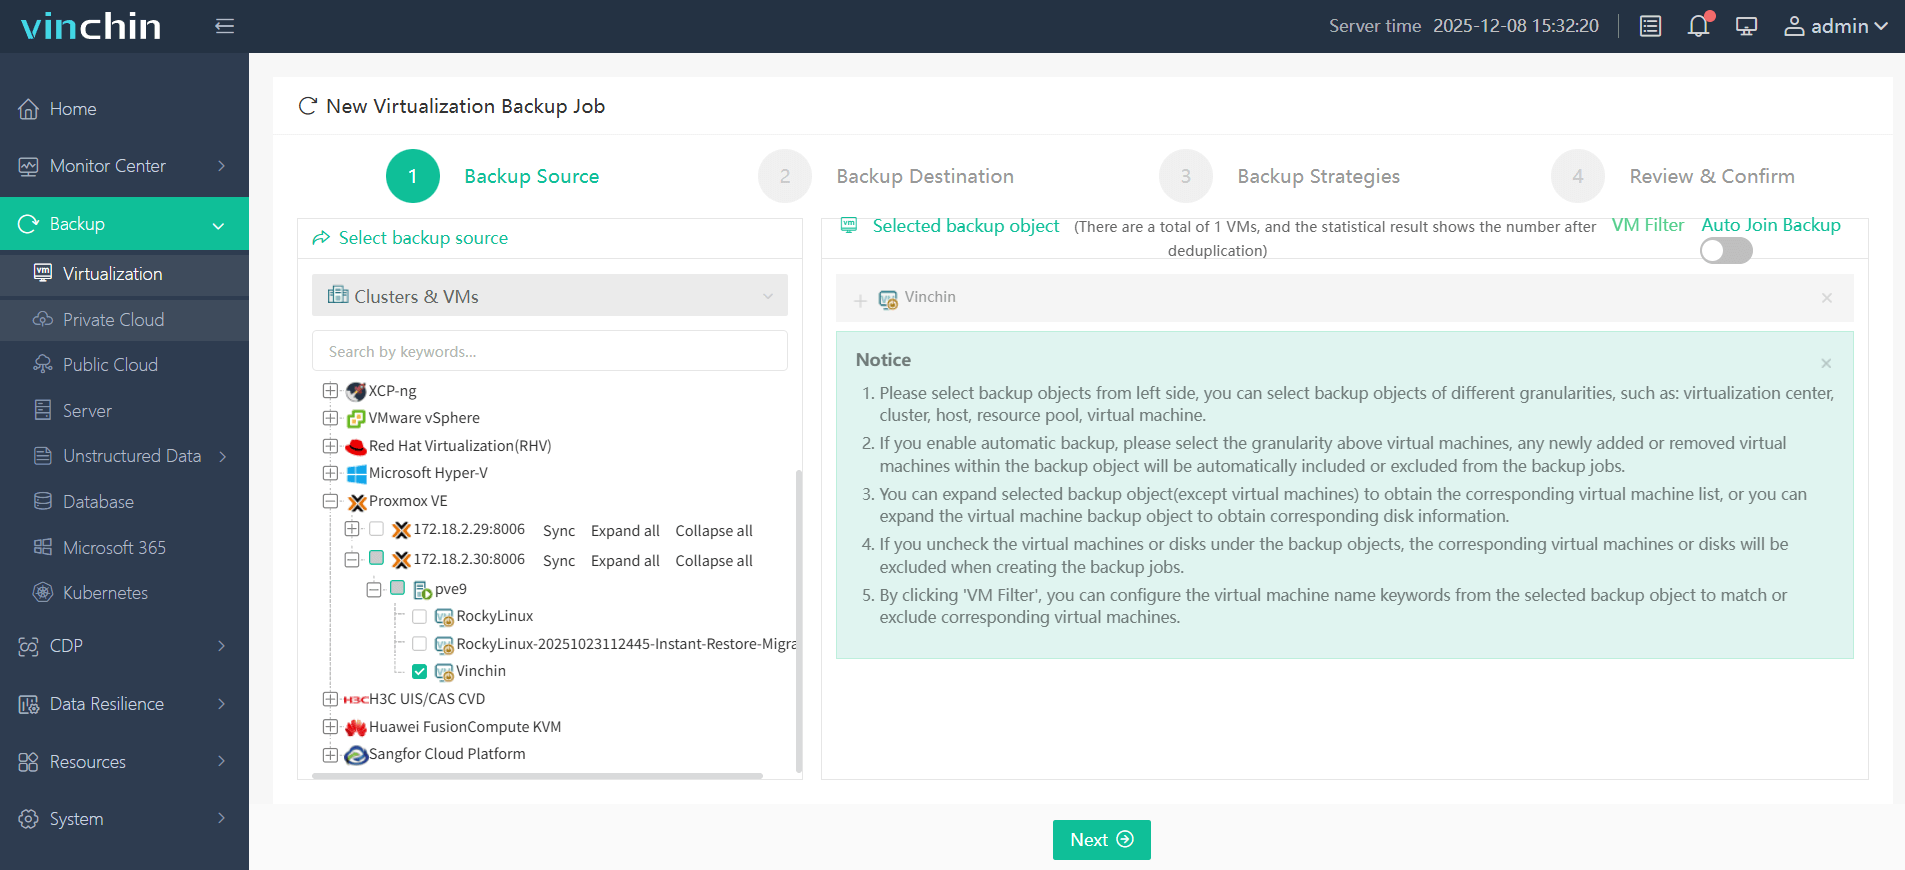
Step 1. Select Proxmox VM as the backup source under Backup > Virtualization
Step 2. Choose the desired backup destination

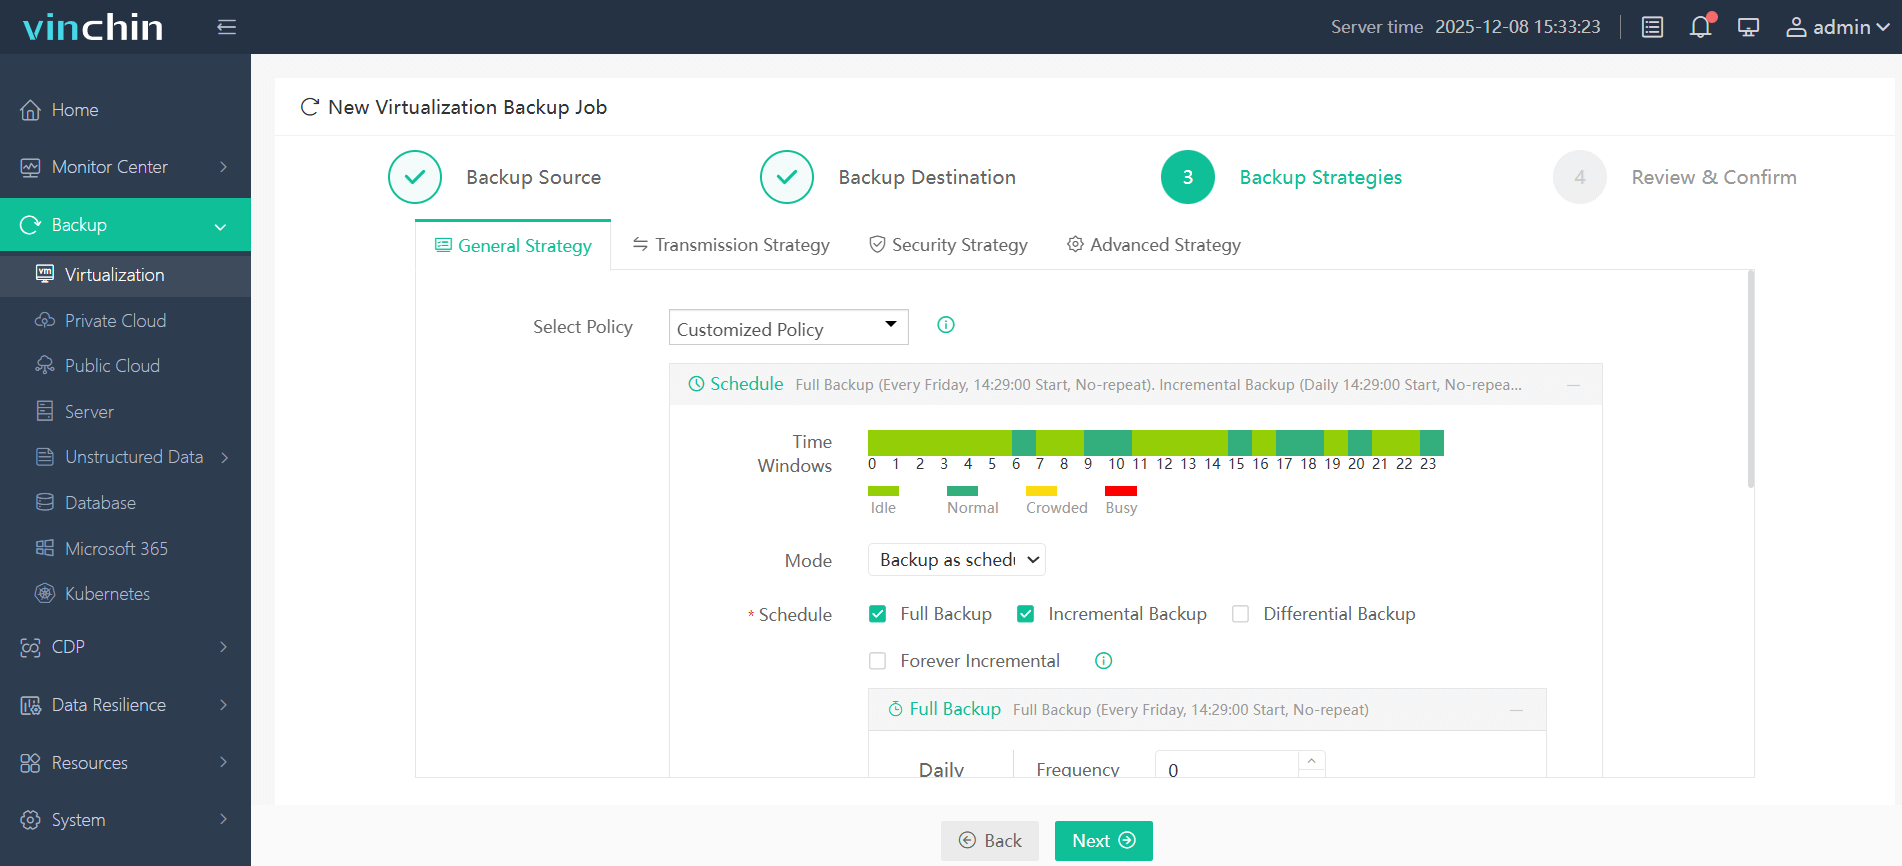
Step 3. Then configure the backup strategies: schedule, mode, and retention policy
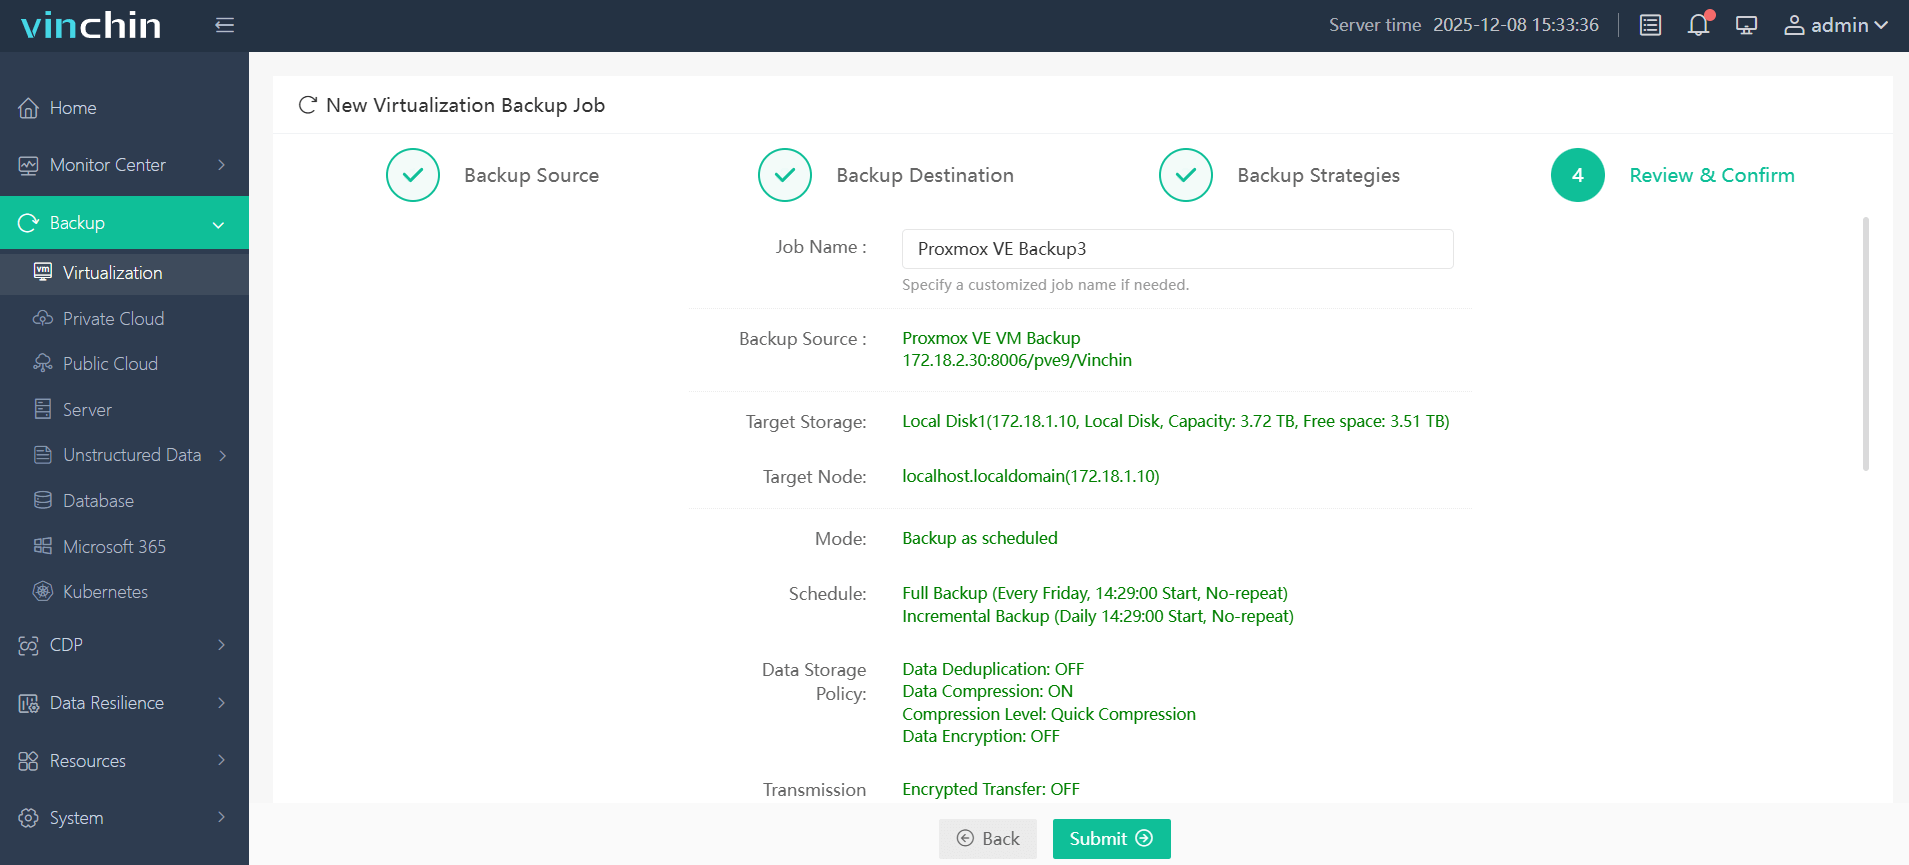
Step 4. Review and confirm your settings, and click Submit
Start a 60-day fully functional trial of Vinchin Backup & Recovery with no credit card required.
FAQs about OVF to Proxmox
Q1: What disk format should I choose for OVF imports to Proxmox?
qcow2: Preferred for file-based storage (supports snapshots, thin provisioning space savings)
raw: For high-performance block storage (LVM/ZFS), no snapshot functionality
vmdk: Only for temporary compatibility testing; avoid for production workloads
Q2: What's the difference between OVF and OVA?
OVF is a collection of files describing a virtual appliance, while OVA is a single archive containing the OVF descriptor and associated virtual disks.
Q3: Why does my imported VM not boot?
Common causes include BIOS mismatches, storage controller differences, missing drivers, or incorrect boot device configurations.
Conclusion
Migrating OVF to Proxmox VE can be straightforward when using the right method and proper preparation. Whether you choose GUI import, qm importovf, or manual disk conversion, validating VM settings after migration is essential. For larger environments, Vinchin Backup & Recovery helps streamline migration while providing reliable backup and recovery protection.