Common Proxmox Backup Storage Types
Proxmox VE supports multiple storage types for saving virtual machine backups. The right option depends on your environment, storage capacity, performance requirements, and recovery objectives. Below is a comparison table of the common backup storage types.
| Storage Type | Storage Methods | Pros | Best For |
| Directory Storage | Stores backups on a local directory or mounted disk | Simple setup and fast local access | Home labs, testing, and single-node servers |
| NFS Share | Stores backups on a remote NAS or Linux server | Centralized storage for multiple hosts | Proxmox clusters and environments with NAS storage |
| SMB/CIFS Share | Stores backups on a Windows file server or SMB-compatible NAS | Easy integration with Windows environments and existing SMB storage | Windows-based or mixed Windows/ Linux environments |
| Proxmox Backup Server (PBS) | Dedicated backup solution with advanced backup features | High backup efficiency, fast recovery, and reduced storage usage | Production environments and enterprise Proxmox deployments |
Prerequisites Before Adding Backup Storage
Before adding backup storage in Proxmox VE, make sure your environment is properly prepared. The following checks can help ensure the storage is added successfully and backup jobs run without issues.
Prepare the Backup Storage
Choose a storage type that fits your environment, such as a local directory, NFS share, SMB/CIFS share, or Proxmox Backup Server (PBS). Ensure the storage has enough free space for your backup data.
Verify Network Connectivity
For NFS, SMB/CIFS, or PBS, confirm that the Proxmox host can reach the storage server over the network. A stable connection helps prevent backup failures and slow transfer speeds.
Configure Access Permissions
Make sure Proxmox has the required permissions to access the storage. Depending on the storage type, this may involve configuring NFS exports, SMB credentials, or PBS authentication.
Estimate your storage needs based on the number of VMs, backup frequency, and retention policy. Reserving sufficient space helps avoid backup interruptions caused by a full storage device.
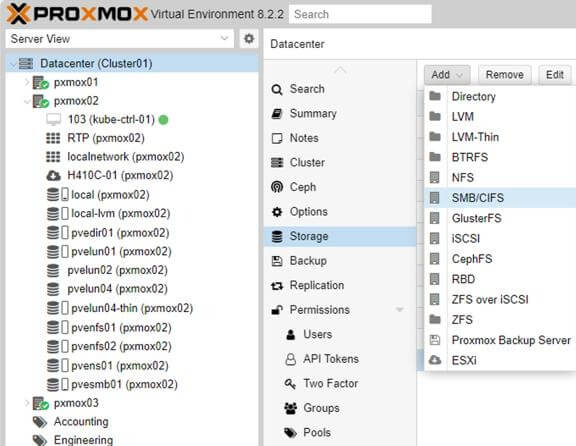
How to Add Backup Storage in Proxmox VE?
Proxmox VE allows you to add different types of backup storage through the web interface. The configuration steps vary slightly depending on the storage type, but the general workflow is similar.
Method 1: Add Directory Storage (Local Path)
A directory storage saves backups to a local file system or a mounted disk on the Proxmox host.
Steps:
1. Log in to the Proxmox VE web interface.
2. Navigate to Datacenter > Storage.
3. Click Add and select Directory.
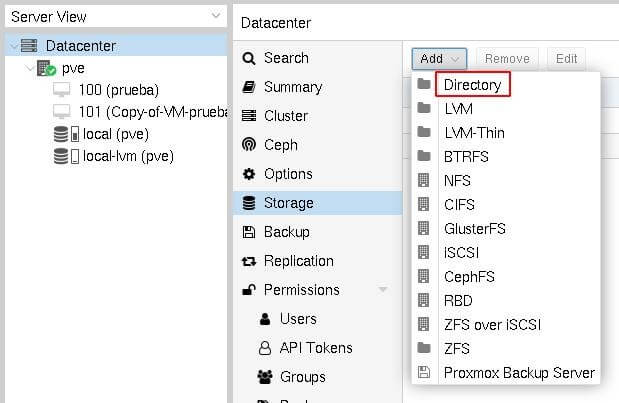
4. Specify the directory path and assign a storage ID.
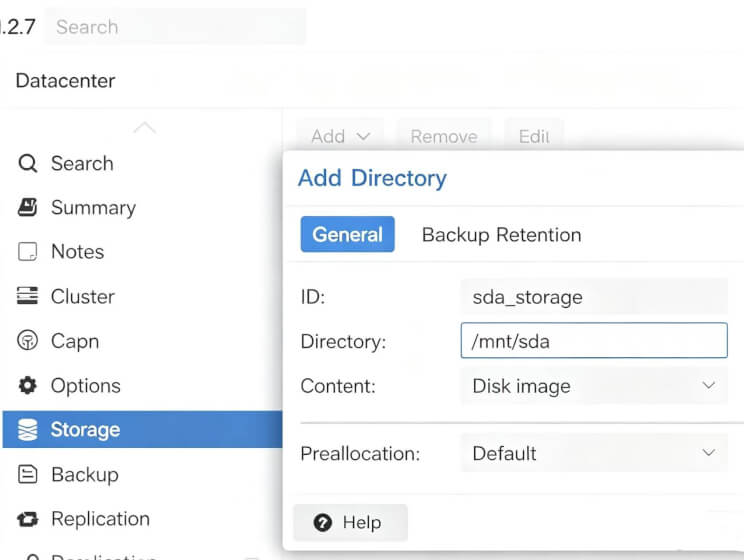
5. Under Content, select VZDump backup file.
6. Click Add to save the configuration.
Method 2: Add NFS Storage as a Backup Target
NFS storage enables Proxmox to save backups to a remote NAS or Linux server.
Steps:
1. Go to Datacenter > Storage > Add > NFS.
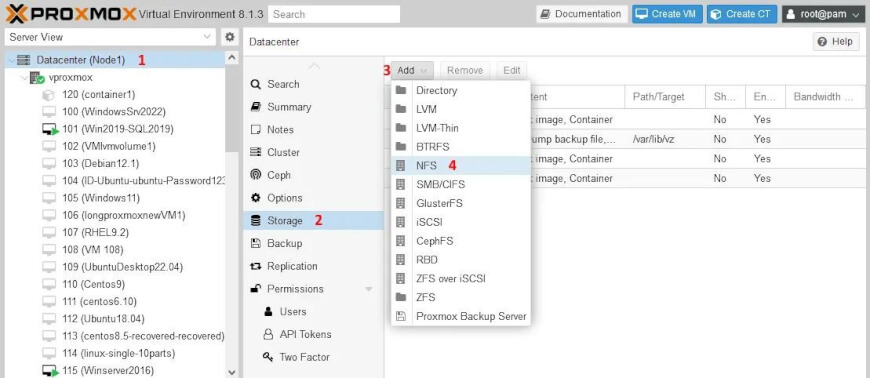
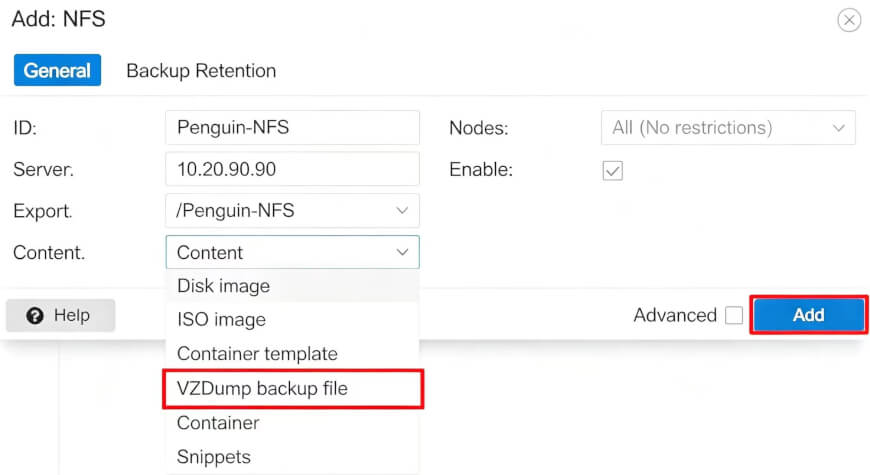
2. Enter the NFS server IP address or host name.
3. Select the exported NFS share.
4. Specify a storage ID.
5. Enable VZDump backup file under Content.
6. Click Add to mount the storage.
Method 3: Add SMB/CIFS Storage
SMB/CIFS storage is commonly used when backups are stored on a Windows file server or a NAS that supports the SMB protocol.
Steps:
1. Navigate to Datacenter > Storage > Add > SMB/CIFS.
2. Enter the server address and share name.
3. Provide the required username and password.
4. Specify a storage ID.
5. Select VZDump backup file as the content type.
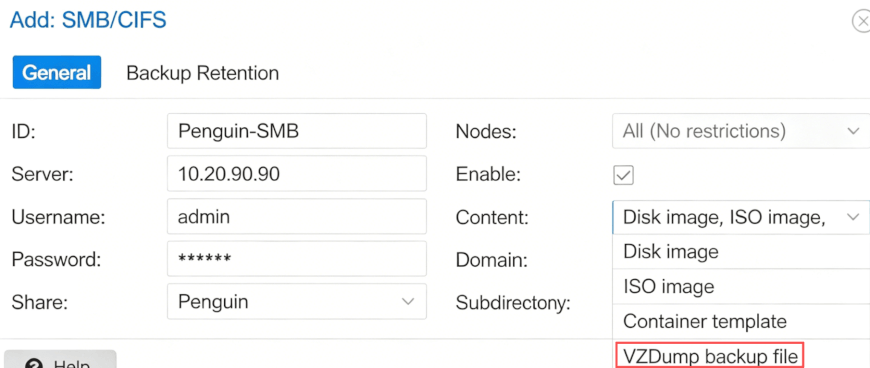
6. Click Add to complete the configuration.
Method 4: Add Proxmox Backup Server (PBS)
PBS is Proxmox's dedicated backup solution and provides incremental backups, deduplication, and faster restore performance.
Steps:
1. Open Datacenter > Storage > Add > Proxmox Backup Server.
2. Enter the PBS server address.
3. Configure the datastore, username, and authentication information.
4. Specify a storage ID.
5. Test the connection to ensure the server is reachable.
6. Click Add to finish the setup.
How to Verify Proxmox Backup Storage?
After adding backup storage in Proxmox VE, it is important to verify that it’s correctly recognized and fully functional before running production backups, ensuring backup tasks run smoothly without failure or data loss.
1. Check Storage Availability
Go to Datacenter > Storage and confirm the storage is listed and marked as Active. If missing or abnormal, recheck the configuration, such as the NFS path, iSCSI target, or PBS connection.
2. Validate Storage Type and Access
Ensure the storage type is correct and accessible:
NFS/SMB: verify mount status and read/write permissions
iSCSI/FC: confirm LUN mapping and node visibility
PBS: check repository connection and credentials
3. Run a Test Backup
Use a non-critical VM to run a manual backup:
4. Verify Backup Output
Check the target storage to ensure:
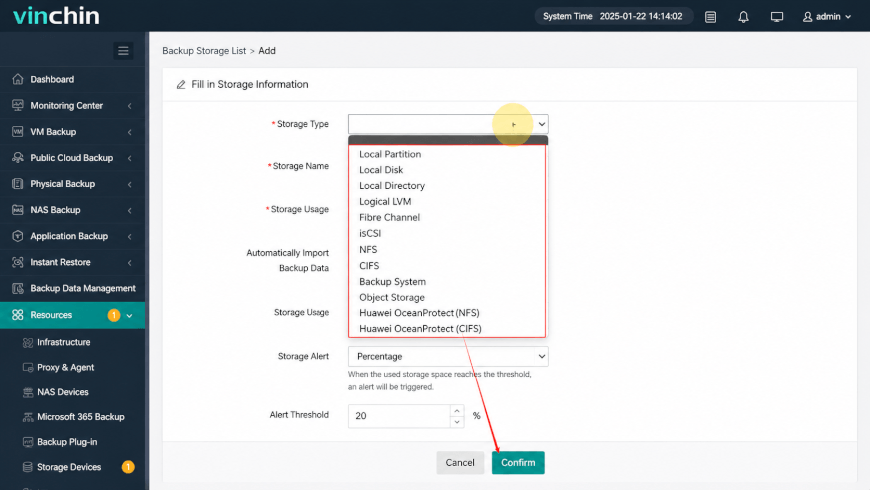
Effortlessly Add Proxmox Backup Storage with Vinchin
Vinchin Backup & Recovery enables fast integration of diverse storage environments without complex configuration, helping IT teams quickly extend backup capacity, improve resource utilization, and adapt to growing workloads with a unified management console. It supports over 15 virtualization platforms, including Proxmox, Hyper-V, and VMware, while ensuring data integrity with strong encryption and built-in ransomware protection.
To add Proxmox backup storage, just follow these steps:
1. Navigate to Resources > Storage, and choose to create a new backup storage.
2. Then, select from the expanded storage resource types, including local disks, SAN storage (iSCSI, FC), NAS storage (NFS, SMB/CIFS), etc.
Next, you can create a new backup job to store the data in the target storage destination.
1. Go to Backup > Virtualization, and select the Proxmox host as the backup source.
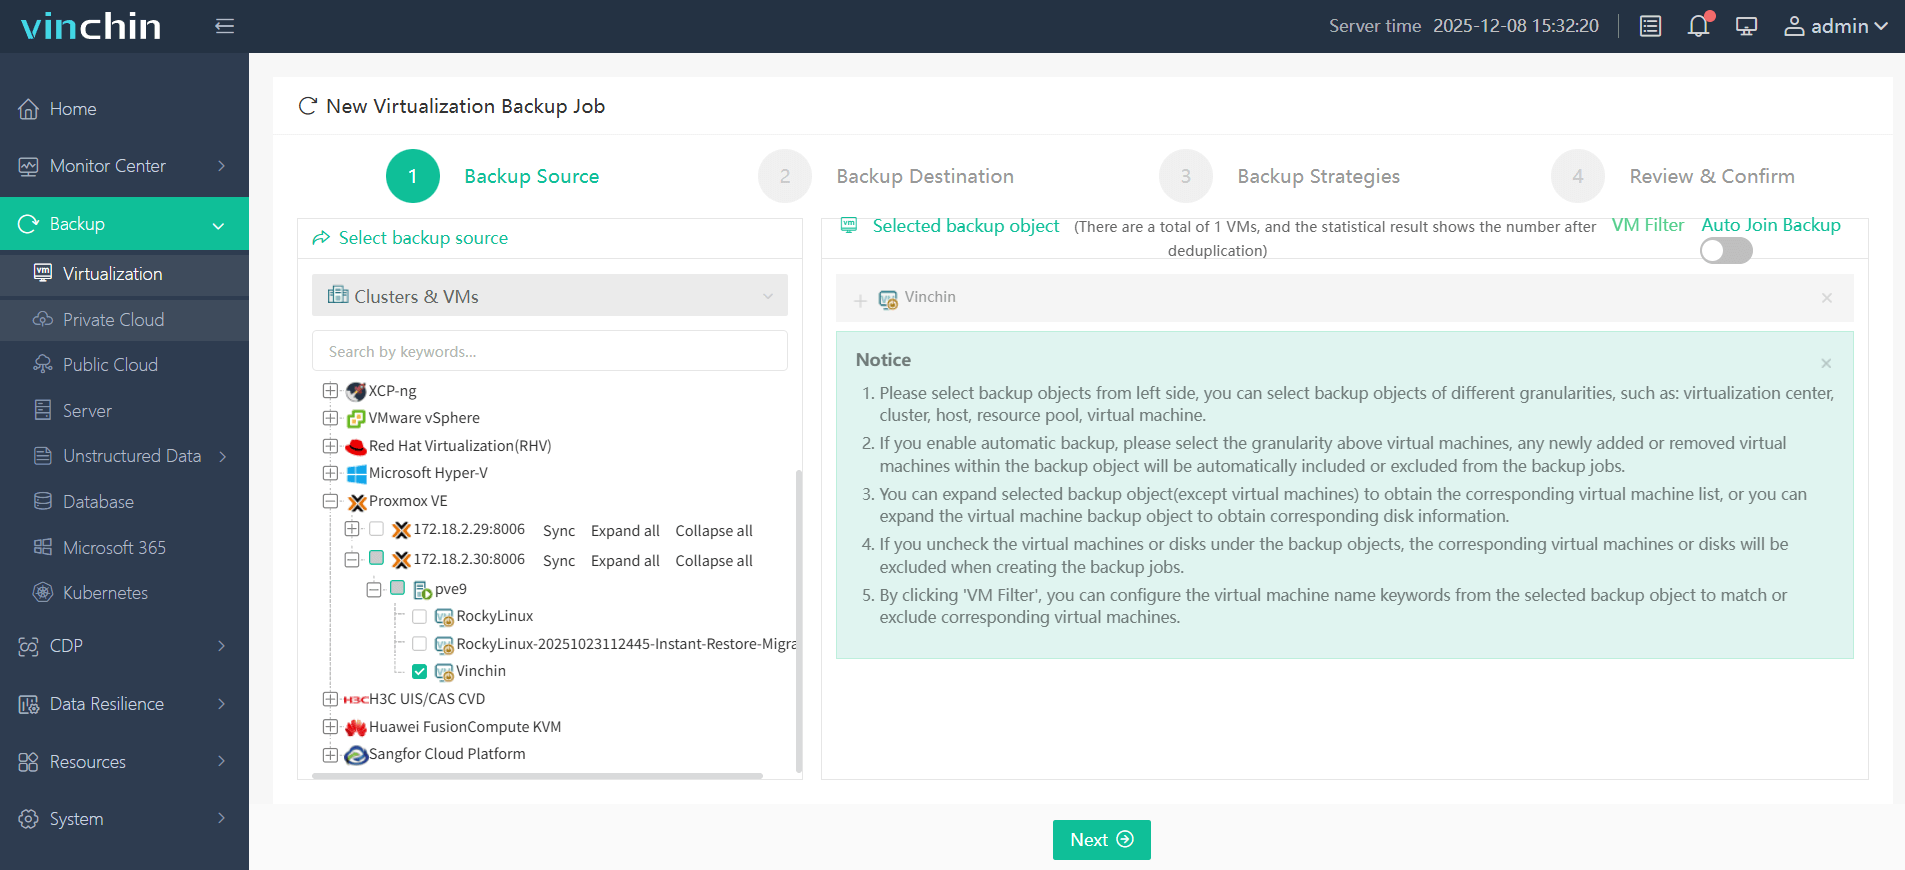
2. Then, choose a target storage device from the storage types you added, and select the target node as well.

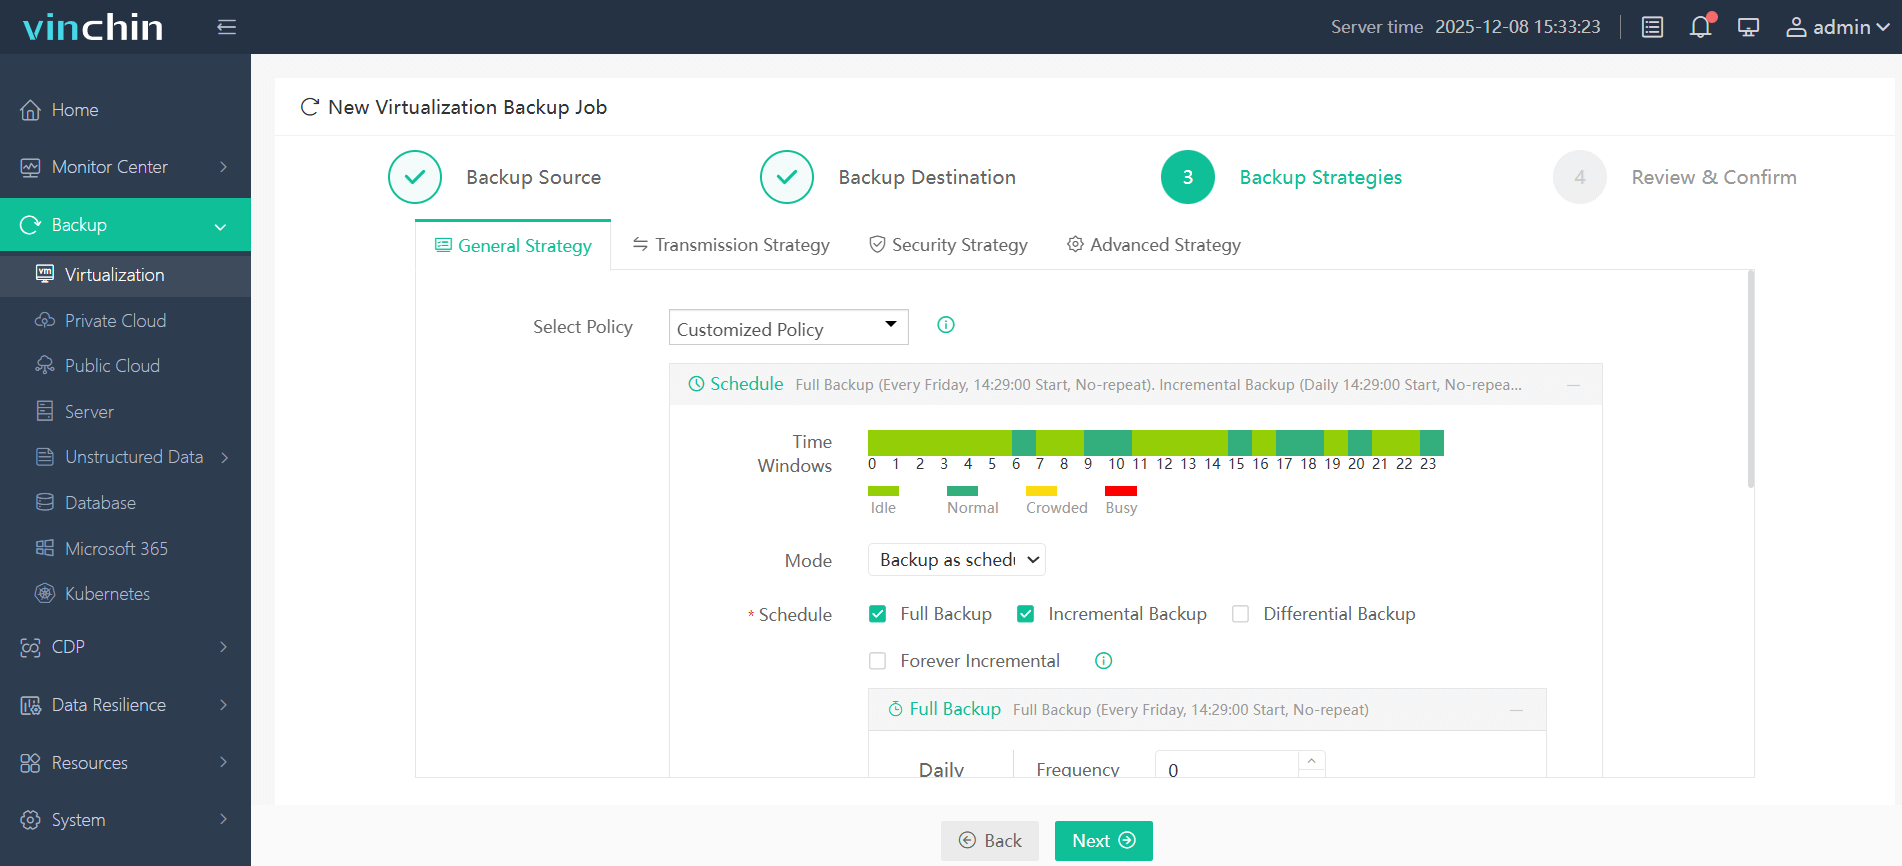
3. Customize the backup strategies. Either run the task immediately or schedule it daily/weekly/monthly, combined with incremental or full backup plans.
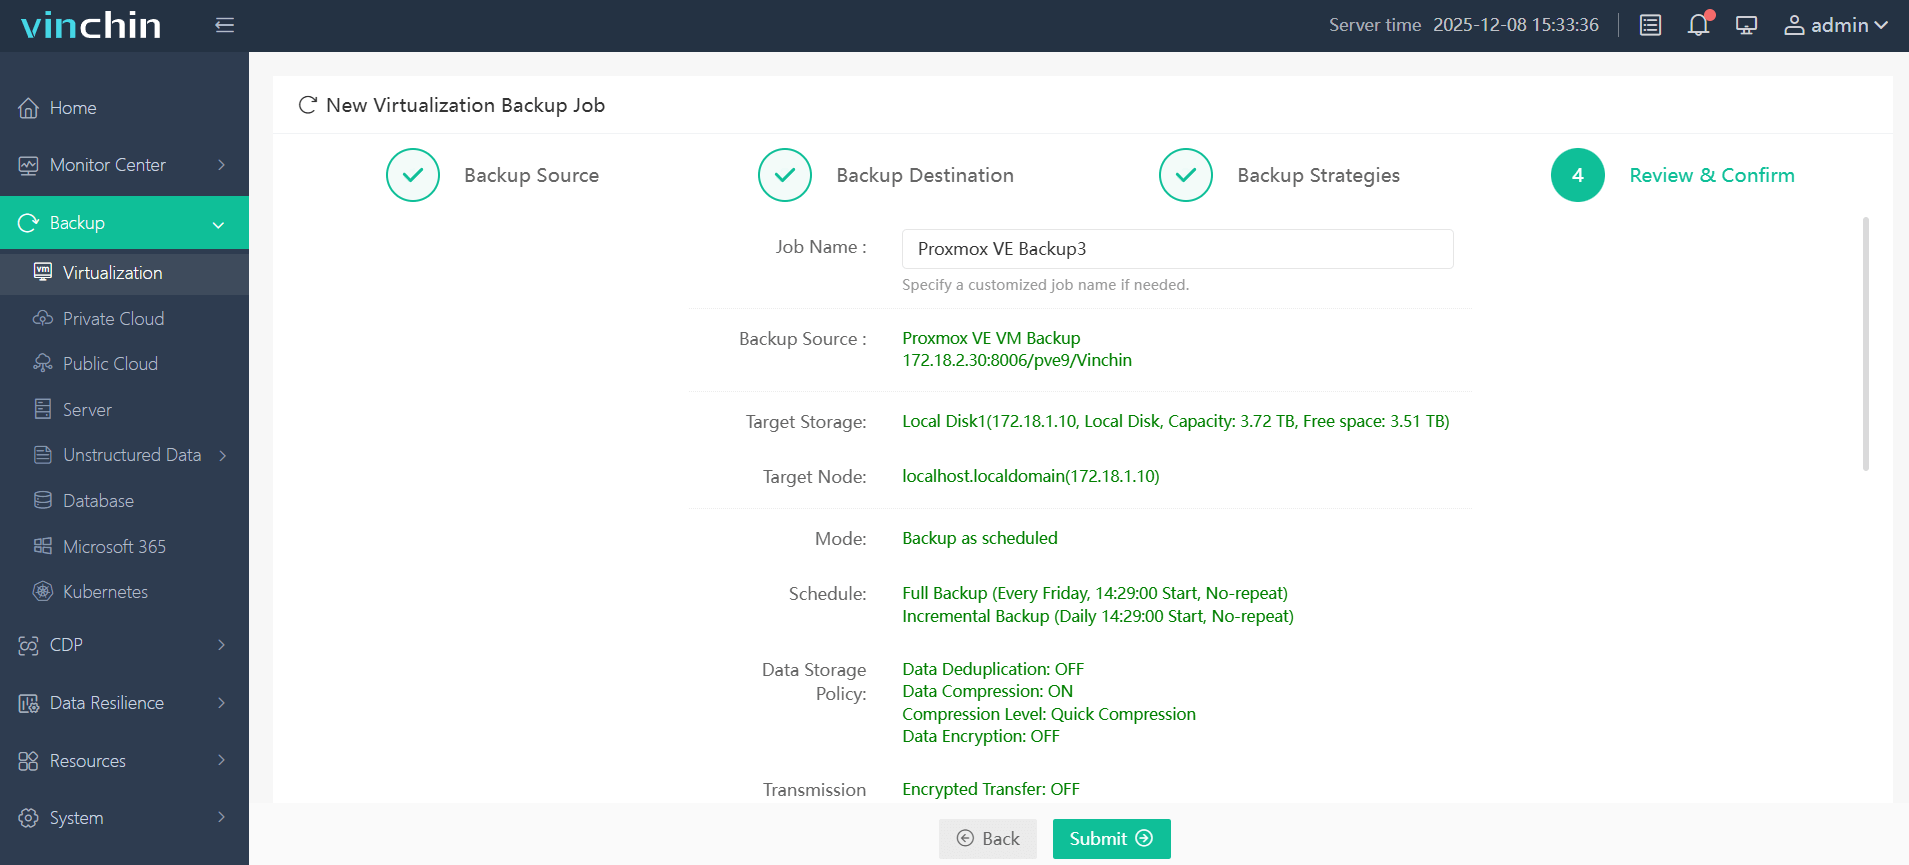
4. Finally, review all the backup settings, and click Submit to run this job.
Vinchin Backup & Recovery is trusted by customers in over 200 countries and regions, and it has won a reputation worldwide for its robust data protection strategies. Click the Download button below to experience a 60-day free trial with full features.
Proxmox Add Backup Storage FAQs
Q1: Why is my Proxmox backup storage not working after adding it?
This is usually caused by incorrect configuration, network issues, permission errors, or unsupported storage parameters. Always check the logs under the backup task details.
Q2: What is the best storage type for Proxmox backups?
It depends on the use case. PBS is recommended for deduplication and incremental backups, while NFS and SAN are commonly used for performance and shared environments.
Q3: Can I use multiple backup storage in Proxmox VE?
Yes, Proxmox allows multiple backup storage targets, enabling flexible backup strategies and improved data redundancy.
Conclusion
Proxmox VE offers four common storage types: directory storage, NFS share, SMB/CIFS, and Proxmox Backup Server (PBS) to store backup data. You can choose the most suitable option based on your production environment and storage capacity requirements.
After defining a Proxmox backup location, it is important to verify its availability and create a backup job to ensure critical data is securely protected. For a simpler and more flexible approach, Vinchin Backup & Recovery can further streamline this process by unifying multiple storage types and helping ensure reliable, centralized data protection.