-
XenServer vs. Proxmox
-
How to migrate VM from XenServer to Proxmox?
-
How to migrate from XenServer to Proxmox with Vinchin Backup & Recovery?
-
XenServer to Proxmox FAQs
-
Conclusion
In the ever-evolving landscape of virtualization, organizations often find themselves seeking more flexible and robust solutions. This guide explores the seamless transition from XenServer to Proxmox VE, providing a comprehensive roadmap to ensure a smooth migration process.
XenServer vs. Proxmox
Proxmox VE is an open-source virtualization solution that furnishes computational, networking, and storage functions all within one software package. As a virtualization platform capable of running both virtual machines and containers, Proxmox VE is primarily developed on Debian Linux. Considering its flexibility, Proxmox VE concurrently supports two virtualization techniques: KVM and LXC.
XenServer sprung from the open-source Xen project, as an open-source virtualization platform which was thereafter acquired by Citrix, and following a commercial period, continued as an open-source platform. XenServer principally builds its virtualization management stack on Xen’s open-source virtualization kernel, widely employed in major corporations’ production environments.
Here’s a table to assist you in making a selection based on your individual needs.
Feature | XenServer | Proxmox VE |
Virtualization techonology | Xen-based | KVM |
Management interface | XenCenter | Proxmox Web interface |
Open source | Yes | Yes |
Live migration | Yes | Yes |
High Availability | Yes | Yes |
Failover | Yes | Yes |
Storage support | Local storage, NFS, iSCSI, Fibre Channel, Ceph | ZFS, Ceph, LVM, NFS, iSCSI, GlusterFS |
Virtualization support | Xen for full virtualization | KVM for full virtualization, LXC for containers |
Thin Provisioning | Yes | Yes |
These two open-source virtual machine management programs have gained global popularity for offering an enterprise-level user operating experience. Advancement in the use of open-source virtual machine management programs has revolutionized the way corporate managers handle their computational resources, lowering IT operational costs and augmenting performance and flexibility.
How to migrate VM from XenServer to Proxmox?
Prerequisites:
Ensure mutual accessibility between the Proxmox and XenServer hosts.
Install essential virtual machine drivers and tools, such as the QEMU driver, on the Proxmox host.
1. Export XenServer virtual machine
Utilize XenCenter or the “xe” command-line tool to export virtual machine configuration files and disk images. This typically encompasses an XML-formatted virtual machine configuration file, along with one or multiple VHD or other formats of disk images.
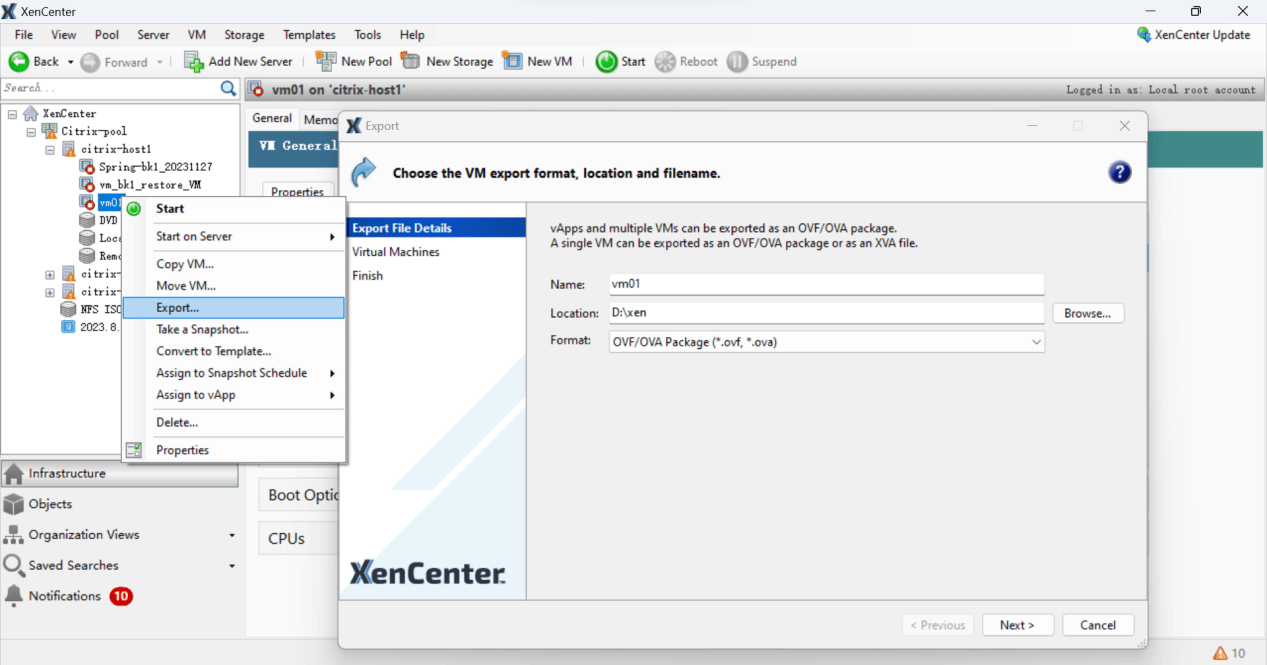
The exported files are as follows.

2. Transfer virtual machine files to Proxmox host
Use SCP, SFTP, or other suitable tools to transfer the exported virtual machine files to the Proxmox host.
3. Transform disk images to a format supported by Proxmox VE
Proxmox VE does not directly accommodate the disk image format exported by default from XenServer. As a result, you need to convert it into the qcow2 format. The “qemu-img” tool can facilitate this transformation.
For instance, in order to convert a VHD format disk image into a qcow2 format, execute the following command:
qemu-img convert -f vpc -O qcow2 <filepath/vm-name>.vhd <filepath/vm-name>.qcow2
Adapt “filepath” and “vm-name” according to your specific circumstances.
For example:

Subsequently, you acquire a disk image file in the .qcow2 format.

4. Create a new virtual machine in Proxmox VE
Log into the Proxmox VE web interface to create new Proxmox VM. Click on the "Create VM" button on the left, and then adhere to the wizard instructions to instantiate a new virtual machine.
5. Import the disk image into Proxmox VE
Use the following command to import the image file into the newly created virtual machine: qm importdisk <vm-id> <filepath/vm-name>.qcow2 <storage-id>.
Replace <vm-id> with the ID of the newly minted virtual machine, <vm-name> with your image file name, and <storage-id> with the ID of the storage device where you wish to store the image.
For instance:
qm importdisk 107 /home/vm01/9dd1fd45-1600-452b-91b5-4690e2c9f56e.qcow2 local-lvm
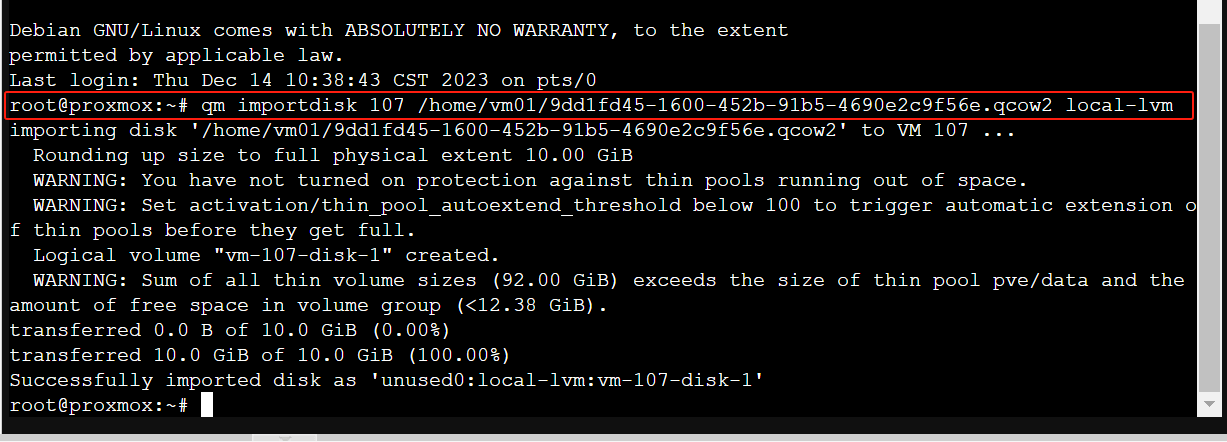
This command will import the 9dd1fd45-1600-452b-91b5-4690e2c9f56e.qcow2 disk image into the virtual machine with ID 107, storing it in the local-lvm storage.
6. Attach the imported disk
After running this command, you will need to manually attach the imported disk to the virtual machine. You can do this using the Proxmox VE web interface, or by using the "qm set" command.
If you’re using the qm set command, it might look something like this:
qm set 107 -scsi0 local-lvm:vm-107-disk-0

In this command, -scsi0 is the SCSI ID for the disk (you can adjust this as needed based on your VM’s configuration), and local-lvm:vm-107-disk-0 is the ID of the disk you’re attaching, which was generated when you imported the disk.
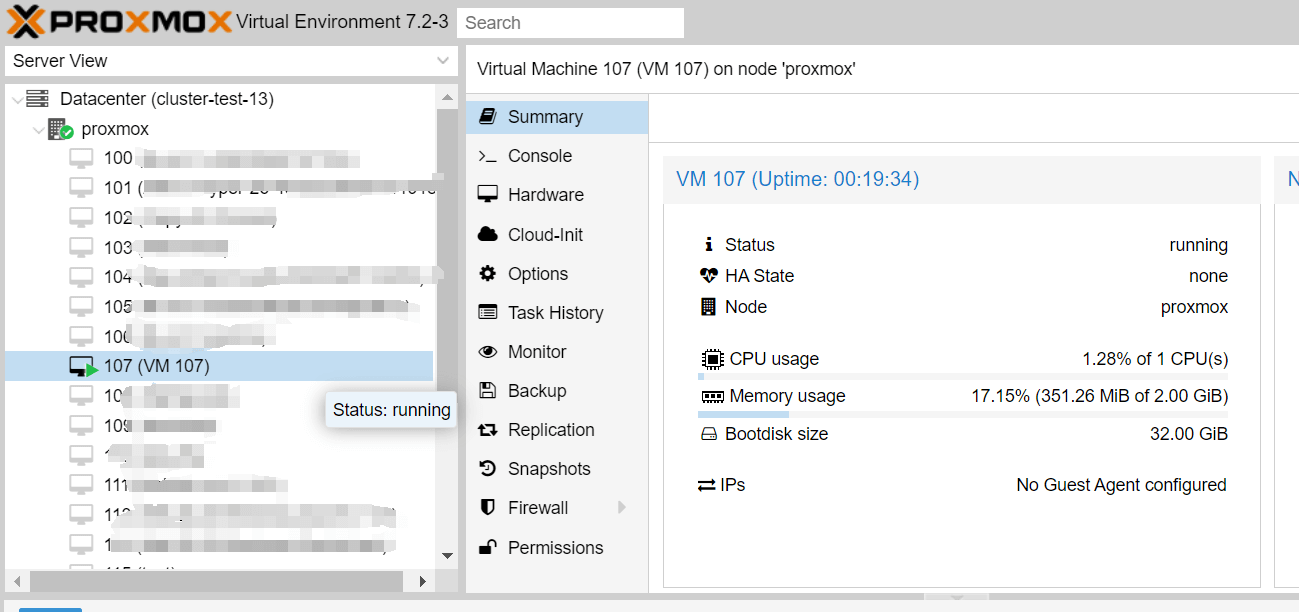
7. Start and check the virtual machine
Within the Proxmox VE web interface, select your virtual machine and hit the "Start" button to ignite it. Verify whether the virtual machine initiates successfully, and all services function as anticipated.
How to migrate from XenServer to Proxmox with Vinchin Backup & Recovery?
There is a solution to help you easily migrate VM from XenServer to Proxmox VE---using Vinchin Backup & Recovery.
Vinchin Backup & Recovery can migrate VMs across 10+ virtual platforms including XenServer, VMware, Proxmox and most KVM-based hypervisors. You can easily switch your critical modern IT workloads from one to another to build your own highly flexible IT infrastructure.
It performs robust backup and recovery functionality including fast incremental backup, image-based, agentless backup, LAN-Free backup and recovery, offsite backup copy, multithreading transmission, ransomware protection and more, to comprehensively secure your critical data. Cross-platform instant restore will allowing restarting a failed VM in 15 seconds, greatly reducing RTO.
You can simply migrate data from a Proxmox VE host to another virtual platform and vice versa with the easy-to-use web console:
1. Backup your XenServer VM, choose the backup destination and Backup strategies, then Submit it.

2. Choose the VM you want to restore.

3. Select the Proxmox VE host to run the restored VM.
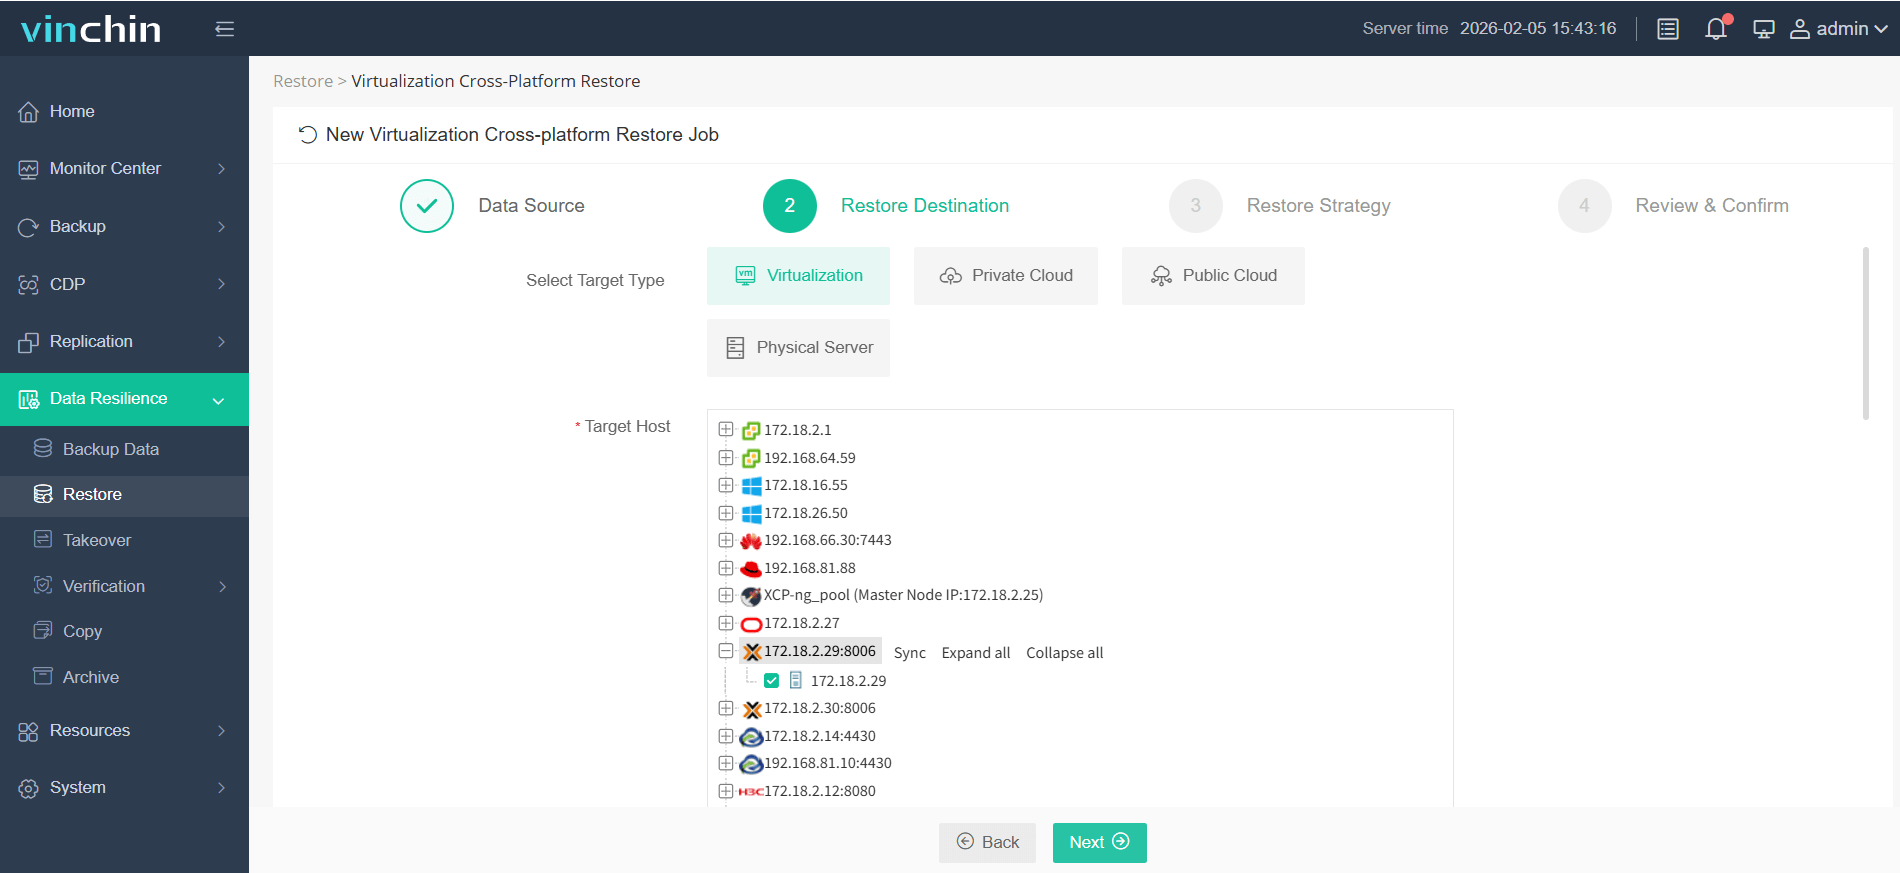
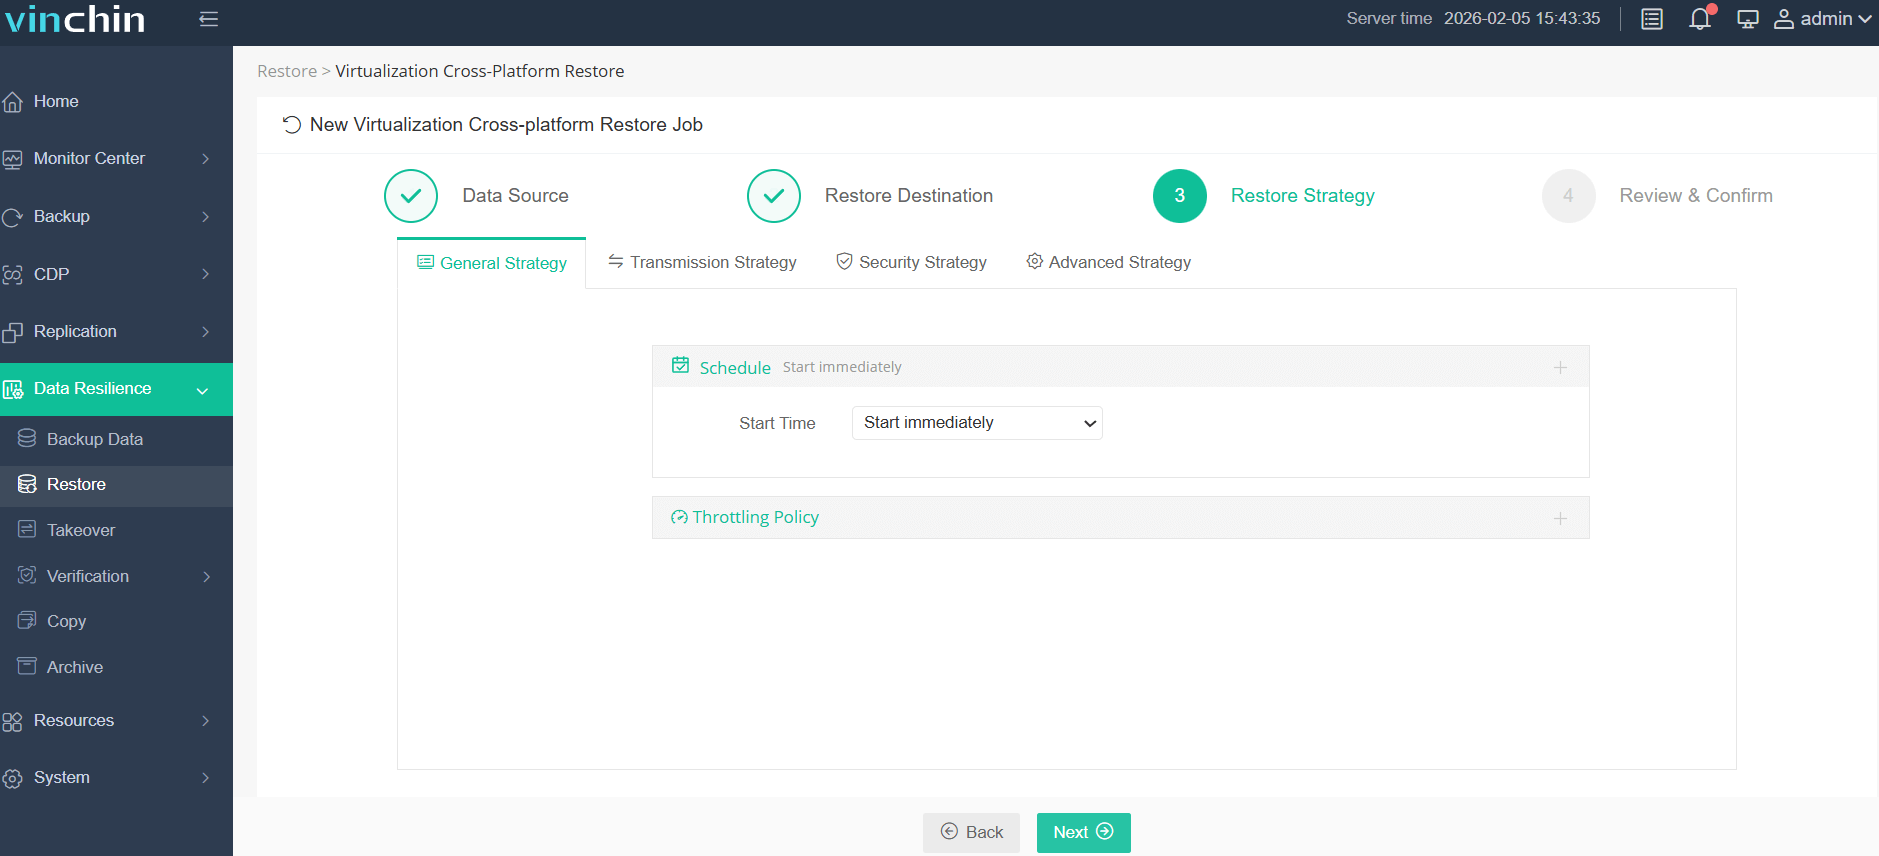
4. Select the restore strategy.
5. Review and submit the job.
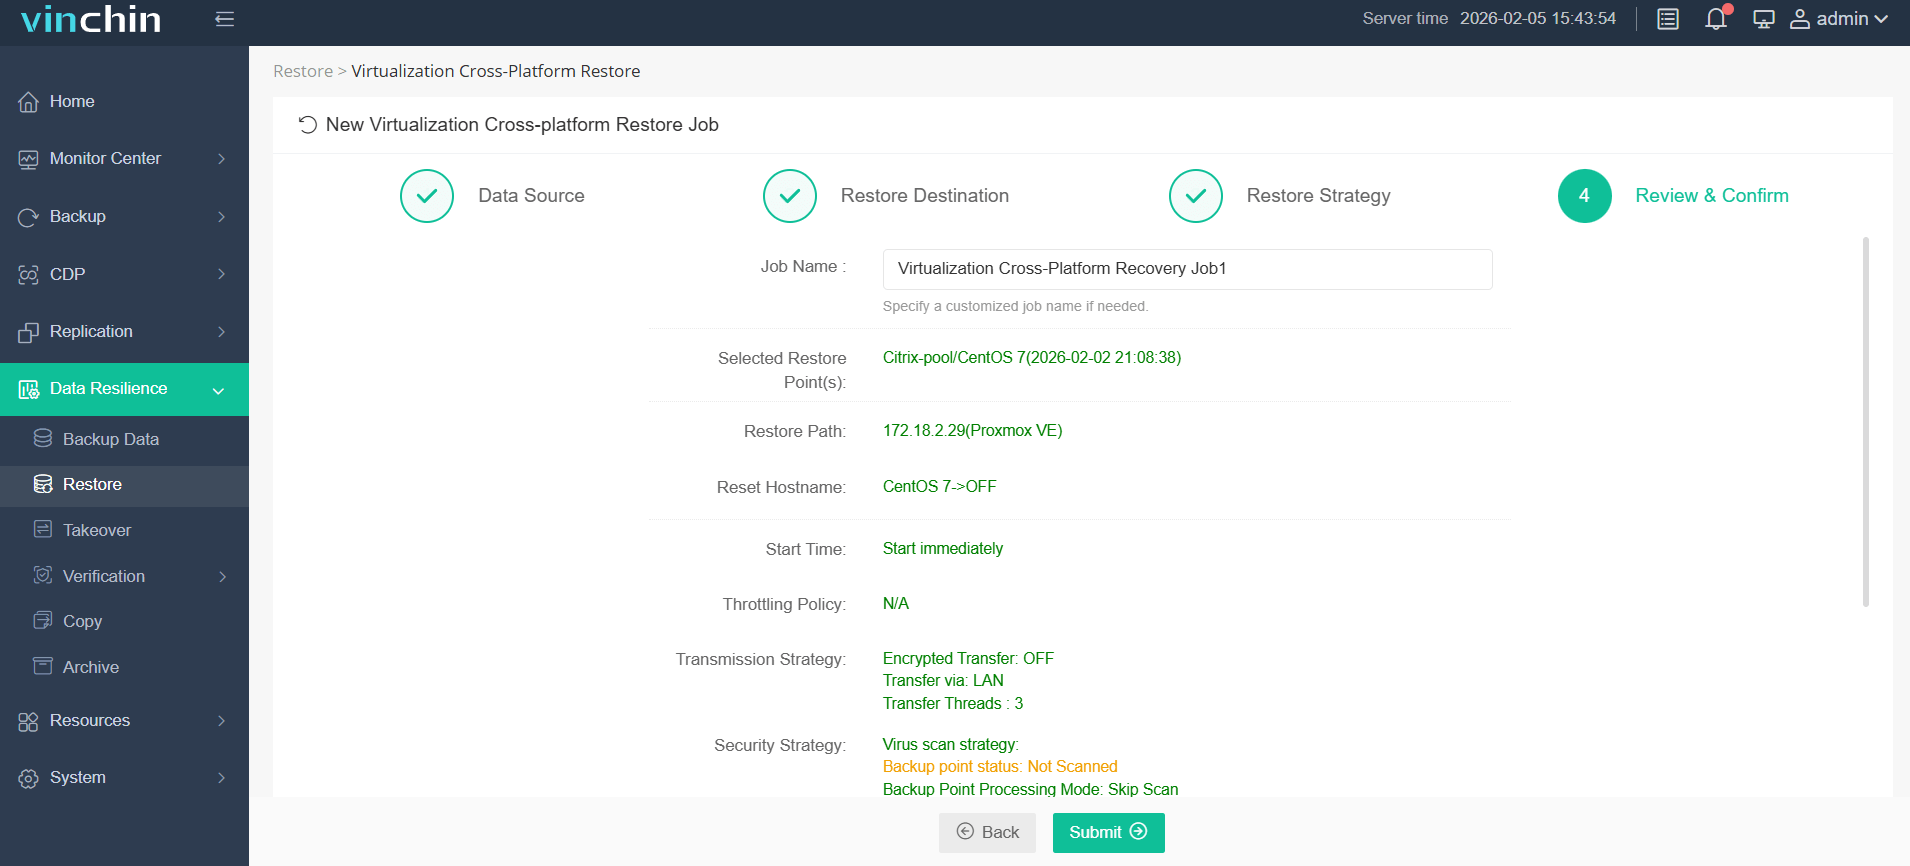
Start the job and then you can check the Proxmox VE web console and find that the VM has been restored and running.
Vinchin Backup & Recovery has been selected by thousands of companies and you can also start to use this powerful system to protect virtual environment and migrate VM betetween different hypervisors with a 60-day full-featured trial! Also, contact us and leave your needs, and then you will receive a solution according to your IT environment.
XenServer to Proxmox FAQs
1.Q: Can I perform the entire migration process through the Proxmox VE web interface?
A: While many tasks can be accomplished through the web interface, certain operations, such as converting disk images and fine-tuning configurations, may involve command-line tools for efficiency.
2.Q: Is there a recommended backup and recovery solution for VM migration between different platforms?
A: Yes, Vinchin Backup & Recovery provides a comprehensive solution for migrating VMs across various platforms, including XenServer to Proxmox VE. It offers robust backup and recovery features, ensuring data integrity and seamless migration.
3.Q: Can I migrate VM from Proxmox to XenServer using Vinchin Backup & Recovery?
A: Yes. Vinchin Backup & Recovery can migrate VMs across 10+ virtual platforms. To migrate from Proxmox to XenServer, you just need to backup your Proxmox VM, select this backup, select a XenServer host, select restore strategies and submit the job. When the restoration job finished, you can check in the XenCenter.
Conclusion
The migration process described above enables users to seamlessly transition virtual machines from XenServer to Proxmox VE. Migrating virtual machines between different virtualization platforms allows organizations to leverage the benefits of different technologies and adapt to changing requirements. Proxmox VE’s support for both KVM and LXC virtualization techniques provides users with flexibility in choosing the most suitable approach for their specific needs.
Share on:


