Learn the Proxmox Remote Migration
Proxmox Remote Migrate refers to the ability to transfer virtual machines between separate Proxmox VE using the qm remote-migrate command or newer management tools such as Proxmox Datacenter Manager (PDM).
The migration occurs over the network and is useful for:
Unlike traditional cluster migration, remote migration uses authenticated API communication instead of Proxmox cluster trust relationships.
| Feature | Cluster Migration | Rmote Migration |
| Same cluster required | Yes | No |
| Shared corosync configuration | Yes | No |
| Cross-site support | Limited | Yes |
| Separate storage environments | Limited | Supported |
| API token authentication | No | Yes |
| Experimental status | Mature | Partially experimental |
Also, you may confuse these two concepts, remote migration and live migration.
| Feature | Remote Migration | Live Migration |
| What is means | Move a VM to another host, cluster, or site | Move a VM while it is still running |
| Main focus | Where the VM is moved | Whether the VM stays online |
| Downtime | May require downtime | Littel to no downtime |
| Use | Data center migration, cluster migration, disaster recovery | Host maintenance, load balancing, hardware upgrade |
Prerequisites Before You Start
Make sure you have done the following workflow before you migrate VM in a different cluster.
Step 1. Create an API Token on the Target Host
1. On the destination Proxmox host, navigate to Datacenter > Permissions > API Tokens

2. Create a token under root@pam
3. Save Token ID and Secret
Step 2. Assign Permissions
1. Navigate to Datacenter > Permissions > Add > API Token Permission
Step 3. Obtain the Target Host Fingerprint
1. Run on the target host:
openssl x509 -fingerprint -sha256 -noout \
-in /etc/pve/nodes/$(hostname)/pve-ssl.pem
2. Save the SHA-256 fingerprint
Step 4. Verify Storage and Networking
Confirm:
Installing the QEMU Guest Agent is recommended for cleaner online migrations.
Step-by-Step: Running a Proxmox Remote Migration
This part provides detail steps to Proxmox remote migrate
Step 1. Identify VM IDs
Determine your source VMID and target VMID
Note: The target VMID must not already exist.
Step 2. Build the Migration Command
General Syntax:
qm remote-migrate <SOURCE_VMID> <TARGET_VMID> \
'host=<TARGET_IP>,apitoken=PVEAPIToken=<USER>@pam!<TOKENNAME>=<SECRET>,fingerprint=<FINGERPRINT>' \
--target-bridge <BRIDGE> \
--target-storage <STORAGE> \
--online
Step 3. Monitor Progress
Example successful output:
migration active, transferred 16.1 GiB of 16.1 GiB VM-state, 497.6 MiB/s
average migration speed: 446.3 MiB/s - downtime 102 ms
migration completed, transferred 16.7 GiB VM-state
Step 4. Remove the API Token
For security, delete the migration API token after completing the migration.
Step 5. Migrating LXC Containers
Example:
pct remote-migrate <SOURCE_CTID> <TARGET_CTID> \
'apitoken=PVEAPIToken=root@pam!migration=<SECRET>,host=<TARGET_IP>,fingerprint=<FINGERPRINT>' \
--target-bridge vmbr0 \
--target-storage local-lvm
Note:
LXC remote migration is offline only.
Containers must be stopped before migration
Common Issues and Troubleshooting
During the migration, you may meet some issues, but don’t worry, here are how to solve the common problems.
Migration Is Extremely Slow
Possible causes:
Shared management network congestion
Migration bandwidth limits
High RAM change rates inside the guest
Recommendations:
CloudInit Drive Errors
A known issue when migrating from:
Proxmox VE 7.x
to Proxmox VE 8.x
Workaround:
1. Remove CloudInit drive.
2. Perform migration.
3. Recreate CloudInit on target.
Large VM Migration Timeouts
High-latency links (e.g., 65ms+) can affect large VMs.
Recommended approaches:
Vinchin Simplify and Protect Proxmox Migration
While Proxmox Remote Migrate makes it easier to move virtual machines between clusters, migration projects still involve risks such as configuration errors, storage incompatibilities, unexpected downtime, or accidental data loss.
Vinchin Backup & Recovery helps simplify Proxmox migration by providing a secure recovery point before workloads are moved. Instead of relying solely on migration tools, administrators can create image-based backups of their virtual machines and quickly restore them if issues arise during the migration process.
Agentless Proxmox VM Backup – Protect virtual machines without installing software inside guest operating systems.
Seamless VM Migration – Organizations can quickly migrate workloads between environments without complex conversion processes, this also minimizes downtime, reduces migration risks, and ensures business continuity
Fast Full VM Recovery – Restore entire VMs to minimize downtime if a migration fails.
Incremental Forever Backup – Reduce backup windows and storage consumption while maintaining recovery readiness.
Offsite Copy and Disaster Recovery – Keep an additional copy of critical workloads before performing cluster migrations or hardware upgrades.
Follow the simple steps to backup and migrate Proxmox VM:
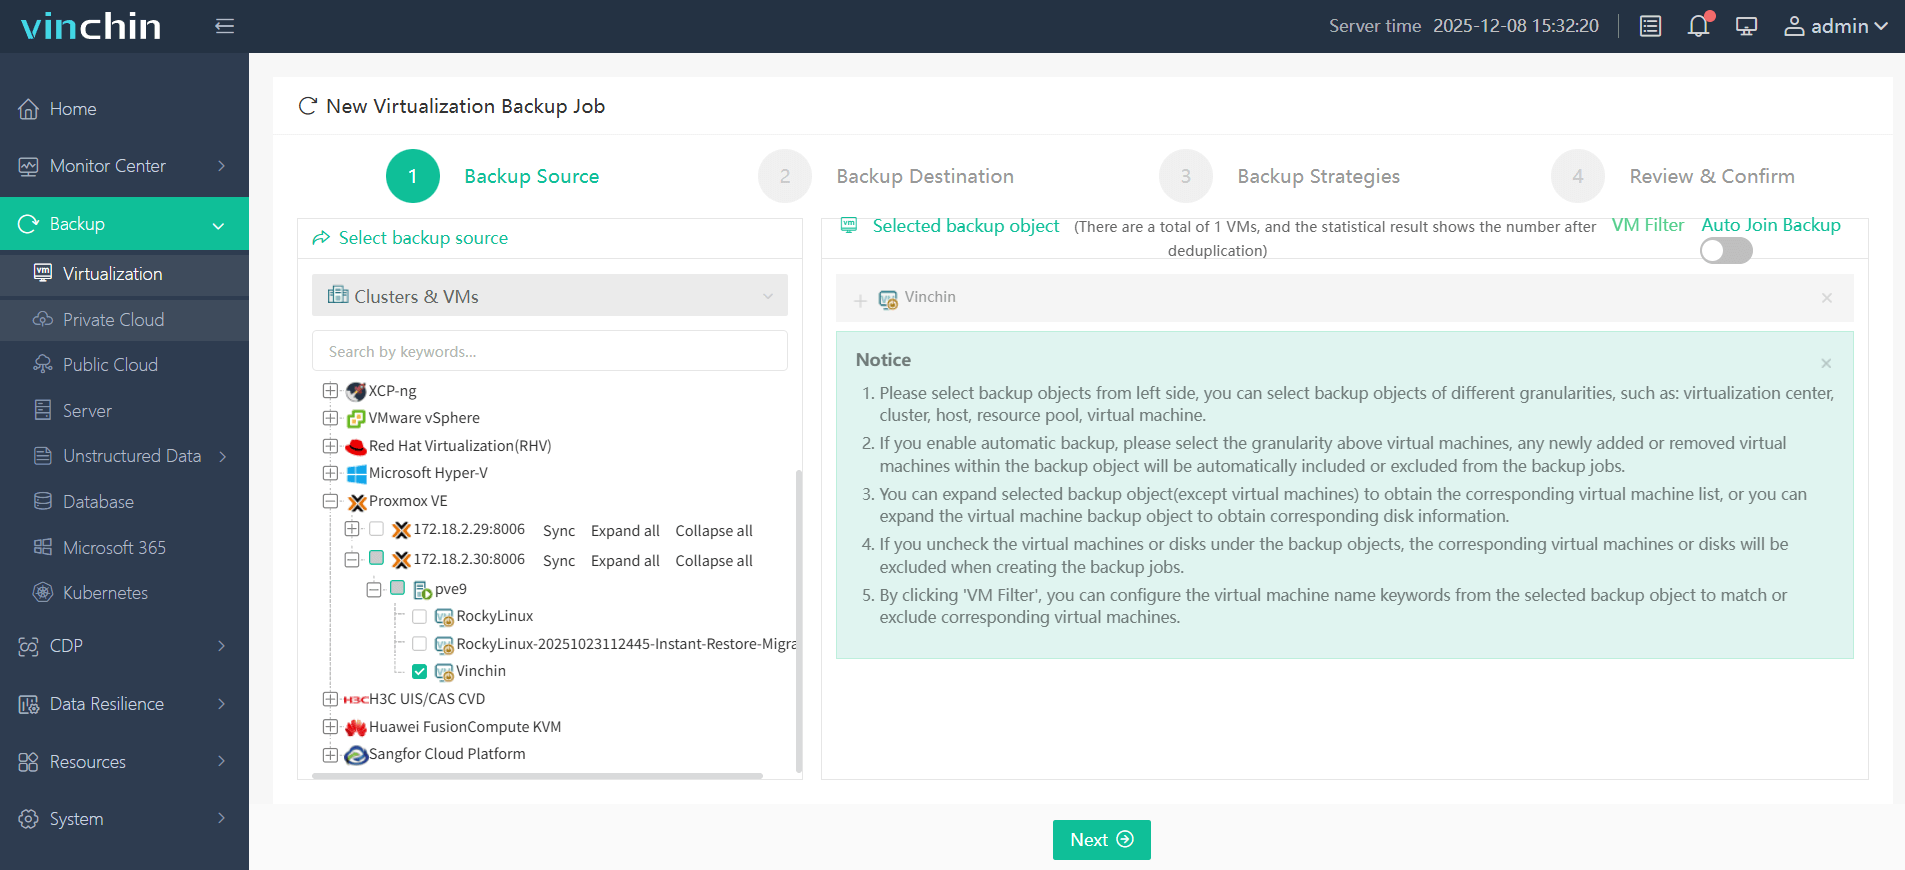
Step 1. Under Backup > Virtualization, choose the Proxmox VM you want to backup
Step 2. In Backup Destination, choose the target storage, you can choose local disk, NFS, iSCSI, and etc.

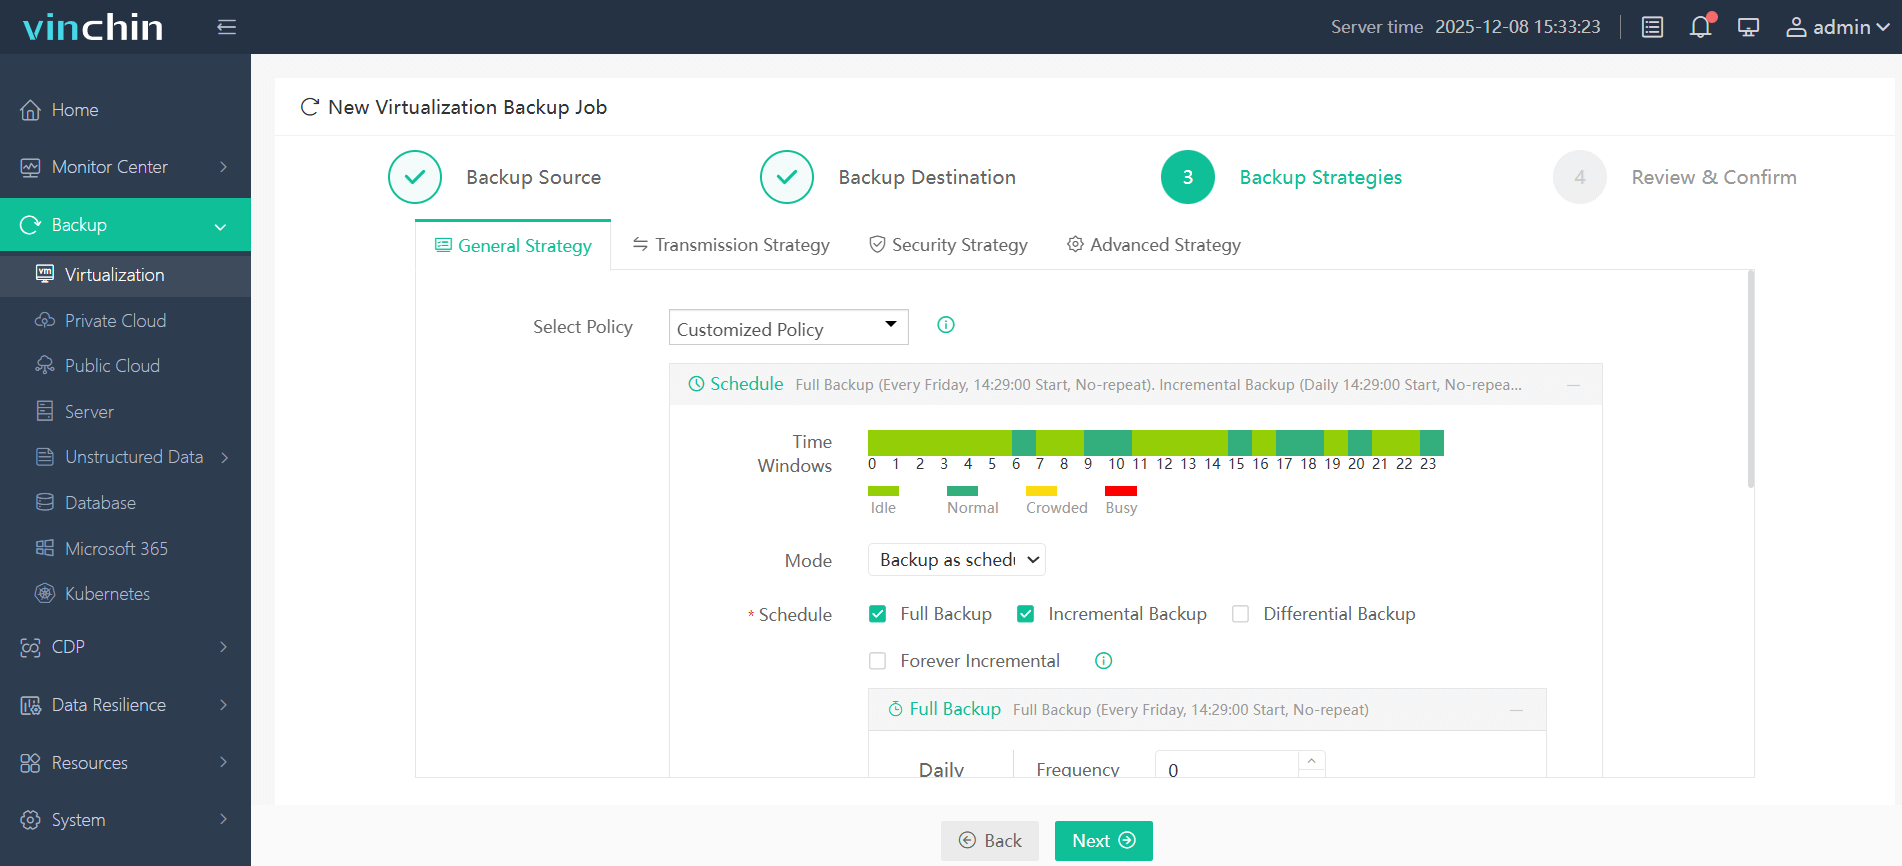
Step 3. In Backup Strategies, set your backup mode and backup schedule
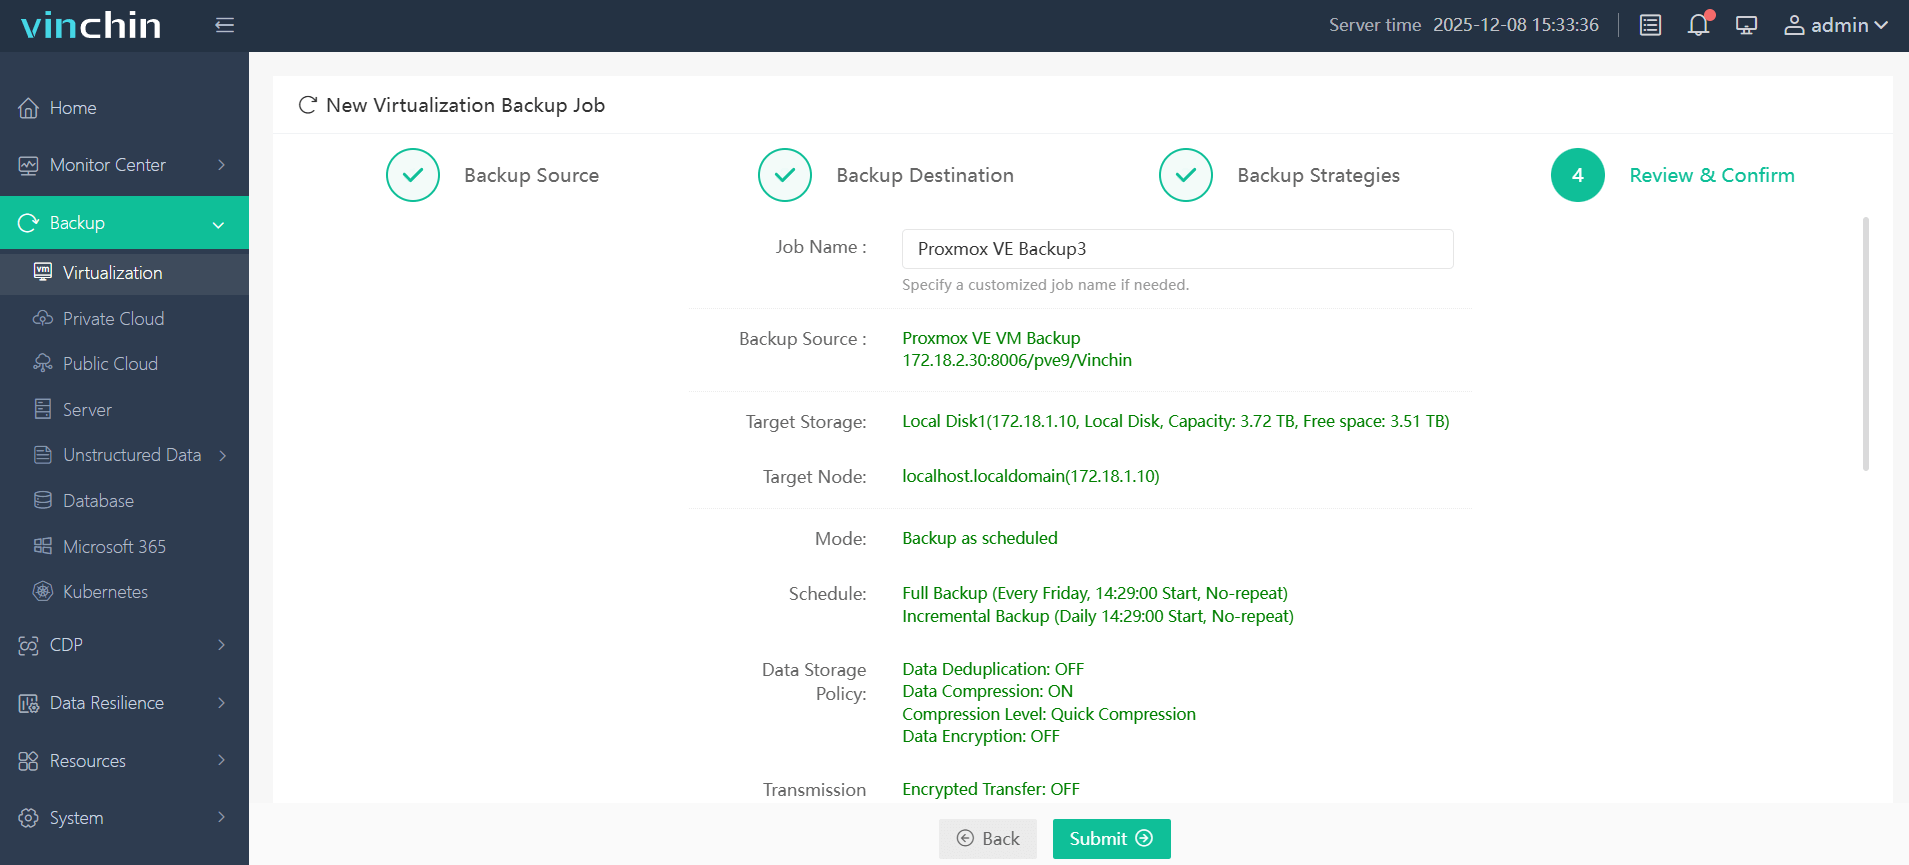
Step 4. Confirm all your settings, and click Submit
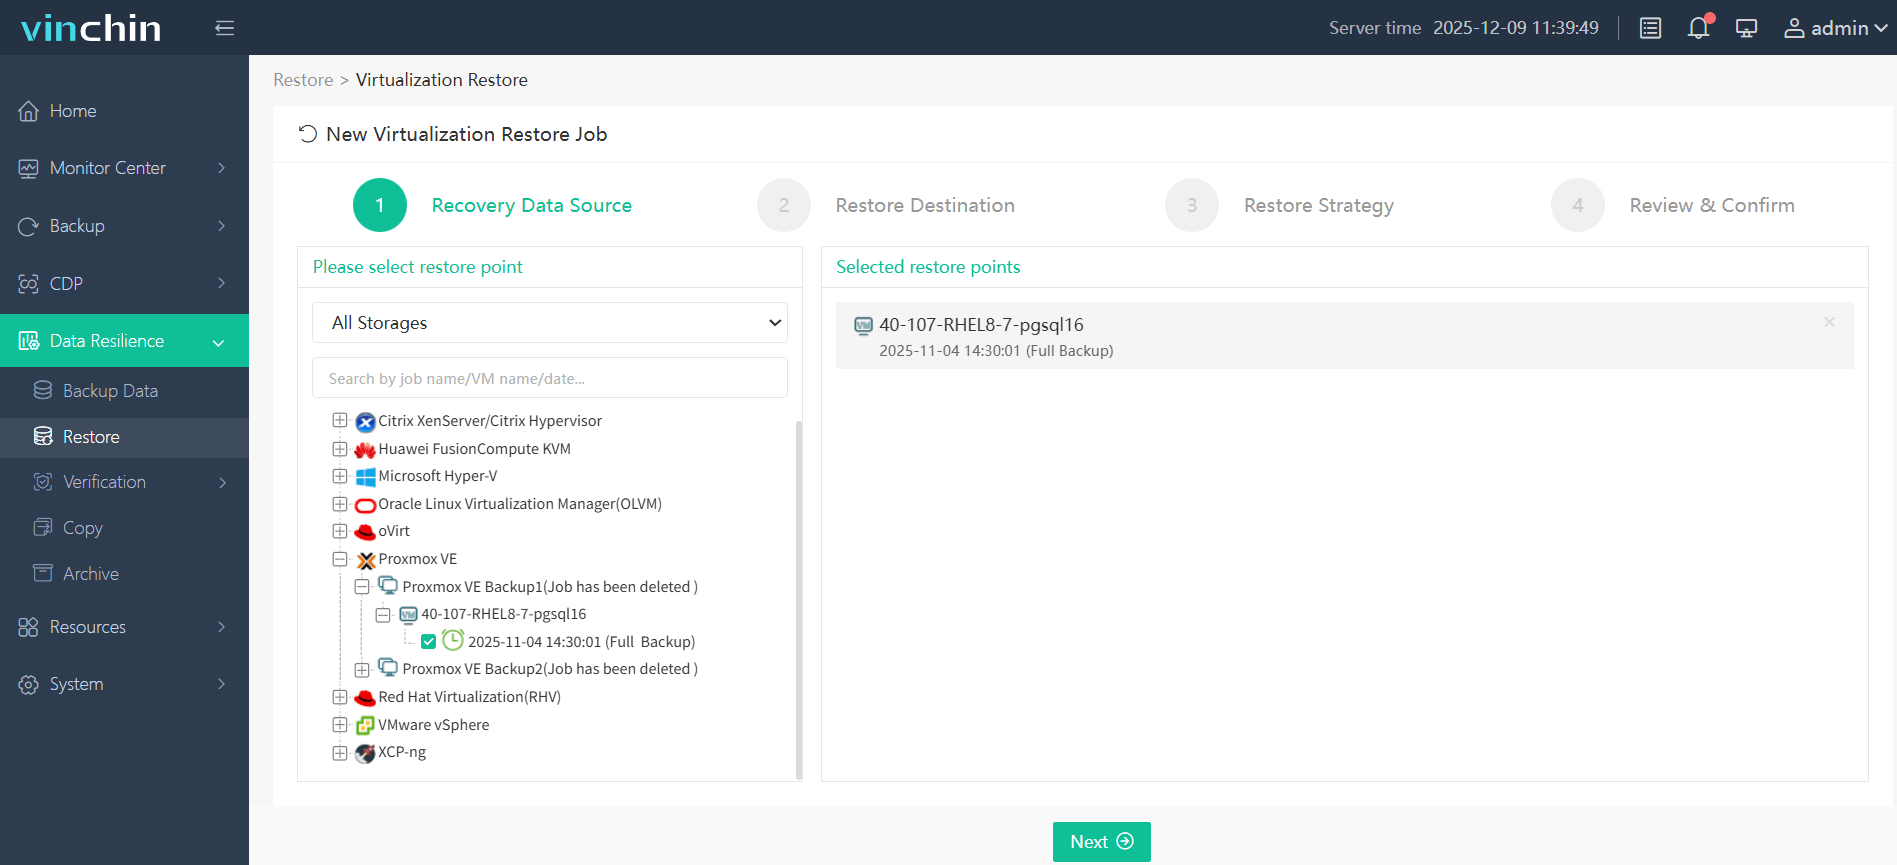
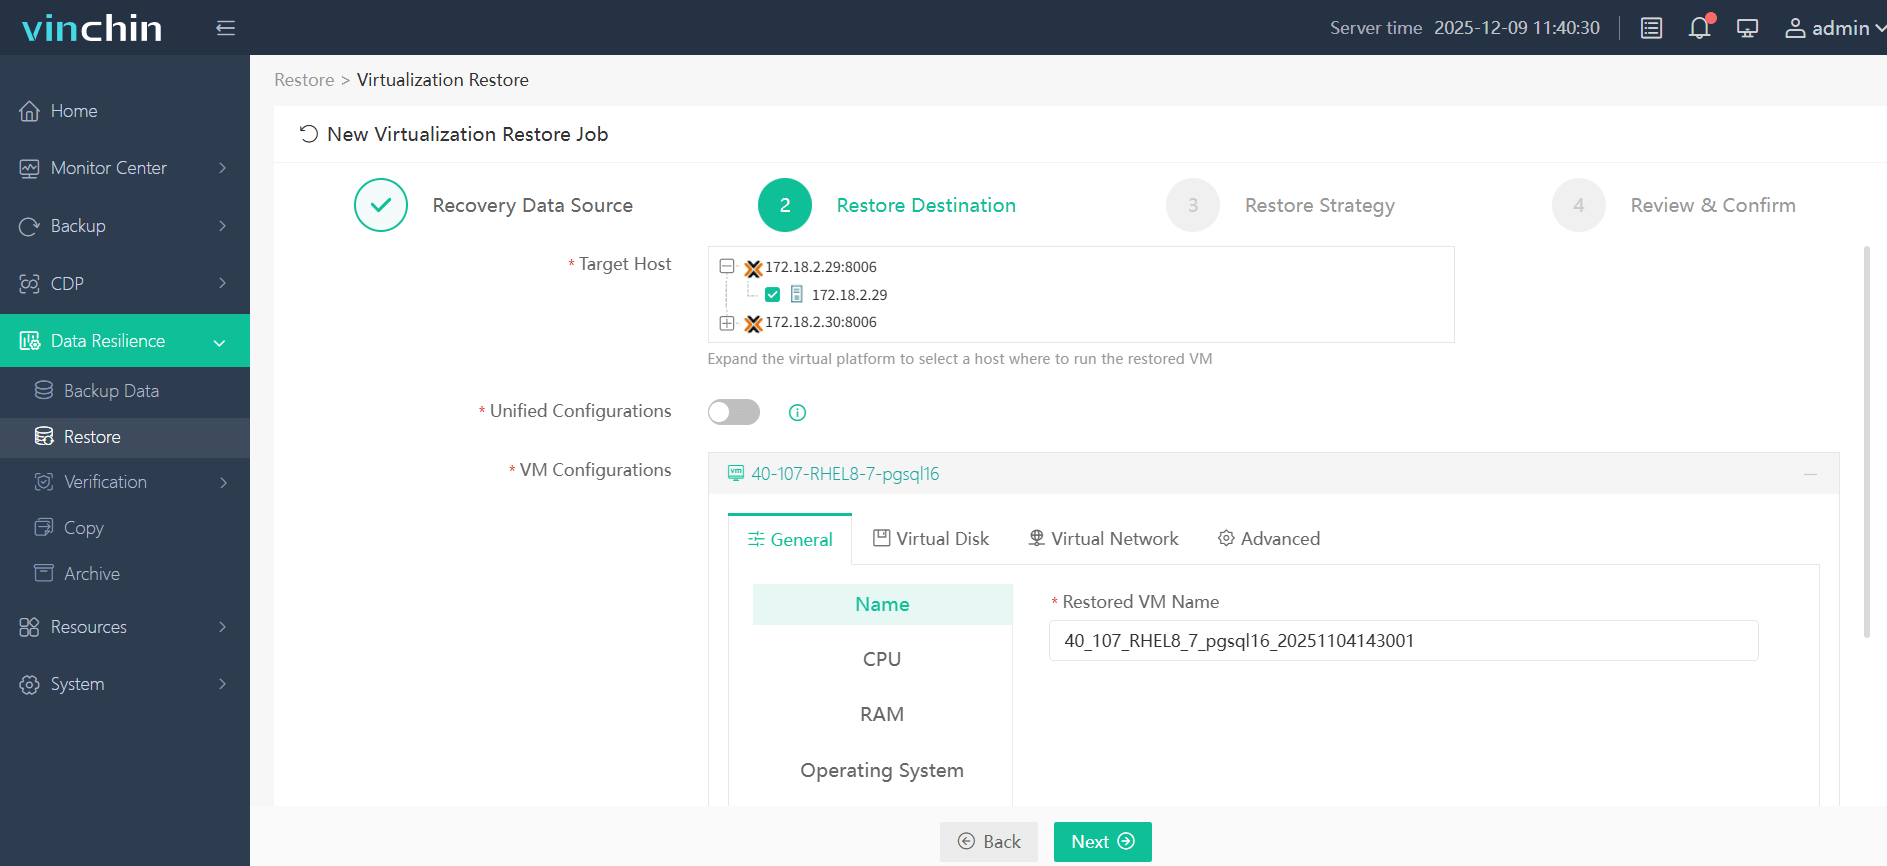
Step 5. Under Data Resilience > Restore, select Proxmox VM as your recovery data source
Step 6. In Restore Destination, you can choose Proxmox as your destination, also you can choose other platforms, like VMware, Hyper-V, XenServer, and etc.
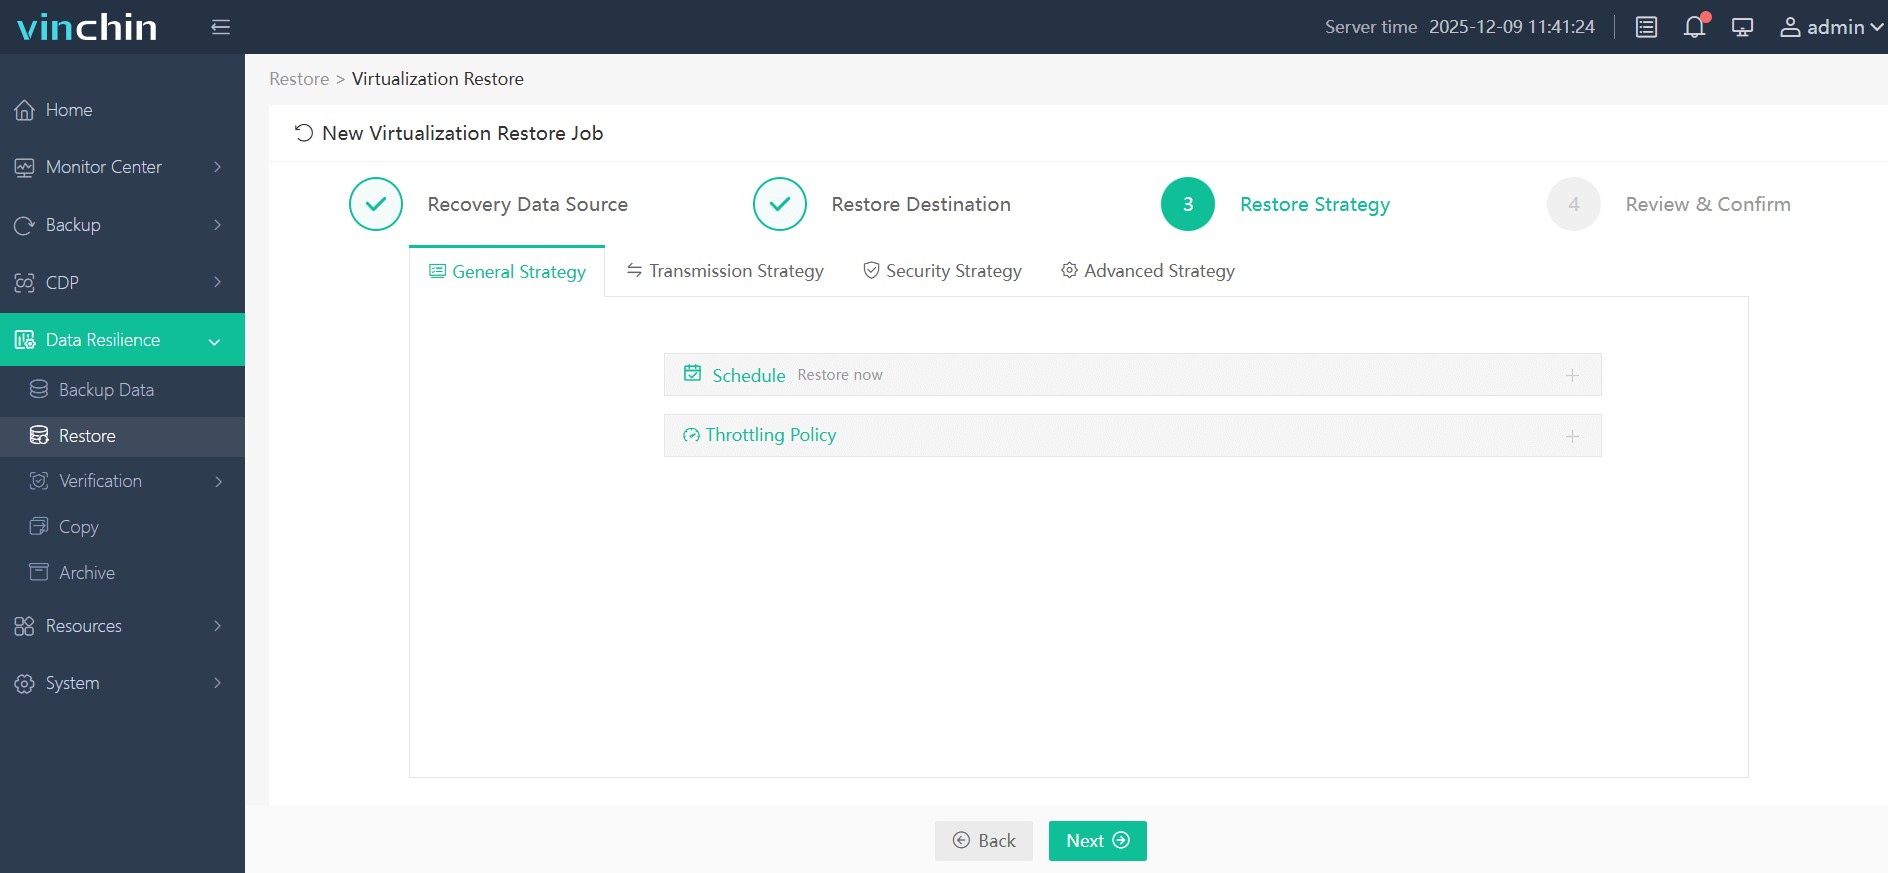
Step 7. Set your restore strategy
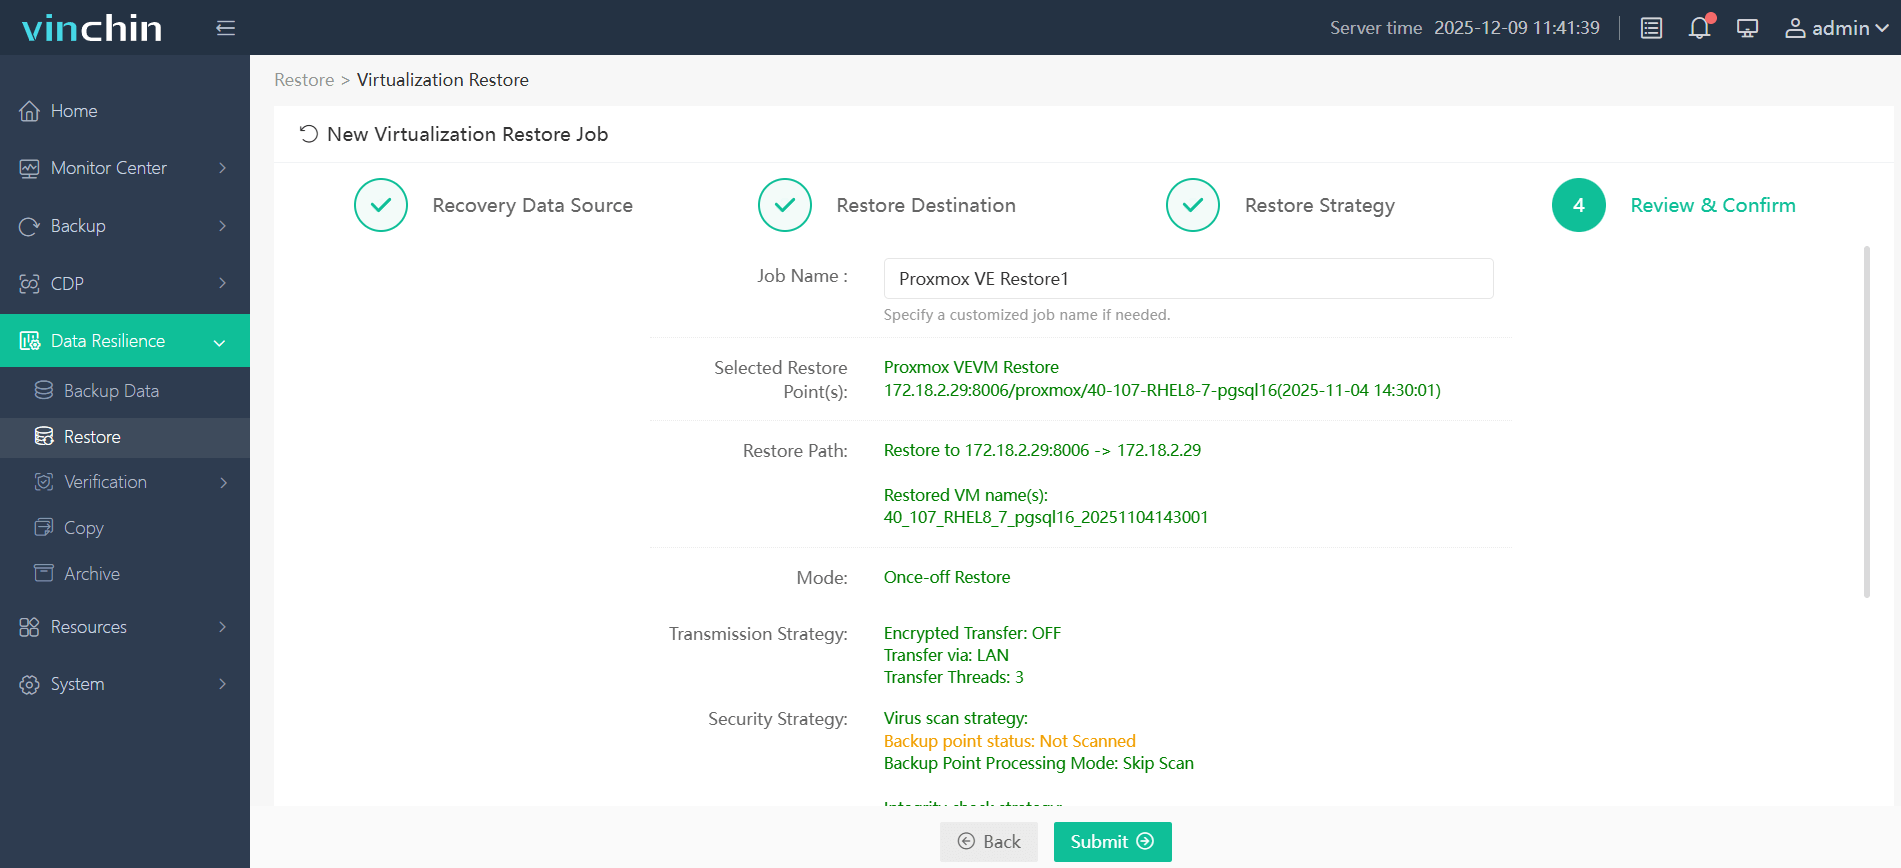
Step 8. Review the settings, and click Submit to finish your migration
Can't wait to use Vinchin Backup & Recovery now? Just click the following DOWNLOAD button to get the 60 days full-feature free trial! And if you have any questions, contact us.
FAQs about Proxmox Remote Migrate
Q1: Is shared storage required for Proxmox Remote Migrate?
A1: NO, remote migration can transfer virtual disks directly to storage on the destination environment, eliminating the requirement for shared storage.
Q2: Is qm remote-migrate production-ready?
A2: Although still labeled experimental, many administrators successfully use it in production environments.
Q3: Does Proxmox Remote Migrate support encrypted communication?
A3: Yes, remote migration uses HTTPS-based API communication and certificate fingerprint verification to establish secure connections between environments.
Q4: What's the differences between cluster migration and non-cluster migration?
A4: Cluster Migration focuses on migrating workloads within or between multi-node clustered environments.
Non-Cluster Migration focuses on migrating workloads between individual standalone hosts without cluster services such as HA, DRS, or shared resource management.
Conclusion
Proxmox Remote Migrate enables administrators to move VMs between standalone hosts and separate clusters with minimal downtime, without requiring shared storage or cluster membership. By following the correct configuration and migration procedures, organizations can simplify infrastructure upgrades and datacenter migrations. For additional protection and recovery flexibility, Vinchin Backup & Recovery provides a reliable migration solution to help ensure a secure and successful migration process.


