Key Takeaways
Proxmox VE builds on KVM, making migration technically compatible and widely adopted.
The most common method to migrate KVM to Proxmox is importing QCOW2 disks.
Manual migration requires careful handling of disk formats, drivers, and network settings.
Choose the right method depends on scale, downtime tolerance, and complexity.
KVM vs Proxmox: What’s the Difference
KVM: Requires additional tools (libvirt, virt-manager) for management
Proxmox: Provides a full web UI, clustering, backup, and storage integration
Use case: KVM is flexible for custom setups; Proxmox is optimized for centralized operations
Why You Need to do KVM to Proxmox Migration?
Although KVM (Kernel-based Virtual Machine) is a powerful open-source hypervisor, it lacks a unified management interface without the aid of additional tools. Proxmox VE is built on KVM, enhancing its functionality:
Web-based centralized management
Built-in backup and restore features
Integrated storage and networking tools
Support for containers (LXC) alongside VMs
How to Migrate KVM to Proxmox
In this section, you will learn the migration preparation and the step-by-step methods to do migration. Also, providing the challenges you will meet during the KVM to Proxmox migration.
Pre-Migration Checklist
Make sure you have already done the following:
Have full backups of your KVM virtual machines
VM disk formats are identified (commonly QCOW2 or RAW)
Network configurations are documented
Target Proxmox storage is prepared
VM compatibility (CPU, drivers) is verified
Challenges During Migration
1. Driver Compatibility Issues
Windows VMs often require VirtIO drivers after migration.
2. Network Configuration Mismatch
Different bridge names between KVM and Proxmox can cause connectivity issues.
3. Disk Format Problems
Ensure compatibility when converting between QCOW and RAW.
Method 1. Direct Disk Migration (QCOW2 import)
This is the most common method when working with KVM.
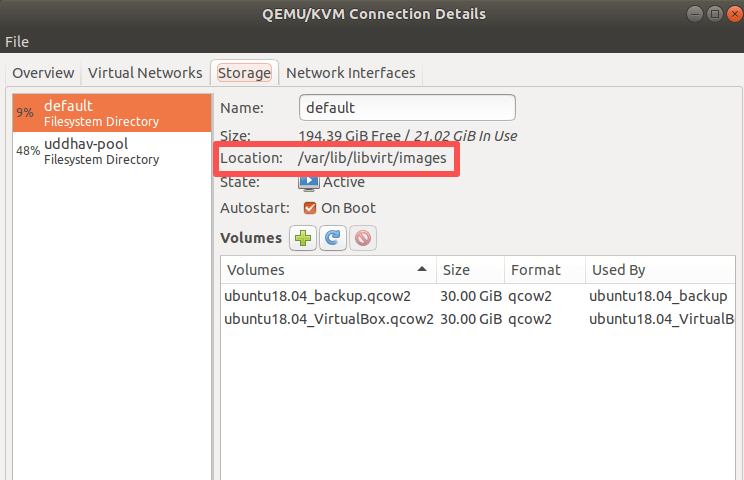
Step 1: Locate the VM Disk File
KVM virtual disks are usually stored in:
/var/lib/libvirt/images/
Step 2: Transfer Disk to Proxmox
Use SCP or rsync to move the disk file:
scp /var/lib/libvirt/images/vm-disk.qcow2 root@<proxmox-ip>:/var/lib/vz/images/
Or using rsync (recommended for large files):
rsync -avz /var/lib/libvirt/images/vm-disk.qcow2 root@<proxmox-ip>:/var/lib/vz/images/
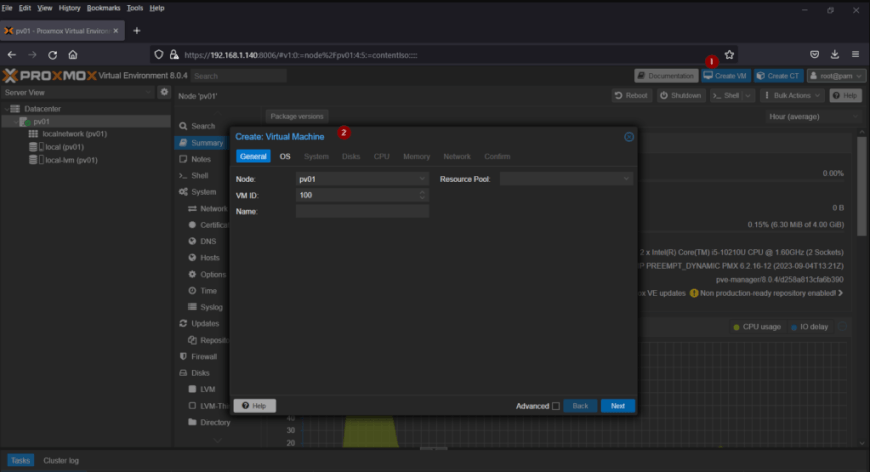
Step 3: Create a New VM in Proxmox
Create a VM via the Proxmox web UI
Do not attach a disk yet (or remove the default disk)
Step 4: Import QCOW2 into Proxmox
Use the following command:
qm importdisk <vmid> vm-disk.qcow2 local-lvm
qm importdisk 100 /var/lib/vz/images/vm-disk.qcow2 local-lvm
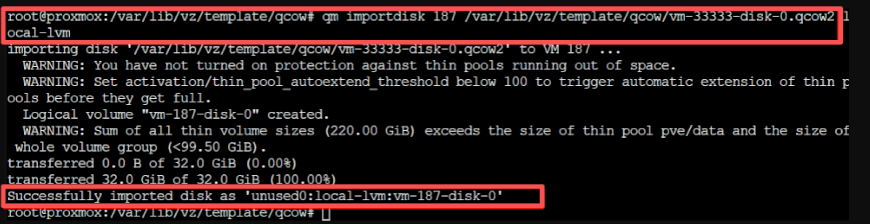
It's essential when you import qcow2 proxmox environments.
Step 5: Attach and Configure Disk
Attach the imported disk to the VM
Set correct bus type (VirtIO recommended)
Adjust boot order
Step 6: Start and Verify
Boot the VM and check:
Network connectivity
OS drivers
Application integrity
Method 2. Using Backup & Restore
If your KVM environment supports backup tools, you can:
1. Export the VM as an image
2. Convert if necessary using qemu-img
3. Restore in into Proxmox
Vinchin Simplifies KVM to Proxmox Migration
While manual methods work, migrate KVM to Proxmox in a large-scale can be time-consuming and error-prone.
That's where Vinchin Backup & Recovery fits into the workflow.
Benefits of using Vinchin:
Simplify Cross-Platform Migration
Significantly Reduce Downtime
Built-in Data Protection
Centralized Management
Scalability for Large Environments
How Vinchin Helps Migrate KVM to Proxmox:
It enables a backup-based migration approach, which is both efficient and reliable.
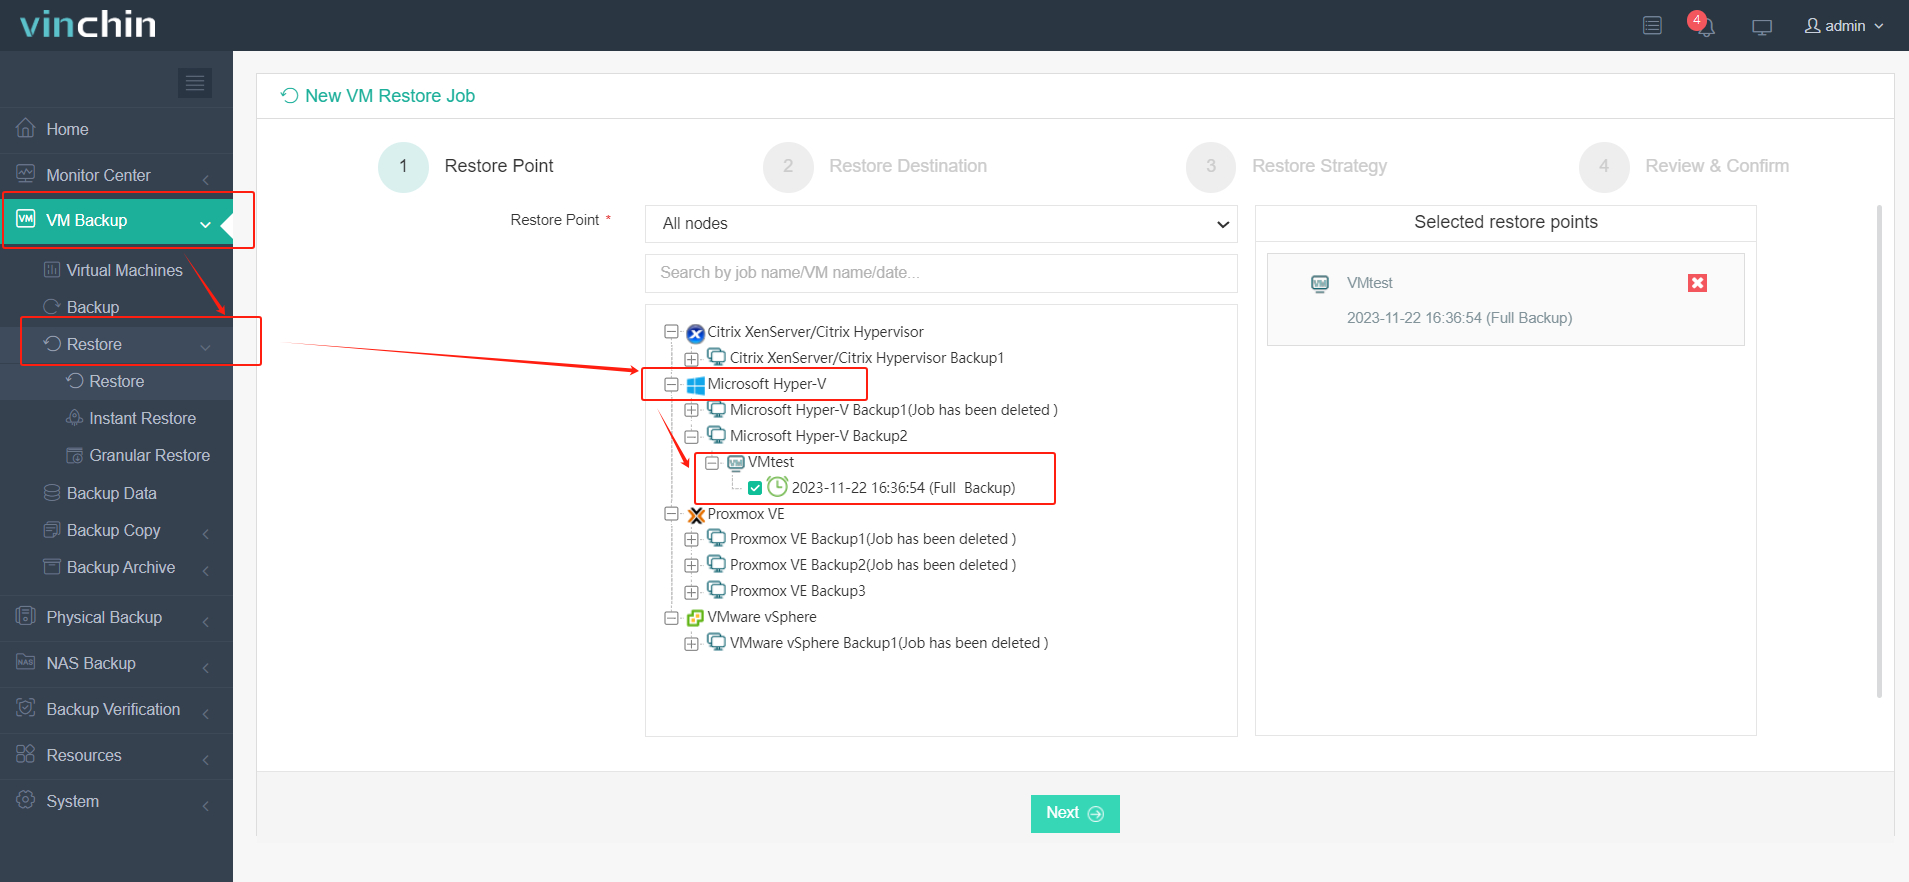
Step 1. Go to VM Backup, select your KVM host and virtual machine to run a full backup job
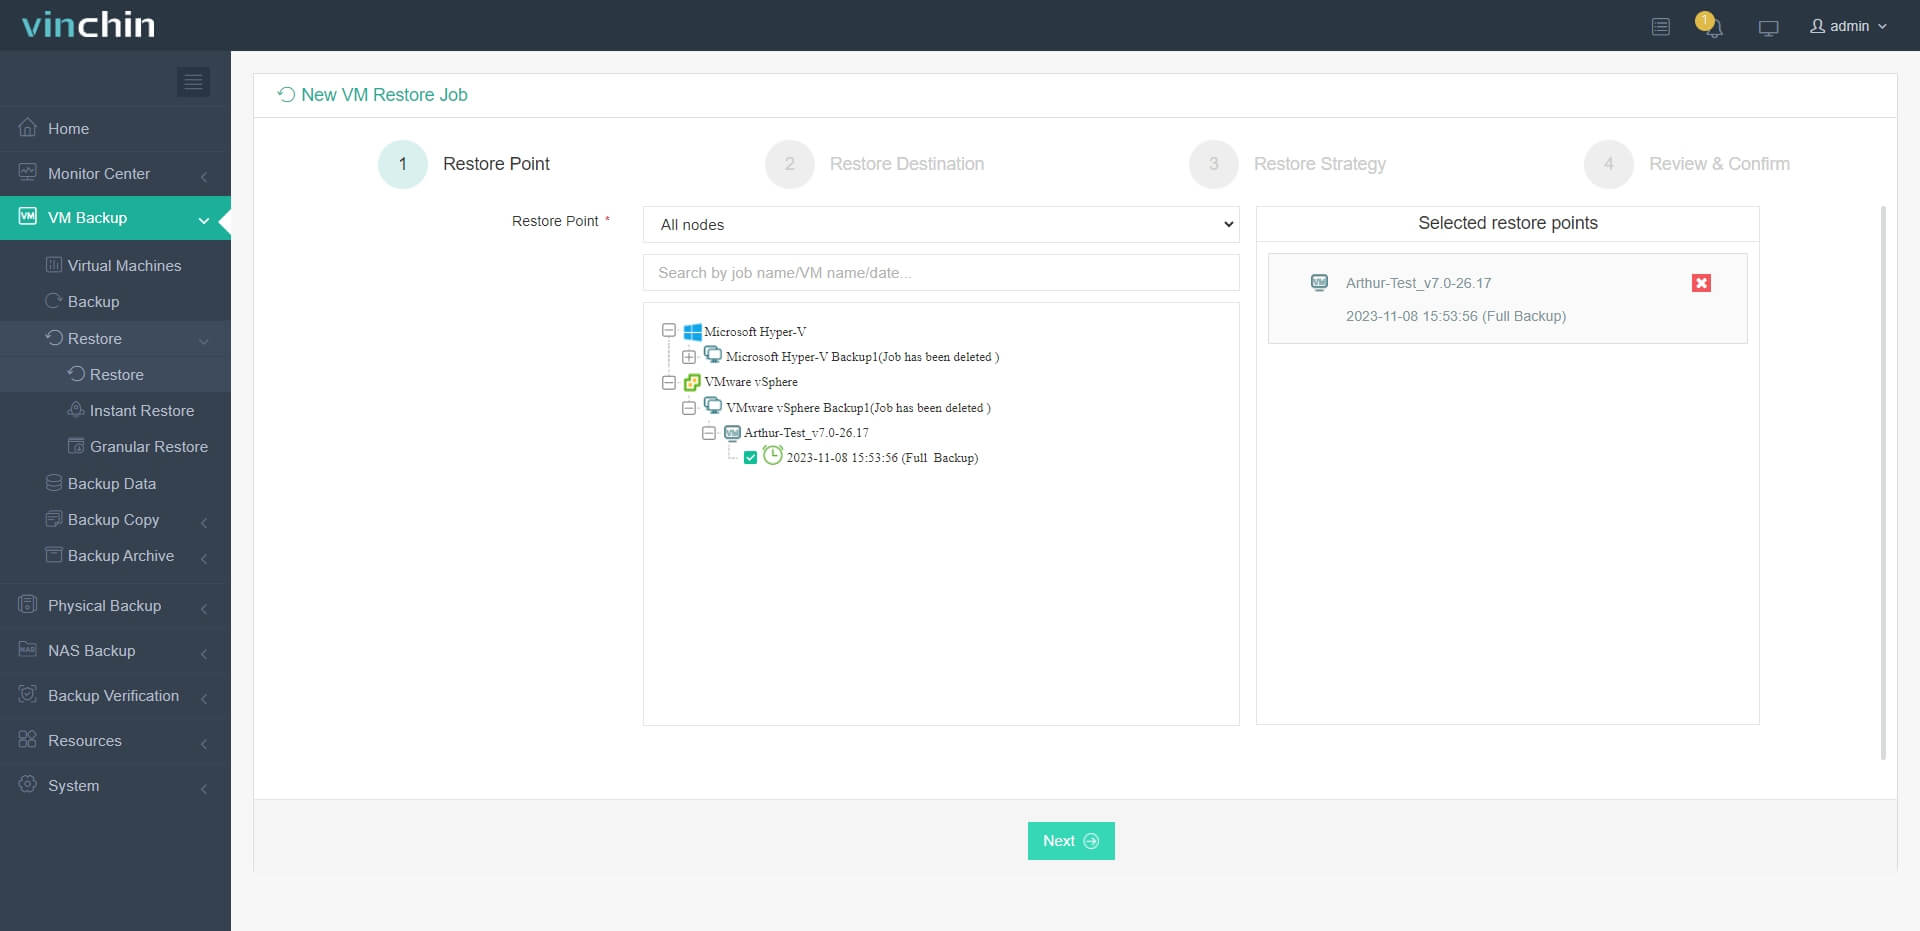
Step 2. Go to VM Backup > Restore. Choose the backup of your KVM VM, and select a specific restore point, click Next
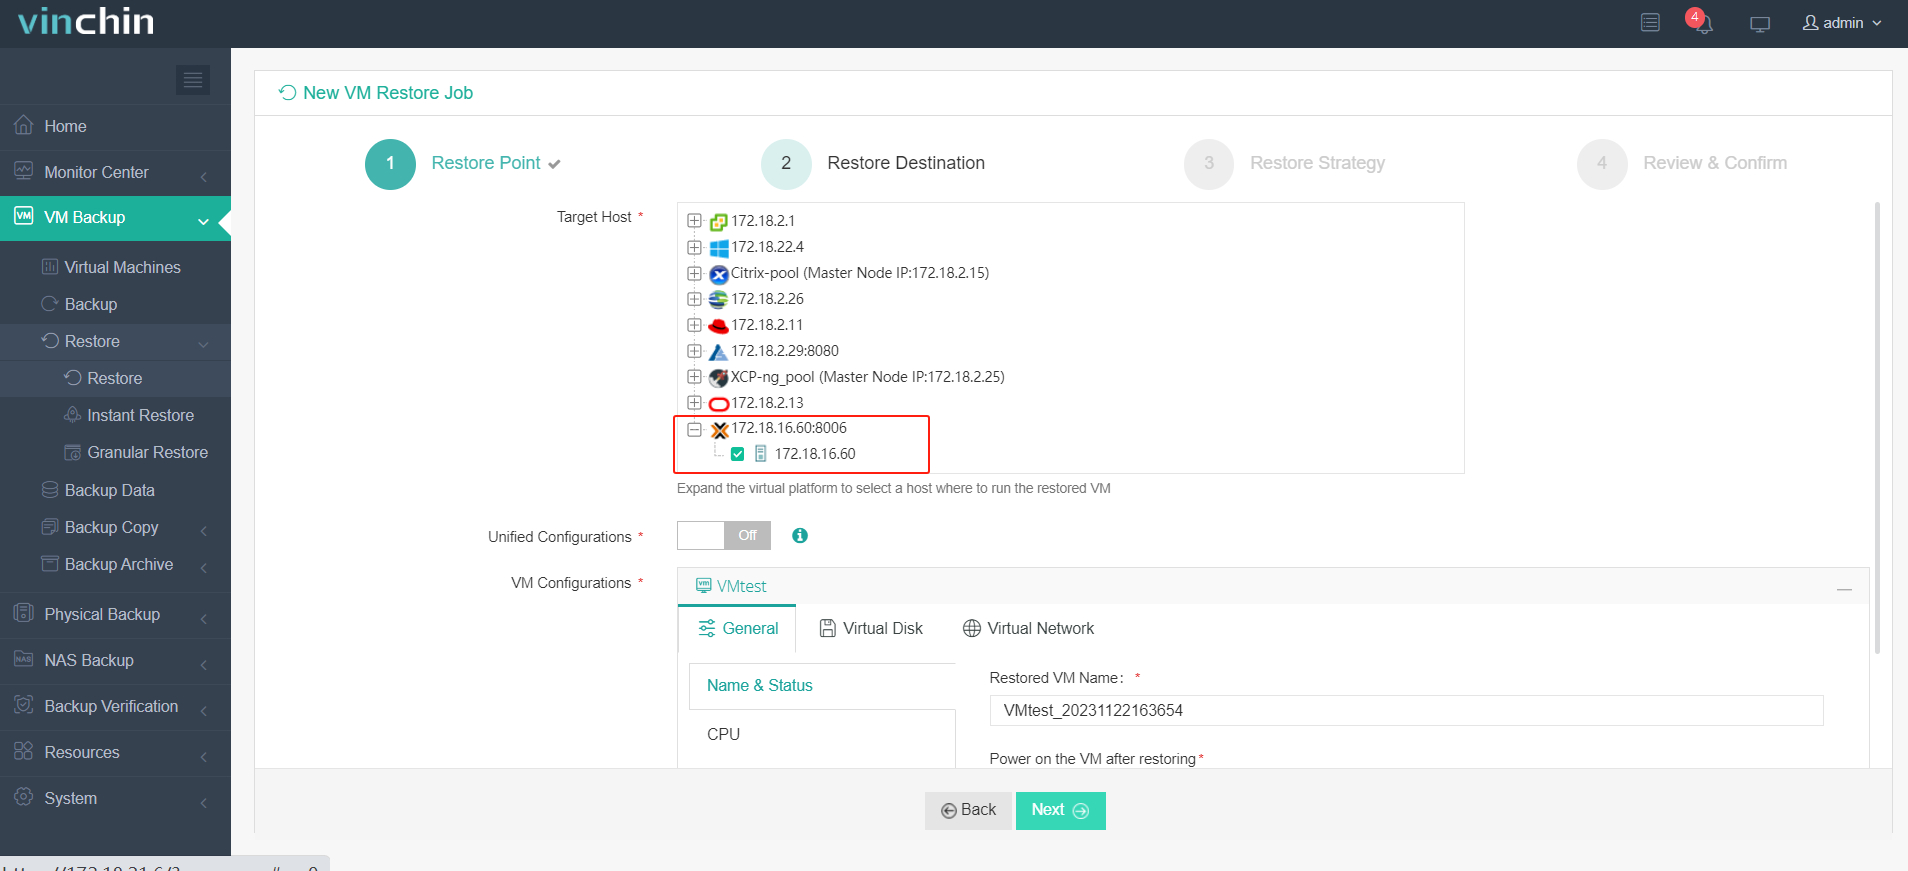
Step 3. Choose the Proxmox VE as target host
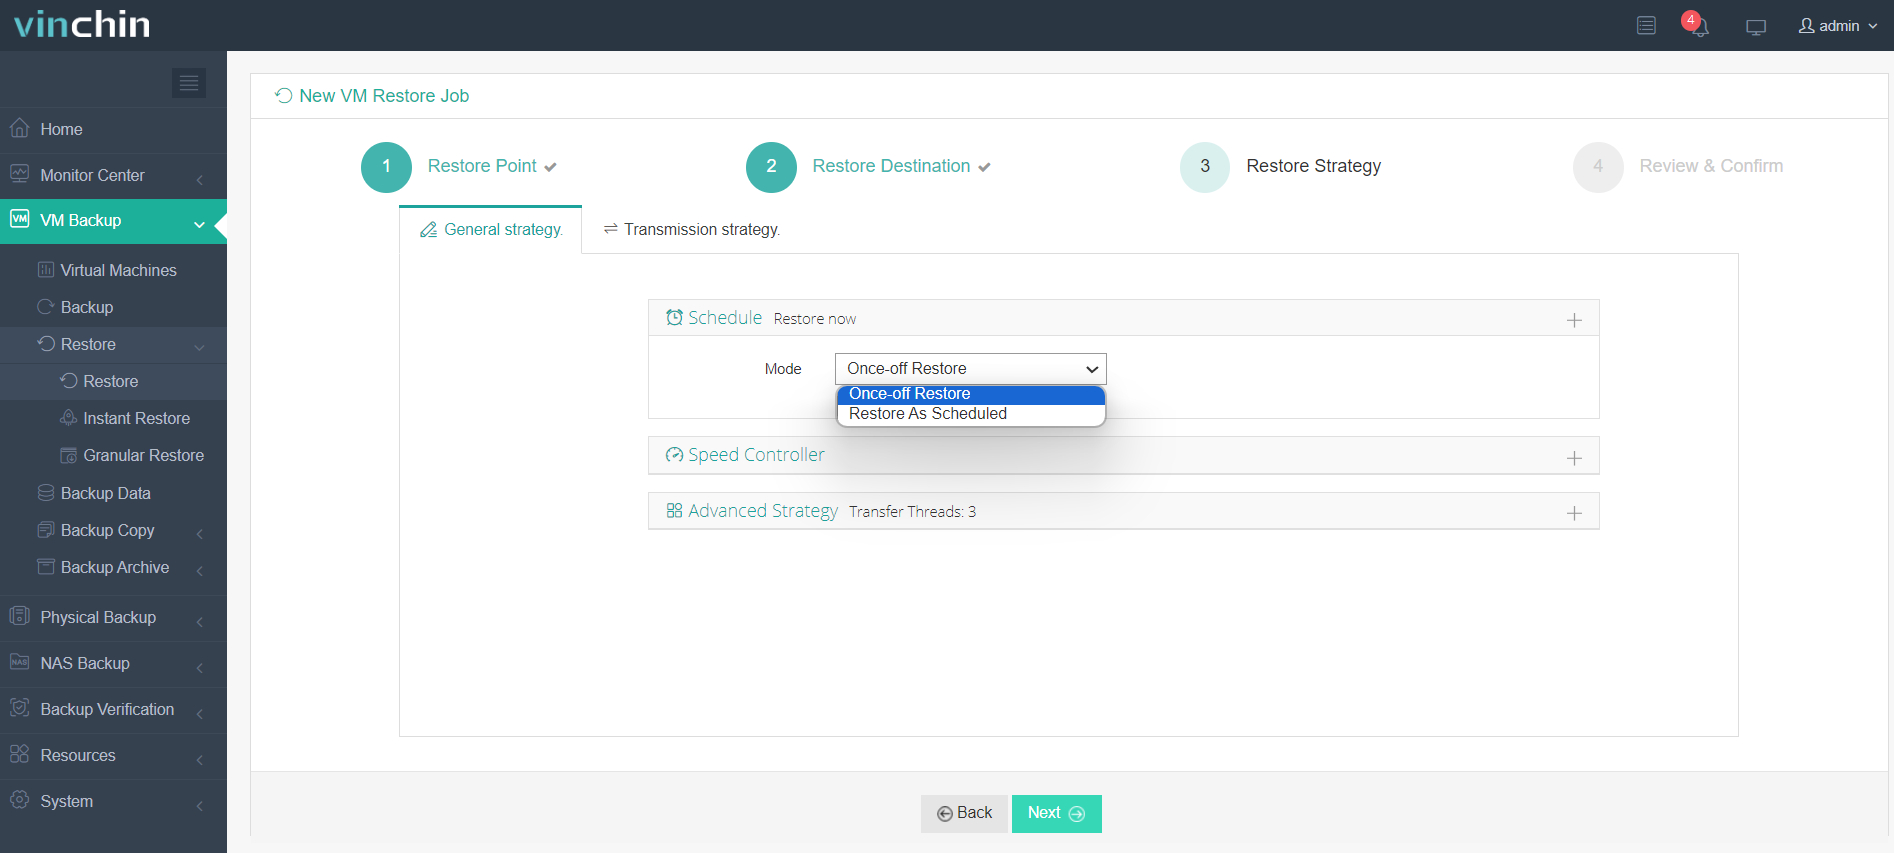
Step 4. Configure restore strategy, and click Next
Step 5. Review all your settings, click Submit. You can view job status in the console.
Just visit the Vinchin web to get a 60-day free trialto try it out to deploy rapidly!
Performance Optimization After Migration
Switch disk to VirtIO SCSI
Enable Write Back cache (if safe)
Install QEMU Guest Agent
Use SSD-backed storage when possible
Migrate KVM to Proxmox FAQs
Q1: What disk formats are supported when migrating KVM to Proxmox?
Multiple disk formats are supported including QCOW2 and RAW.
Q2: How do I convert QCOW2 images for Proxmox if needed?
You can use the qemu-img tool to convert disk formats.
Q3: Why does my VM fail to boot after migration to Proxmox?
Common causes include incorrect disk bus type or missing drivers, especially VirtIO for Windows.
Q4: Will there be downtime during KVM to Proxmox migration?
Yes, in most cases, the VM must be powered off during disk transfer and import.
Conclusion
To migrate KVM to Proxmox successfully, you need a clear understanding of disk formats, VM configurations, and compatibility requirements. For small-scale migration, importing QCOW2 files can be enough, however, in a larger environment you can ask Vinchin Backup & Recovery for a help, more platform migration (V2V, P2V, C2C, etc.) are available in Vinchin Backup & Recovery.