-
What Is pgAdmin in PostgreSQL?
-
How to Set Up pgAdmin for PostgreSQL?
-
How to Connect to PostgreSQL Using pgAdmin?
-
How to Back Up Databases in pgAdmin?
-
Protecting Your PostgreSQL Database With Vinchin Backup & Recovery
-
Pgadmin postgresql FAQs
-
Conclusion
Managing PostgreSQL databases can be challenging. The right tools make it easier. One of the most popular ways to work with PostgreSQL is through pgAdmin. This article will guide you through what pgAdmin is, how to install it, connect to your databases, back up data, monitor performance, troubleshoot common issues, and protect your PostgreSQL environment with Vinchin. Whether you are just starting or have years of experience as an administrator, you will find clear steps and practical advice here.
What Is pgAdmin in PostgreSQL?
pgAdmin is the leading open-source graphical management tool for PostgreSQL databases. It acts as a client application that lets you manage, query, and monitor PostgreSQL servers using a web-based or desktop interface. Unlike the core PostgreSQL server—which stores your data—pgAdmin gives you a visual way to interact with that data.
With pgAdmin you can create tables, run SQL queries, schedule maintenance tasks, back up databases, view logs, analyze performance metrics, and much more—all without needing command-line skills. According to the official pgAdmin website, it works on Windows, macOS, Linux desktops or browsers (for web mode), so you can access both local and remote servers easily.
There are two main versions: pgAdmin Desktop runs as a standalone app on your computer; pgAdmin Web runs in a browser after being launched from a server process on your machine or network host. Both offer similar features but differ in deployment style.
Why do so many administrators choose pgAdmin? Its intuitive layout reduces errors when managing complex environments. You see database objects like tables or functions organized clearly in panels instead of typing long commands by memory.
How to Set Up pgAdmin for PostgreSQL?
Setting up pgAdmin is straightforward if you follow each step carefully. Before installing anything new on production systems though—always check compatibility with existing software versions.
Installation Steps
First visit the pgAdmin download page and select an installer matching your operating system (Windows/macOS/Linux). For Windows users: download the executable file then double-click it; follow prompts until finished. On macOS: drag pgAdmin 4 into Applications folder after opening its disk image file; launch from there when ready.
Linux users may use package managers like apt or yum, but always refer to official docs for latest instructions since dependencies may change over time.
Note: pgAdmin 4 requires Python 3.7+ if running in server/web mode; most installers bundle this automatically but verify if unsure.
Initial Configuration
When launching pgAdmin for the first time:
1. You’ll be prompted to set a master password—this encrypts saved connection details locally
2. Enter something secure but memorable
3. After login you'll see a panel labeled Servers on left side
If no servers appear yet—that’s normal! You’ll add one next.
For browser-based setups (web mode), open http://127.0.0.1:5050/ (or another port shown during installation) in Chrome or Firefox after starting the service from terminal or Start menu shortcut.
How to Connect to PostgreSQL Using pgAdmin?
Connecting pgAdmin to your PostgreSQL server unlocks full control over all database objects via point-and-click menus instead of manual scripts.
Adding Your First Server Connection
Start by right-clicking Servers panel then selecting Create > Server...
In dialog box:
1. Under General, type any name that helps identify this connection (“Production DB” or “Test Server”)
2. Switch to Connection
For local installs use
localhostor127.0.0.1For remote hosts enter their IP address or DNS name
Default port is
5432Maintenance database usually stays as
postgresUsername defaults often as
postgres; enter yours if differentType user’s password below
If connecting across networks:
Make sure target server's firewall allows inbound connections on port
5432Edit its
pg_hba.conffile (on database host) so client IP addresses are permitted under correct authentication method (md5, etc.)
For encrypted sessions go into SSL tab:
Set SSL mode dropdown menu value as needed (Require, etc.)
If required by policy upload root certificate files using provided fields
Click Save
If everything matches—and both machines are reachable—you’ll see new entry appear under Servers list at left side of screen! Expand it anytime for quick access to schemas/tables/functions/logs/etc.
How to Back Up Databases in pgAdmin?
Backing up databases protects against accidental loss due to hardware failure—or human error! Pgadmin makes this easy even for beginners while offering advanced options pros expect too.
Step-by-Step Backup Process
First expand desired server/database tree at left panel until seeing target database name.
Right-click its icon then choose Backup.
A dialog appears:
1) In General tab pick filename/location where backup will be saved
2) Choose format:
Custom: Compressed binary archive supporting selective restore; recommended for most cases
Tar: Uncompressed archive readable by other tools; good when moving large sets between systems quickly
Plain: Simple SQL script recreating schema/data line-by-line; useful for review/editing before restoring elsewhere
3) Use Dump Options #1/#2 tabs if needing fine-grained control over which objects/data get included/excluded
Click Backup
Progress bar shows status until done—a message confirms success/failure afterward.
Resulting file can later be restored using same menu (Restore) targeting empty/newly created destination database object!
Comparing Backup Formats
| Format | Compression | Selective Restore | Human Readable | Best Use Case |
|---|---|---|---|---|
| Custom | Yes | Yes | No | Routine backups |
| Tar | No | Yes | No | Large migrations |
| Plain | No | No | Yes | Manual review/edit |
Always test restores periodically—even small sample ones—to confirm backup integrity before disaster strikes!
Protecting Your PostgreSQL Database With Vinchin Backup & Recovery
For organizations seeking robust protection beyond basic tools like those built into pgAdmin itself, Vinchin Backup & Recovery stands out as an enterprise-grade solution designed specifically for today’s mainstream databases—including comprehensive support for PostgreSQL environments alongside Oracle, MySQL, SQL Server, MariaDB, PostgresPro and MongoDB platforms alike.
Vinchin Backup & Recovery delivers critical features such as incremental backup support tailored for PostgreSQL workloads; batch database backup capabilities ideal for managing multiple instances efficiently; flexible data retention policies including GFS retention strategies; cloud backup integration plus tape archiving options; ransomware protection mechanisms; scheduled backups; any-point-in-time recovery functionality; seamless restore-to-new-server workflows; advanced data compression/deduplication methods—and more—all engineered with reliability at scale in mind so businesses stay resilient against threats ranging from accidental deletion through cyberattacks or hardware failures.
The intuitive web console streamlines every operation into four simple steps:
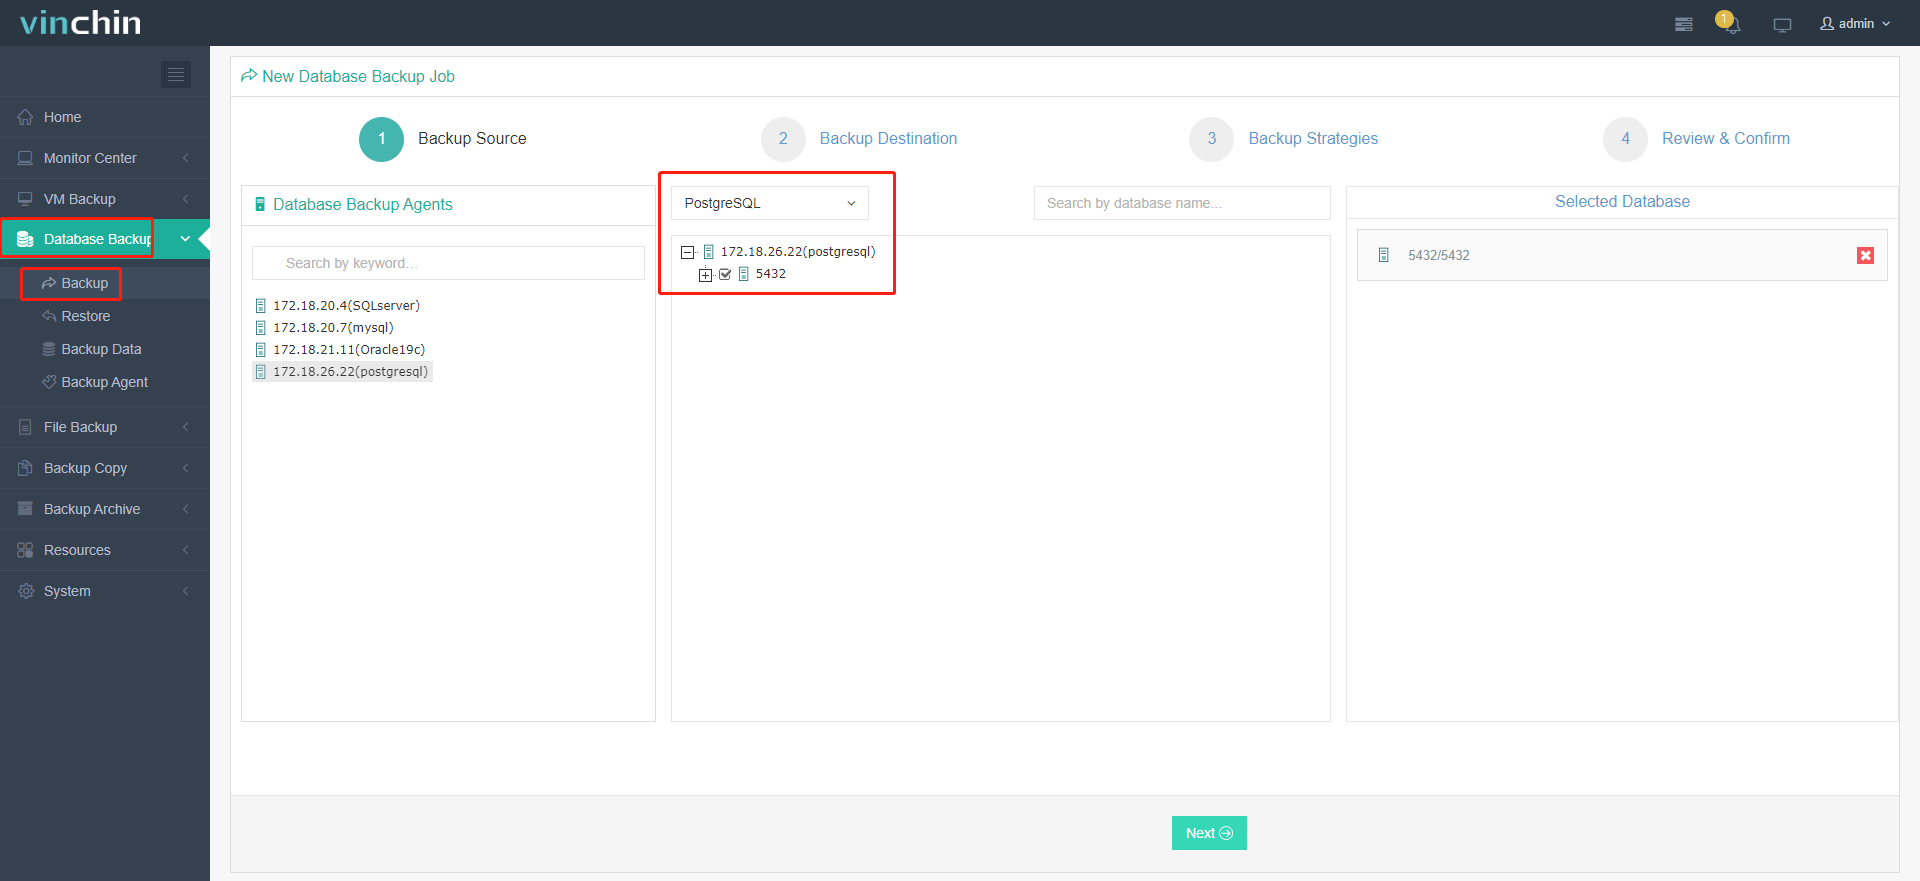
1. Go to Database Backup> Backup, and select the data source from the licensed database list.

2. Select the target node and storage for the job.

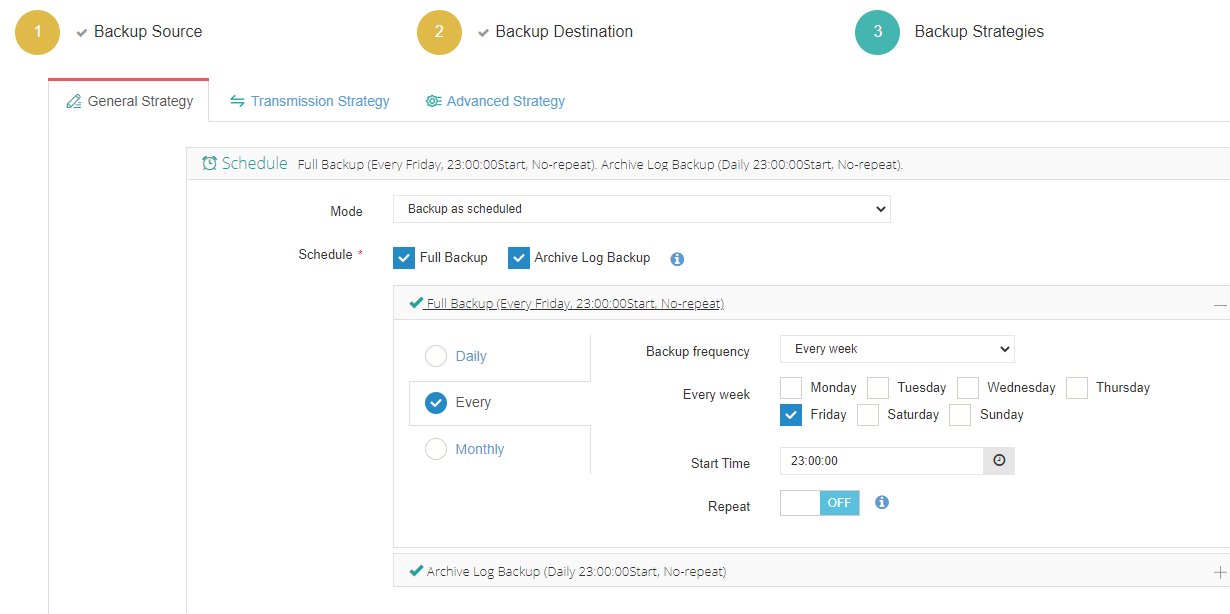
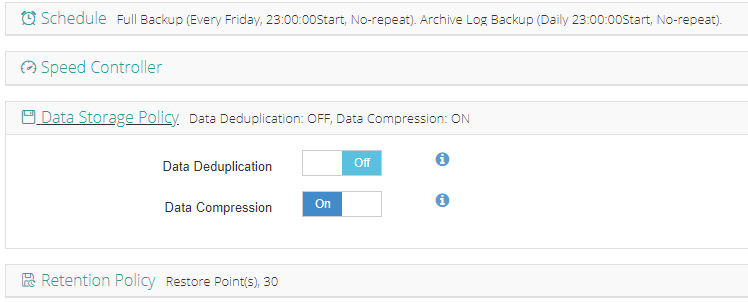
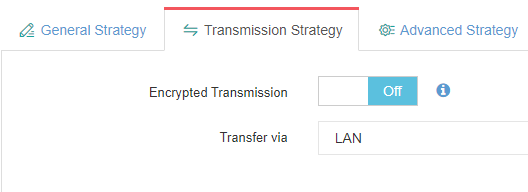
3. Set up desired backup strategies.


4. View settings and click Submit.
Recognized globally among enterprise customers—with high ratings across industry platforms—Vinchin Backup & Recovery offers a risk-free 60-day full-featured trial so IT teams everywhere can experience powerful data protection firsthand before committing further investment—click below now to start safeguarding mission-critical assets today!
Pgadmin postgresql FAQs
Q1: Can I schedule automatic backups directly within pgAdmin?
A1: While native scheduling isn’t built-in yet you can combine OS cron jobs/task scheduler scripts with command-line tools called from within custom maintenance plans managed alongside manual GUI exports/imports.
Q2: Why does my remote connection fail even though credentials are correct?
A2: Check that both firewall rules allow traffic on port 5432 AND proper entries exist inside both postgresql.conf ("listen_addresses") plus corresponding lines within "pg_hba.conf" granting access based on source IP/method used by client device running Pgadmin session externally not locally only!
Conclusion
Pgadmin makes managing every aspect of PostgreSQL—from setup through daily monitoring/backups—simple even at scale For advanced protection Vinchin delivers enterprise-grade solutions ensuring business continuity Start mastering basics today grow confidence tackling larger challenges tomorrow
Share on:


