-
What Is Hyper-V on Server 2016?
-
Prerequisites for Creating Hyper-V Virtual Machines
-
Method 1: Create Virtual Machine on Hyper V Server 2016 Using GUI
-
Method 2: Create Virtual Machine on Hyper V Server 2016 With PowerShell
-
Backup your Hyper‑V Virtual Machines with Vinchin
-
Create Virtual Machine Hyper V Server 2016 FAQs
-
Conclusion
Virtualization is now standard in IT operations worldwide. If you use Windows Server 2016, you can create virtual machines using its built-in hypervisor—Hyper-V. This guide shows how to create a virtual machine in Hyper-V Server 2016 step by step using both graphical tools and PowerShell commands. Whether you’re just starting out or already an expert administrator, you'll find practical advice here to get your VMs running smoothly—and keep them that way.
What Is Hyper-V on Server 2016?
Hyper-V is Microsoft's native hypervisor included with Windows Server 2016 at no extra cost. It lets you run multiple isolated operating systems—called virtual machines—on a single physical server. Each VM acts like a separate computer with its own OS and applications but shares underlying hardware resources efficiently through virtualization technology. With Hyper-V on Server 2016, you can consolidate workloads, improve resource usage, test new software safely, or recover quickly from disasters—all while supporting Windows or Linux guests.
Prerequisites for Creating Hyper-V Virtual Machines
Before you create virtual machine hyper v server 2016 environments successfully, make sure your setup meets these requirements:
Your server must have a clean installation of Windows Server 2016 with the Hyper-V role enabled.
Hardware-assisted virtualization (Intel VT-x or AMD-V) must be turned on in BIOS/UEFI settings.
Second Level Address Translation (SLAT) support is required.
At least 4 GB of RAM is necessary; more memory improves performance.
Use SSD storage if possible for better speed; check available space before creating large disks.
Do not install other virtualization software (like VMware Workstation) alongside Hyper-V—it may cause conflicts.
You need administrative rights on the host system.
Guest operating systems require proper licensing according to Microsoft's terms.
If managing remotely via another PC's Hyper-V Manager tool, ensure network connectivity and permissions are set up correctly.
Method 1: Create Virtual Machine on Hyper V Server 2016 Using GUI
The graphical interface—Hyper-V Manager—is user-friendly even if you’re new to virtualization technology.
First open Hyper-V Manager from your Start menu or Administrative Tools folder. Select your server name in the left pane so actions apply to it directly.
In the right-hand Actions pane:
1. Click New, then choose Virtual Machine to launch the wizard.
2. On the first page (Before You Begin) click Next.
3. Under Specify Name and Location, enter a descriptive name for your VM (for example “TestVM”). To store files elsewhere than default path (C:\ProgramData\Microsoft\Windows\Hyper-V), check Store the virtual machine in a different location then browse to your preferred folder before clicking Next.
4. On Specify Generation, select either:
Generation 1 (legacy BIOS)—supports older guest OSes including some Linux distributions,
Or Generation 2 (UEFI-based)—offers newer features like Secure Boot but only works with supported x64 guests such as recent Windows or modern Linux versions. Click Next after choosing carefully; this cannot be changed later!
5. For memory allocation (Assign Memory) type an amount such as 4096 MB. Enable Use Dynamic Memory for this virtual machine if desired—this allows automatic adjustment based on workload needs—but static memory may suit production servers better.
6. On networking (Configure Networking) pick an existing virtual switch from the drop-down list so your VM can communicate externally or internally as needed; if none exists yet skip this step—you can add one later via Virtual Switch Manager.
7. For storage (Connect Virtual Hard Disk) choose:
Create a new disk (default format is VHDX which supports larger sizes up to 64 TB),
Name it,
Set location,
Specify size (e.g.,
127 GB).
8. Under installation options (Installation Options) select:
Install an operating system from a bootable image file,
Browse to your ISO installer file,
Click Next when ready.
9. Review all choices on summary screen then click Finish.
Method 2: Create Virtual Machine on Hyper V Server 2016 With PowerShell
PowerShell provides fast automation when you want repeatable results—or need advanced control beyond what GUIs offer.
Open an elevated instance of Windows PowerShell (Run as Administrator) on your host server:
1. First check whether at least one suitable network switch exists by running:
Get-VMSwitch
If no switches appear—or none match what you want—you can create one quickly:
New-VMSwitch -Name "ExternalSwitch" -NetAdapterName "Ethernet" -AllowManagementOS $true
2. Now create your VM using this command (note: omitting -Generation defaults to Generation 1):
   New-VM -Name "MyVM" -MemoryStartupBytes 4GB -Generation 2 `
     -NewVHDPath "C:\VMs\MyVM\MyVM.vhdx" `
     -NewVHDSizeBytes 127GB `
     -SwitchName "ExternalSwitch"
3. Attach an ISO image so installation can begin at first boot:
   Set-VMDvdDrive -VMName "MyVM" `
     -Path "C:\ISOs\installer.iso"
4. Start up your newly created VM:
Start-VM -Name "MyVM"
5.To connect interactively from local host use:
vmconnect.exe $env:COMPUTERNAME "MyVM"
If scripting bulk deployments—for example spinning up several test servers at once—you might loop through names stored in a CSV file like so:
Import-Csv .\vmlist.csv | ForEach-Object {
    New-VM –Name $_."name" –MemoryStartupBytes $_."memoryMB" –Generation $_."generation" `
        –NewVHDPath $_."diskpath" –NewVHDSizeBytes $_."disksizeGB" –SwitchName $_."switch"
}
This approach saves time when building labs or scaling environments rapidly!
Remember that Generation 2 requires UEFI-compatible guest OSes; enable Secure Boot only if supported by chosen installer media (Set-VMFirmware cmdlet controls firmware options).
Backup your Hyper‑V Virtual Machines with Vinchin
To ensure reliable protection of your newly created Hyper‑V virtual machines, consider Vinchin Backup & Recovery—a professional enterprise-level solution supporting more than fifteen mainstream virtualization platforms including VMware, Proxmox, oVirt, OLVM, RHV, XCP-ng, XenServer, OpenStack, ZStack and notably full-featured backup for Microsoft Hyper‑V environments.
Among its comprehensive capabilities are incremental backup and forever-incremental backup strategies for efficient data protection cycles; granular restore allowing precise recovery at file level; scheduled backup automation; advanced data deduplication and compression reducing storage costs; and robust data encryption safeguarding sensitive information throughout transmission and storage—all designed to streamline administration while maximizing security and efficiency across diverse infrastructures.
Backing up a Hyper‑V virtual machine with Vinchin Backup & Recovery is straightforward thanks to its intuitive web console interface:
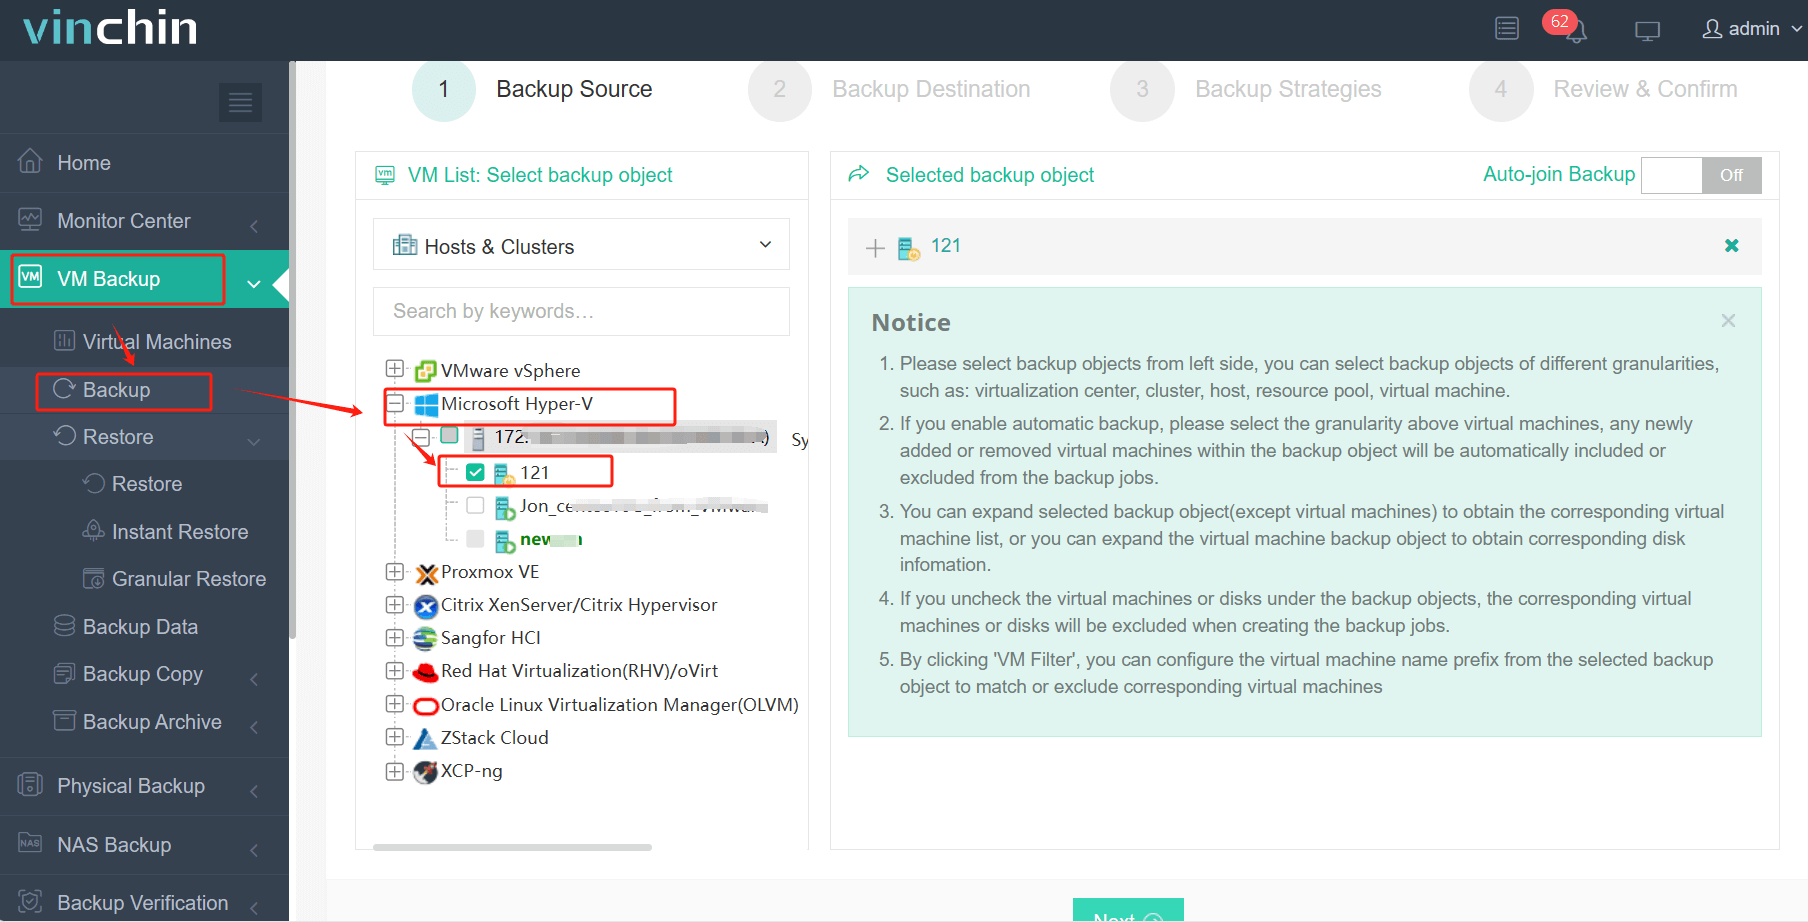
1.Just select Hyper‑V VMs on the host

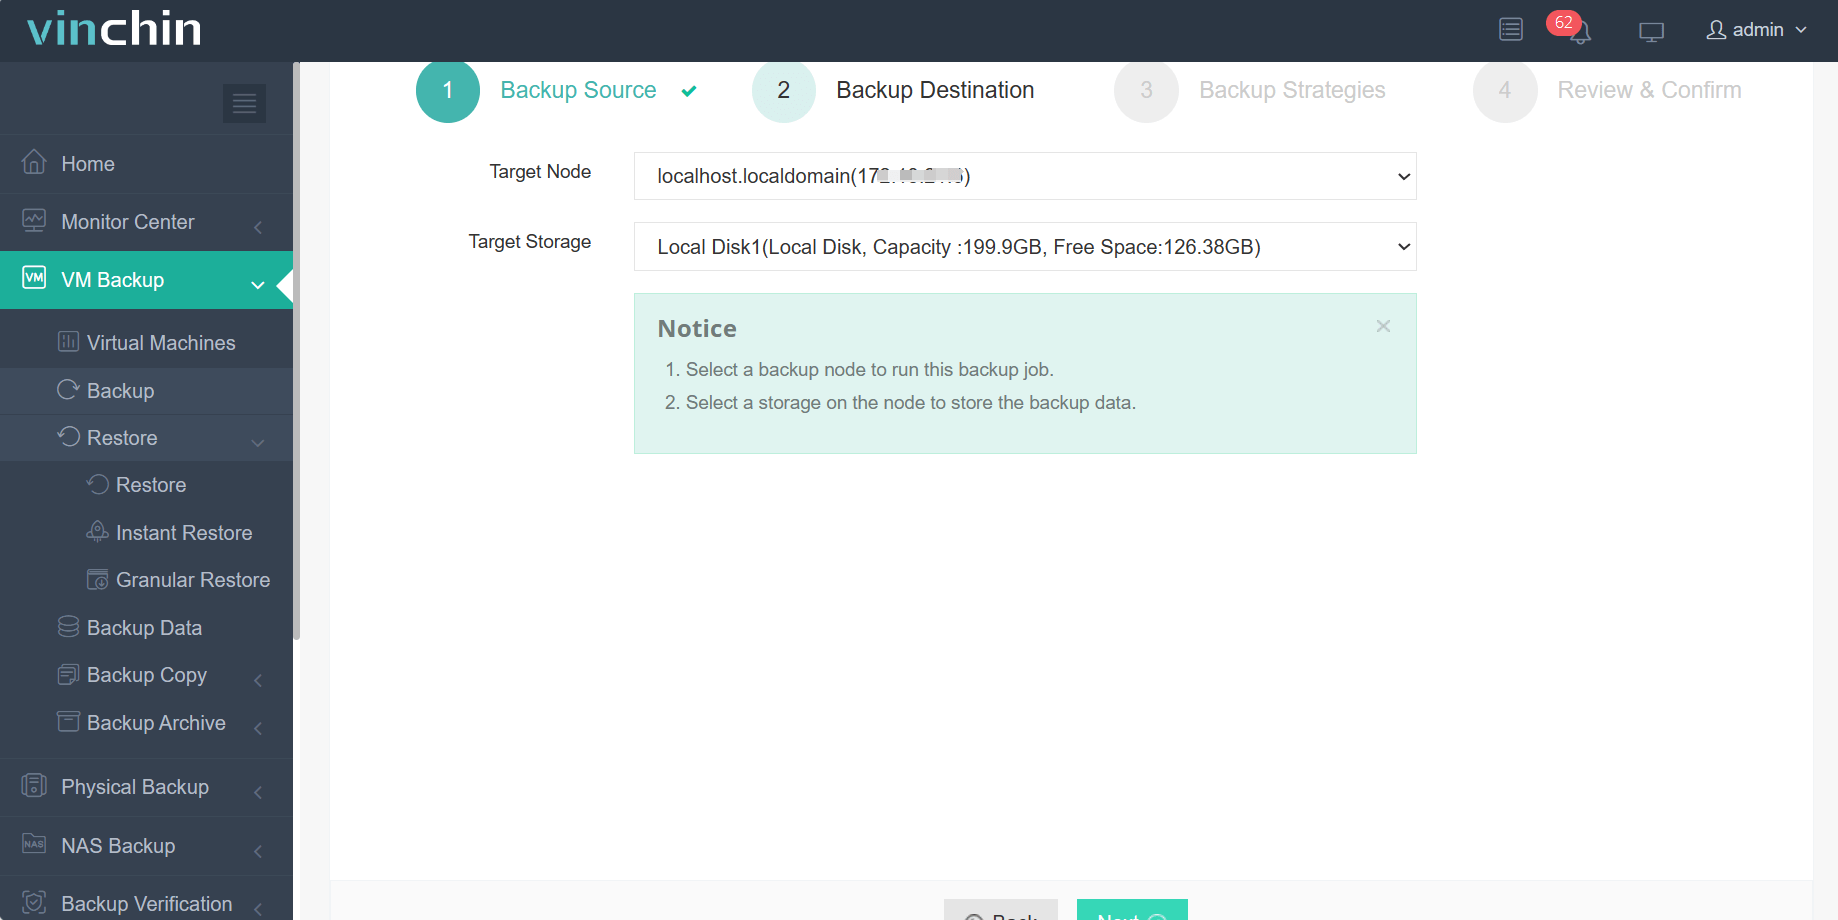
2.Then select backup destination

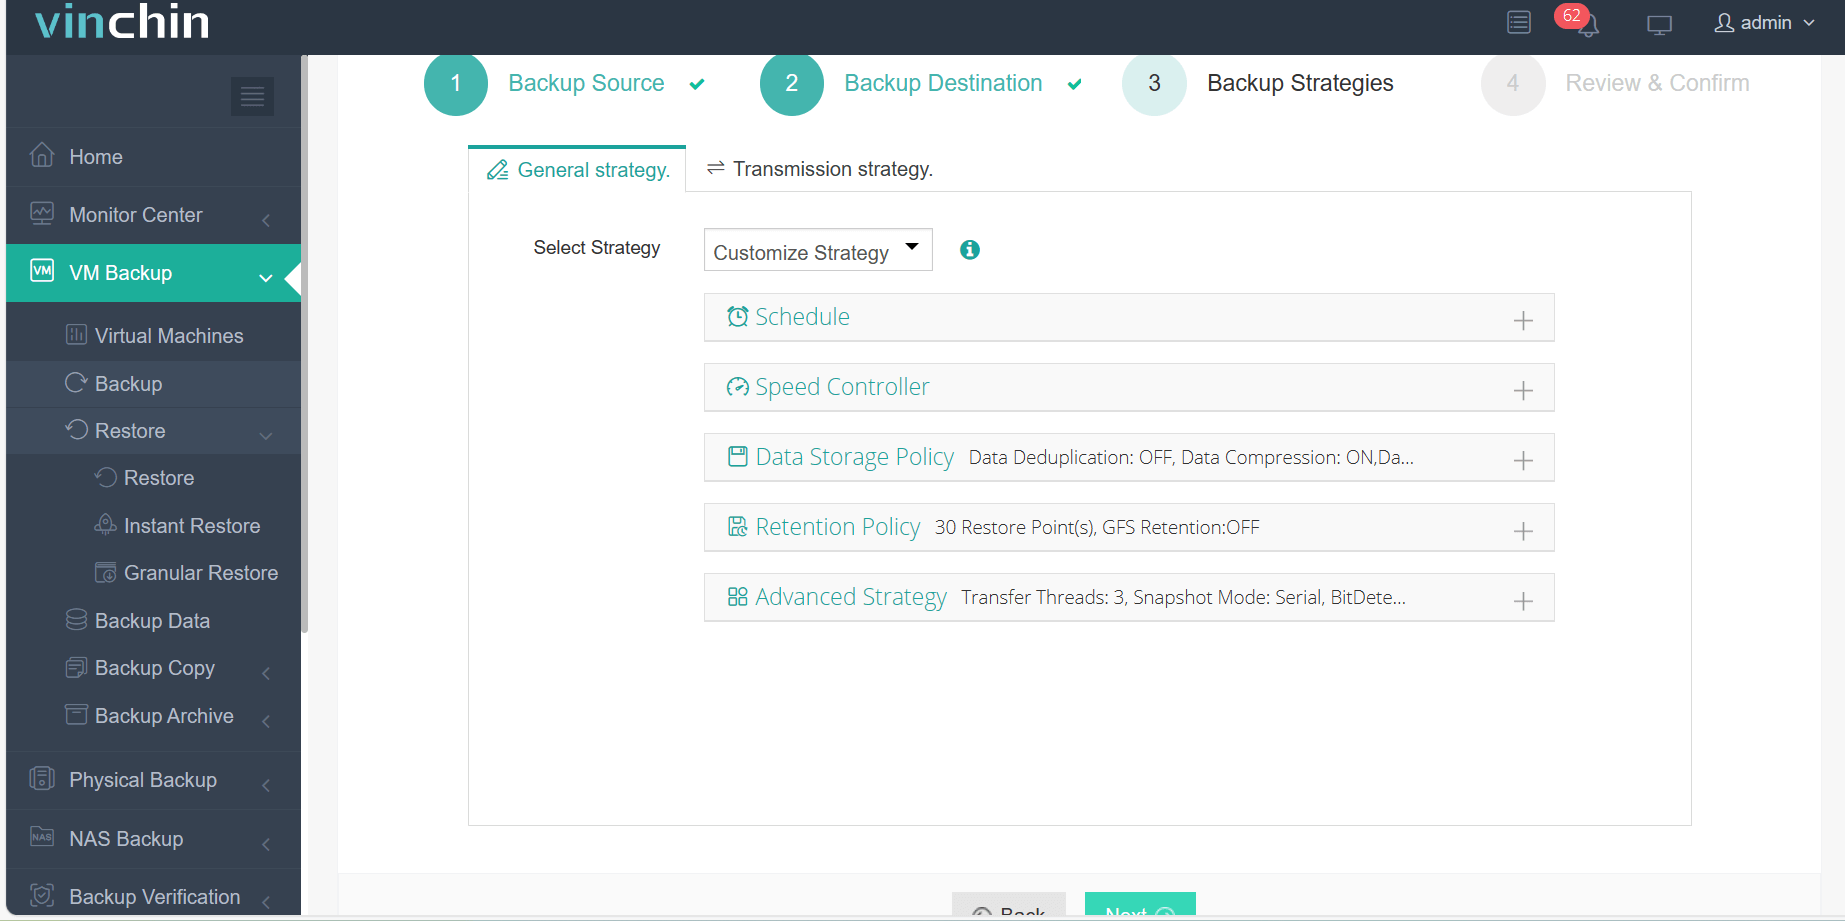
3.Select strategies

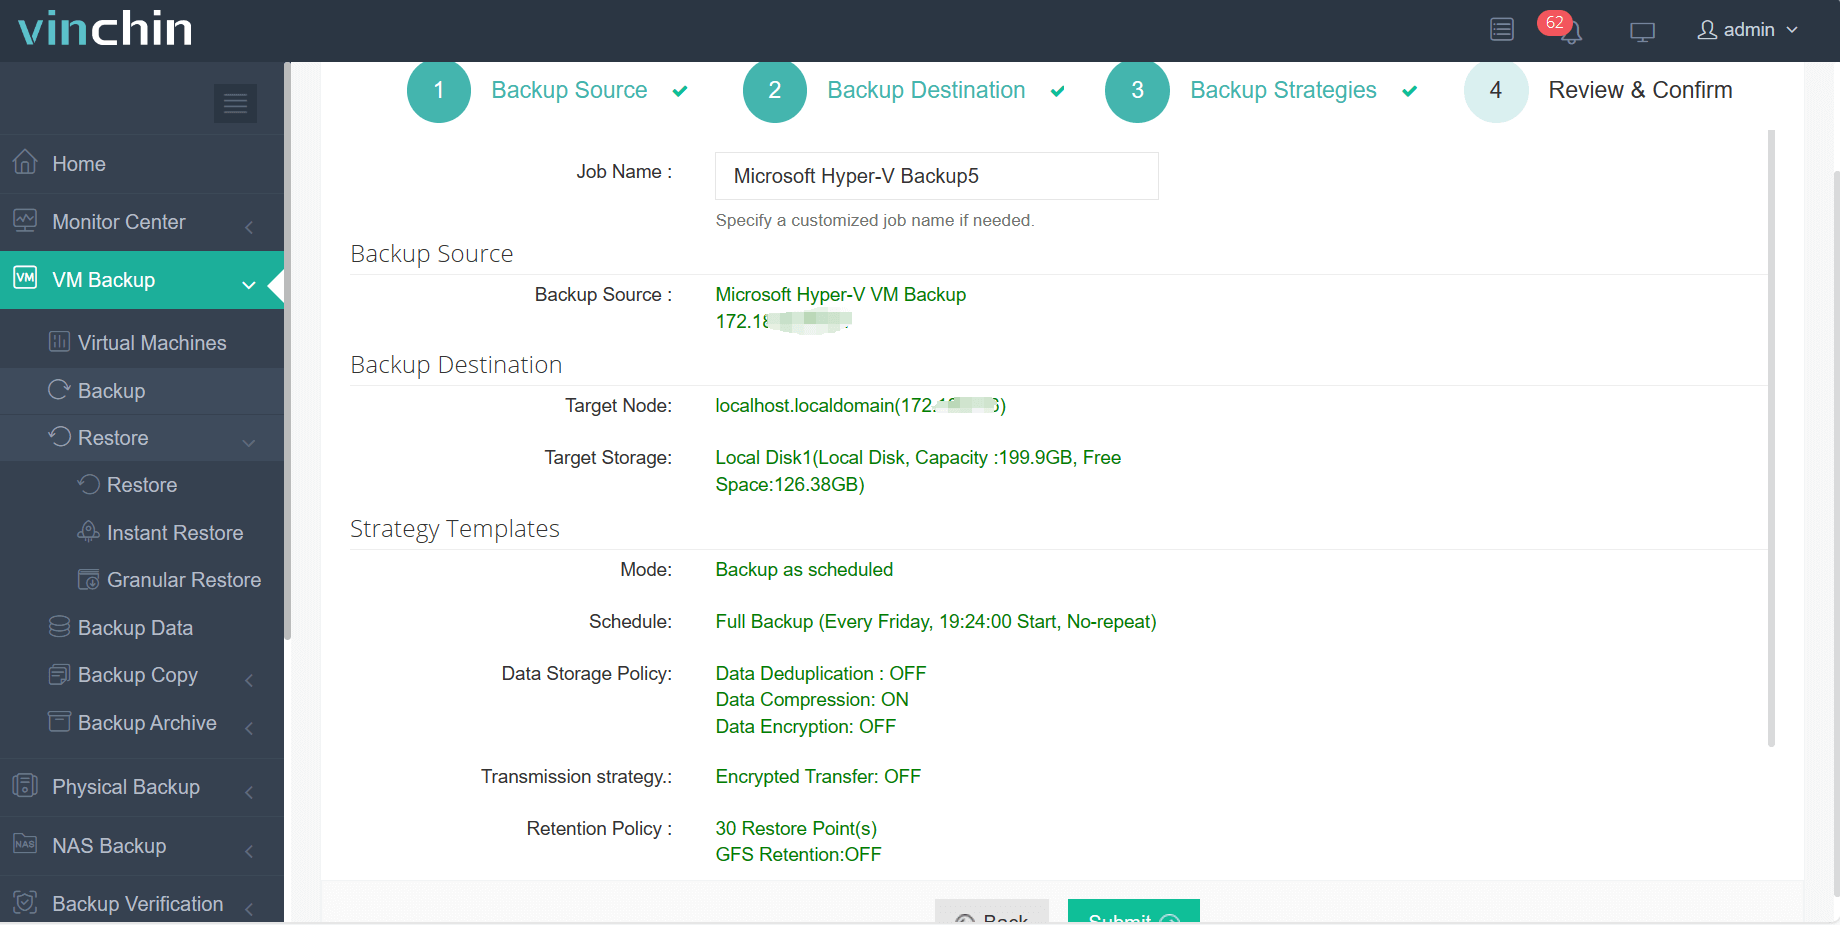
4.Finally submit the job

Trusted globally by thousands of organizations—with top ratings among enterprise data-protection solutions—Vinchin Backup & Recovery offers a risk-free experience through its fully featured free trial valid for 60 days; click below to download now.
Create Virtual Machine Hyper V Server 2016 FAQs
Q1: Can I create a Generation 2 VM for a 32-bit operating system on Hyper‑V Server 2016?
A1: No; Generation 2 supports only x64 guest operating systems due to UEFI requirements.
Q2: How do I add more virtual hard disks after creation?
A2: Right-click target VM in Hyper‑V Manager > click SETTINGS > select SCSI CONTROLLER > click ADD > choose HARD DRIVE > click APPLY; SCSI disks allow hot-add/remove unlike IDE which require shutdown first.
Q3: Can I manage my remote Host running Hyper‑V Server 2016 from Windows 10?
A3: Yes; install Remote Server Administration Tools including Hyper‑V Manager then connect directly over network once permissions granted properly.
Conclusion
Creating reliable virtual machines with Hyper‑V Server 2016 takes just minutes whether using GUI wizards or automated scripts—and fine-tuning afterward ensures peak efficiency long-term! Protect every workload easily using Vinchin’s advanced backup platform today—download their free trial now!
Share on:


