How to Migrate oVirt/RHEV VMs to VMware ESXi?
2022-04-07 | Iris Lee
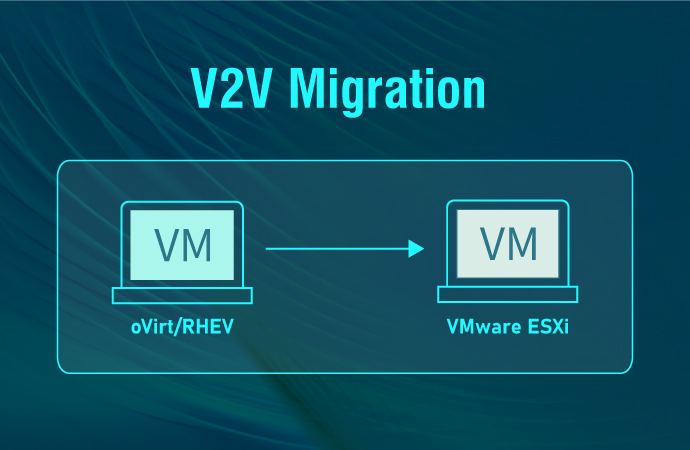
oVirt is a free, open-source distributed virtualization management platform founded by Red Hat as s community project. It supports KVM on x86-64, PowerPC64 and s390x hosted hypervisors. While VMware is the leading computing software virtualization provider, whose software hypervisor for servers VMware ESXi is a bare-metal hypervisor ran on server hardware. This means the high availability and resource management.
Some applications and software may be more suitable, or even only support to be hosted by VMware, owing to their different monitoring, backup and network dependencies. So, some users who had deployed oVirt/RHEV in the data center may wonder how are they supposed to migrate IT workloads from oVirt to VMware for better business operations. Well, here's the way.
Use Vinchin Backup & Recovery for easy V2V migration
The data migration between two different types of virtual machines can be tricky with adaptation issues, distinct hypervisors and versions.
Therefore, there are Standalone and all kinds of v2v tools on market to match with corresponding virtualization platforms. However, it’s inconvenient. Is there an all-in-one solution that can help simplify such things to realize V2V? Yes, of course. Simply use the Cross-Platform Recovery feature in Vinchin Backup & Recovery, which supports streamlined V2V migration across 10 virtual platforms including VMware and oVirt/RHV, and you can manage them all from a single web-based console.
Vinchin V2V works by backing up VMs from the original virtualization and restoring them as a target VM, so that the V2V migration process can be done with the integrity and security of your original data being fully guaranteed.
1. Back up Ovirt/RHEV
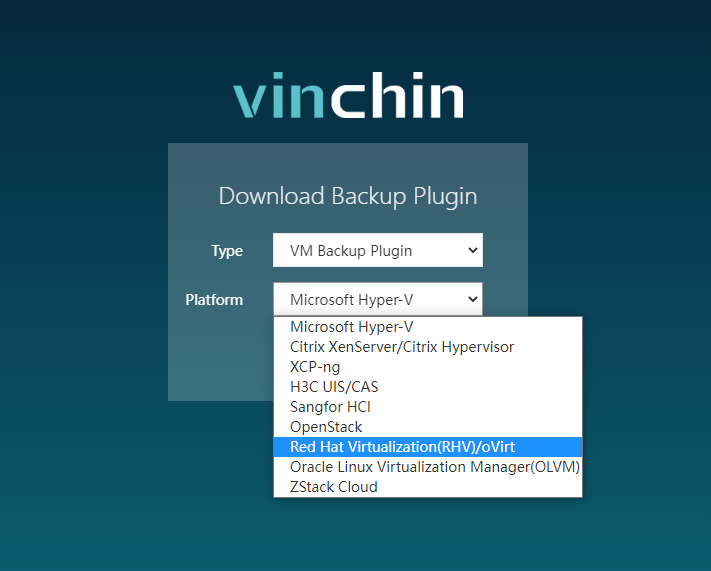
1) Download oVirt/RHEV backup plugin.
A lightweight plugin needs to be installed first for oVirt backup. You can choose the target plugin type from the login console of backup server, and following the wizard to complete the installation.
2) Get your Vinchin backup server licensed;
Login the console, go to “System” on the left and choose “System License”.“Upload License” with the free trial key sent to your email.
3) Add oVirt and VMware virtual platform;
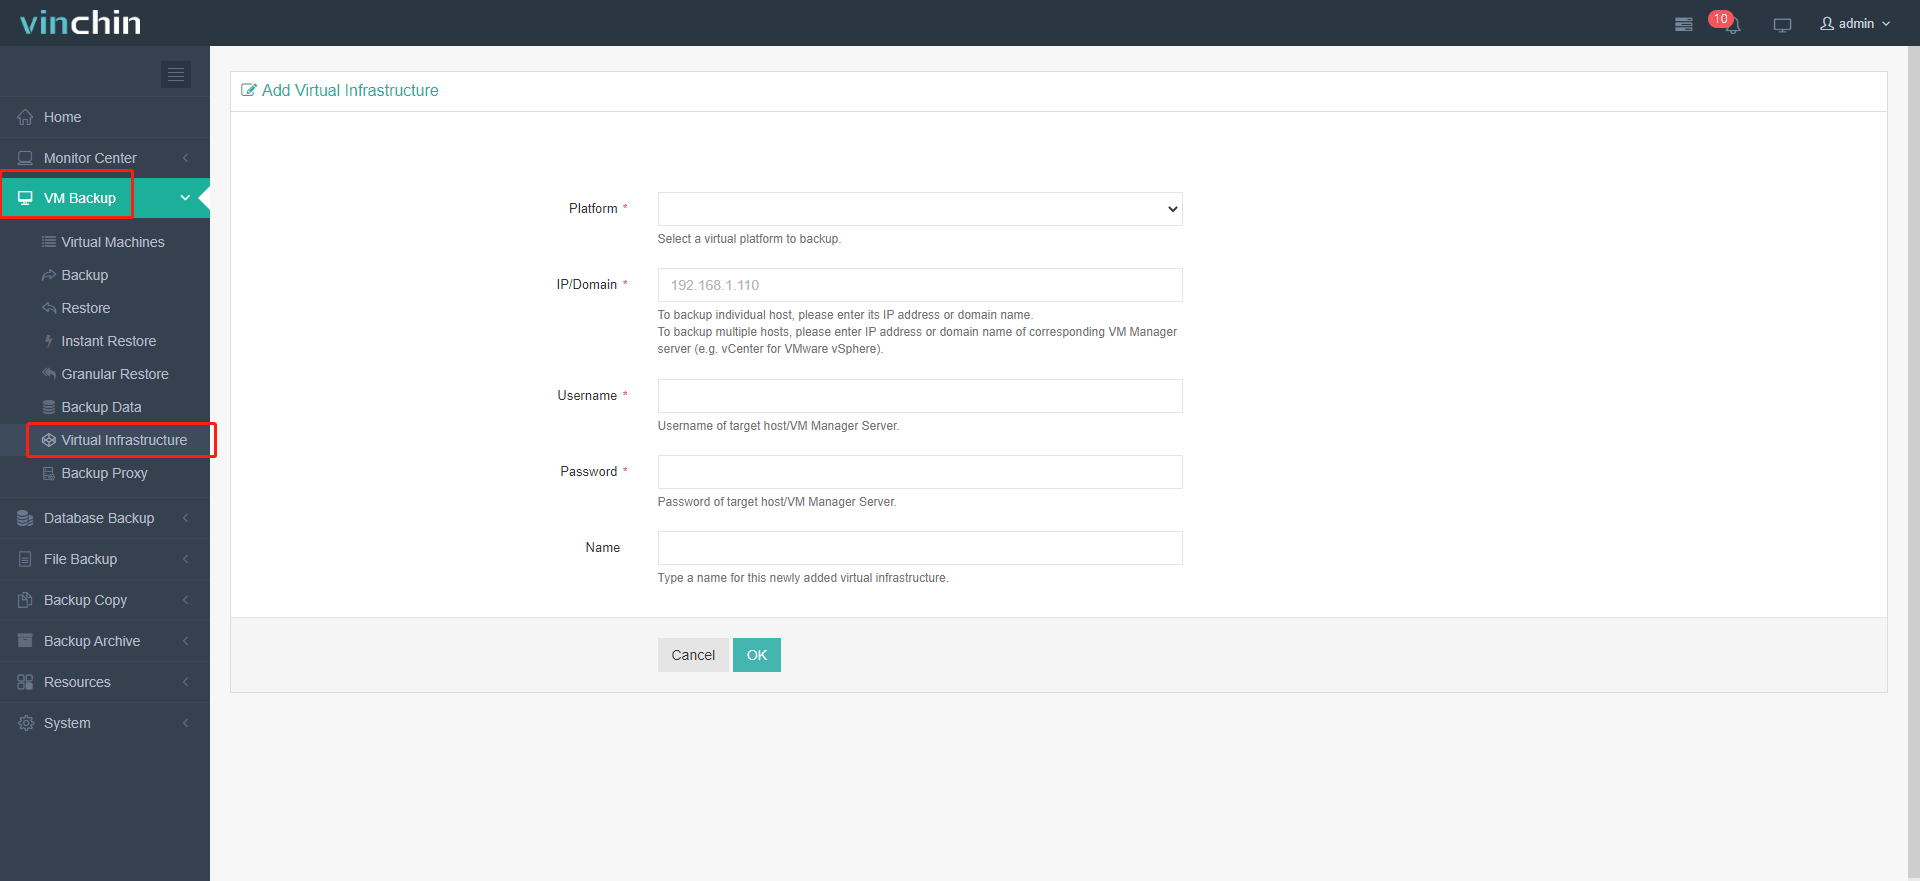
Go to “VM Backup” board and select “Virtual Infrastructure”.
Click “Add”, select VMware/oVirt/RHV each time, and enter the required information.
4) Authorize oVirt/RHEV host;
Click“Auth”in the same page. Then“Authorize" the host you want to authorize in the popup window.
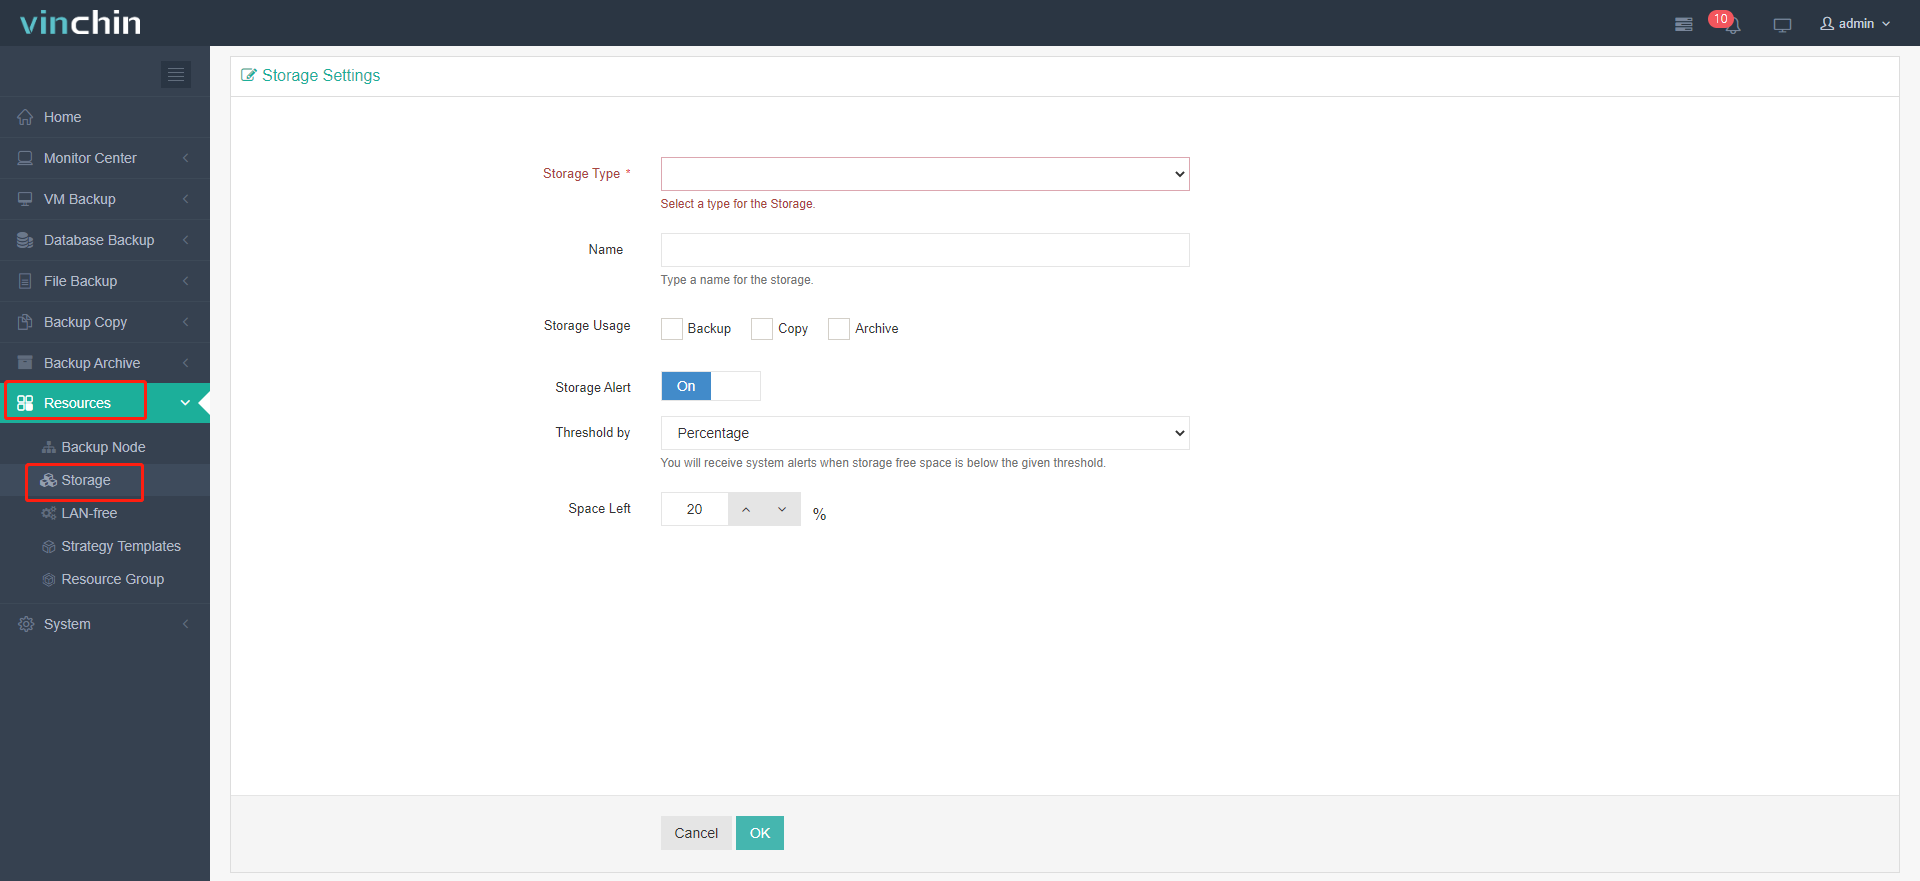
5) Add Backup Storage;
Click“Resources”, find“Storage”and click“Add”.
Local disk, local directory, logical volume, fiber channel, iSCSI, and multiple more storage types can all be added as local backup storage.
6) Create backup jobs;
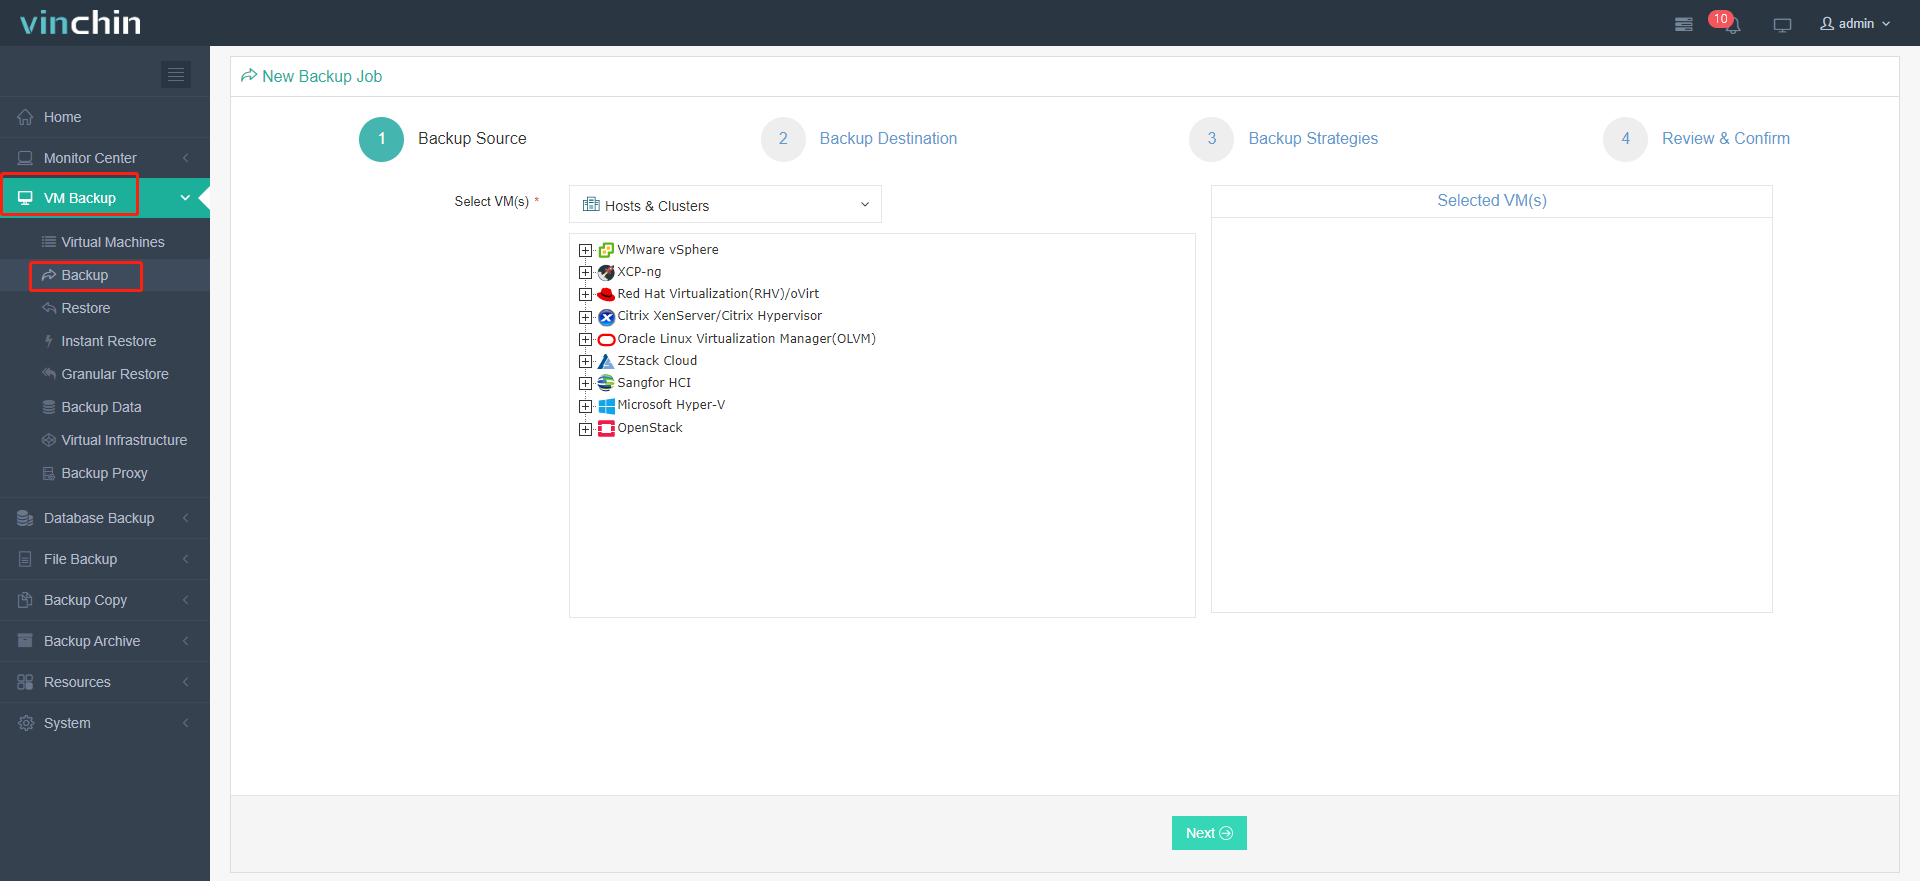
Click “VM Backup” “Virtual Machines” to add VMs for creating or adding backup jobs.
The backup data will later be the source of V2V migration.
2. Restore/Migrate oVirt VM backup to VMware
1) Go to the“VM Backup”“Restore”;
Vinchin V2V can be used in both regular full VM restore, and instant restore, which works to instantly get a VM up running on another virtual platform in 15 seconds for business continuity. Here, we choose full restore for demonstration.
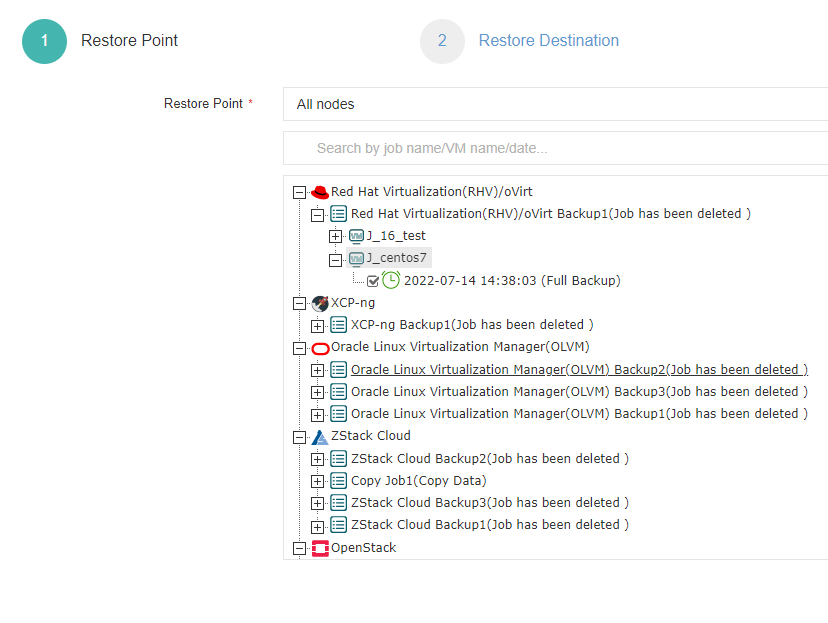
2) Select restore point;
Select a target VM restore point under your virtual infrastructure which you want to recover.
3) Select restore destination;
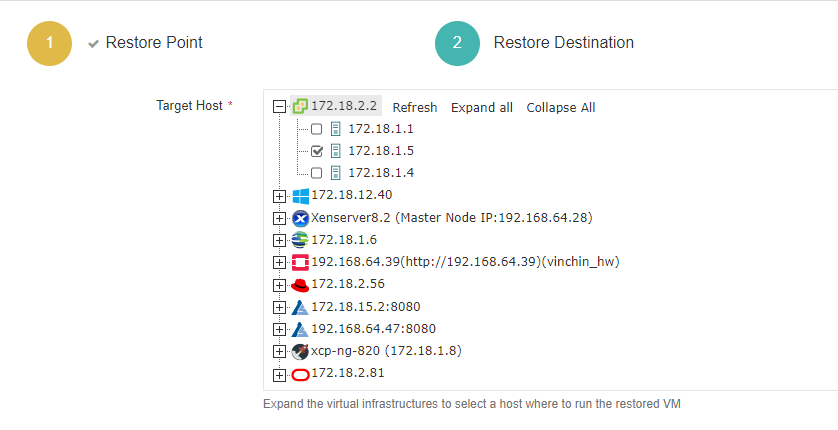
Select target host you want to run the restored VMs (here choose VMware EXSi host)
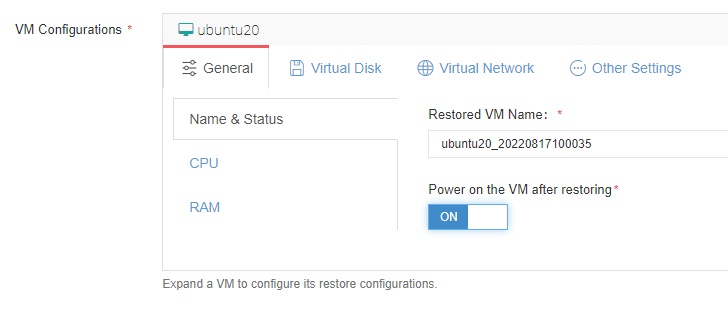
Unified Configurations: If you enable this function while restoring a group of VMs, you can configure the storage, network, and whether or not to power on the target VMs after restoring.
VM Configurations: Set up advanced restore options for specific VM(s) by clicking its name. Its setup will not influence on the unified configurations.

4) Select restore strategy;
For the job schedule, you can configure the VM restore job as once-off restore (running right after the job has been created, recommended in this V2V job) or restore as scheduled (the job runs as scheduled).
Advanced Strategy: configure multithreading for the VM restore job.
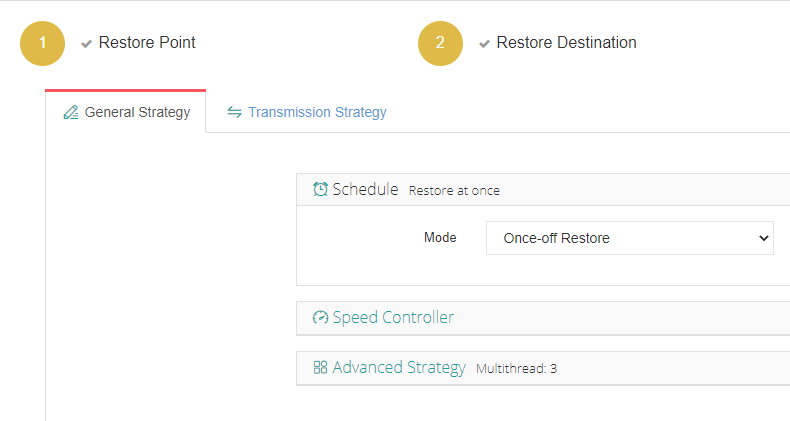
After all the configurations, you can then submit the job.
After the job done, selected oVirt/RHEV VM(s) will be restored to the target virtualization platform-VMware, it means that your cross-platform data migration is complete.
Vinchin Backup & Recovery also supports cross-platform instant restore to guarantee business continuity, which still requires simple clicks in the console. Apply for the 60-day full-featured trial of Vinchin Backup & Recovery with V2V feature available.
Share on:
 English


