-
What Is Hyper-V Server Core?
-
Hyper-V Server Core Hardware Requirements
-
Method 1: Install Hyper-V with PowerShell
-
Method 2: Install Hyper-V with DISM
-
Post-Installation Steps for Hyper V Server Core Installation
-
Backup Hyper-V VMs with Vinchin Backup & Recovery
-
Hyper-V Server Core Installation FAQs
-
Conclusion
Hyper-V on Windows Server Core delivers a lightweight yet powerful virtualization platform without the overhead of a full graphical interface. For many IT teams, this minimal approach means better performance, improved security, and fewer updates to manage. But how do you install Hyper-V on Server Core when there’s no familiar desktop? This guide walks you through every step—from checking prerequisites to configuring your environment—using both PowerShell and DISM methods. You’ll also learn essential post-installation tasks and how to protect your virtual machines with reliable backup strategies.
What Is Hyper-V Server Core?
Hyper-V Server Core is Microsoft’s streamlined version of Windows Server designed for running server roles like Hyper-V without unnecessary extras or a graphical user interface (GUI). Why choose it? With only essential components installed, you get reduced disk footprint, lower memory usage, fewer patches to apply—and most importantly—a smaller attack surface for threats (Microsoft Learn). Management happens through command-line tools or remote consoles rather than local GUIs.
Hyper-V Server Core Hardware Requirements
Before starting your installation journey, make sure your hardware meets Microsoft's requirements for running Hyper-V on Server Core:
A 64-bit processor that supports Second Level Address Translation (SLAT)
At least 4 GB RAM (8 GB or more recommended if you plan to run multiple VMs)
Virtualization support enabled in BIOS or UEFI
Hardware-enforced Data Execution Prevention (DEP) turned on
Windows Server Standard or Datacenter edition installed using the “Server Core” option
You can check if your system supports these features by running systeminfo at the command prompt; look for all "Hyper-V Requirements" lines showing "Yes." If any requirement is missing or set to "No," address it before proceeding.
Method 1: Install Hyper-V with PowerShell
PowerShell offers an efficient way to add roles—even without a GUI. Make sure you have administrative privileges before starting these steps.
First, open PowerShell by typing powershell at the command prompt in Server Core. To see if Hyper-V is already present:
Get-WindowsFeature -Name Hyper-V
If not installed yet, add both the role and its management tools by entering:
Install-WindowsFeature -Name Hyper-V -IncludeManagementTools -Restart
This command installs everything needed and restarts your server automatically so changes take effect right away.
After rebooting, confirm success by running:
Get-WindowsFeature -Name Hyper-V
The output should show Installed : True next to “Hyper-V.” Want extra assurance? Check that key services are running:
Get-Service vmms,vmicheartbeat | Format-List Status,StartType
If you need to remove features later—or add others—use Uninstall-WindowsFeature or Install-WindowsFeature as needed.
Method 2: Install Hyper-V with DISM
DISM (Deployment Image Servicing and Management) is another robust tool favored by admins who script deployments or work offline. Here’s how you use it:
Open Command Prompt as administrator by logging into Server Core and typing cmd.
To check if Hyper-V is available:
dism /online /Get-Features /format:table | find "Microsoft-Hyper-V"
If not enabled yet, turn it on with:
dism /online /Enable-Feature /FeatureName:Microsoft-Hyper-V /All
The /All flag ensures all required parent features are included automatically—no need to enable them one by one.
Want management tools too? Run this additional command:
dism /online /Enable-Feature /FeatureName:Microsoft-Hyper-V-Management-PowerShell /All
Note that unlike PowerShell’s install method above—which restarts automatically—DISM does not trigger an automatic reboot unless specified otherwise. So after enabling features with DISM:
shutdown /r /t 0
Once restarted, verify installation again using the earlier /Get-Features command; look for “Enabled” next to Microsoft-HyperV entries.
Troubleshooting tip: If DISM says “Feature name Microsoft-HyperV is unknown,” double-check your OS version using dism /online /Get-CurrentEdition. Only supported editions allow this feature!
Post-Installation Steps for Hyper V Server Core Installation
Once installation finishes successfully—whether via PowerShell or DISM—you’re not done yet! Several critical setup tasks remain before deploying production workloads safely.
Configuring Network Settings via sconfig
Networking forms the backbone of any virtualization host; misconfiguration here leads straight to headaches later! On Windows Server Core use sconfig, which provides an easy menu-driven interface even without graphics support.
Launch sconfig from Command Prompt simply by typing sconfig then pressing Enter. To configure networking:
1. Select option number 8 Network Settings
2. Choose your active network adapter from the list shown onscreen
3. Set static IP address details—including subnet mask/gateway/DNS—as required by your organization’s standards
Static addressing avoids surprises during reboots or DHCP outages—a must-have best practice in enterprise environments!
Enabling Remote Management Securely
Managing servers locally isn't practical long-term; instead enable secure remote access so you can control everything from another workstation using familiar tools like Hyper‑V Manager or Windows Admin Center.
In sconfig:
1. Select option number 5 Remote Management
2. Choose Enable Remote Management when prompted
For added security restrict WinRM traffic only from trusted networks using PowerShell:
Set-NetFirewallRule -Name WINRM-HTTP-In-TCP -RemoteAddress '192.168.x.x/24'
Replace '192.168.x.x/24' with your actual admin subnet range!
From another machine open Hyper‑V Manager, click Connect to server, enter either hostname/IP address of new host—and start managing remotely! Or launch Windows Admin Center in browser for web-based administration experience.
Want proof remote access works? Test connectivity:
Test-NetConnection -ComputerName <ServerIP> -Port 5985
A successful result confirms WinRM is listening properly!
Updating Your Host & Joining Domain
Keeping systems patched protects against vulnerabilities while joining Active Directory simplifies centralized authentication/policy enforcement across large fleets of hosts.
Back inside sconfig:
1. Pick option number 6 Download And Install Updates—let updates complete fully!
2. Change computer name if desired via option number 1 Computer Name
3. Join domain using option number 2 Domain/Workgroup, entering credentials when prompted
Reboot once finished so all changes apply cleanly across services!
With networking solidified remote access secured latest patches applied—and optionally joined domain—you’re ready for advanced VM deployment scenarios!
Backup Hyper-V VMs with Vinchin Backup & Recovery
Protecting virtual machines hosted on Microsoft Hyper‑V requires a robust backup solution tailored for enterprise needs. Vinchin Backup & Recovery stands out as a professional VM backup platform supporting over fifteen mainstream virtualization environments—including VMware, Proxmox VE, oVirt, OLVM, RHV, XCP-ng, XenServer, OpenStack, ZStack—and notably Microsoft Hyper‑V itself.
Key features such as forever-incremental backup strategies, data deduplication and compression technology, granular restore capabilities at file level within VM backups, scheduled automated jobs for consistent protection cycles, and cross-platform V2V migration empower organizations with flexible recovery options while optimizing storage efficiency and minimizing downtime.
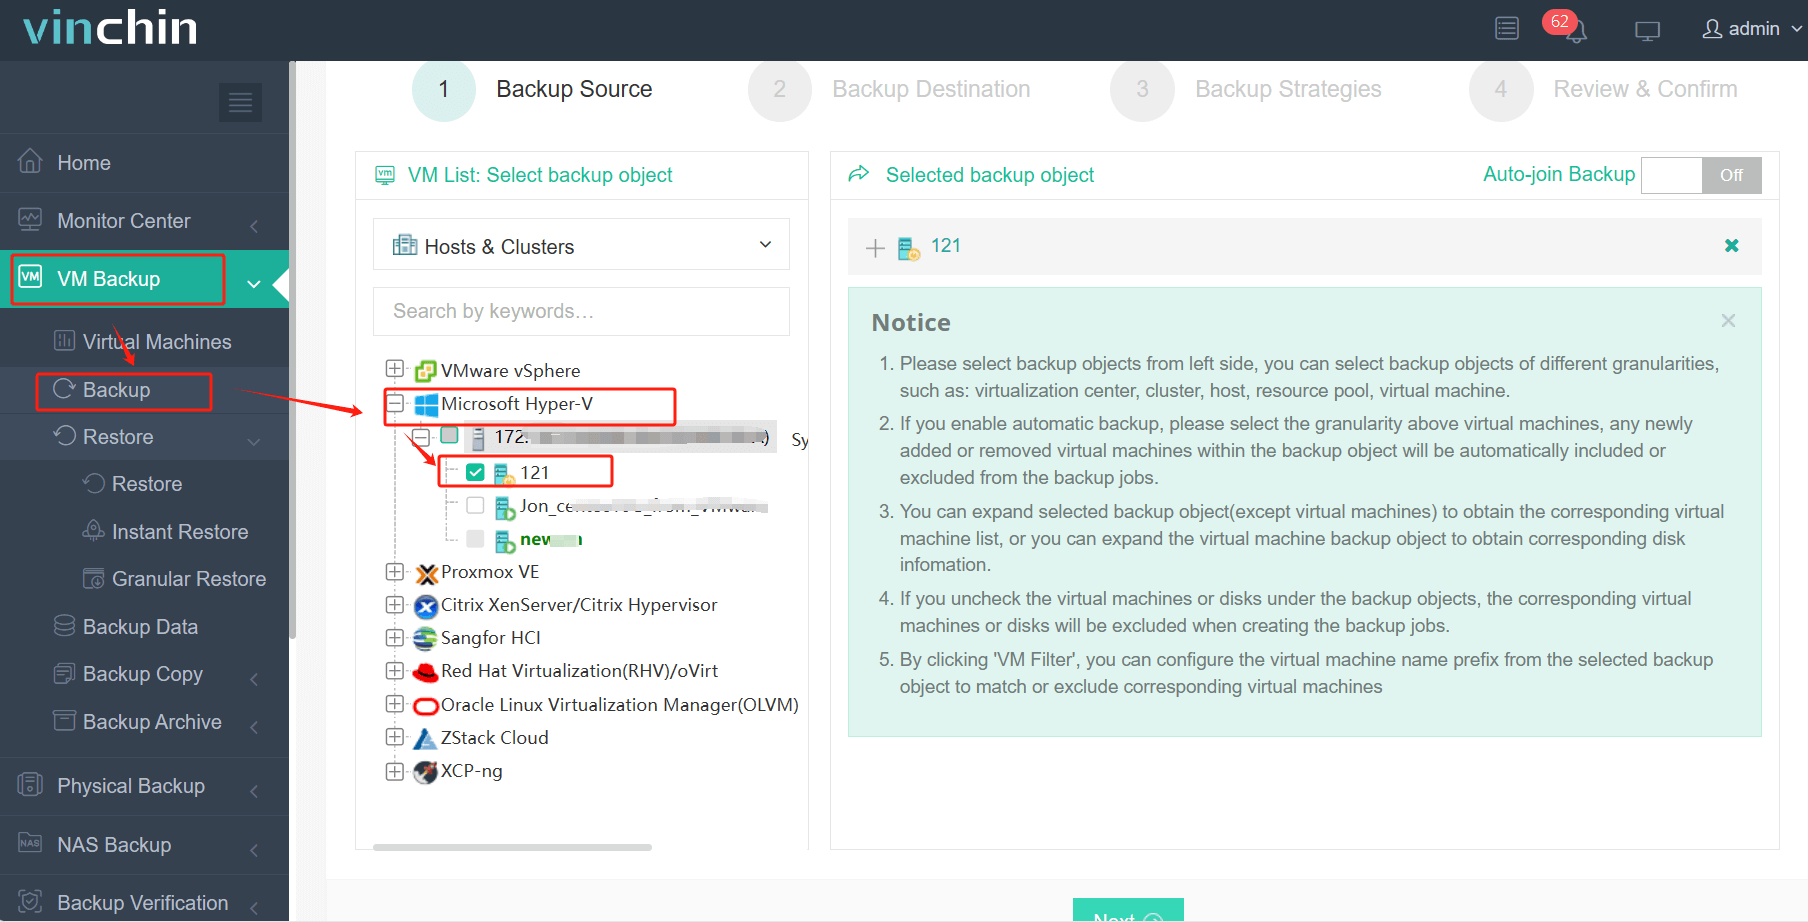
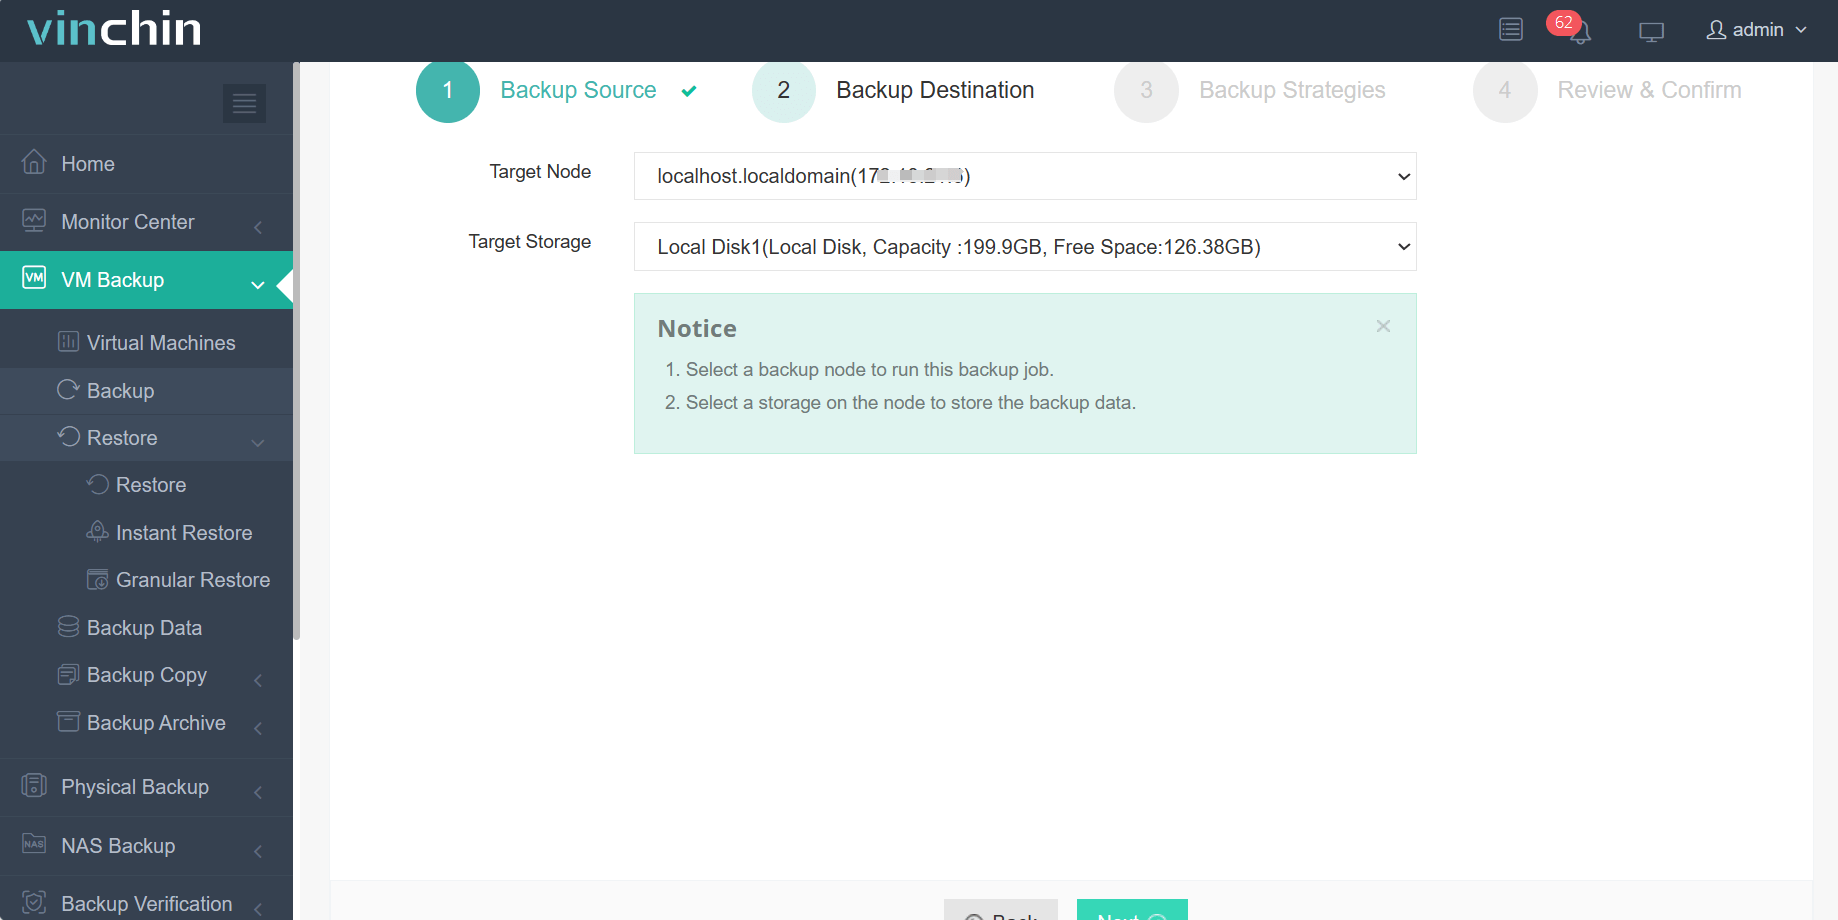
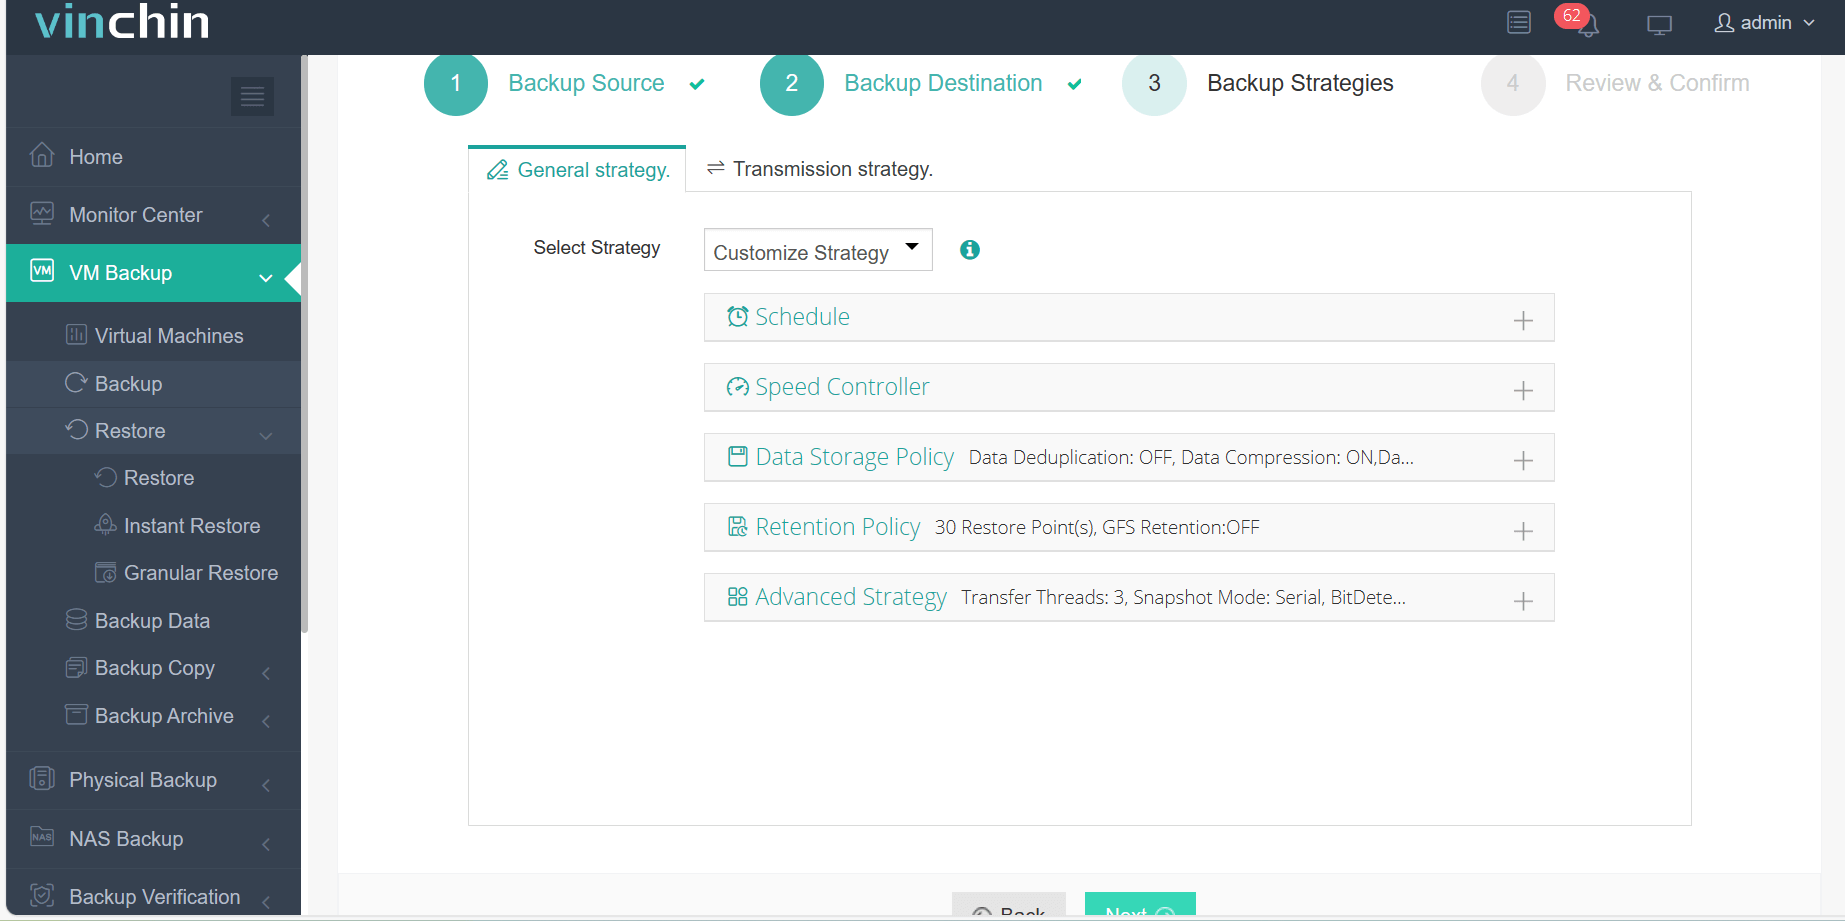
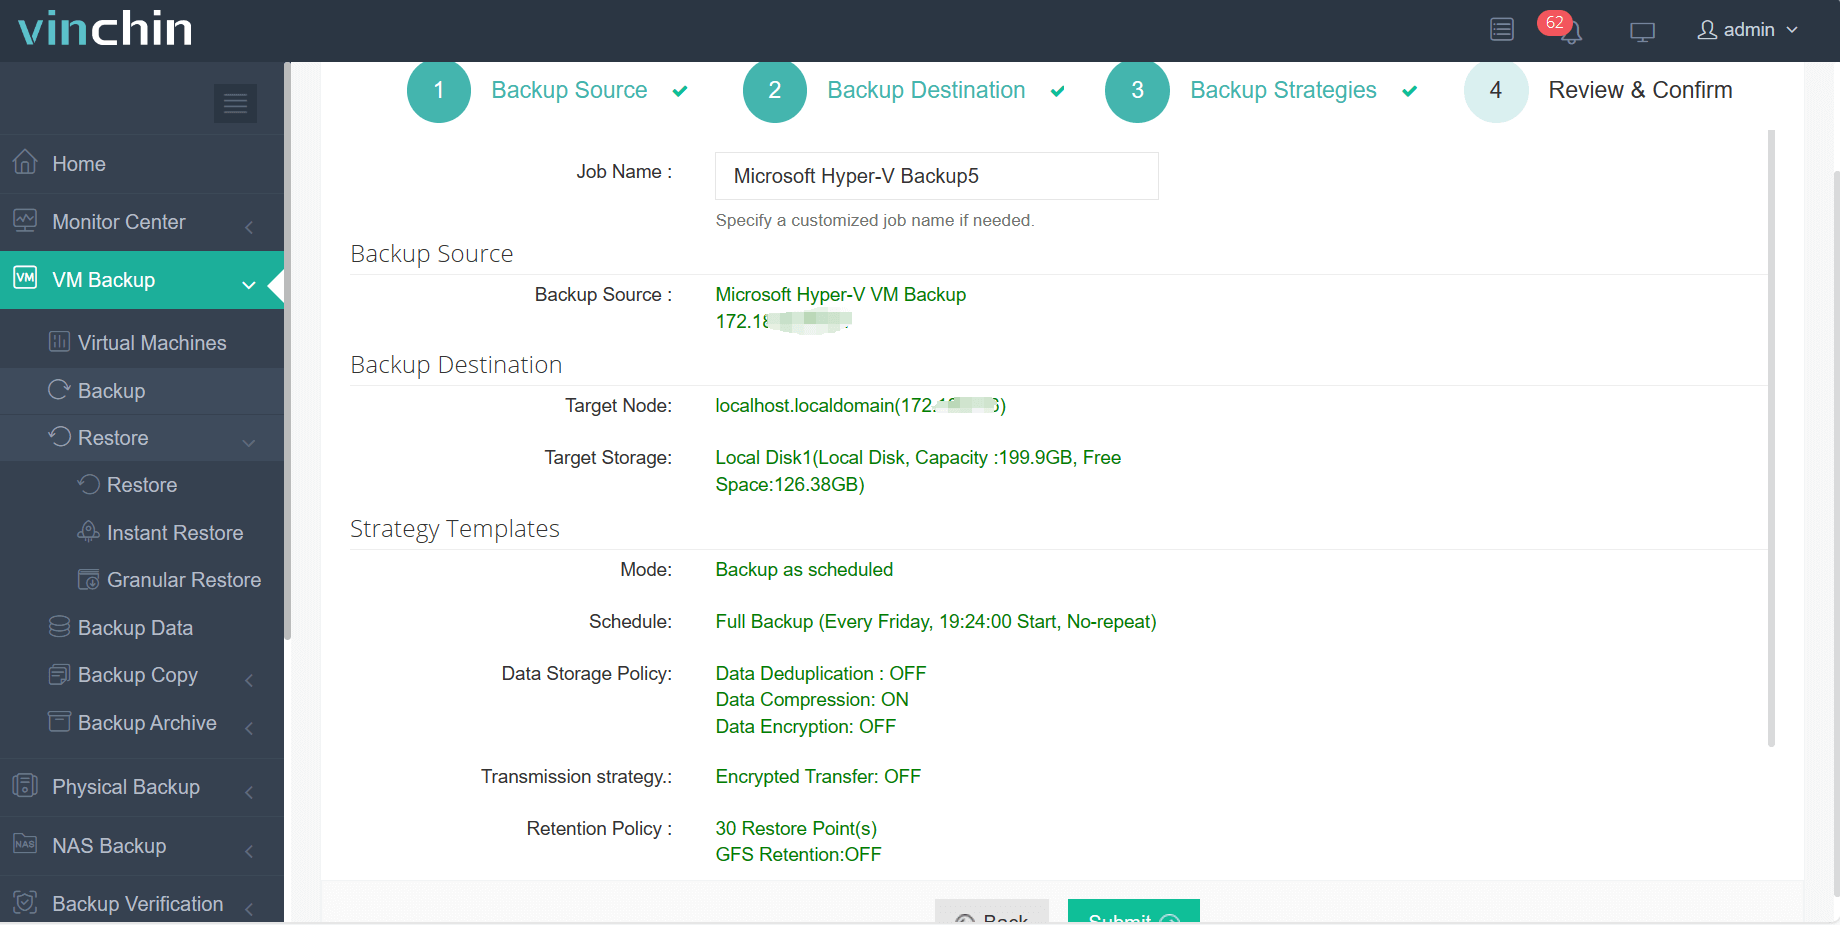
Using Vinchin Backup & Recovery's intuitive web console makes safeguarding virtual machines straightforward:
1.Just select Hyper‑V VMs on the host

2.Then select backup destination

3.Select strategies

4.Finally submit the job

Recognized globally among enterprise users—with top ratings and thousands of satisfied customers—Vinchin Backup & Recovery offers a comprehensive data protection solution backed by responsive support teams worldwide. Experience all advanced features free for 60 days; click below to start your trial today!
Hyper-V Server Core Installation FAQs
Q1: Can I install hyper v server core installation without internet access?
A1: Yes—use DISM pointing at local media sources (/Source:D:\sources\sxs) along with /LimitAccess.
Q2: How do I securely manage my new host remotely?
A2: Enable remote management via sconfig then connect using HYPER‑V MANAGER or WINDOWS ADMIN CENTER from another trusted machine after restricting firewall rules appropriately.
Q3: What hardware do I need before starting hyper v server core installation?
A3: Ensure CPU supports SLAT virtualization BIOS enabled minimum 4GB RAM DEP active per Microsoft's published requirements; check compatibility first using SYSTEMINFO output lines marked "Hyper‑V Requirements".
Conclusion
Installing hyper v server core doesn’t have to be intimidating—with proper planning validated commands careful post-installation hardening anyone can build secure scalable hosts quickly! For effortless VM protection try Vinchin's robust backup platform free today—it keeps critical data safe while letting admins focus confidently on growth.
Share on:


