Are you looking for a robust VM backup solution? Try Vinchin Backup & Recovery!↘ Download Free Trial Creating and managing virtual machines is a common task in virtualized environments. However, as the number of VMs grows and the complexity of their configuration increases, manually deploying each VM becomes increasingly time-consuming and error-prone. To solve this problem, VMware provides a powerful tool, VMware template.
VMware template is a pre-configured virtual machine image that helps you deploy new virtual machine instances quickly and consistently. By saving an already-configured VM as a template, you can quickly replicate and deploy multiple similar VMs when needed, greatly simplifying the management and maintenance of your virtualized environment. The following will explore 2 methods of how to create a VMware template as well as some VMware template best practices.
Method 1: Clone a Virtual machine as a template
This method first copies an existing VM and then configures this copied virtual machine as a template. It is suitable for situations where you need to create a template based on an existing VM, such as generating a standardized template based on an already configured VM.
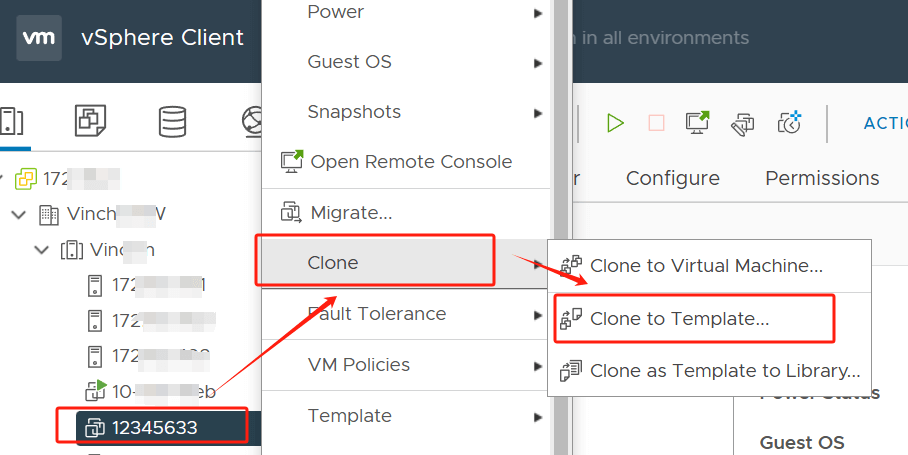
1. In vSphere, hit the VM > Clone > Clone to Template
2. Select a name and folder
3. Select a computer resource
4. Select storage
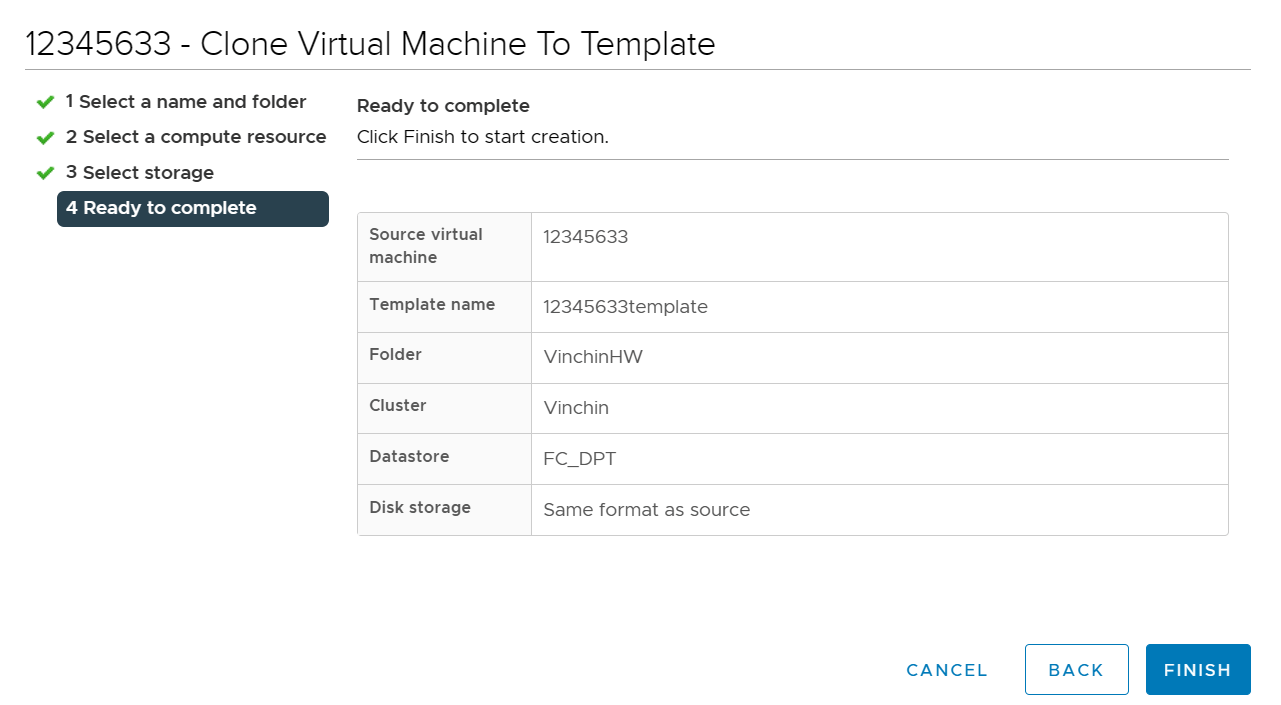
5. Review and Finish the job
Method 2: Convert a VM into a template
Another approach is to directly convert an existing VM to a template instead of creating a new clone. This means that the VM will no longer be an available VM instance after conversion to a template. As opposed to the clone operation which is more concise and does not require the creation of an additional copy of the VM, the existing VM is directly converted to a template.
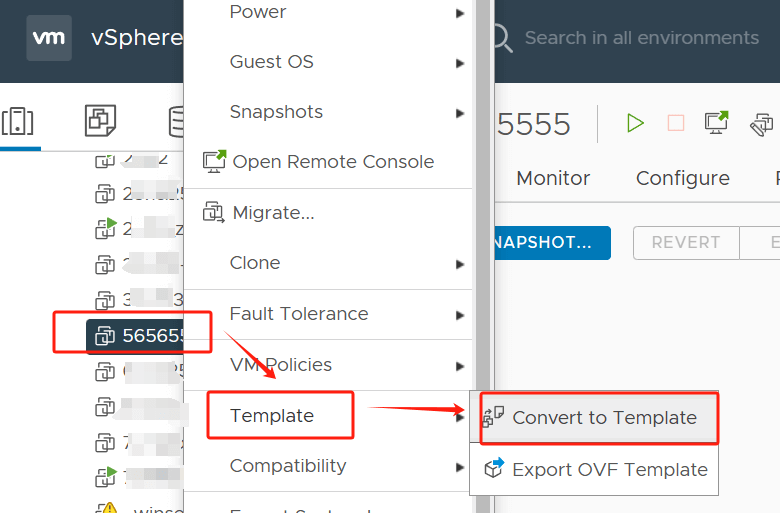
In vSphere, click the VM > Template > Convert to Template > hit Yes in the pop-page
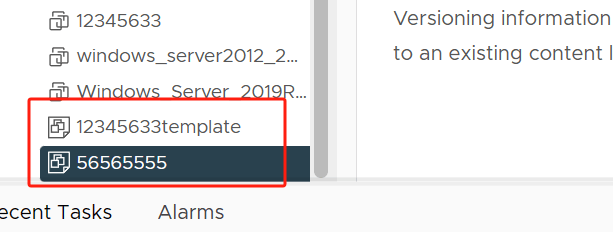
You can see that the templates transformed by the above 2 methods have been successful:
VMware template best practices with customization specifications
The combination of VM templates and customization specifications is designed to enable rapid deployment of virtual machines that meet specific requirements, using predefined templates. This simplifies the deployment process and ensures consistent deployment every time, effectively reducing setup time and minimizing the risk of configuration errors.
To apply customization specifications, following these steps:
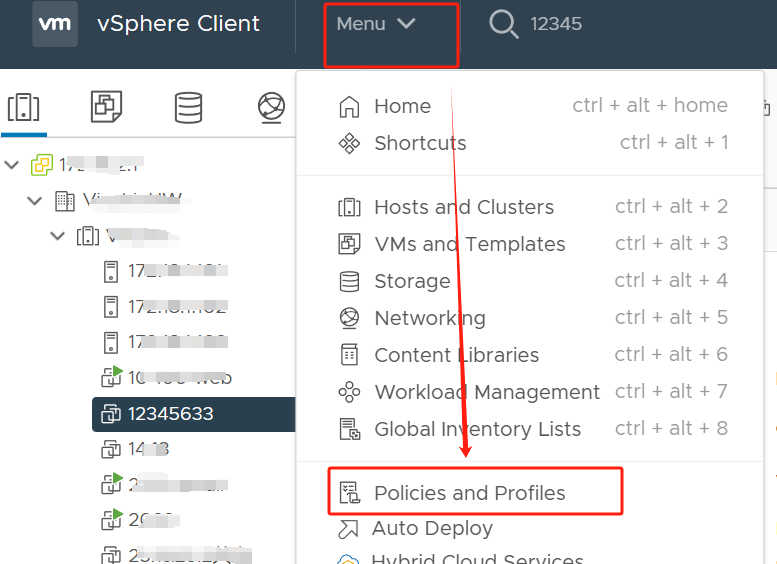
1. In vSphere, hit Menu > Policies and Profiles
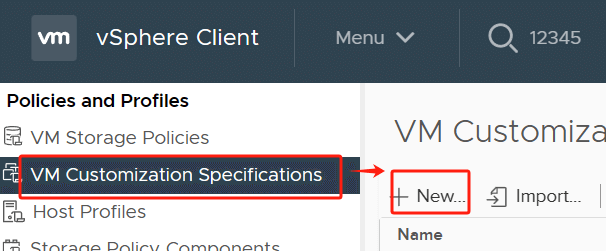
2. Choose VM Customization Specification > New
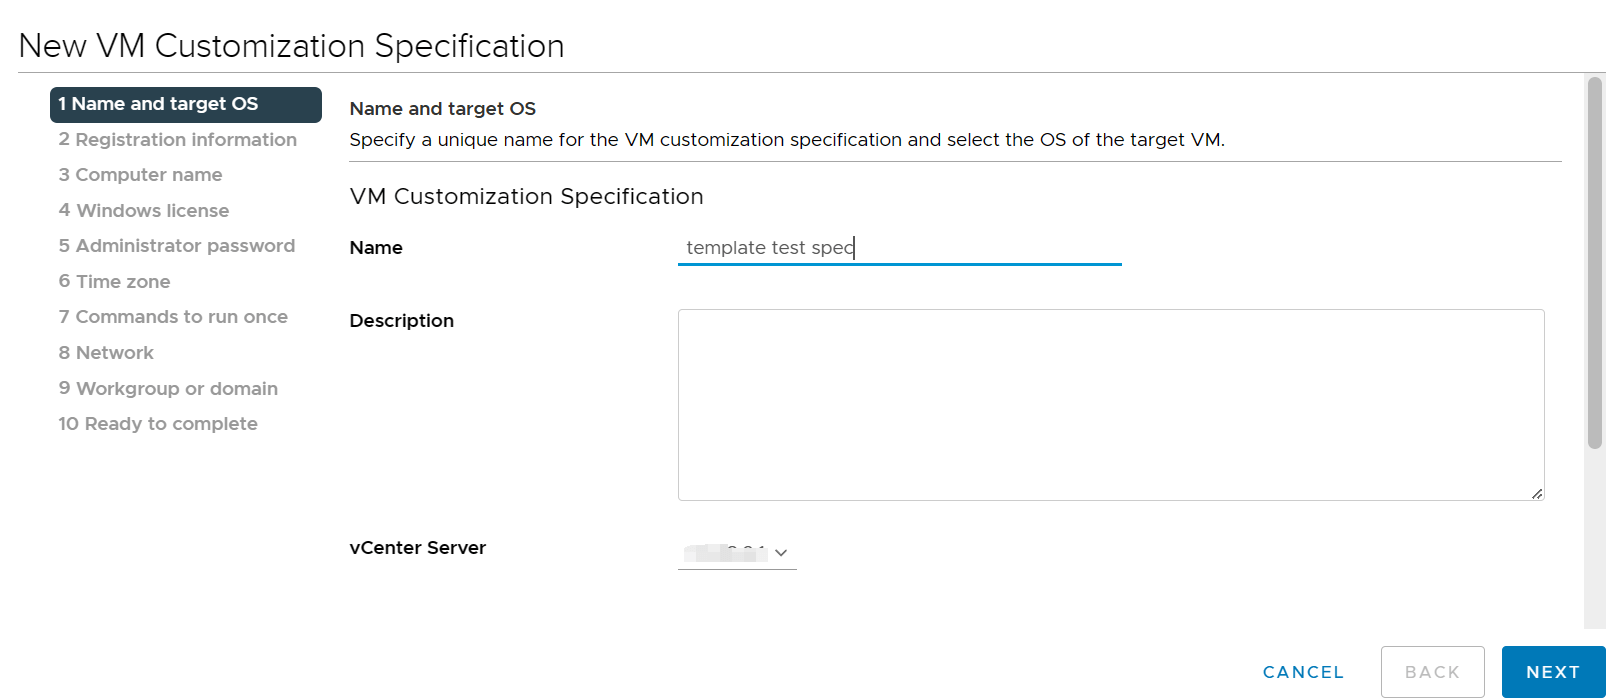
3. Specify a Name > Registration information > Computer name > Windows license(Specify the Windows licensing information for this copy of the guest operating system. If the virtual machine does not require licensing information, leave these fields blank) > Administrator password > Time zone > Network > Workgroup
4. Review and Finish

Here you can see that customization specifications have been created and you can edit, copy, export and delete specifications from here.

How to deploy a VM from this template VMware?
When you create virtual machines using VMware's templates, you can personalize them by combining them with previously set custom specifications. This way, you can quickly and easily configure new virtual machines to ensure they match your standards. And, if needed, you can always modify these specifications after creation to adapt them to changing needs and environments.
Below, the following images will illustrate the process of creating a VM from a VMware template and integrating it with the custom specifications previously set.
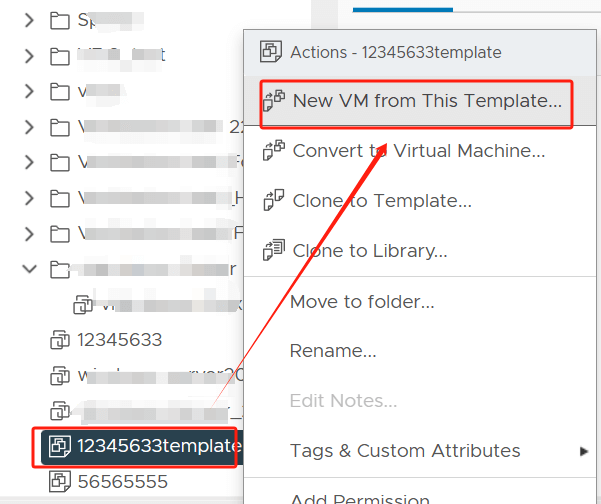
1. Hit the VM template > New VM from This Template
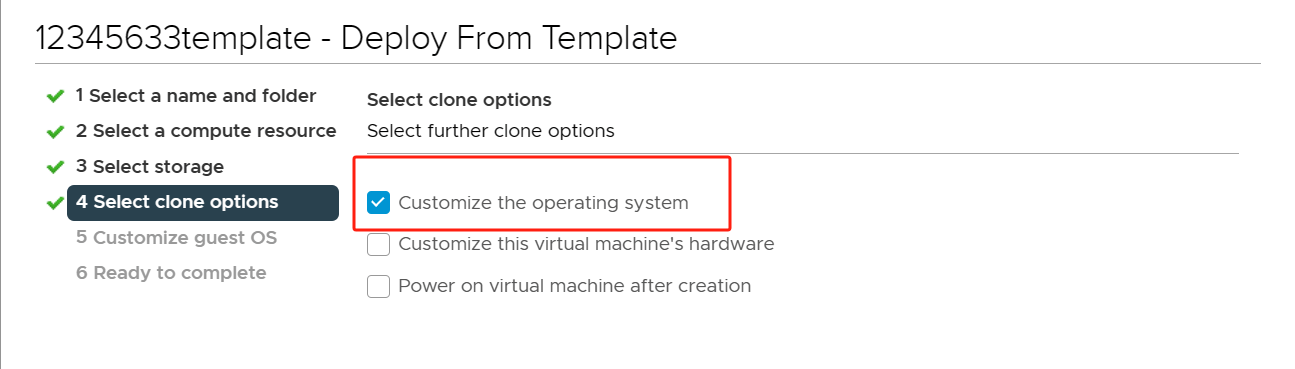
2. Select a name > Select a computer resource > select storage > Select clone options (here you can apply the guest OS customization specification that you just created, so enable Customize the operating system)
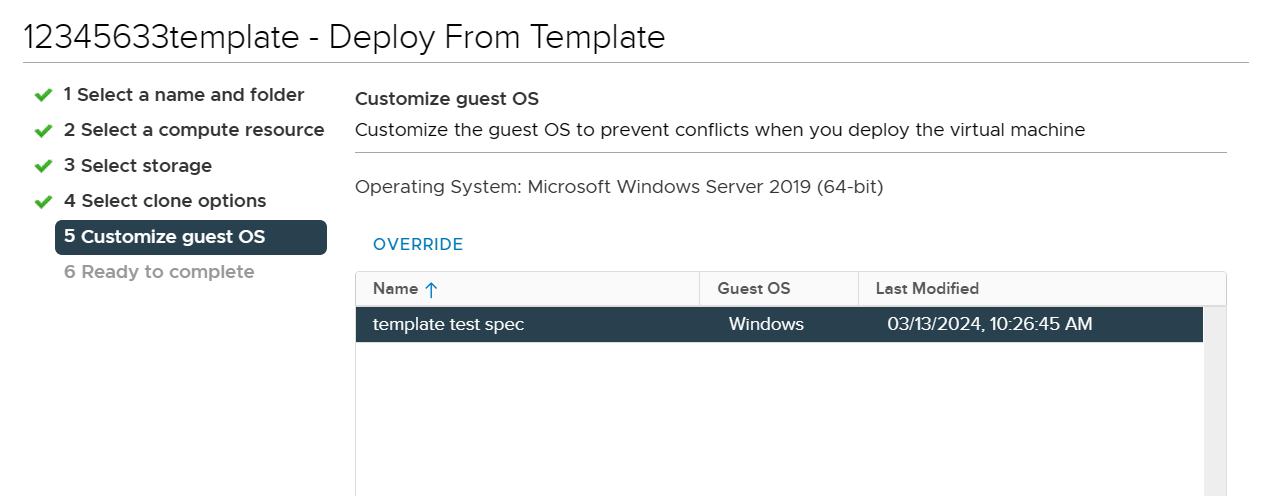
3. Customize guest OS
Select the guest OS customization specification you created from the list
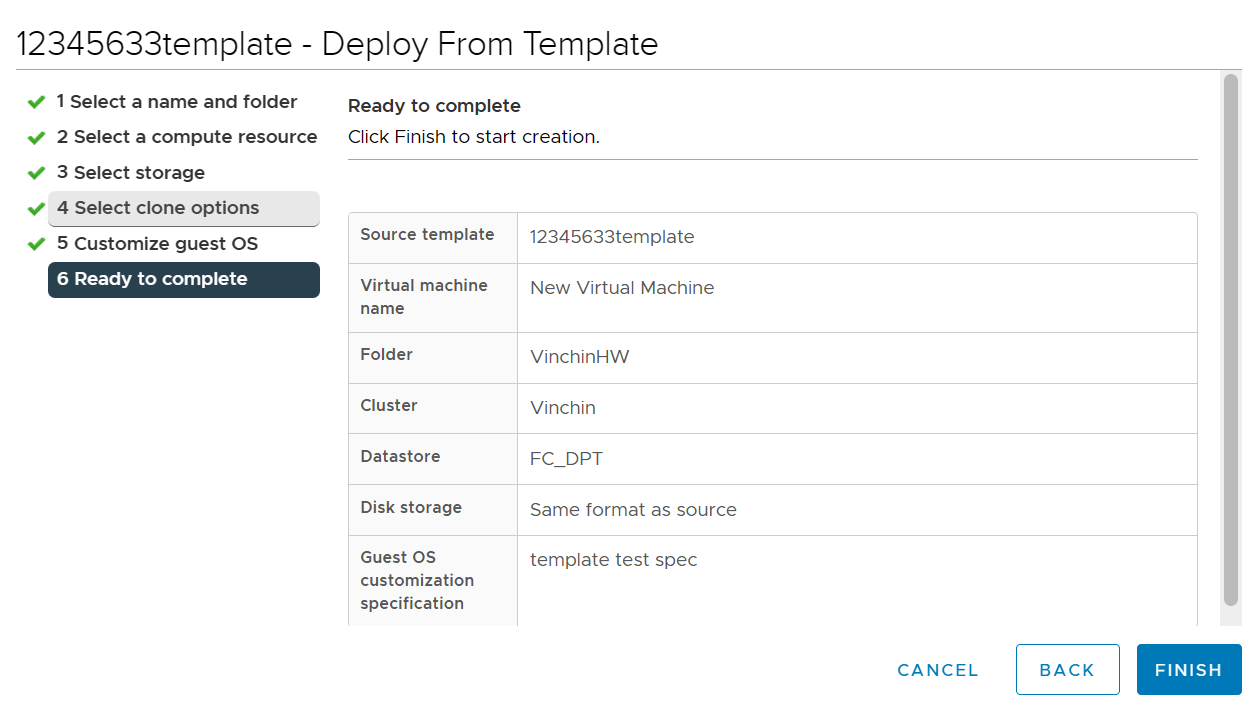
4. Review and hit Finish
How to perform regular VMware VM backups with Vinchin Backup & Recovery?
After creating VMware templates and virtual machines, it is critical to back them up on a regular basis. While the snapshot feature that comes with VMware can provide temporary backups, for long-term backups and disaster recovery, using specialized third-party backup software is a more reliable option. It is highly recommended to use Vinchin Backup & Recovery for VMware VM backups. Vinchin is a backup solution designed specifically for VMware, Hyper-V, XenServer, XCP-ng, oVirt, RHV and other VMs. VM backup in Vinchin Backup & Recovery is not mere backup data to recover failed VM, but also a kind of VM template which can be used to deploy new VM on another host and or virtualization platform.
Vinchin provides a comprehensive and powerful VM backup solution with a number of features such as agentless backup, instant recovery and V2V migration. This means that you can easily perform full backups of VMs without worrying about agent issues during the backup process, and achieve fast instant recovery operations. In addition, the V2V Migration feature allows you to easily migrate VMs between different virtualized environments, ensuring flexibility and scalability. With Vinchin Backup & Recovery, you can rest assured that your data is safe and secure and you can respond to unforeseen circumstances and ensure business continuity.
To backup VMware VM in Vinchin Backup & Recovery is very simple, just follow these steps:
1. Just select VMs on the host
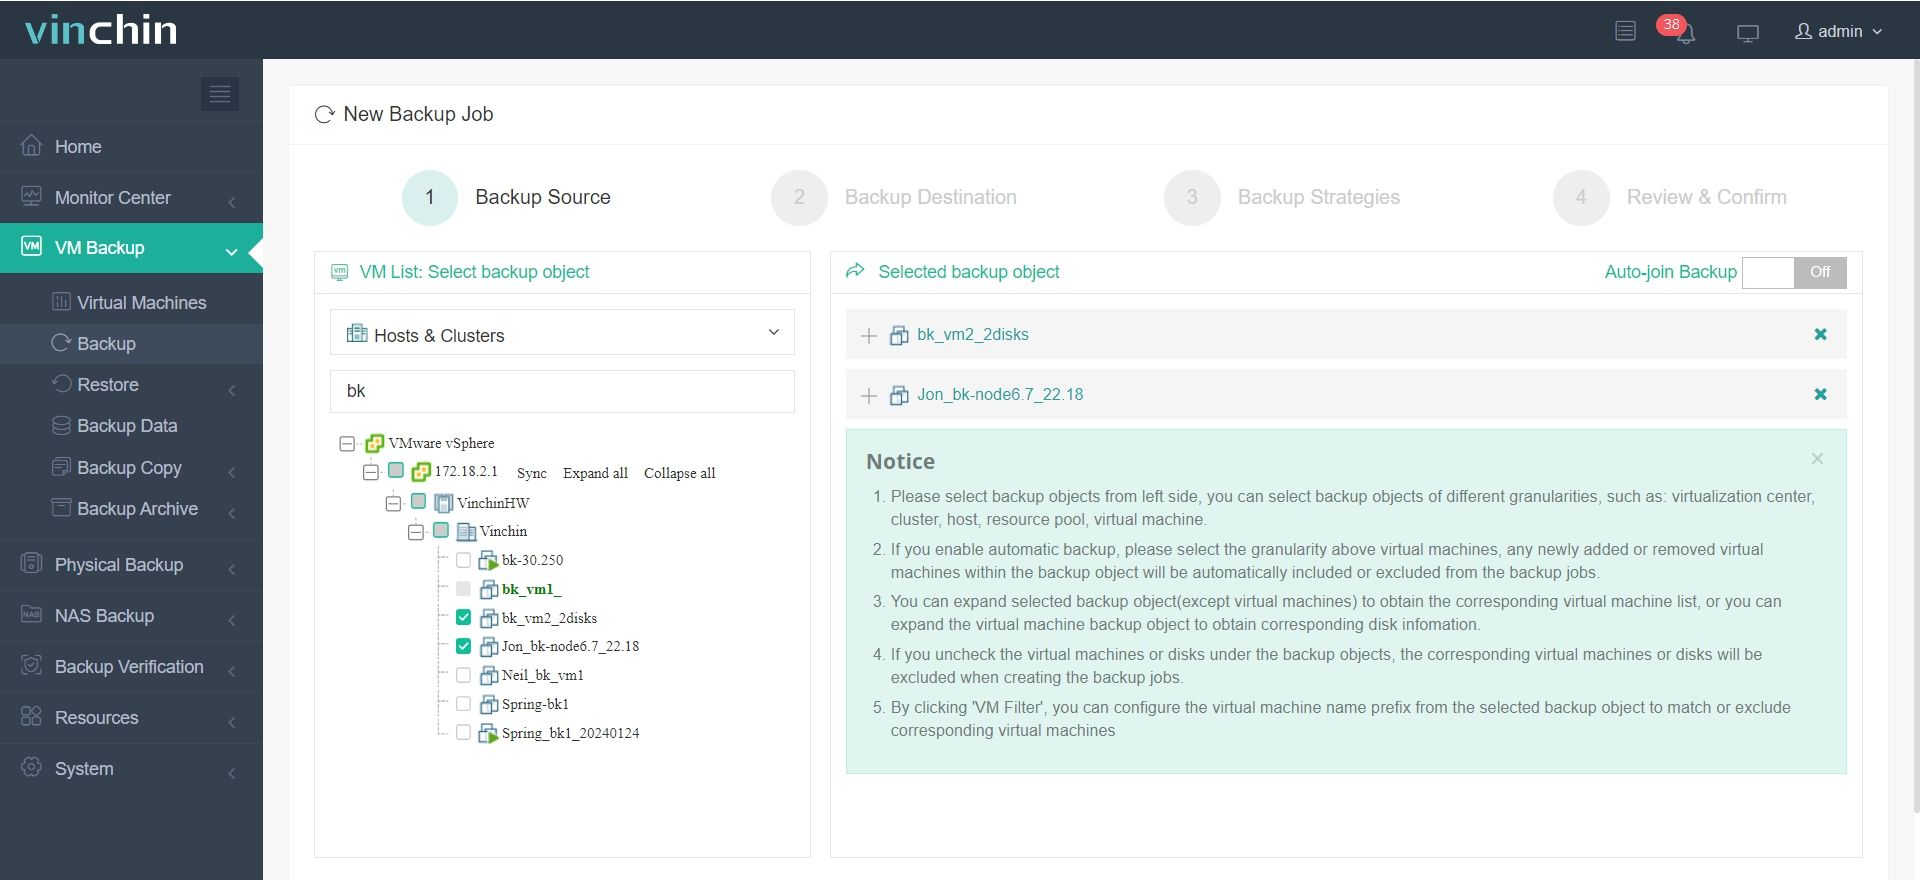
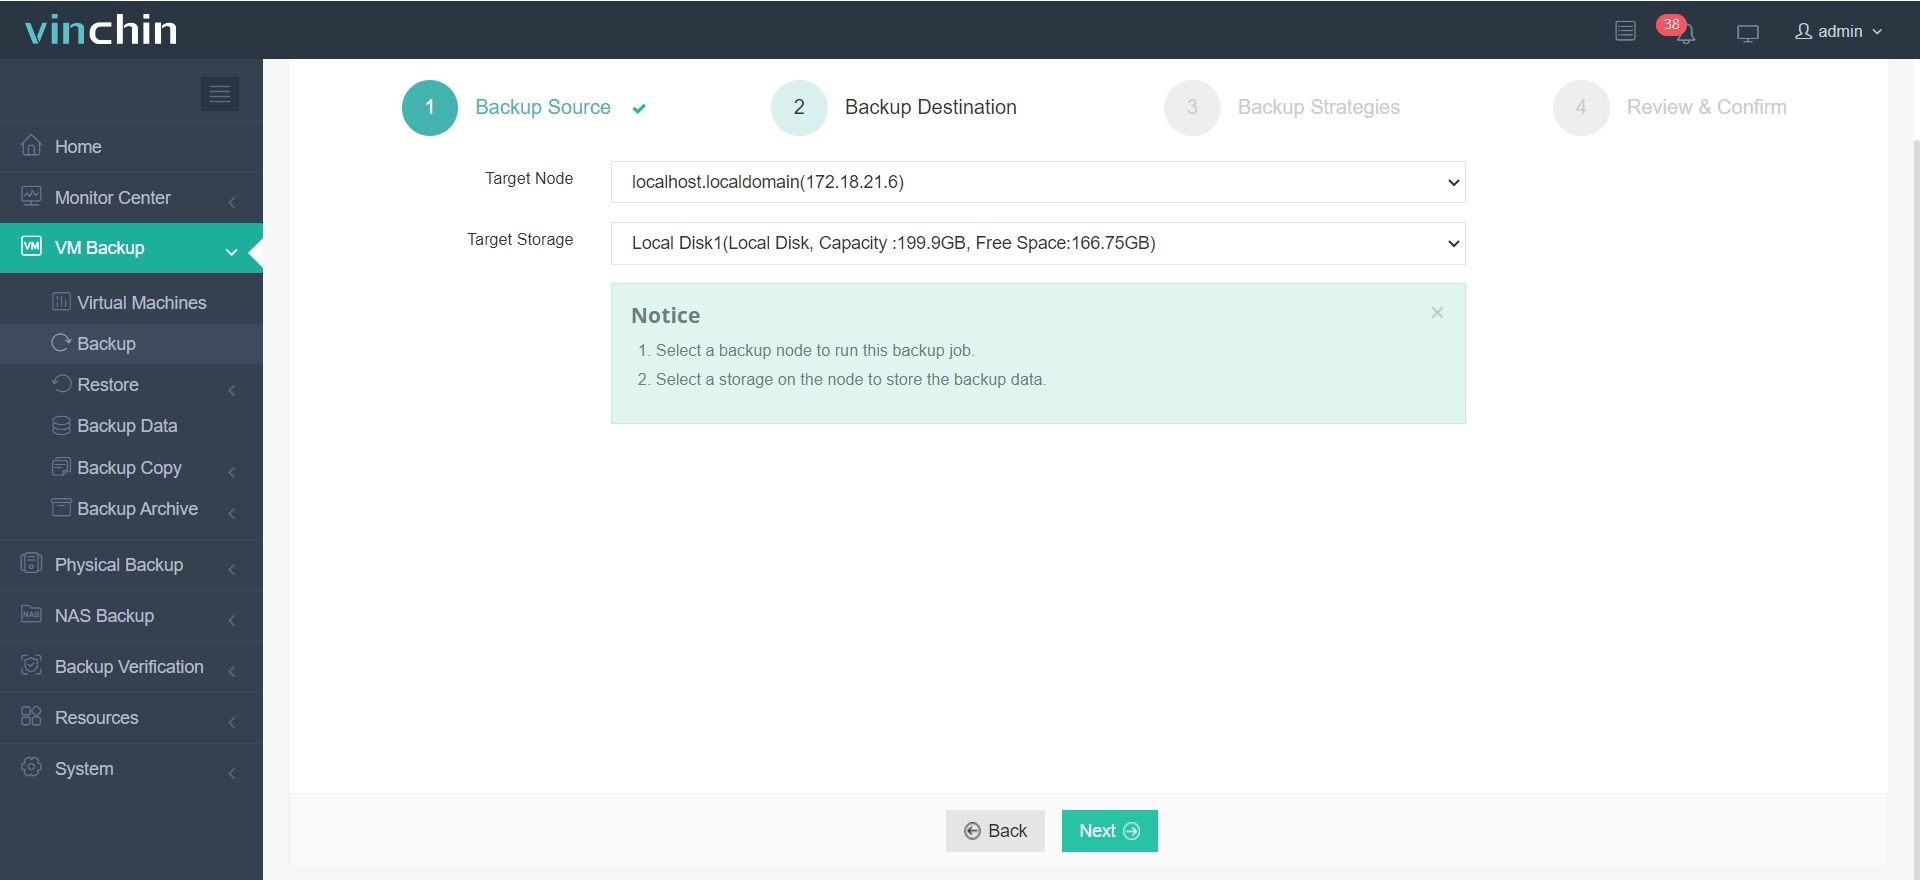
2.Then select backup destination
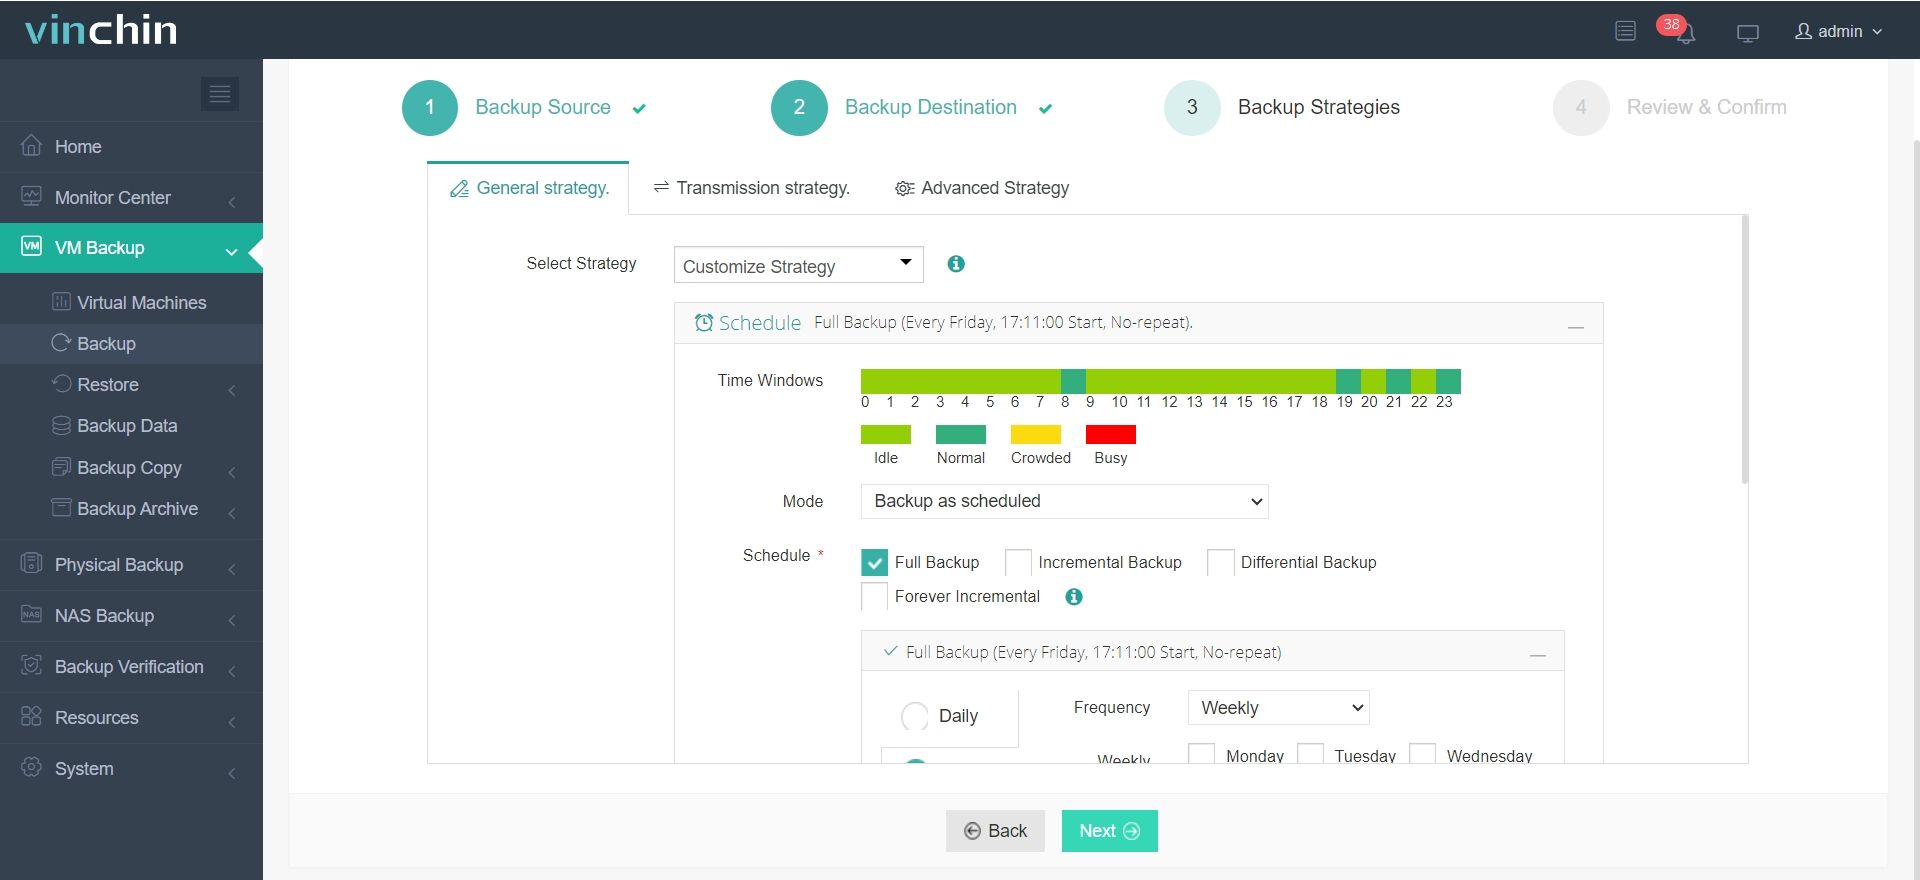
3.Select strategies
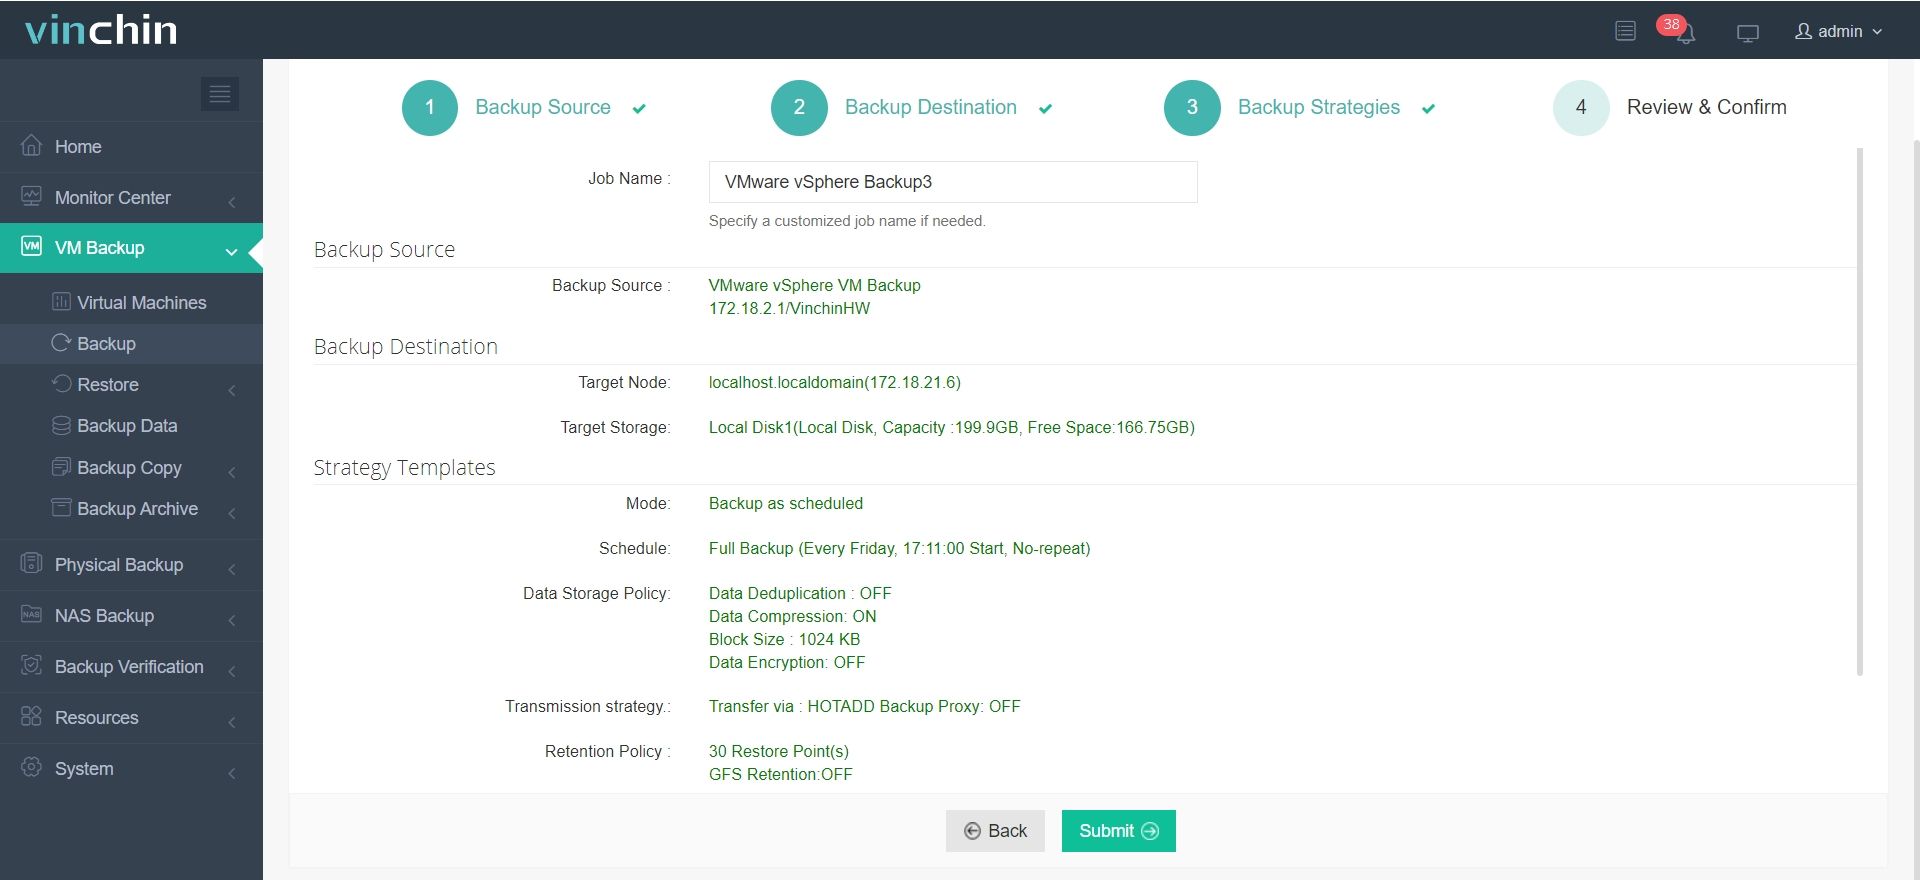
4.Finally submit the job
Vinchin offers a free trial period of up to 60 days, giving users plenty of time to experience its features in a real-world environment. If you need more information, please contact Vinchin directly or get in touch with one of our local partners. This will allow you to get a deeper understanding of the product to ensure your needs are met.
VMware template FAQs
Q1: What is the difference between a template and a snapshot?
A1: A template is a static snapshot of a virtual machine that contains the complete operating system and application configuration. Snapshots, on the other hand, are simply a stateful snapshot of a VM that is used to restore the VM to a previous state at a specific point in time.
Q2: How do you secure VMware templates?
A2: To ensure the security of VMware templates, it is recommended that the templates be regularly updated to include the latest security patches and best practice configurations. And take appropriate security measures to restrict access and modifications to the templates.
Conclusion
Manually managing multiple virtual machines in a virtualized environment is time-consuming and error-prone. VMware templates offer a solution by providing preconfigured images for fast, consistent deployment. This guide explores the creation of templates and best practices, integrating custom specifications for efficient deployment. It recommends using Vinchin Backup & Recovery for robust virtual machine backups.


