You will learn how to backup and restore XenServer VM with Vinchin Backup & Recovery in 6 steps here. Vinchin supports Citrix Hypervisor 8.2, 8.1, 8.0 on both Windows server core and Windows server with desktop experience. The supported XenServer virtual infrastructure deployment can be standalone server and failover cluster.
First, let’s open a browser and log in Vinchin Backup server web console. Go to VM Backup > Backup page.
Step 1. Select Backup Source
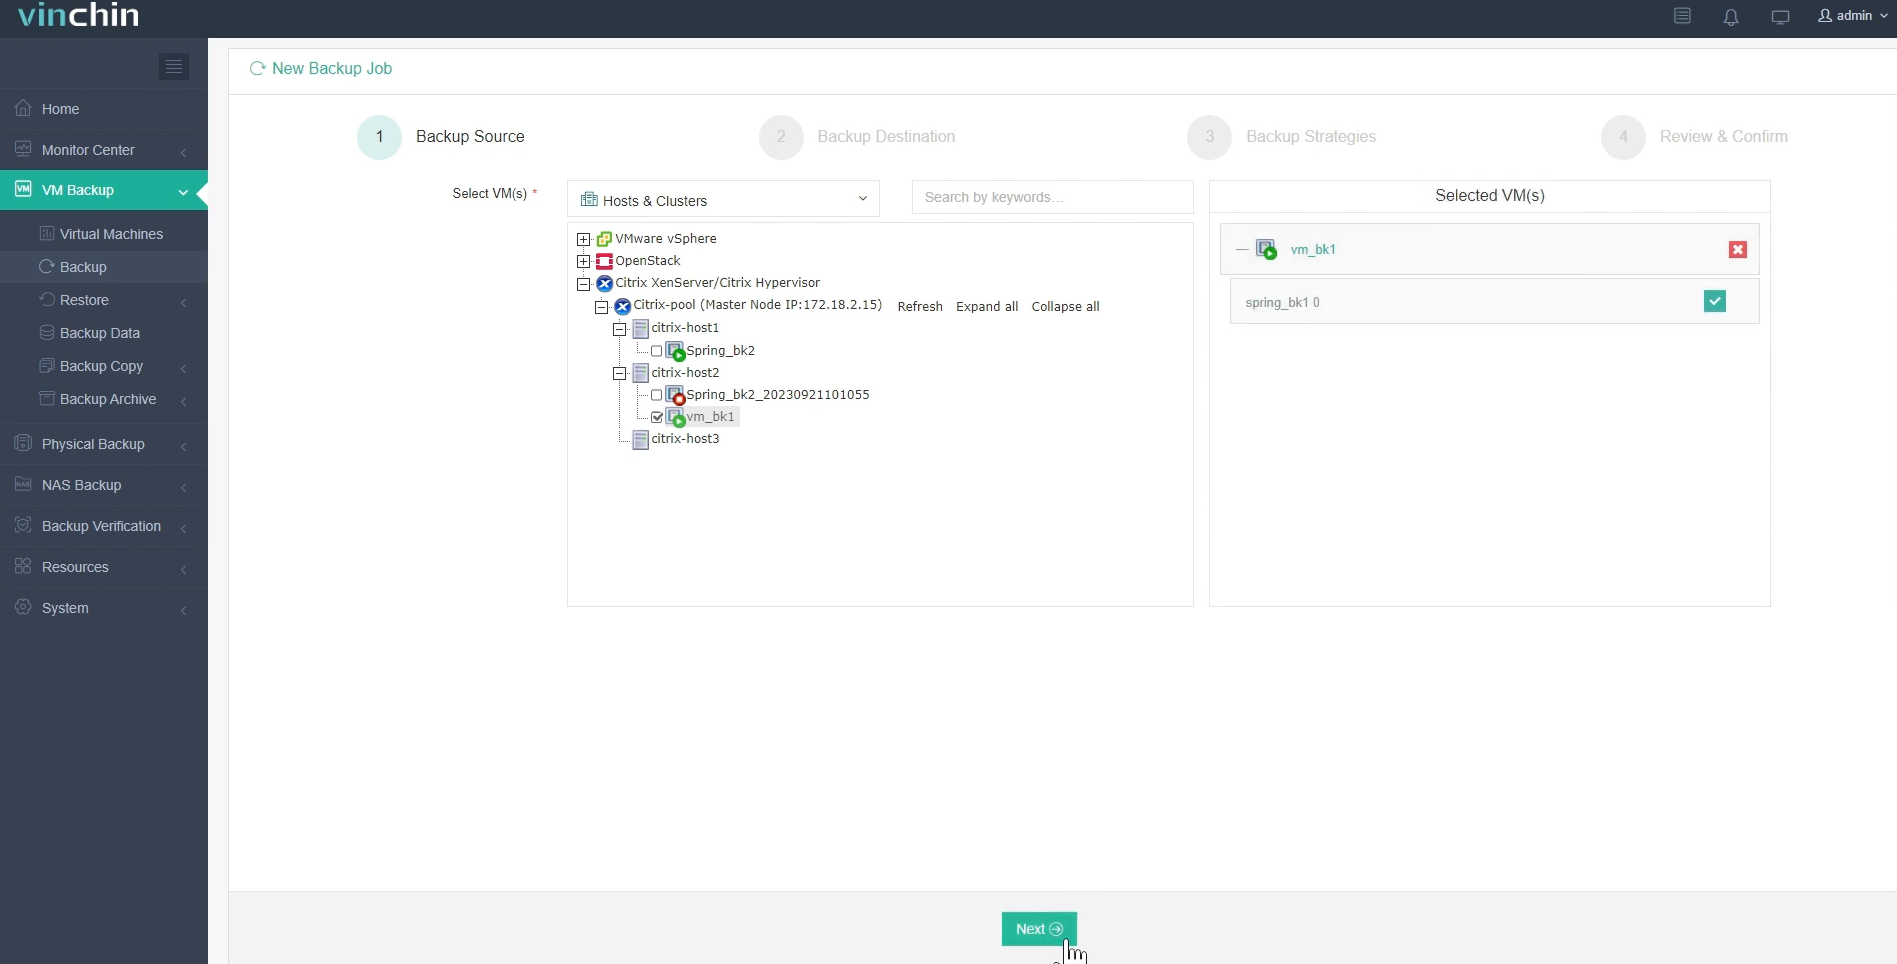
Here you can click a XenServer host and select the VM to backup. For multiple VMs on the host, you can select a group of VMs to backup to add them to the list on the right. After adding the VMs which you want to backup, click Next.
Step 2. Select Backup Destination
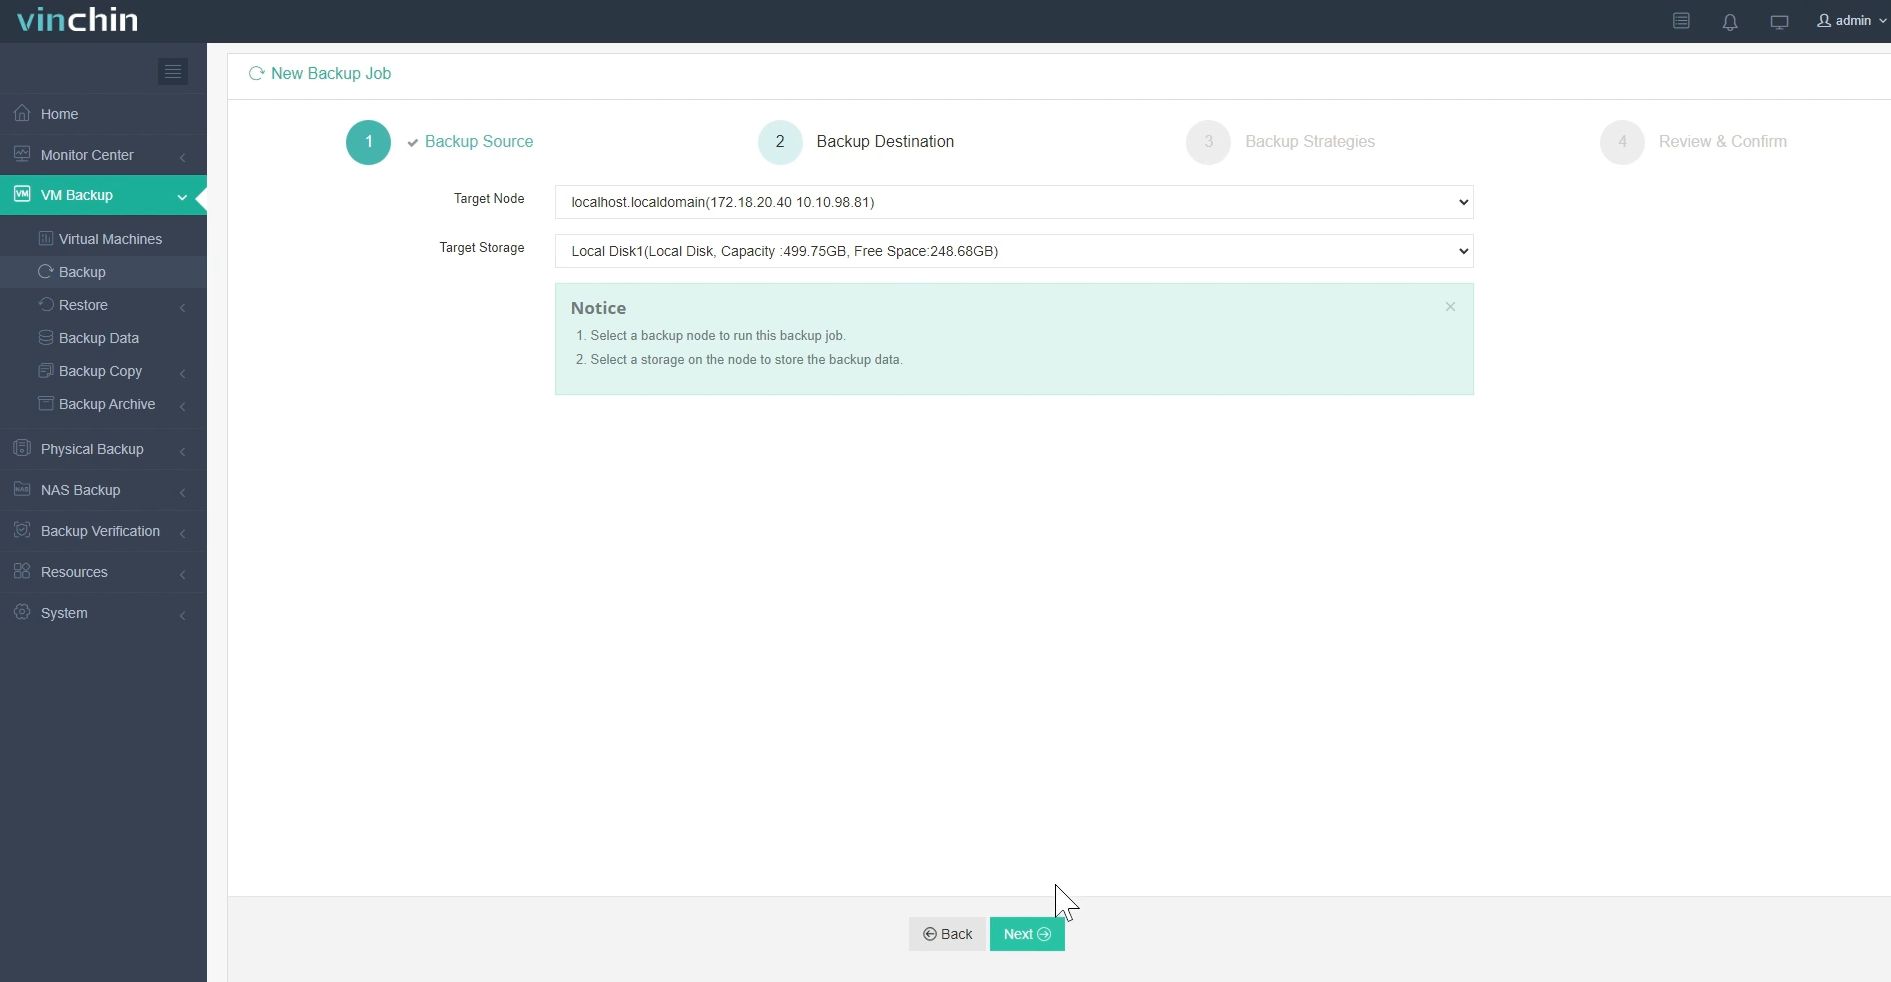
Select the Target Node and then select the Target Storage for the VM backup. Click Next.
Step 3. Select Backup Strategies
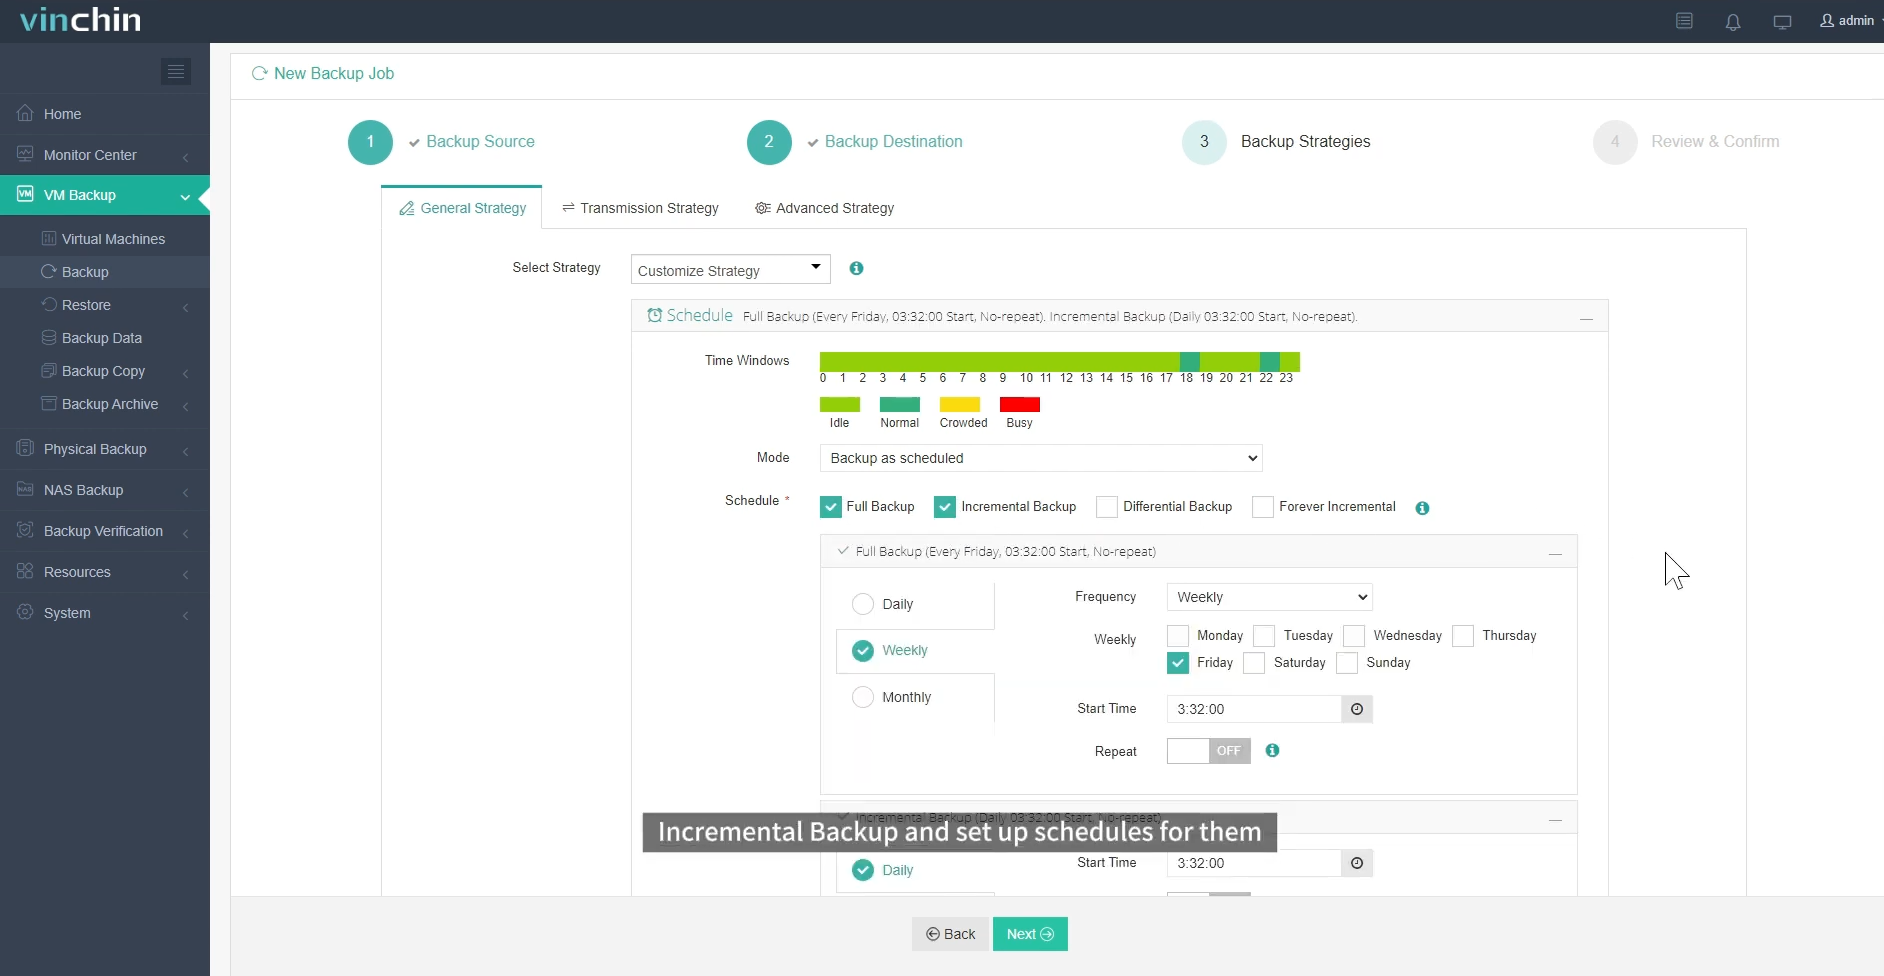
In Schedule, you can choose Backup as scheduled or Once-off backup. Backup as scheduled will automatically backup the selected VMs at a specific time, and Once-off backup will backup the VMs only once.
For scheduled backups, you can choose a daily, weekly or monthly schedule. You can also choose incremental or differential combinations of backups. And data storage policies provide deduplication and compression.
Data transfer security is ensured by enabling encryption in the transfer policy. Retention policies allow retention by recovery point or number of days.
After configuring all the backup strategies, click Next.
Step 4. Give a name to the job, review the details of the job, and submit it.
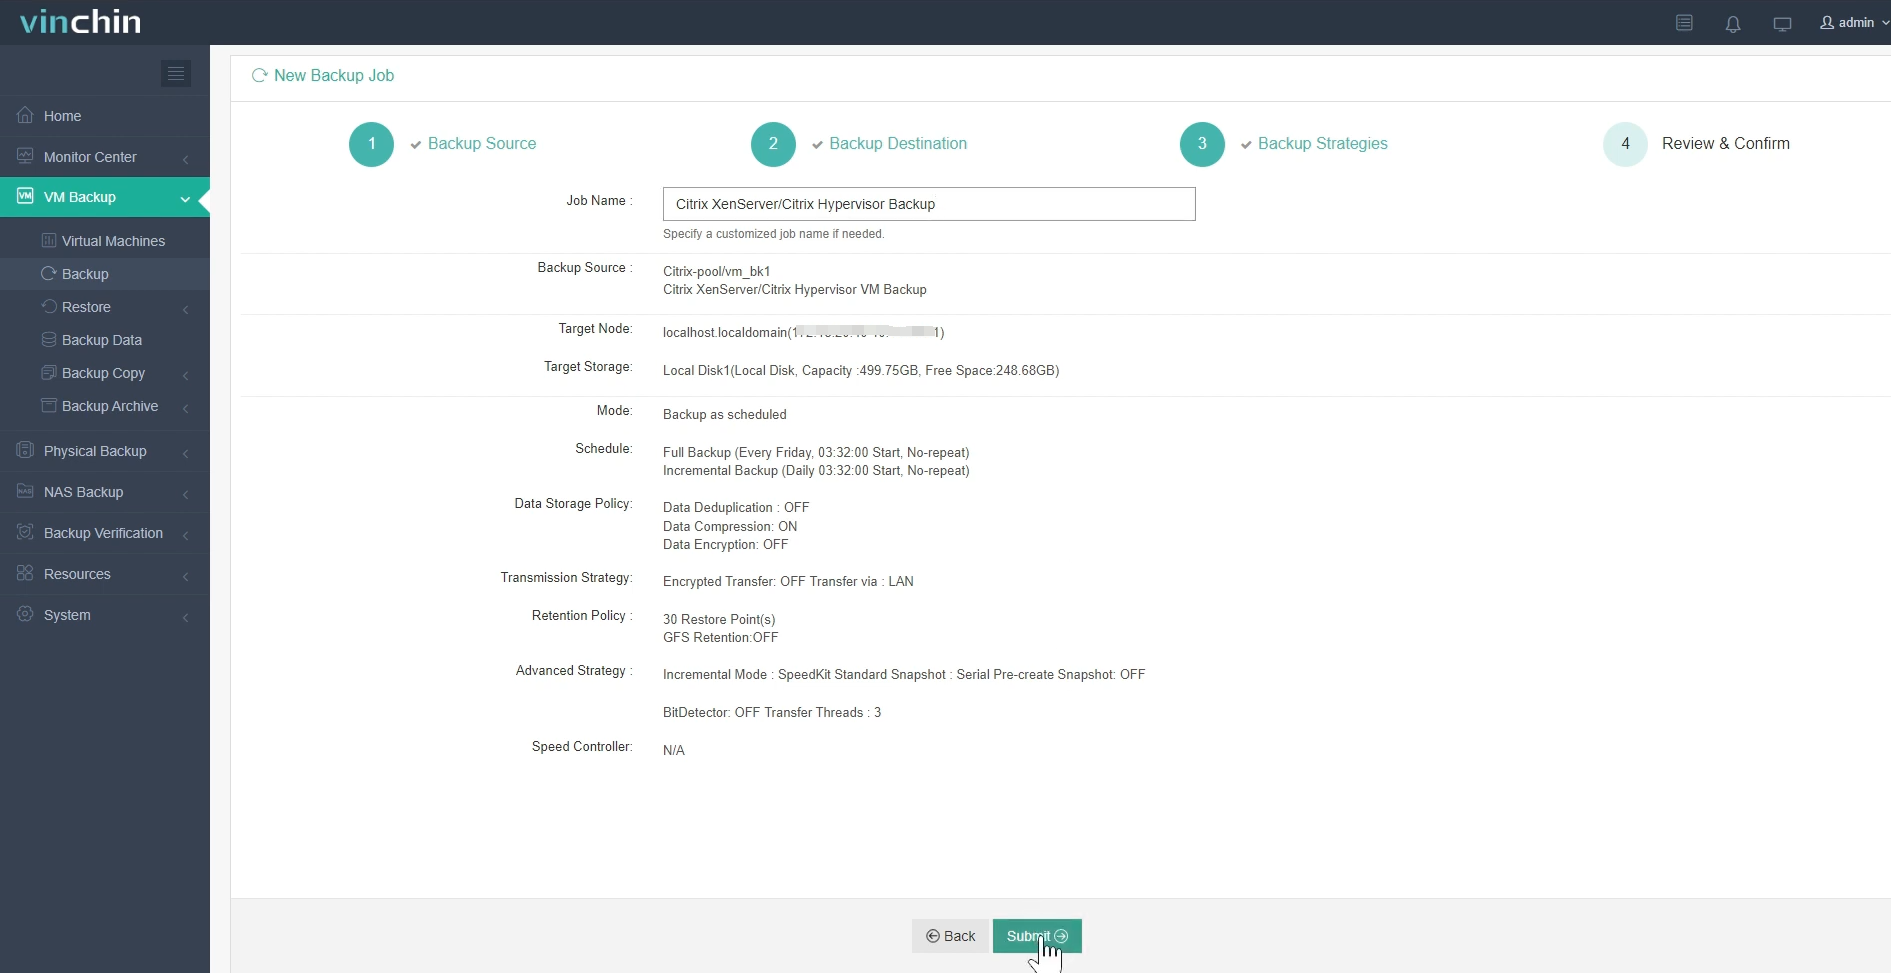
You will be redirected to the Jobs page of Monitor Center. The created backup job will be listed here and you can start job manually, then click job name to monitor the job in real time.
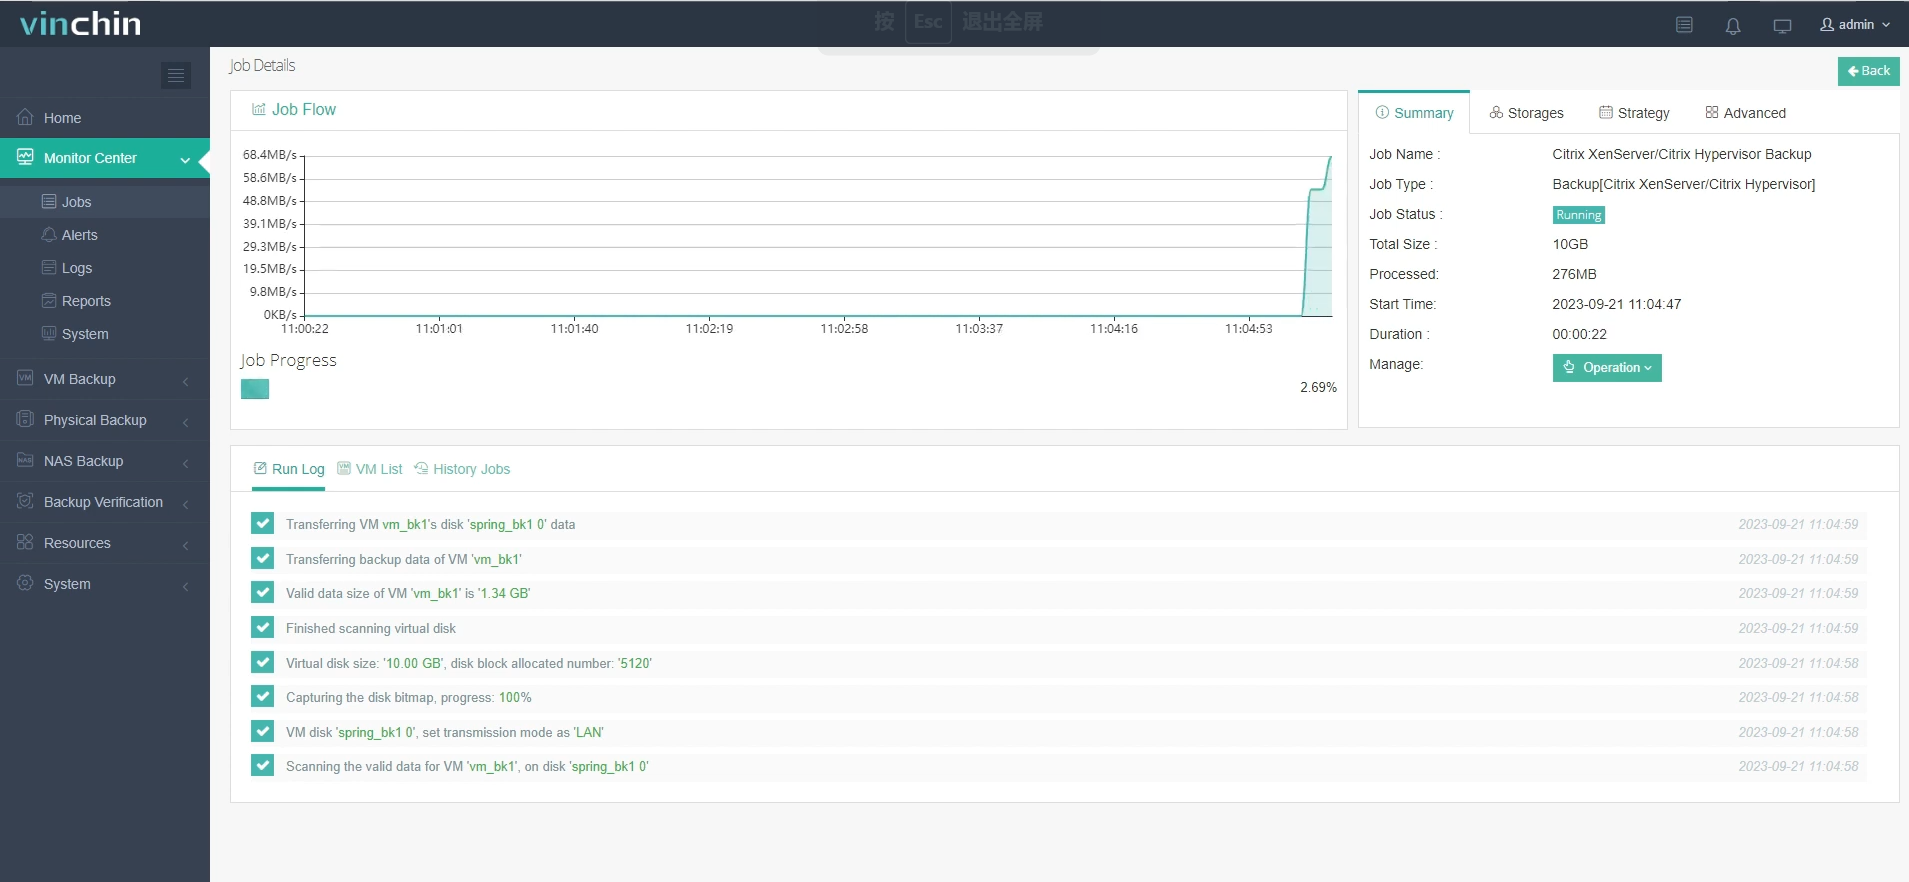
Here, you can see the XenServer VM has been successfully backed up.
VM restore is also easy. Now, let’s go to VM Backup > Restore page
Step 1. Select Restore Point
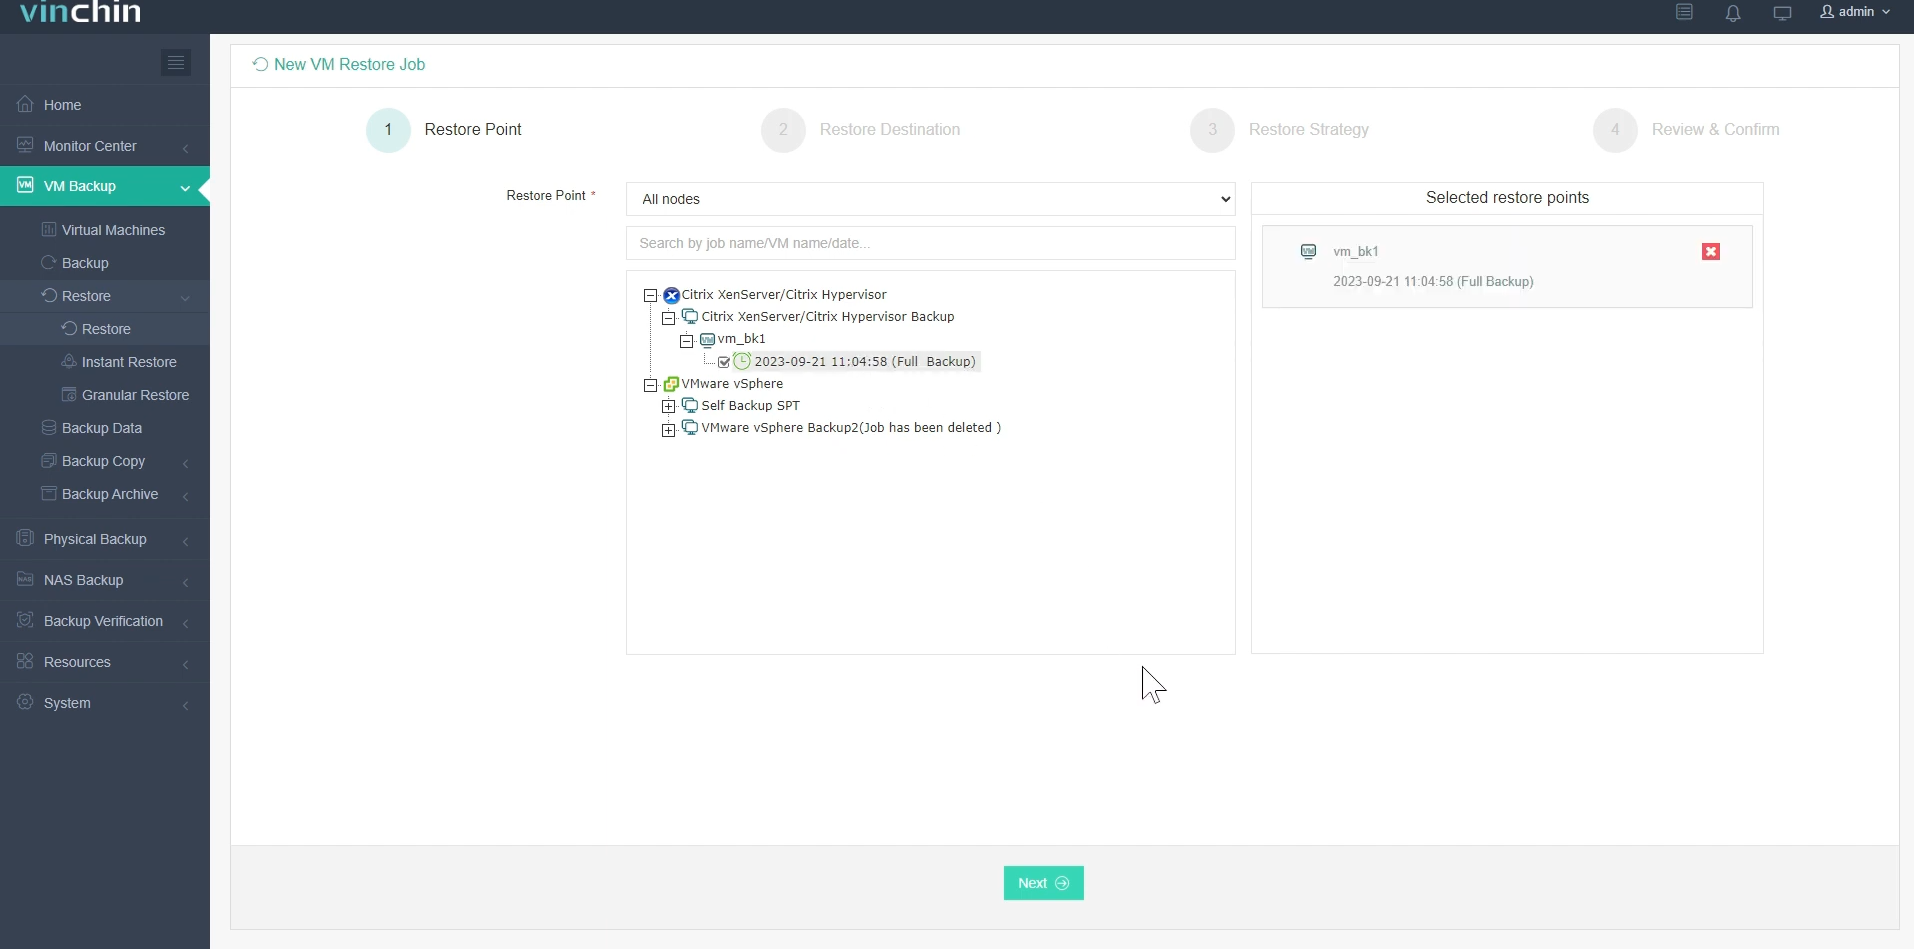
In the list, you can see all the available restore points. Just select the XenServer restore point you want to restore, input a name for the job, and click OK.
Step 2. Select Restore Destination
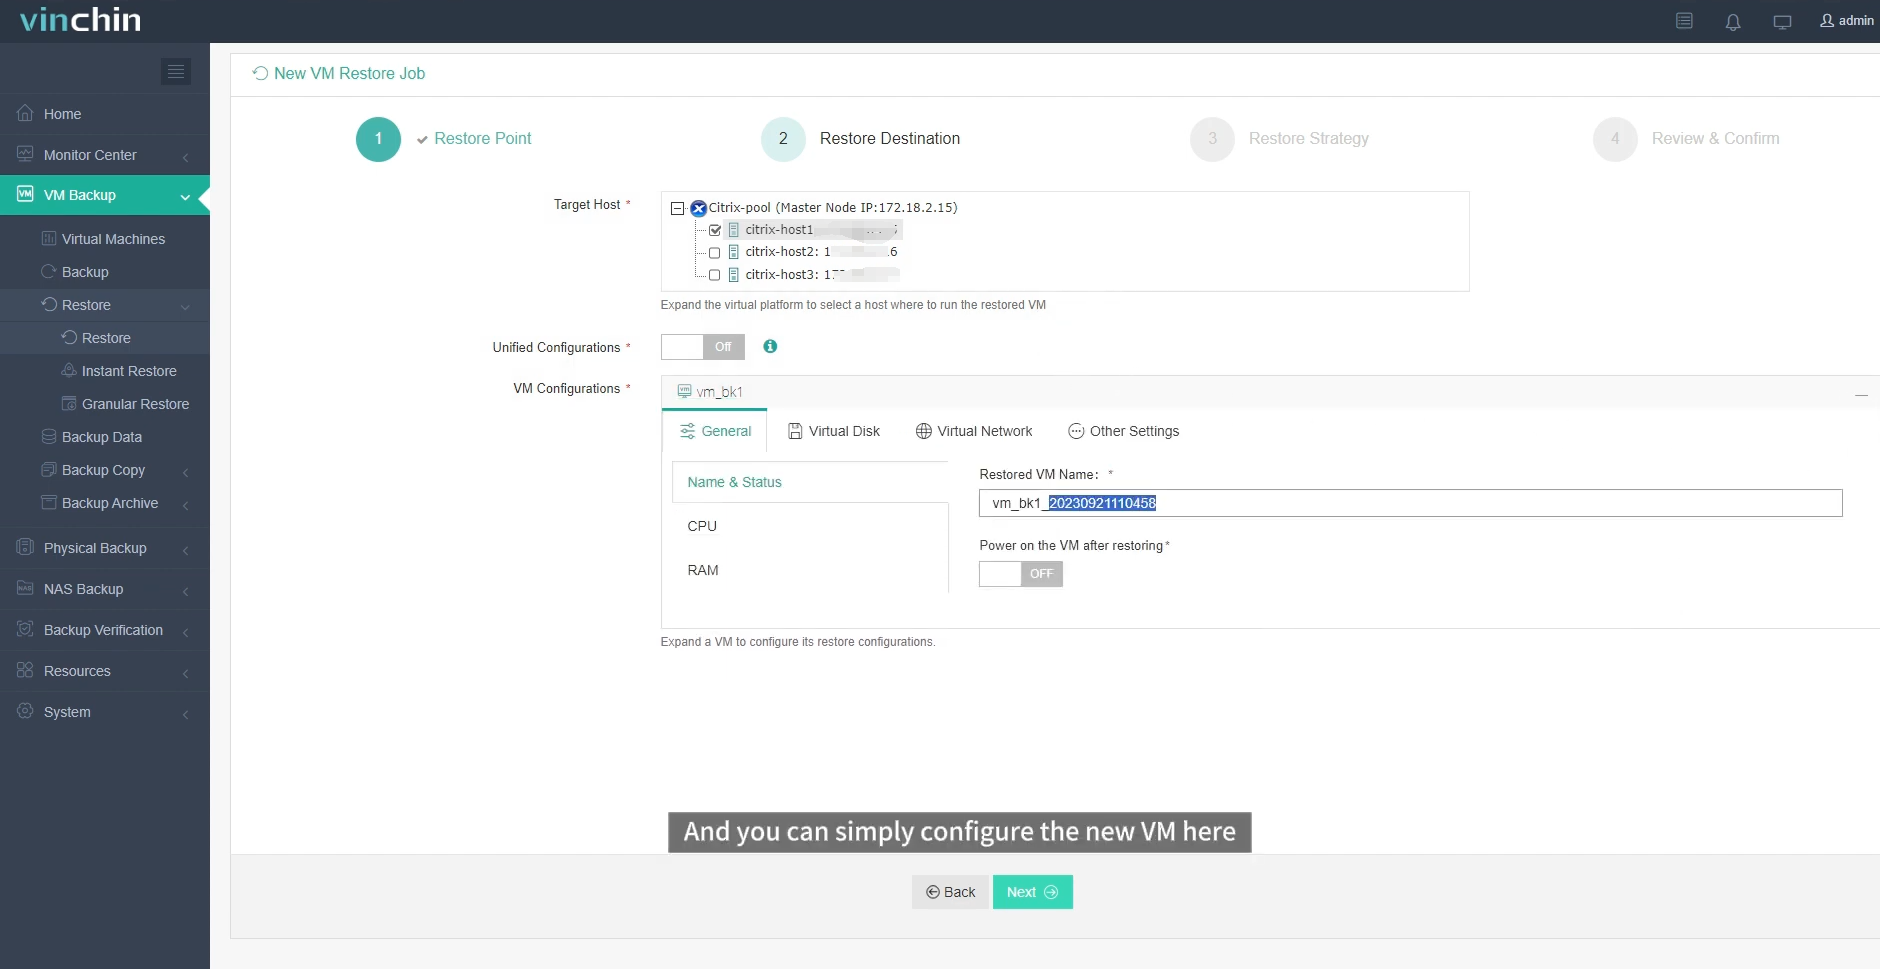
Select the Target Node and then select the Target Storage for the VM restore. Click Next.
Step 3. Select Restore Strategies
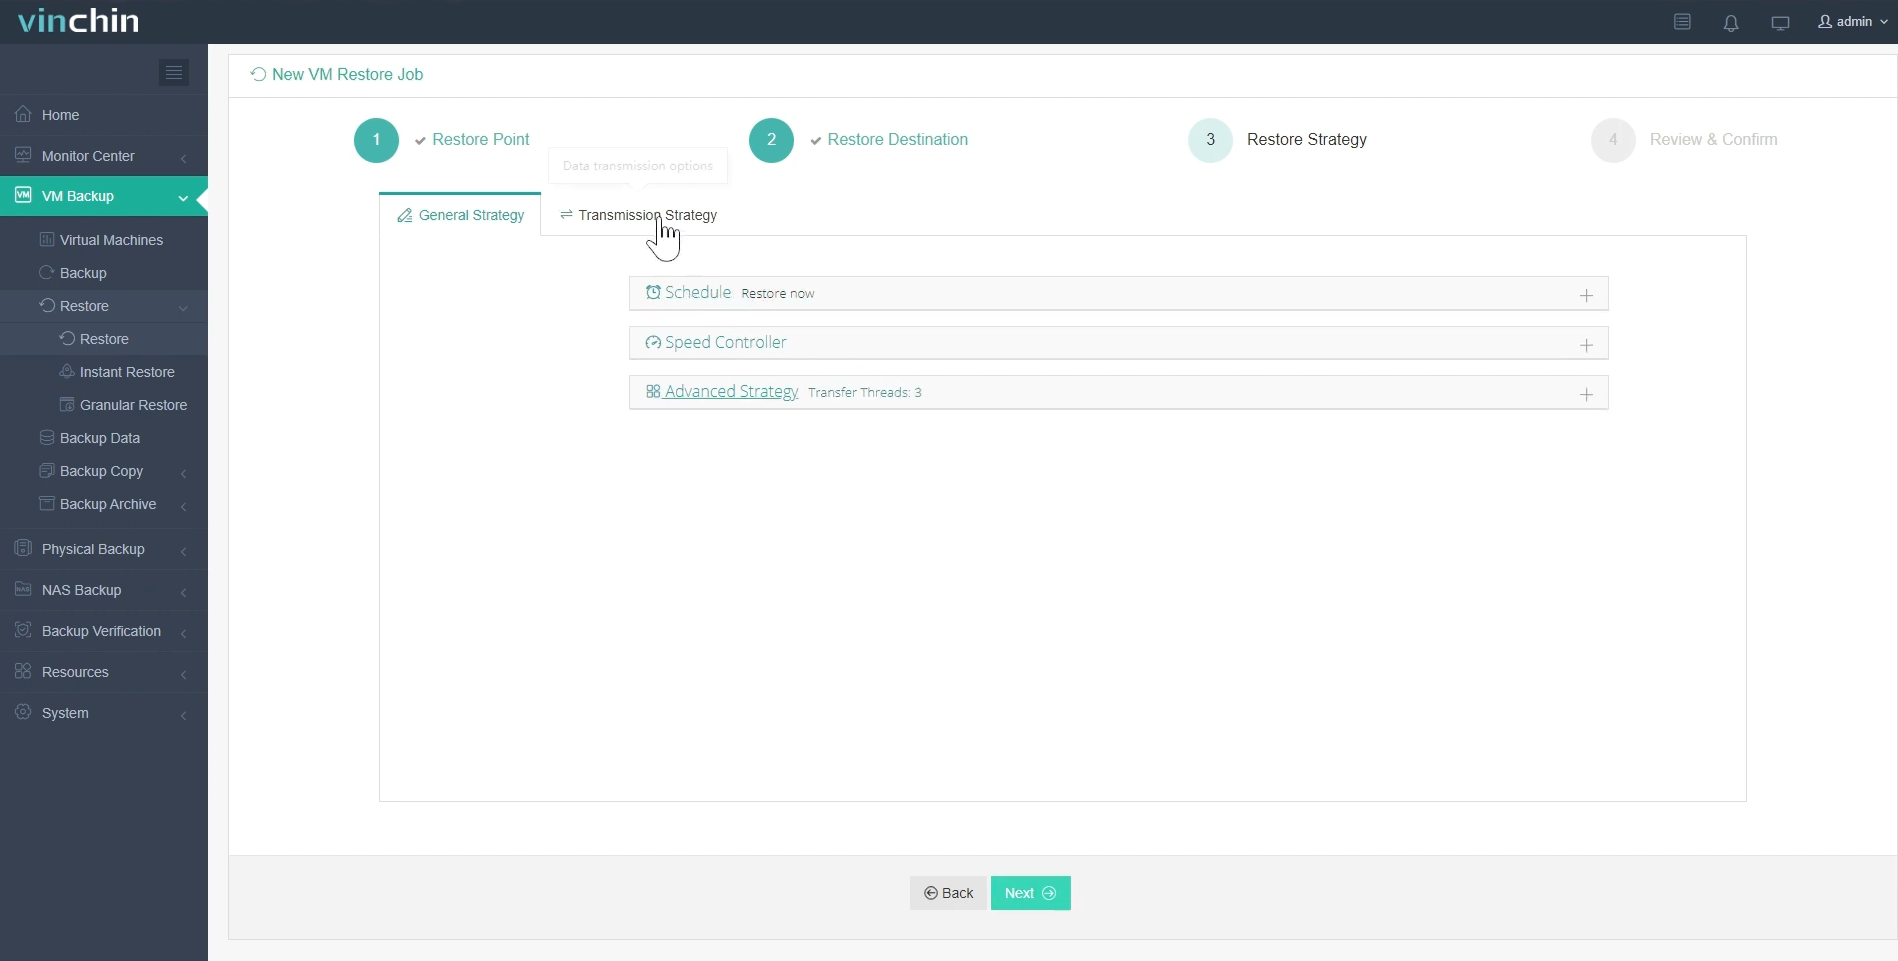
In Schedule, you can choose Restore as scheduled or Once-off Restore. Restore as scheduled will automatically restore the VMs at a specific time, and Once-off Restore will restore the VMs only once.
After configuring all recovery policies, click Next.
Name the job, view the details, and then submit.
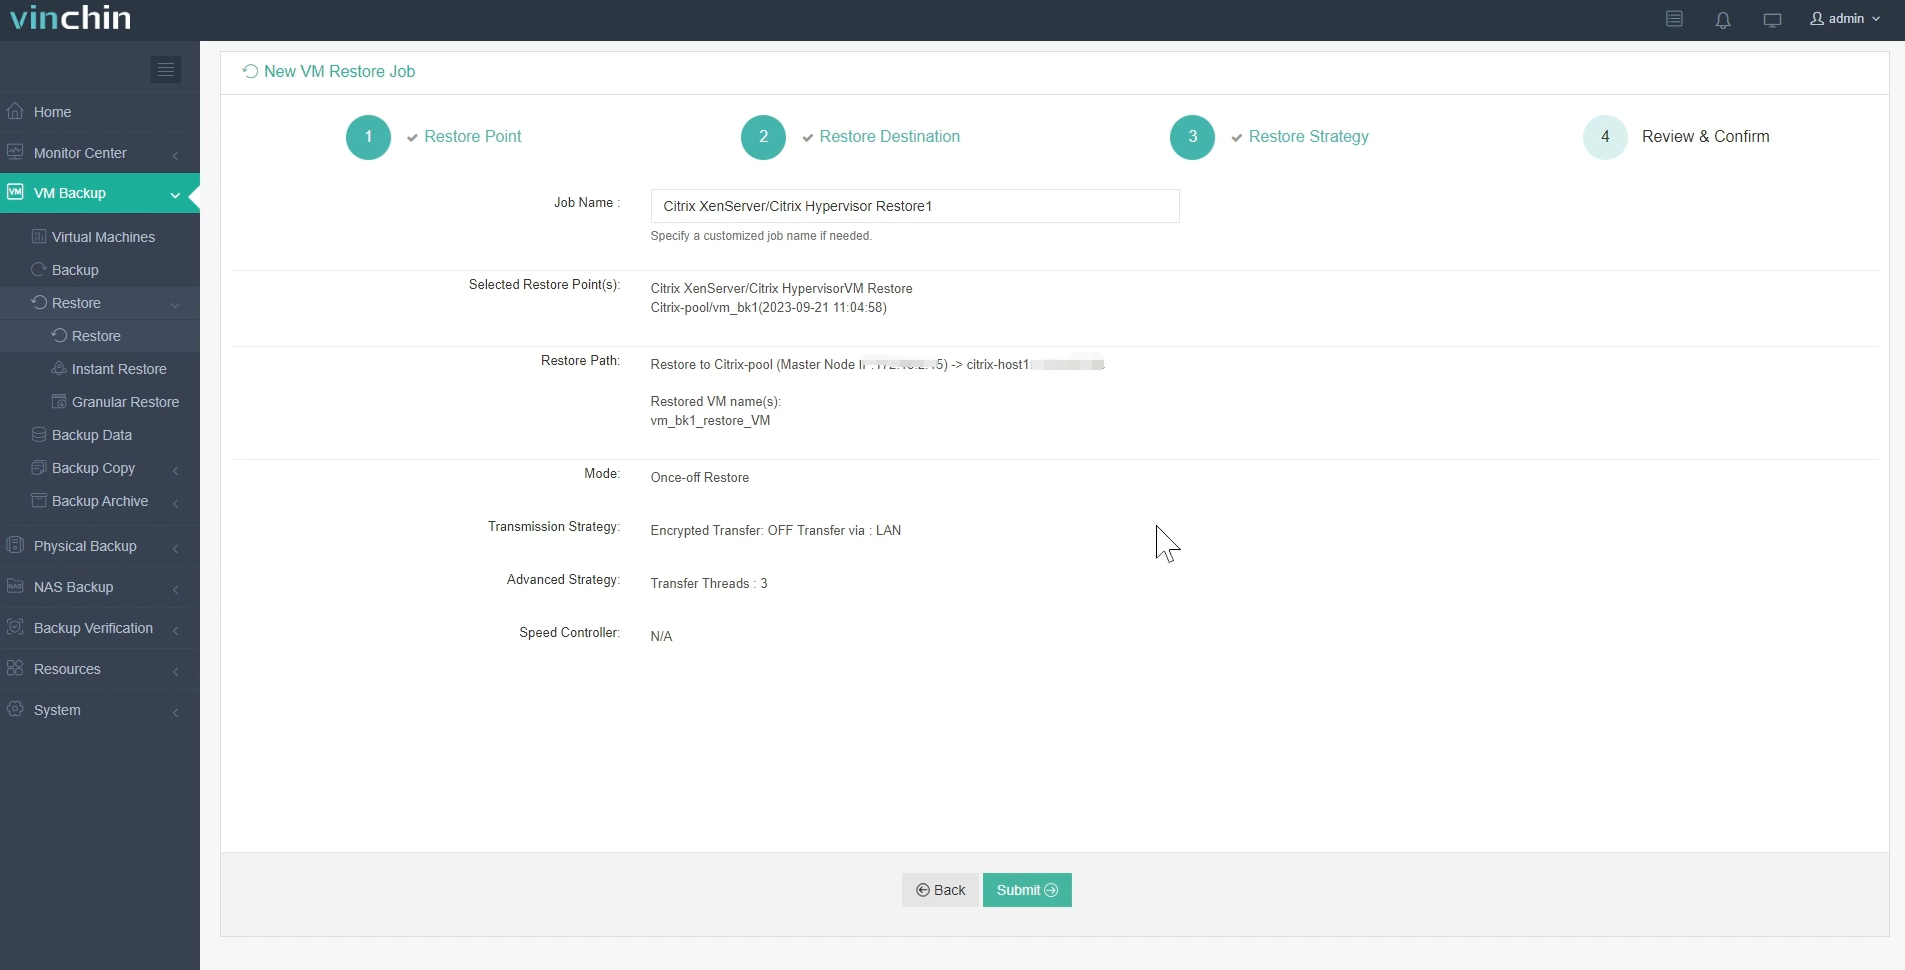
Once the job is created, you’ll be redirected to the job list page and the restore job will run now.
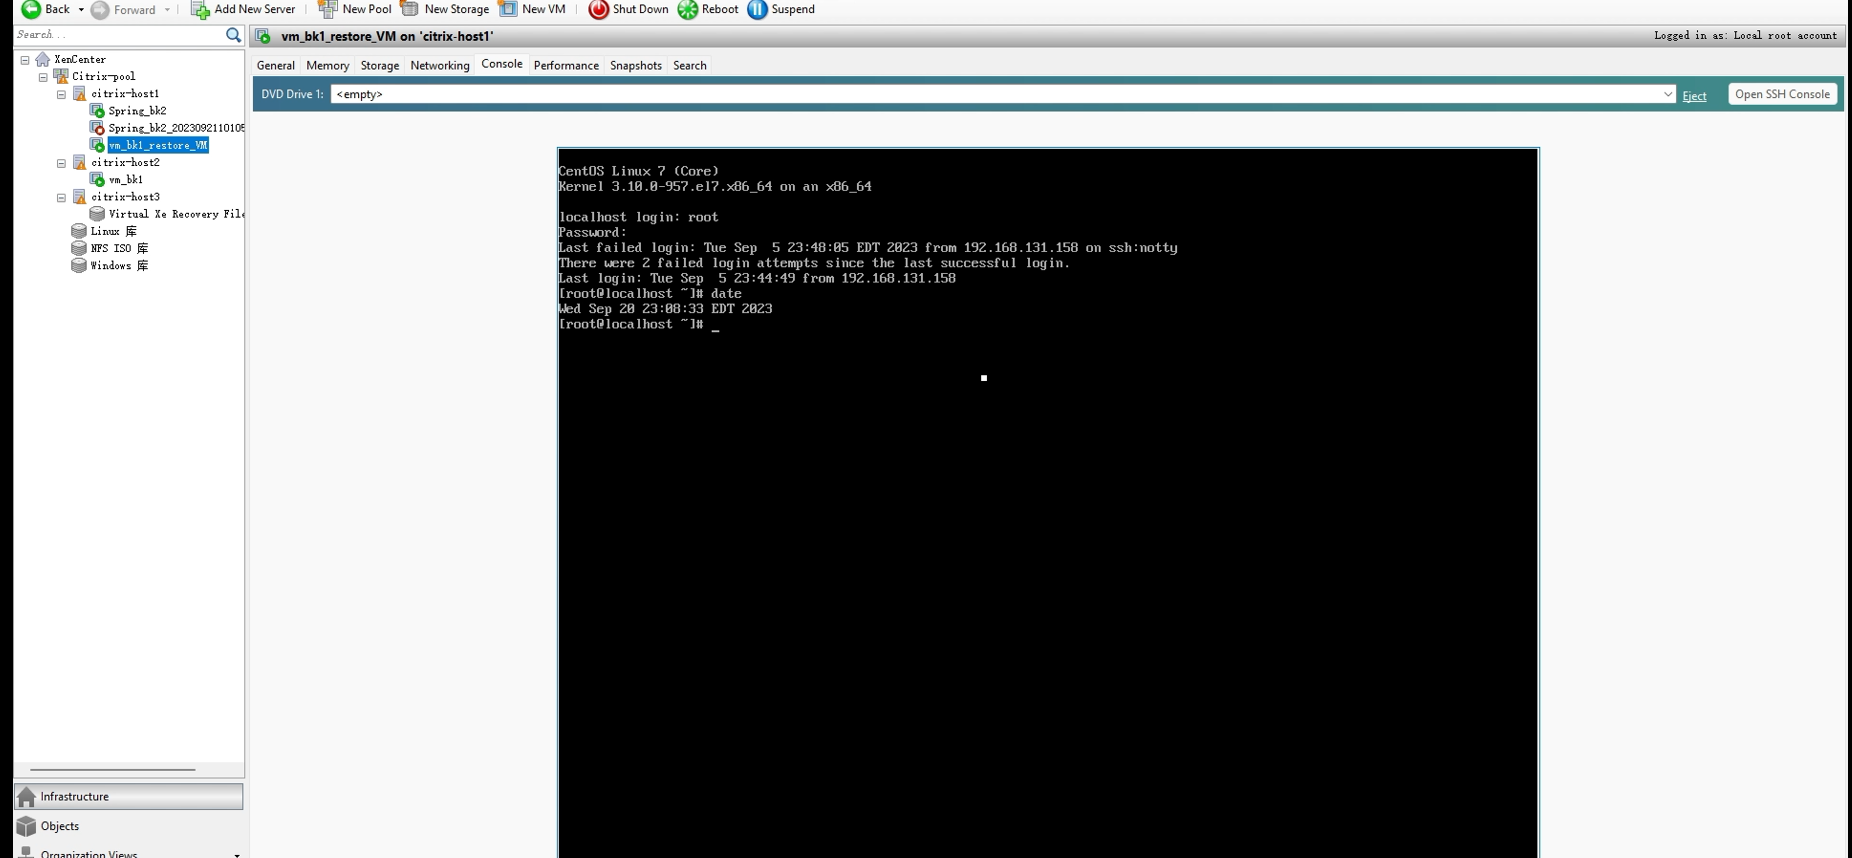
Here, you can see the XenServer VM has been successfully restored.
Vinchin offers a free 60-day trial for users to experience the functionality in a real-world environment. For more information, please contact Vinchin directly or contact our local partners.
Share on:


