-
What is SQL Server Database Restoring?
-
Method 1: Restore from Full Backup
-
Method 2: Restore Using Differential Backup
-
Method 3: Restore from Transaction Log Backup
-
Method 4: Restore Using SQL Server Management Studio (SSMS)
-
Protecting Your Databases with Vinchin Backup & Recovery
-
SQL Server Database Restoring FAQs
-
Conclusion
Restoring a SQL Server database is one of the most important skills for any operations administrator. Whether you face data loss from hardware failure, need to recover after ransomware attacks, or must meet compliance requirements during audits, knowing how to perform sql server database restoring quickly can save your business. This guide covers practical methods for restoring databases in SQL Server 2016 and later versions. You’ll learn not only how to restore but also why restores sometimes fail—and how to avoid common pitfalls.
What is SQL Server Database Restoring?
SQL Server database restoring means copying data from a backup file back into a SQL Server instance. This process helps recover lost or corrupted data, undo unwanted changes, or move databases between servers. The type of backup you use—full, differential, or transaction log—depends on your recovery goals.
Before you start any restore operation, it’s vital to understand your database's recovery model: Full, Bulk-Logged, or Simple. The recovery model controls what types of backups you can make and how much data you can recover after a failure. For example:
Full Recovery Model lets you restore full backups plus transaction logs for point-in-time recovery.
Simple Recovery Model allows only full or differential restores; transaction logs are not kept after checkpoints.
Choosing the right model affects both backup strategy and restore options.
Testing restores regularly in a non-production environment ensures that your backups work when disaster strikes. After all—what good is a backup if it cannot be restored?
Method 1: Restore from Full Backup
Restoring from a full backup is often the first step in sql server database restoring. A full backup contains everything in your database at that moment—including tables, indexes, stored procedures, and user data.
Before starting a restore in production environments:
1. Always validate your backup file using RESTORE VERIFYONLY to check its integrity without actually restoring data.
2. Consider using WITH CHECKSUM during both backup creation and restoration for extra protection against corruption.
Here’s how you might restore using T-SQL:
RESTORE DATABASE [YourDatabase]
FROM DISK = N'C:\Backups\YourDatabase.bak'
WITH REPLACE,
     RECOVERY,
     STATS = 10,
     CHECKSUM;
Let’s break down these options:
WITH REPLACE overwrites an existing database with the same name—be careful as this deletes current contents!
WITH RECOVERY brings the database online after restoration so users can connect again.
STATS = 10 shows progress every 10 percent completed.
CHECKSUM checks page-level integrity during restore.
If you need to change where files are placed (for example when moving between servers), use MOVE like this:
RESTORE DATABASE [YourDatabase]
FROM DISK = N'C:\Backups\YourDatabase.bak'
WITH MOVE 'YourDataFile' TO 'D:\SQLData\YourDatabase.mdf',
     MOVE 'YourLogFile' TO 'E:\SQLLogs\YourDatabase_log.ldf',
     REPLACE,
     RECOVERY;
After completion:
1. Confirm that users can access the restored database.
2. Run DBCC CHECKDB([YourDatabase]) to verify logical consistency inside the restored files.
For added safety in scripts or automated jobs:
BEGIN TRY
    RESTORE DATABASE [YourDatabase] FROM DISK = N'C:\Backups\YourDatabase.bak' WITH REPLACE;
    PRINT 'Restore completed successfully.';
END TRY
BEGIN CATCH
    PRINT ERROR_MESSAGE();
END CATCH;
This way errors are caught cleanly if something goes wrong.
Method 2: Restore Using Differential Backup
Differential backups store all changes made since the last full backup—not just changes since the previous differential backup! This makes them faster than doing frequent full backups but still quick to restore compared to applying many transaction logs.
To use differential backups effectively:
1. First restore your latest full backup using NORECOVERY. This keeps your database offline so more changes can be applied next.
2. Then apply your chosen differential backup with RECOVERY.
Example steps:
-- Step 1: Restore latest full backup (keep DB offline)
RESTORE DATABASE [YourDatabase]
FROM DISK = N'C:\Backups\YourDatabase_Full.bak'
WITH NORECOVERY,
     REPLACE;

-- Step 2: Apply most recent differential (bring DB online)
RESTORE DATABASE [YourDatabase]
FROM DISK = N'C:\Backups\YourDatabase_Diff.bak'
WITH RECOVERY,
     STATS = 10;
If there are several differentials available—for example from nightly jobs—you should always pick only one: the most recent one taken after your last full backup.
To identify which files are which before starting:
RESTORE HEADERONLY FROM DISK = N'C:\Backups\';
This command lists metadata about each file so you don’t accidentally apply an old diff!
Method 3: Restore from Transaction Log Backup
Transaction log backups capture every change made since either the last log backup or last differential/full—depending on sequence used—and allow point-in-time recovery down to specific minutes or even seconds.
The process requires careful order:
1. Start by restoring your latest full (and optionally latest diff) with NORECOVERY.
2. Next apply each log file sequentially—with NORECOVERY except on final log where you use RECOVERY.
Example workflow:
-- Step 1: Full backup first
RESTORE DATABASE [YourDatabase]
FROM DISK = N'C:\Backups\Full.bak'
WITH NORECOVERY,
     REPLACE;

-- Step 2 (optional): Latest diff next
RESTORE DATABASE [YourDatabase]
FROM DISK = N'C:\Backups\Diff.bak'
WITH NORECOVERY;

-- Step 3: Each log file in order!
RESTORE LOG [YourDatabase]
FROM DISK = N'C:\Backups\Log1.trn'
WITH NORECOVERY;

RESTORE LOG [YourDatabase]
FROM DISK = N'C:\Backups\Log2.trn'
WITH NORECOVERY;

-- Final step: Last log brings DB online
RESTORE LOG [YourDatabase]
FROM DISK = N'C:\Backups\Log3.trn'
WITH RECOVERY,
     STATS=10;
Why does order matter? Each log has its own Log Sequence Number (LSN). Skipping even one breaks continuity; SQL Server will refuse further restores until fixed.
Want point-in-time recovery? Use STOPAT like this:
RESTORE LOG [YourDatabase]
FROM DISK=N'C:\Backups\Log3.trn'
WITH STOPAT='2024-06-01T14:30:00', RECOVERY;
This stops replaying transactions at exactly that time—a lifesaver if someone dropped tables by mistake!
Always confirm successful completion by querying system views such as msdb.dbo.restorehistory.
Method 4: Restore Using SQL Server Management Studio (SSMS)
Not everyone likes typing commands! SSMS offers an easy graphical way for sql server database restoring tasks—even complex ones like tail-log backups before major restores.
Here’s what to do:
First open SQL Server Management Studio, then connect to your target instance using Windows Authentication or SQL Login credentials as needed.
In Object Explorer, right-click Databases, choose Restore Database... In the dialog box under Source, select Device, then click on ellipsis button beside it; browse for desired .bak, .trn, etc., files on disk network share locations supported by SQL Server service account permissions.
Confirm destination settings match intended target name under Destination field; adjust if necessary when migrating between servers/environments!
On advanced pages such as Options, consider enabling features like “Overwrite the existing database (WITH REPLACE)” if replacing live systems—or “Tail-log backup before restore” which captures uncommitted transactions prior to overwrite events ensuring zero loss up-to-last-second activity!
Before clicking OK at bottom right corner—try clicking “Script” at top left instead; this generates exact T-SQL code behind GUI actions which can be reused later for automation purposes!
SSMS displays progress bars throughout; once done it confirms success/failure status clearly onscreen so no guesswork required!
For cross-platform users who prefer alternatives like Azure Data Studio—the basic steps remain similar though interface elements may differ slightly depending on version/platform support levels present at time of writing.
Protecting Your Databases with Vinchin Backup & Recovery
For organizations seeking robust protection beyond native tools, Vinchin Backup & Recovery delivers enterprise-grade solutions tailored for mainstream platforms including SQL Server, Oracle, MySQL, MariaDB, PostgreSQL/PostgresPro and MongoDB environments alike. As an advanced professional solution designed specifically for critical workloads such as Microsoft SQL Server databases, Vinchin Backup & Recovery supports essential features including batch scheduling of multiple databases, granular any-point-in-time recovery capabilities, cloud and tape archiving integration, comprehensive ransomware protection mechanisms and flexible retention policies—all engineered to maximize uptime while minimizing risk across hybrid infrastructures.
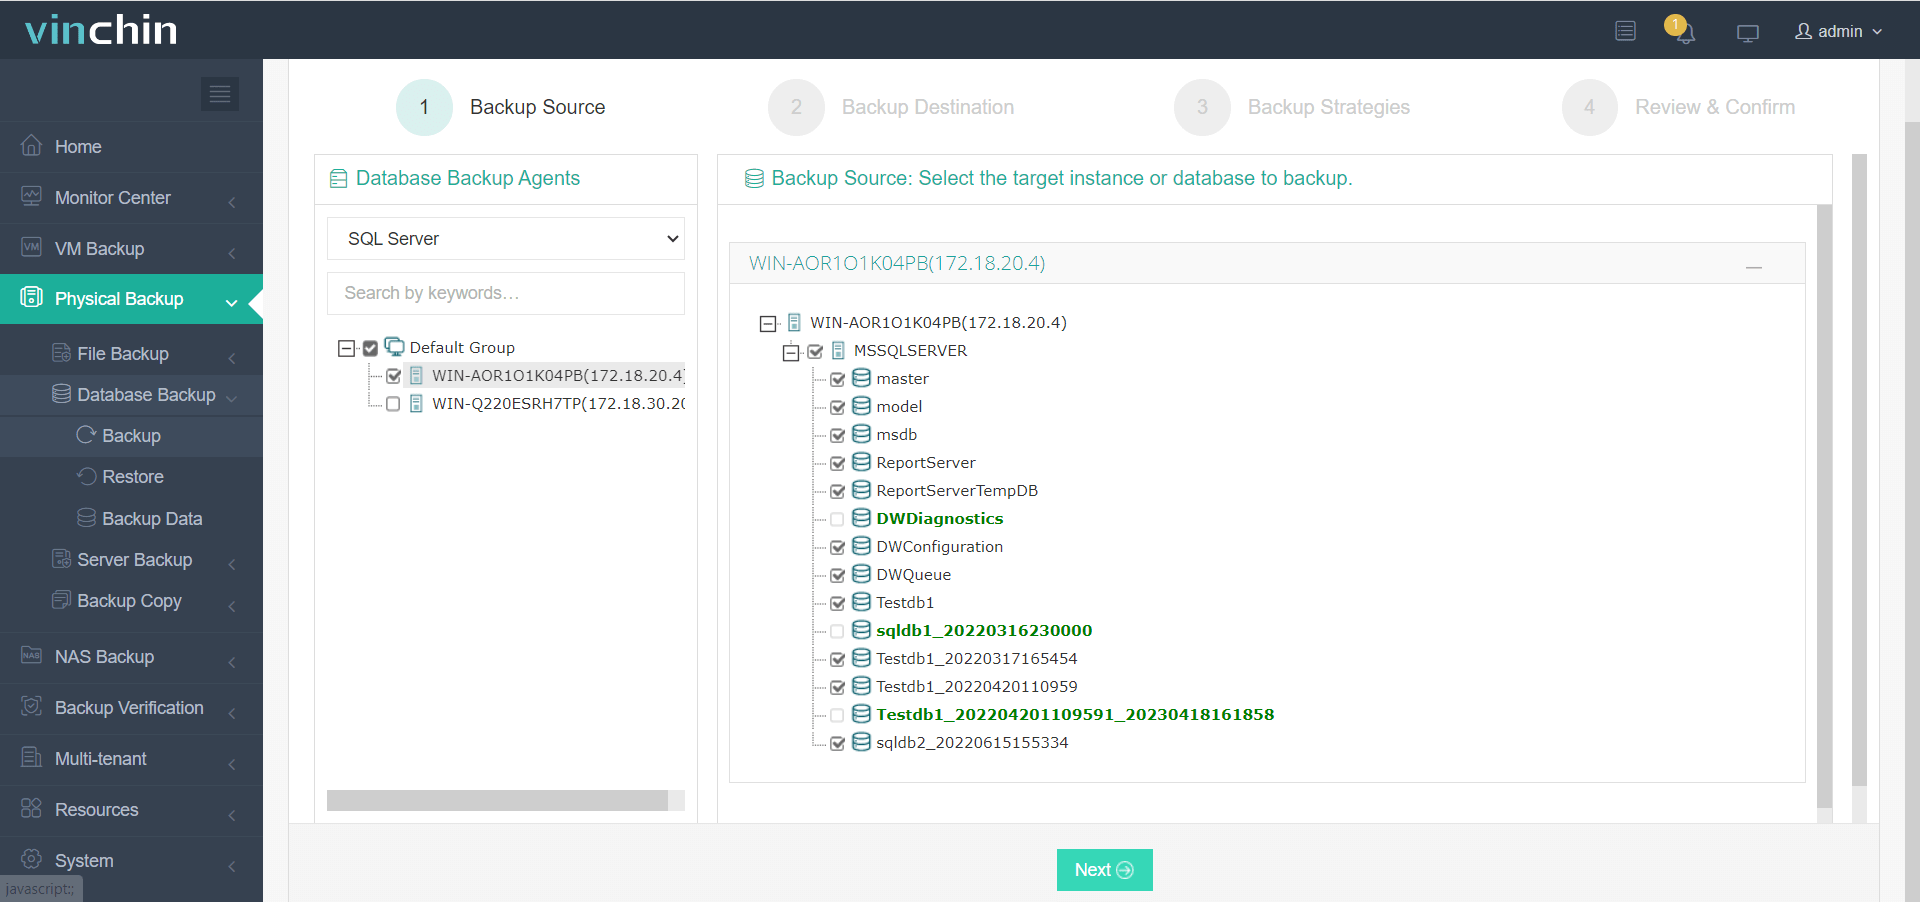
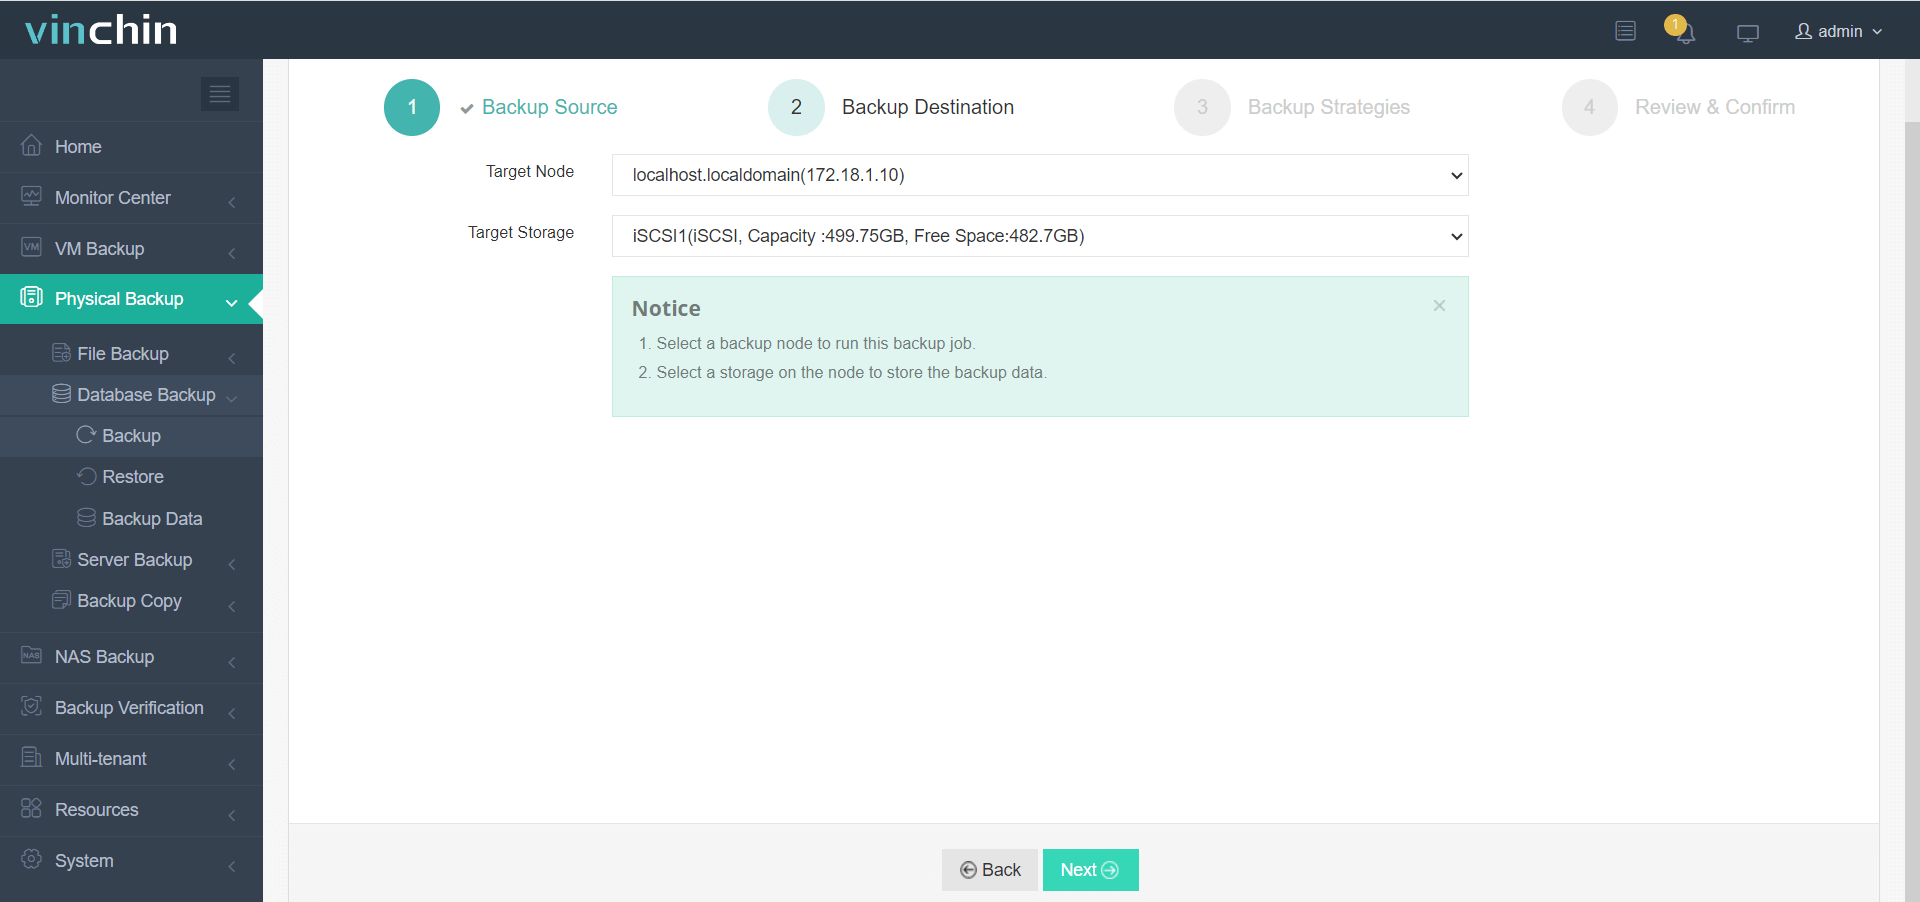
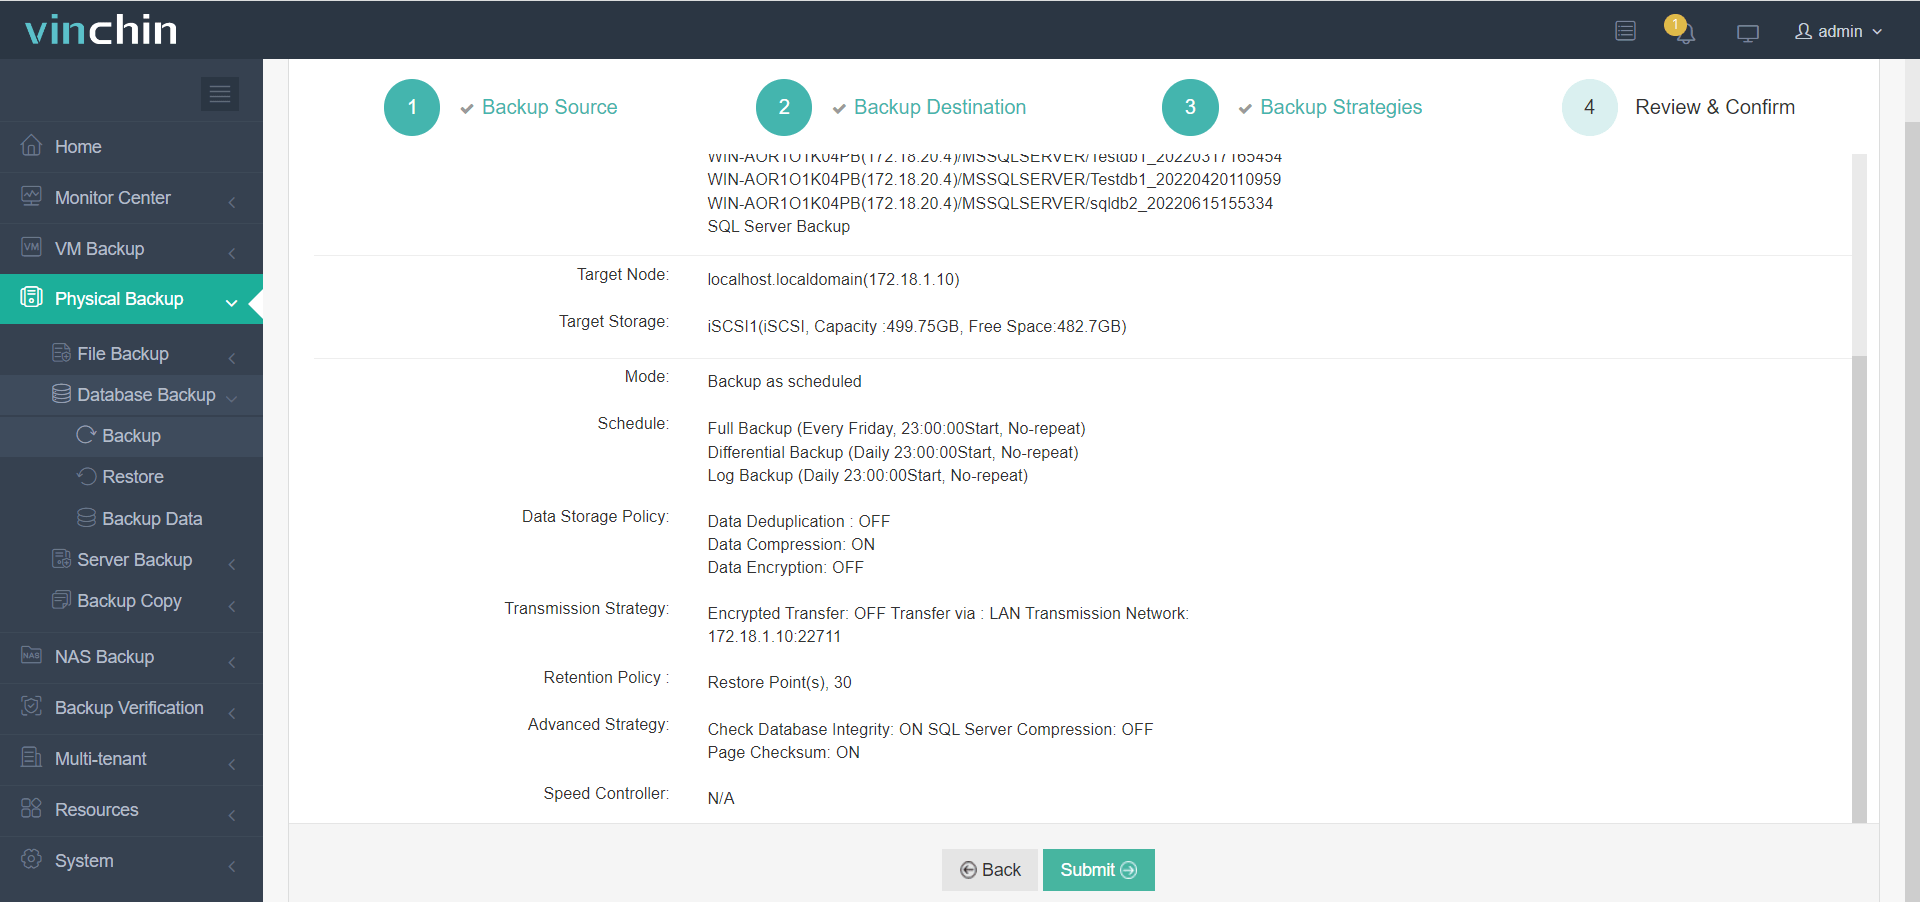
Administrators benefit from an intuitive web console that streamlines operations into four straightforward steps:
1. Select source SQL Server database(s),

2. Choose target storage location(s),

3. Configure backup strategies,

4. Submit the job.

With global recognition among enterprise IT teams and consistently high customer ratings worldwide, Vinchin Backup & Recovery stands out as trusted software for safeguarding mission-critical data assets everywhere—start today with their fully featured free trial (60 days) via download below.
SQL Server Database Restoring FAQs
Q1: Can I keep my restored SQL Server database read-only for reporting?
A1: Yes; use WITH STANDBY option during final RESTORE LOG step so users may query while keeping future logs restorable later if desired.
Q2: How do I handle encrypted databases protected by Transparent Data Encryption?
A2: Before restoration import original certificate/key pair onto target instance using CREATE CERTIFICATE/FROM FILE statements then proceed normally afterward per usual workflow outlined above earlier sections covered previously herein already discussed thoroughly enough.
Conclusion
Mastering SQL Server database restoration gives administrators peace of mind when facing any disaster—from accidental deletions to major outages affecting entire organizations. By applying proven recovery techniques and leveraging solutions like Vinchin, you can ensure that critical data remains safe, accessible, and recoverable whenever it’s needed most—empowering your business to move forward with confidence and resilience.
Share on:


