-
What Is SCN in Database Recovery?
-
Why Recover Database Until SCN?
-
Pre-Recovery Checklist: Ensuring Success
-
How to Recover Database Until SCN Using RMAN?
-
How to Recover Database Until SCN Using SQL*Plus?
-
Best Practices for SCN-Based Recovery
-
Introducing Vinchin Backup & Recovery
-
Recover Database Until SCN FAQs
-
Conclusion
Database recovery is one of those tasks you hope you never need—but when disaster strikes, it can save your business. In high-stakes environments like financial systems or ERP databases, even small mistakes can lead to major problems. For IT operators, mastering System Change Number (SCN)-based recovery isn’t just theoretical—it’s often the last line of defense against data corruption or user errors.
Sometimes you need to restore an Oracle database not just by date or time but by its exact state before something went wrong. That’s where recovering until SCN comes in handy. This guide walks you through everything: what an SCN is, why it matters, how to recover using RMAN or SQL*Plus step by step—and how Vinchin helps keep your data safe.
What Is SCN in Database Recovery?
The System Change Number (SCN) is at the heart of Oracle’s internal consistency model. Every time a transaction commits in Oracle Database, it gets assigned a unique SCN—think of it as an ever-increasing marker that records each change made across all tablespaces.
Why does this matter? The database uses these numbers like timestamps but without relying on system clocks—which means no confusion from time zones or clock drift. When you recover until SCN, you tell Oracle: “Bring my database back to exactly this point.” It’s precise down to every committed transaction.
Why Recover Database Until SCN?
Why would anyone choose this method over recovering by date or log sequence? Imagine someone accidentally deletes critical payroll data at 2:03 p.m., but several other changes happened around that same minute. If you only know the timestamp—or if server clocks aren’t perfectly synced—you might miss important transactions or roll back too far.
Recovering until SCN lets you pinpoint exactly where things went wrong and undo only what needs fixing. This approach minimizes data loss after accidental deletions or batch job failures and helps meet strict compliance rules that demand precise audit trails.
For organizations under regulatory scrutiny—or those who simply want peace of mind—SCN-based recovery offers unmatched accuracy compared to time-based methods.
Pre-Recovery Checklist: Ensuring Success
Before jumping into recovery steps, preparation makes all the difference between smooth sailing and hours of troubleshooting later on.
First off: validate your backups! Use RMAN VALIDATE BACKUP commands regularly so there are no surprises during restore operations. Next up: confirm that all archived logs up to your target SCN are available; missing logs mean incomplete recovery.
Check disk space on both source and destination servers—restoring large databases requires plenty of room for both backup files and temporary storage during processing. Finally, document which incarnation your database is currently running under; if there was ever an OPEN RESETLOGS event before now, knowing this helps avoid confusion later when restoring control files or archived logs.
Taking these steps upfront saves headaches down the road—and ensures every piece needed for successful recovery is ready when disaster hits.
How to Recover Database Until SCN Using RMAN?
RMAN (Recovery Manager) is Oracle’s built-in tool for backup and disaster recovery—and most administrators rely on it because it automates many complex tasks behind simple commands.
Start by finding your target SCN—the number right before unwanted changes occurred. You can query either V$DATABASE or V$ARCHIVED_LOG views directly:
SELECT CURRENT_SCN FROM V$DATABASE;
Or if you want historical points:
SELECT SEQUENCE#, FIRST_CHANGE#, NEXT_CHANGE# FROM V$ARCHIVED_LOG ORDER BY SEQUENCE#;
Once you have identified your desired SCN:
1. Shut down the database if open using SHUTDOWN IMMEDIATE (or SHUTDOWN ABORT if needed).
2. Start up in mount mode with STARTUP MOUNT—this keeps datafiles closed but accessible for restore.
3. Connect as target user in RMAN.
4. Preview required files with:
   SET UNTIL SCN <your_scn>;
   RESTORE DATABASE PREVIEW;
This shows which backups/logs are needed before actual restore begins—a great way to catch missing pieces early!
5. Begin actual restore:
   RUN {
     SET UNTIL SCN <your_scn>; # Replace <your_scn> with actual value
     RESTORE DATABASE;
     RECOVER DATABASE;
   }
6. Once complete, open with resetlogs:
ALTER DATABASE OPEN RESETLOGS;
A few tips: If working after previous incarnations (RESETLOGS) use RESET DATABASE TO INCARNATION <incarnation_key> before starting restores. Always double-check that all necessary archive logs exist up through your chosen SCN; otherwise RMAN will halt mid-recovery asking for missing files!
For compressed backups or multi-section strategies common in larger deployments, ensure compatible settings are used during both backup creation and restoration phases—otherwise performance may suffer or errors could occur during decompression/reassembly steps.
How to Recover Database Until SCN Using SQL*Plus?
SQL*Plus gives experienced DBAs fine-grained control over manual recoveries—but demands careful attention since automation features are limited compared with RMAN.
First step remains identifying your target SCN via queries mentioned above (V$DATABASE, V$ARCHIVED_LOG, etc.).
Here’s how manual recovery unfolds:
1. Shut down using SHUTDOWN IMMEDIATE
2. Mount instance via STARTUP MOUNT
3. Restore physical datafiles from backup location—this usually happens outside SQL*Plus using OS-level copy tools (like cp on Linux). Make sure restored files match their original paths; otherwise update control file pointers accordingly using ALTER DATABASE RENAME FILE.
4. Begin media recovery:
RECOVER DATABASE UNTIL CHANGE <your_scn>;
5. As prompted by SQL*Plus during redo application phase, supply full pathnames for each required archived log file until reaching chosen change number.
6. Complete process by opening database:
ALTER DATABASE OPEN RESETLOGS;
Manual methods require vigilance: If any archive log is missing—even one—the entire process halts until resolved! Also beware hot backups taken while tablespaces were online; inconsistent snapshots may require additional checks such as RECOVER DATABASE USING BACKUP CONTROLFILE.
SQL*Plus shines when scripting custom workflows across multiple hosts—but always test procedures thoroughly beforehand since error handling here falls squarely on operator shoulders!
Best Practices for SCN-Based Recovery
Want smoother recoveries next time? Here are some habits worth building into daily routines:
Regularly script queries against CURRENT_SCN from production databases then store results alongside monitoring metrics; having a timeline makes root-cause analysis much faster after incidents occur (“What changed between 10am–11am?”).
Automate validation jobs checking presence/health of recent archive logs plus periodic test restores onto non-production clones—nothing beats hands-on practice under controlled conditions!
After every significant schema change—or especially following any RESETLOGS event—take immediate fresh full backups so future incremental chains remain unbroken regardless what comes next week/month/year!
And finally: keep detailed runbooks describing each step unique to local environment including network shares used for offsite copies plus escalation contacts should anything go awry mid-process…because sometimes even best-laid plans hit unexpected snags!
Introducing Vinchin Backup & Recovery
Beyond manual processes and native tools, enterprise-grade protection calls for robust solutions tailored specifically for mission-critical environments like Oracle databases—which demand precision and reliability at scale. Vinchin Backup & Recovery stands out as a professional enterprise-level solution supporting today’s mainstream platforms including Oracle, MySQL, SQL Server, MariaDB, PostgreSQL/PostgresPro, and MongoDB databases.
With features such as advanced source-side compression (for Oracle), incremental backup options (for Oracle), batch database backup capabilities, flexible retention policies including GFS retention policy support, and ransomware protection built-in across supported platforms—including cloud backup/tape archiving—you gain comprehensive coverage against threats ranging from accidental deletion to sophisticated cyberattacks while optimizing storage efficiency and operational agility.
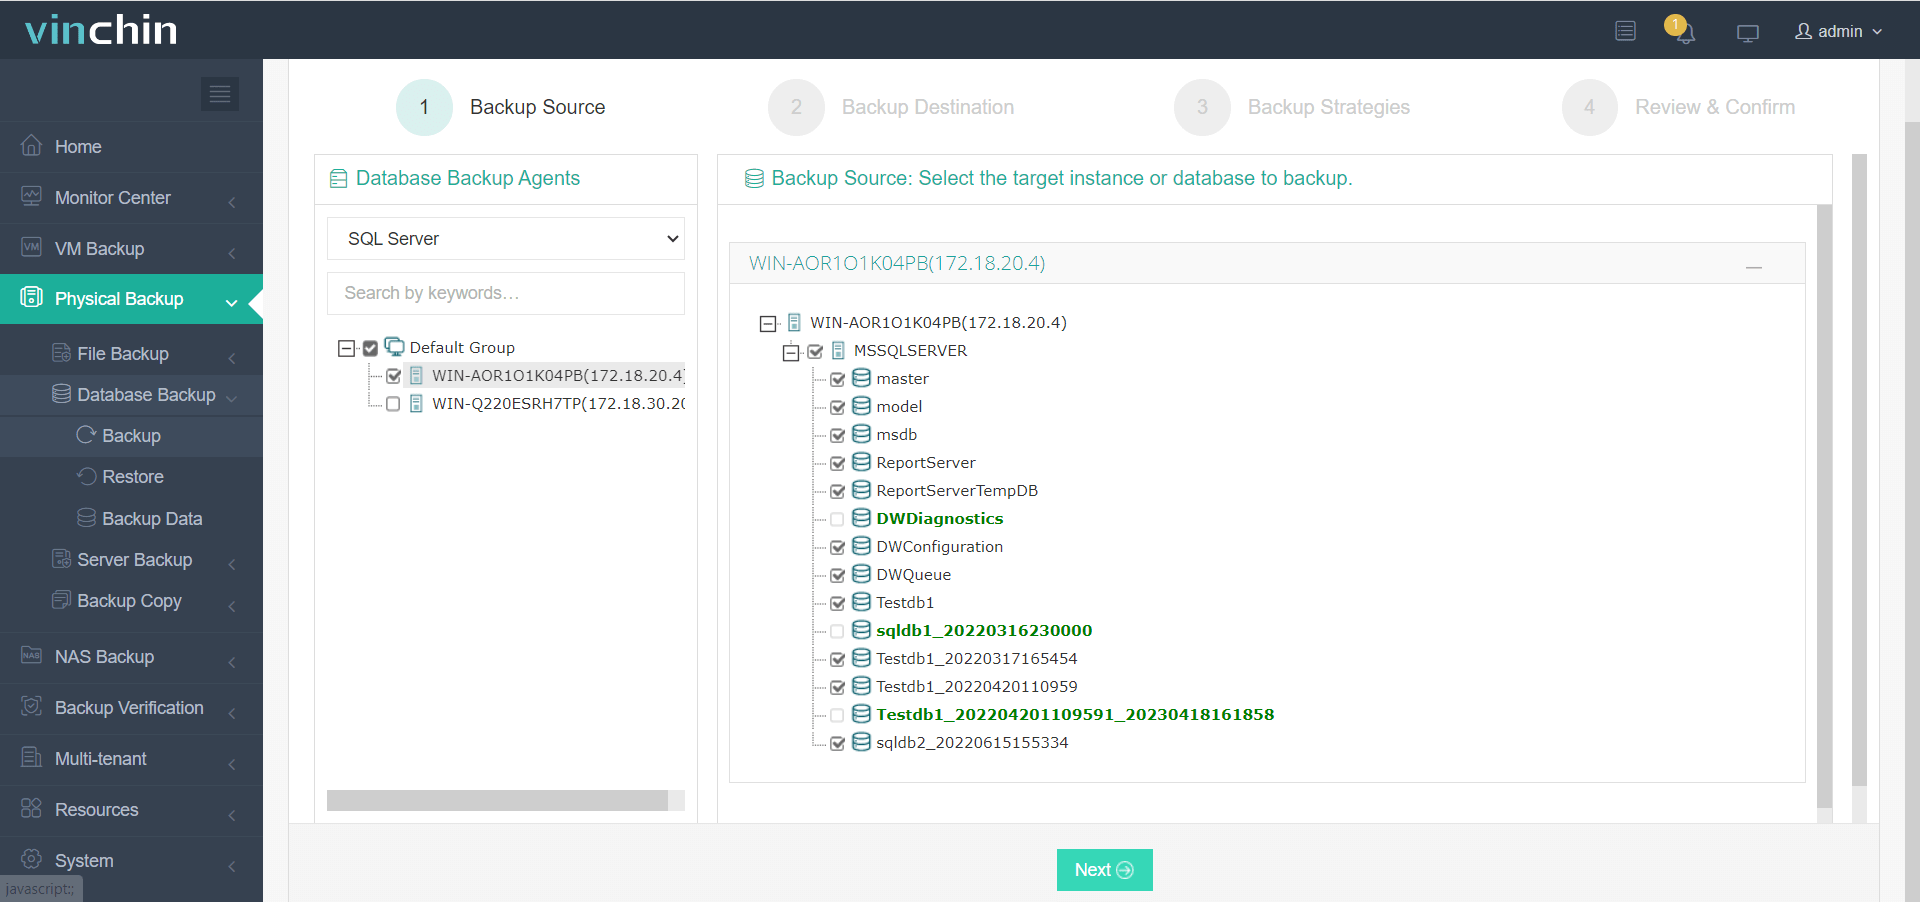
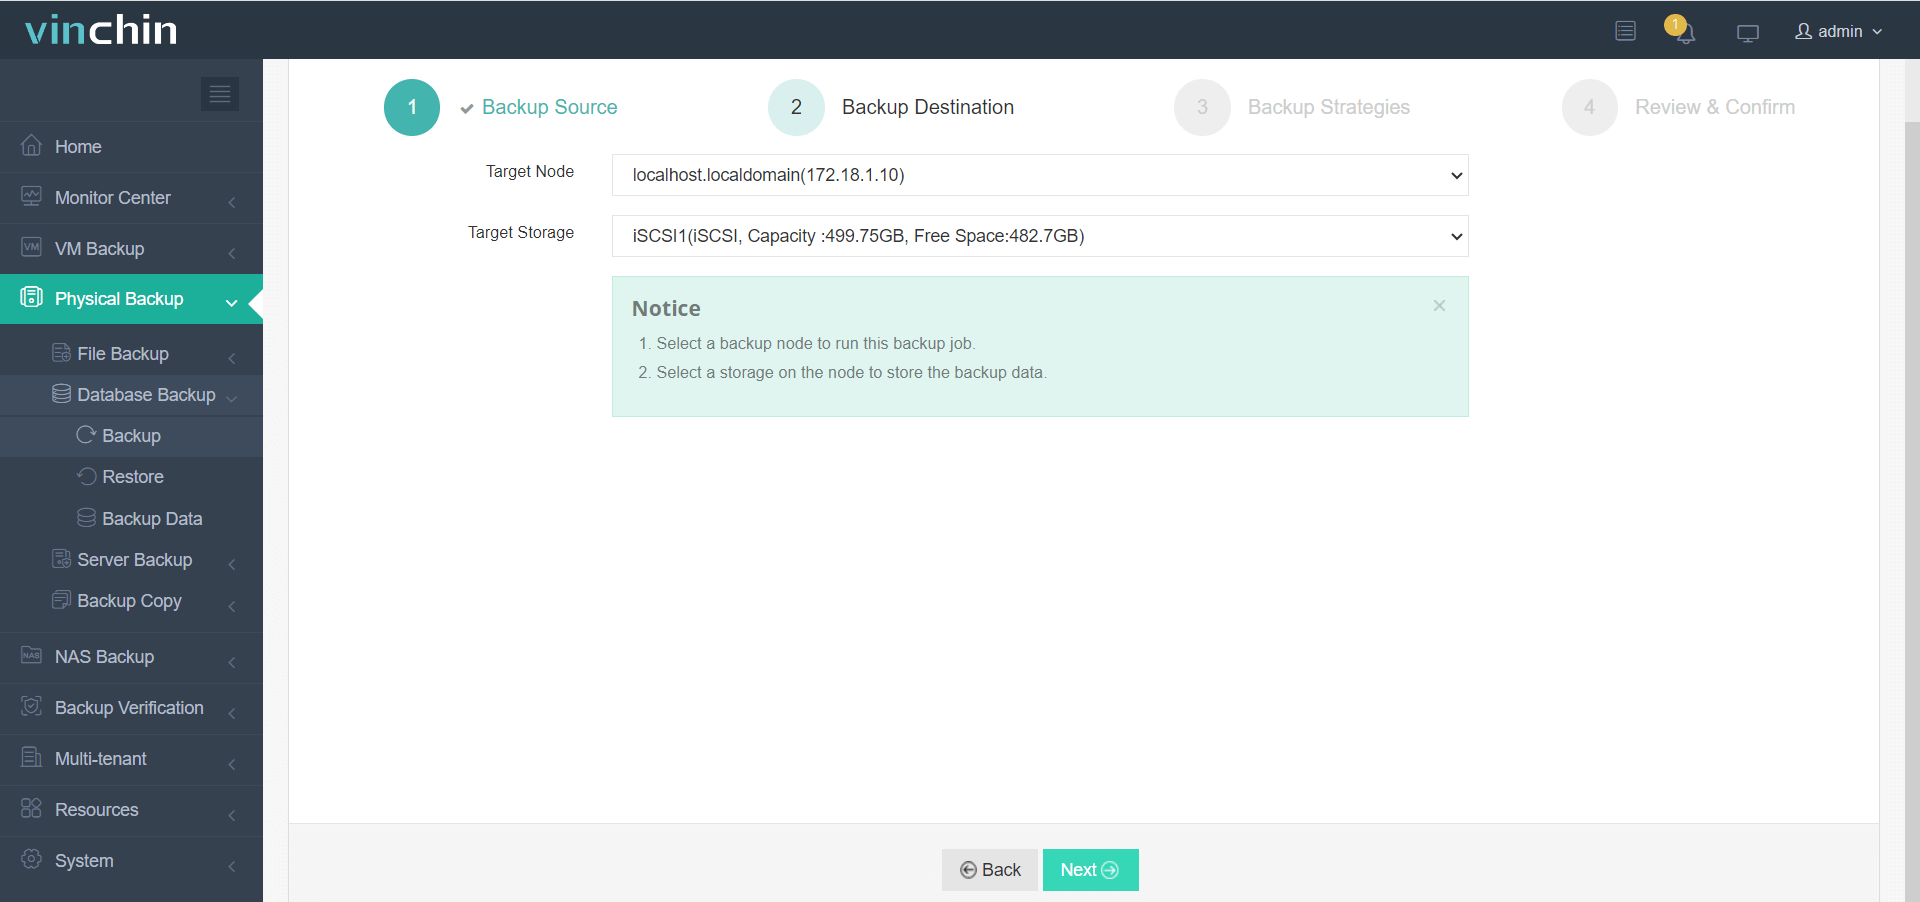
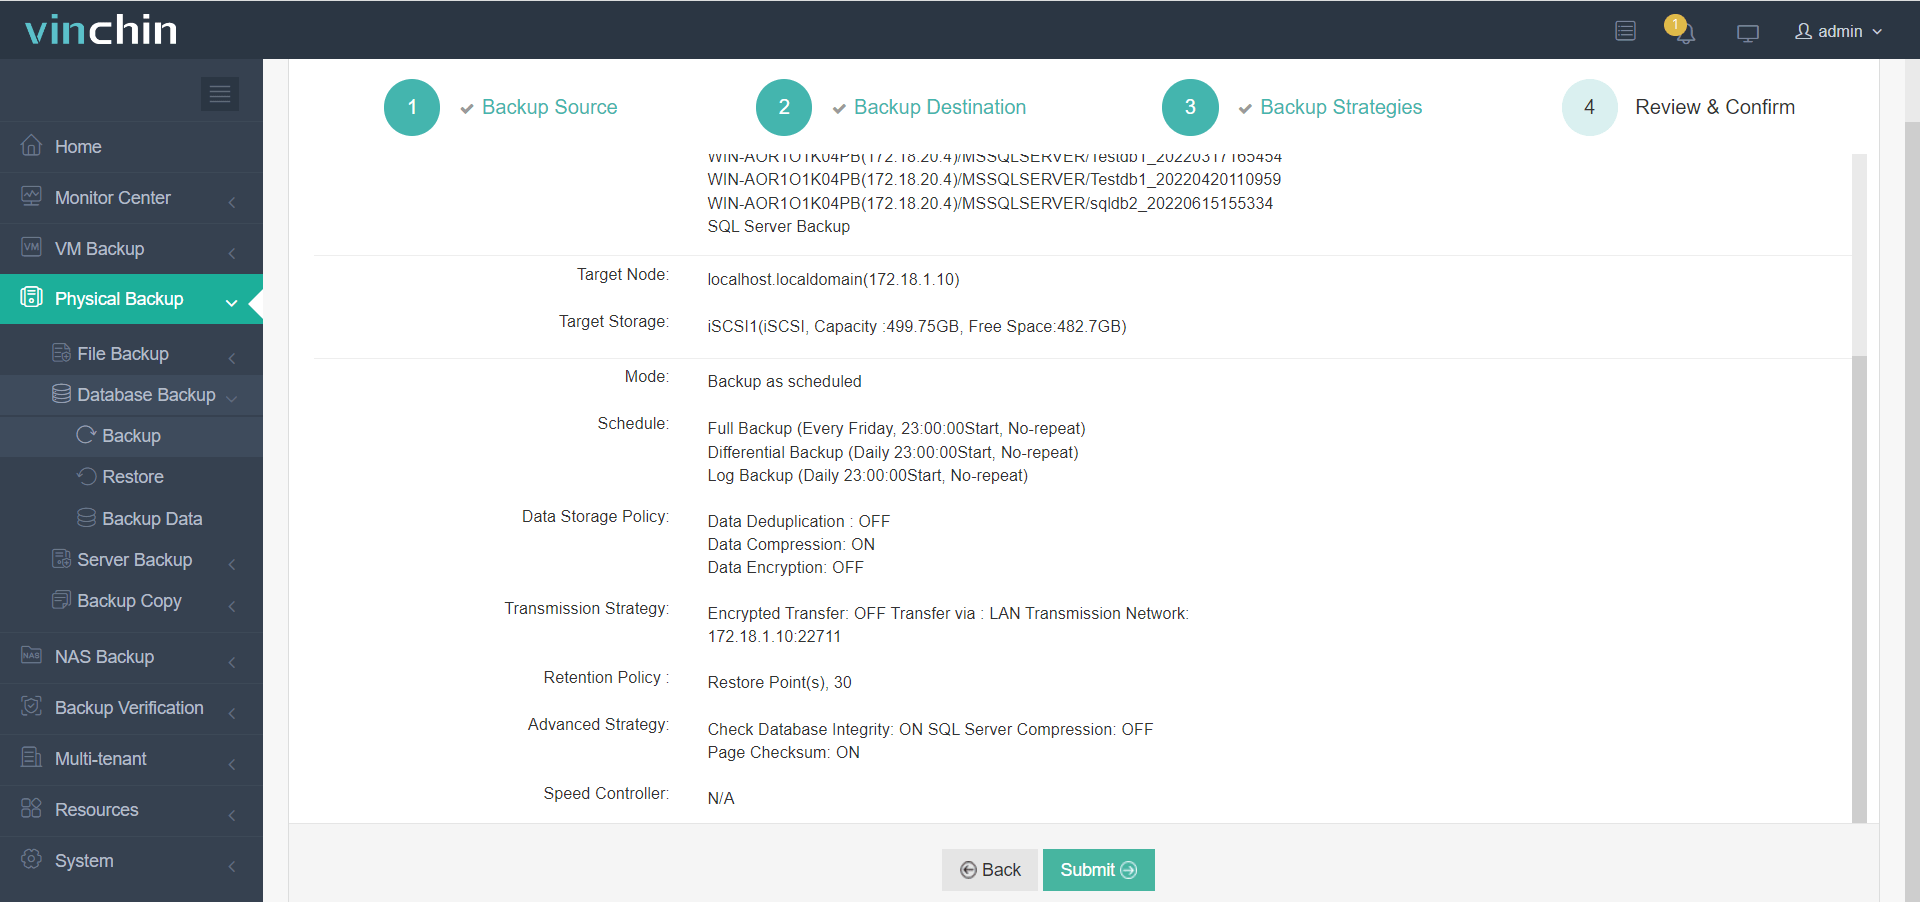
The intuitive web console streamlines protection workflows into four clear steps:
Select databases to protect.

Choose target storage (local, NAS, SAN, cloud).

Define schedules, retention, and policies.

Submit the job.

Recognized globally with top ratings among enterprise users worldwide,Vinchin Backup & Recovery offers a fully featured 60-day free trial—click below to experience industry-leading data protection firsthand.
Recover Database Until SCN FAQs
Q1: Can I automate regular capture of my current database's SCNs?
A1: Yes; schedule scripts querying CURRENT_SCN from V$DATABASE then export results daily via cron jobs or Windows Task Scheduler depending platform preference.
Q2: What should I do if my archive logs span multiple storage locations?
A2: Catalog all directories containing archived redo logs within RMAN using CATALOG START WITH command before beginning any restore operation involving those files.
Q3: Is there extra risk performing point-in-time recovery on very large databases?
A3: Larger datasets increase chance partial restores due hardware/network interruptions so always validate integrity post-recovery using DBVERIFY utility plus application-level checks wherever feasible.
Conclusion
Recovering a database until a specific System Change Number gives operations teams precision control over restoring lost data after accidents big or small—with both automated tools like RMAN plus manual options via SQL*Plus available depending situation complexity involved! For streamlined protection consider Vinchin’s solutions designed specifically around enterprise-grade reliability needs today’s businesses demand everywhere they operate worldwide.
Share on:


