Understanding Proxmox VE root login and password management is vital for secure operations. Proxmox VE does not ship with a preset root password. You set it during installation. Losing root access can disrupt services. This article shows how to verify login details, reset lost credentials via console access, and apply security hardening.
What is the default password for the root user?
Proxmox VE does not include a default root password. During the installer, you must specify a secure password and an email for notifications. The installer prompts: “Password of the superuser (root) and an email address needs to be specified”. If you see a login prompt at https://<your-server-ip>:8006, use root and the password you chose during installation.
Embedding hardcoded credentials in automated scripts or cloud-init for guest VMs differs from host credentials. For guest VM templates, you may inject a root password via preseed or cloud-init. Always audit those scripts to avoid unintended weak passwords or exposure. For Proxmox VE host installs, no default or fallback exists: forgotten credentials require reset via console or recovery steps.
Administrators must store the root password securely using vaults or password managers. If an automation team installs Proxmox VE, ensure they use a strong, unique password. Avoid reuse of service or personal passwords. Weak root credentials expose the hypervisor and all hosted VMs. Implement policies that mandate periodic rotation and audit access to password storage.
How to reset Proxmox admin password?
You can reset the root password when you have console or out-of-band access. Proxmox VE runs on Debian; standard Linux recovery methods apply. Ensure you have direct console, IPMI, or other OOB access before starting. Record these procedures in runbooks to avoid surprises during an incident.
Method 1. Single-User Mode via GRUB
Interrupt the GRUB menu: press e on the Proxmox VE boot entry. Locate the line starting with linux. Append rw init=/bin/bash to enable a Bash shell with read-write root. Boot by pressing Ctrl+X or F10. Once at the shell, remount root read-write explicitly: mount -o remount,rw /. Run passwd to set a new root password. After resetting, execute exec /sbin/init or reboot -f to continue normal boot.
For ZFS root pools, import before mounting: after shell access, run zpool import -f rpool then mount -o remount,rw / if needed. Confirm filesystem names match your setup. Use this method only when you can access the console directly, as remote sessions may not allow GRUB interaction.
Method 2. Live CD or Rescue Media
Boot from a live ISO that supports ZFS and LVM (e.g., SystemRescue or Ubuntu Live). Open a root shell: sudo -i. For ZFS root: zpool import -f -R /mnt rpool (default pool rpool). For LVM ext4/XFS: identify volume group via vgscan and activate it. Mount root filesystem: mount /dev/pve/root /mnt or mount -o subvol=@ rpool/ROOT/<version> /mnt for BTRFS/ZFS. Chroot: chroot /mnt then passwd to set root password. Exit, unmount filesystems: umount -R /mnt, zpool export rpool. Reboot. Confirm console access works with new password. Document pool names and mount points in recovery guides.
Proxmox VE uses GRUB by default, even on UEFI systems. Systemd-boot setups are rare in Proxmox VE. Adjust bootloader edits accordingly if custom. For BIOS with GRUB, the above GRUB edits apply. For UEFI with GRUB, similar process works. For alternative boot managers, refer to their docs. Always verify which bootloader the host uses before attempting Method 1.
Security Hardening and Best Practices
Securing Proxmox VE login interfaces reduces risk of unauthorized access. Follow least-privilege and defense-in-depth principles.
1. Disable Root SSH Login
Edit /etc/ssh/sshd_config: set PermitRootLogin no or at minimum PermitRootLogin prohibit-password. Use key-based login for admin users. Restart SSH: systemctl restart sshd. Ensure admin accounts are in the correct group and have sudo rights. This prevents direct root SSH access and forces accountability.
2. Use Centralized Authentication
Integrate with LDAP/AD realms via Proxmox VE authentication server. Create individual admin users, assign roles via Datacenter > Permissions. Avoid shared accounts. Leverage REST API automation for user management. Enforce 2FA for all admin accounts. Proxmox supports OATH (TOTP) and YubiKey methods. Require 2FA before enabling access to web UI and SSH if possible.
3. Enable Two-Factor Authentication
Navigate in GUI: click on user (e.g., root@pam), select TFA, generate OATH key, scan QR code in an authenticator app. Enforce 2FA on PAM realm under Datacenter > Authentication. Warn: configure keys before enforcing to avoid lockout. Document fallback procedures (e.g., via pveum user tfa delete root@pam) for lost keys.
4. Network Access Controls
Restrict access to port 8006 (web UI) and port 22 (SSH) using firewall rules. Use Proxmox VE firewall or host-based iptables/ nftables. Allow only management subnets or VPN/jump hosts. Avoid exposing management interfaces directly to the internet. Use bastion hosts for remote admin. Limit source IPs where possible. Document firewall policies in network diagrams.
5. Encrypt Communications
Use valid TLS certificates for the web interface. Replace self-signed certs with certificates from internal CA or Let’s Encrypt via reverse proxy. Ensure SSH uses strong ciphers and disable obsolete protocols. Regularly audit SSH configuration with tools like ssh-audit.
6. Patch Management
Regularly update Proxmox VE via apt update && apt dist-upgrade, using the enterprise repository if available. Subscribe or use tested community repos. Schedule maintenance windows. Automate updates with notifications to operations teams. Test updates in staging clusters before rolling out to production.
7. Logging and Monitoring
Enable centralized logging of auth attempts, SSH and GUI logins. Integrate with SIEM solutions. Monitor for repeated failed login attempts. Configure alerting for suspicious events. Use Proxmox’s built-in audit logs and external tools. Periodically review logs as part of security operations.
8. Backup and Recovery Integration
Ensure that backup solutions like Vinchin integrate with Proxmox VE. Regular backups protect against data loss but also allow recovery if misconfiguration locks you out. Store backups offsite or in separate network segments. Validate backups by test restores. Document backup schedules and retention policies aligned with business needs.
Reliable Backup and Recovery for Proxmox VE with Vinchin
Vinchin offers robust VM protection that pairs well with Proxmox environments. Vinchin Backup & Recovery is a professional, enterprise grade VM backup solution. It works natively with Proxmox VE, and therefore you can back up virtual machines at without extra adapters.
Moreover, it uses deduplication and compression to save storage space, while also supporting local, remote, or cloud targets. In addition, Vinchin offers a central console for easy job setup and scheduling, and it applies throttling policies so that backups do not impact performance. Furthermore, Vinchin logs events and notifies administrators of any issues, which helps you monitor backup health. Finally, since it scales across multiple sites, you can rely on fast and reliable recovery for your Proxmox environment.
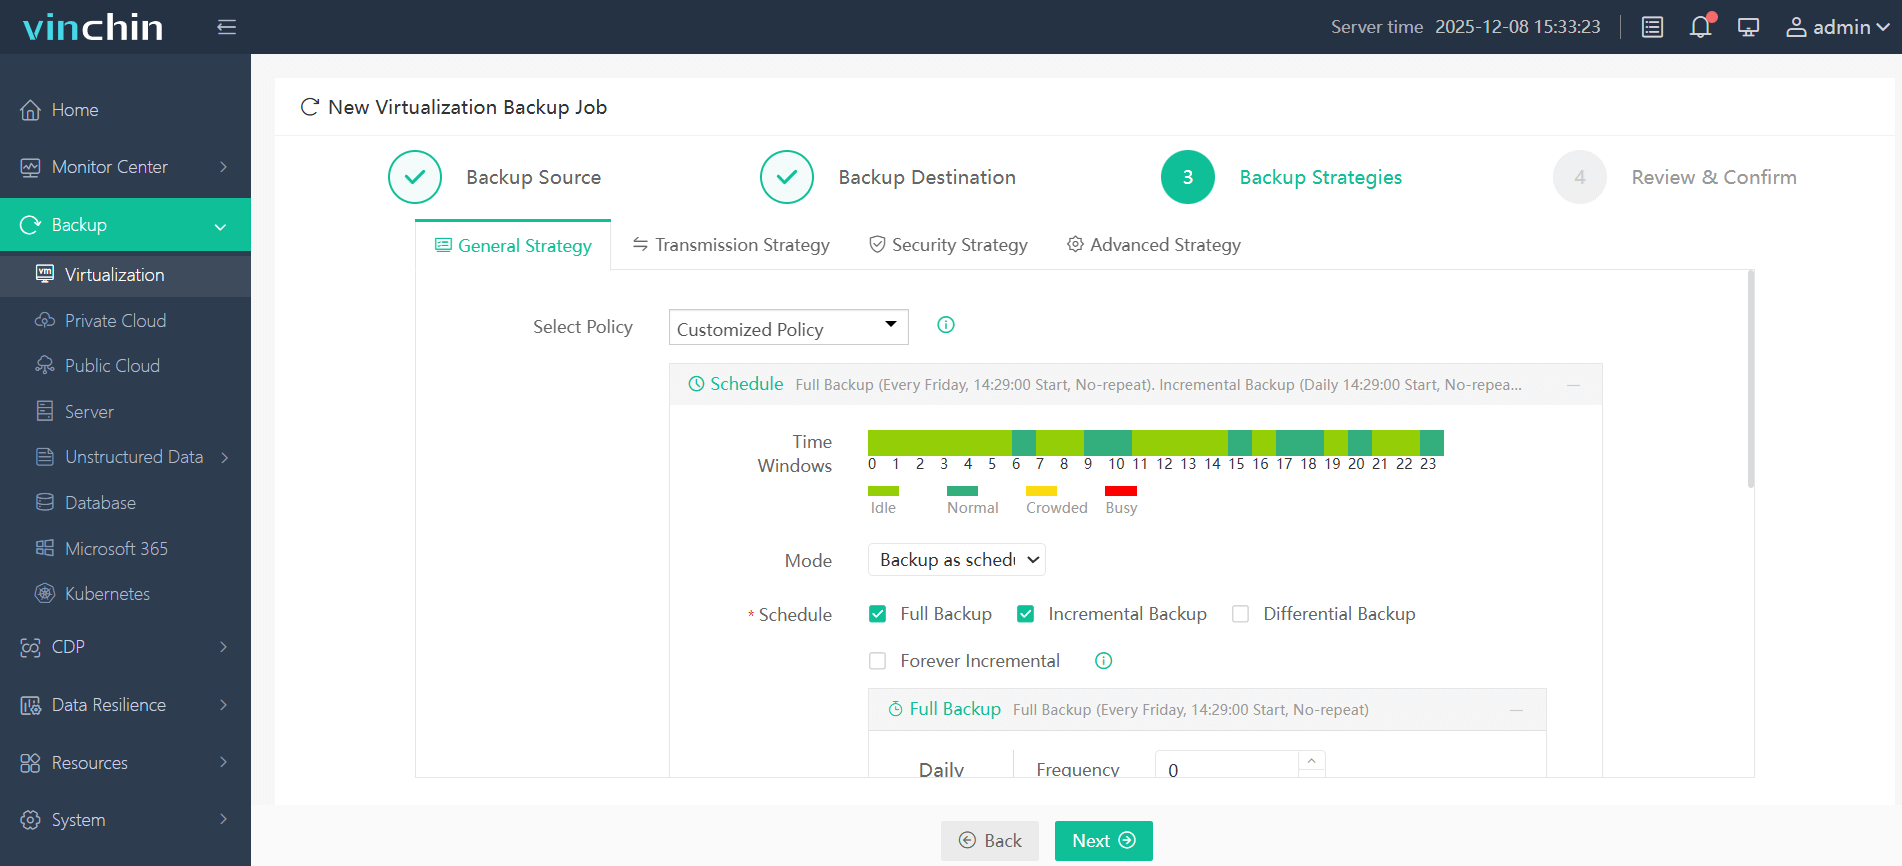
Using Vinchin's web console is straightforward. Backing up a Proxmox VM involves four steps aligned to the VM in question:
1. Select the Proxmox VM to back up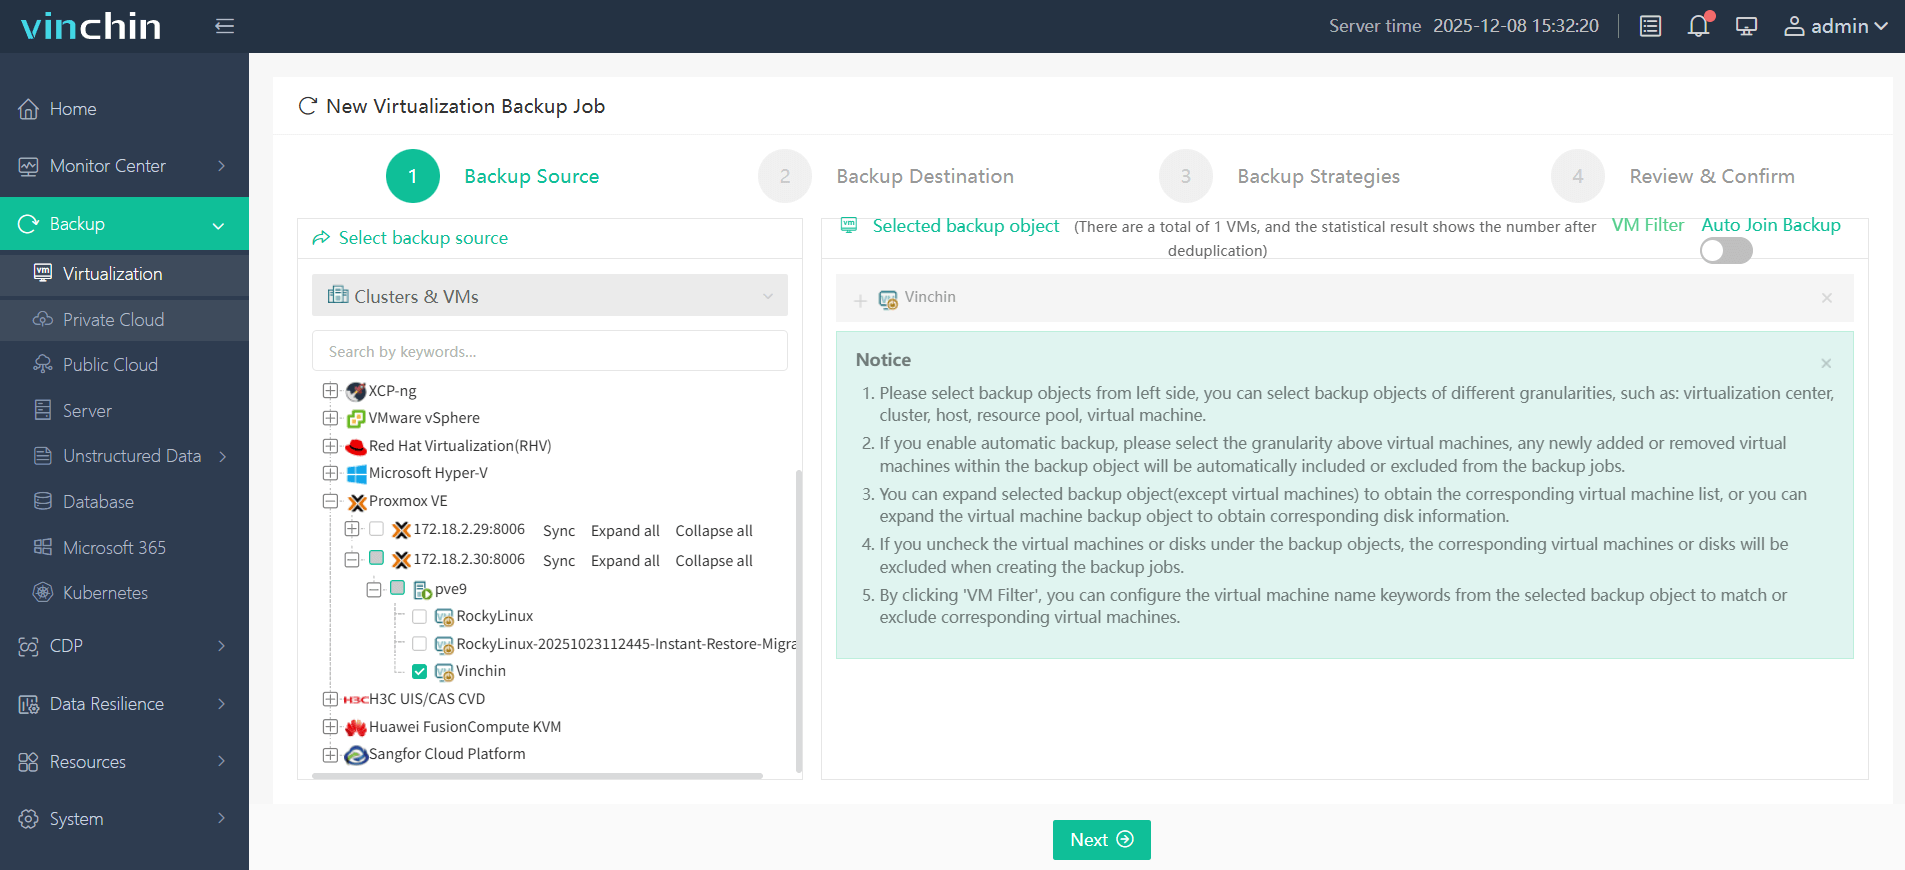
2. Choose backup storage
3. Configure backup strategies
4. Submit the job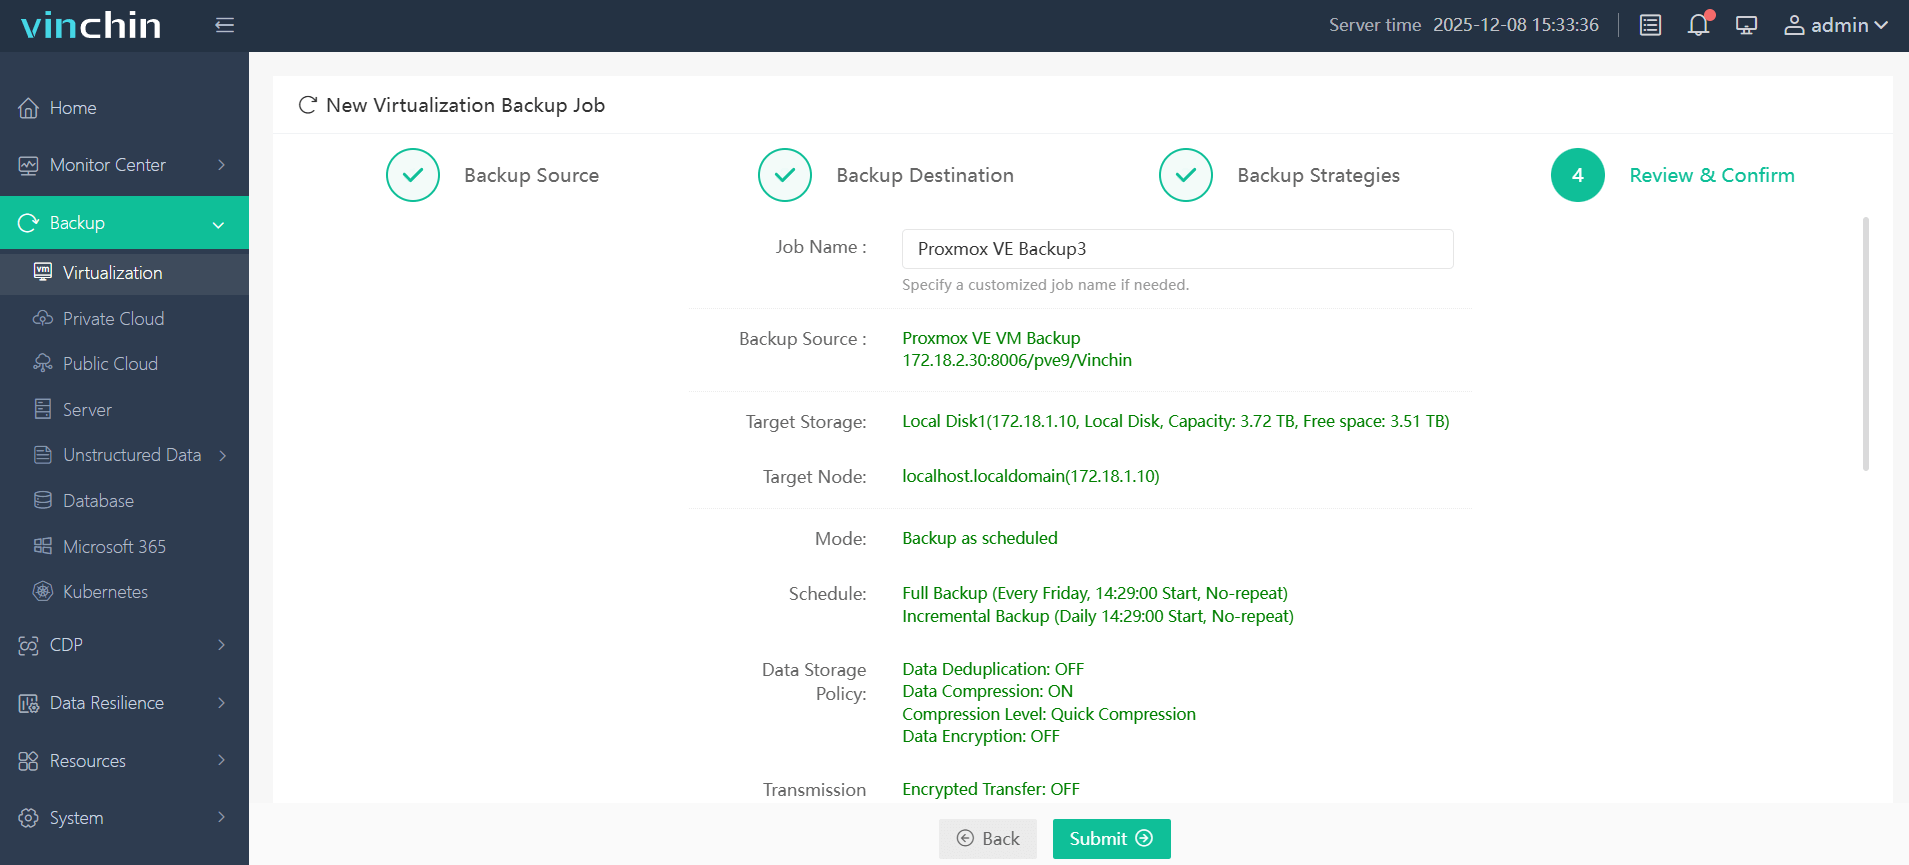
Try Vinchin Backup & Recovery free for 60 days and see how easily it protects your virtual machines. Click the Download Trial button to get the installer and deploy quickly.
Default Proxmox Login FAQs
Q1: What if I lose access to the Proxmox root password?
You reset it via console: interrupt GRUB and use single-user mode or boot live media to chroot and run passwd.
Q2: How can I enforce SSH key login and disable root SSH?
Add public keys to /root/.ssh/authorized_keys, set PermitRootLogin no in /etc/ssh/sshd_config, and restart SSH. Use sudo for root tasks.
Q3: How do I secure Proxmox VE login further?
Enable 2FA in User Management, restrict ports via firewall, serve web UI over VPN or bastion, and use valid TLS certificates.
Conclusion
Proxmox VE never ships with a default root password; you set it during installation. Record and store that credential securely. If lost, use GRUB single-user mode or rescue media to reset. Harden access by disabling root SSH, enforcing SSH keys, enabling 2FA, and restricting network access. Integrate these steps into runbooks and test OOB recovery channels.
For reliable VM backup in Proxmox VE, leverage Vinchin's enterprise-grade features, such as incremental backup, deduplication, and easy web console operations. Start a free trial to protect your environment with advanced backup and recovery strategies.


