-
What is P2V migration?
-
Why choose Clonezilla for P2V migration?
-
Pre-Migration Preparation
-
How to create a Clonezilla Live USB?
-
How to perform a P2V migration with Clonezilla?
-
Limitations of Clone-Based P2V Migration
-
Clonezilla VMware esxi FAQs
-
Conclusion
What is P2V migration?
P2V (Physical to Virtual) migration refers to the process of converting a physical computer—including its operating system, applications, and data—into a virtual machine that runs on a virtualization platform such as VMware.
This approach enables organizations to improve hardware consolidation, enhance system backup and disaster recovery capabilities, and achieve more flexible resource management.
Why choose Clonezilla for P2V migration?
Clonezilla is a free and open-source disk cloning tool that supports a wide range of file systems and storage protocols, making it ideal for full-disk backups and system migrations. In P2V scenarios, it offers the following advantages:
✅ Free and open-source, with no licensing restrictions
✅ Supports multiple file systems (e.g., EXT4, NTFS, XFS)
✅ Handles disks larger than 2TB
✅ Enables network-based cloning via SSH, NFS, or Samba
✅ Supports compression and block-based transfer to improve efficiency
⚠️ Note: Clonezilla does not support true incremental backups. It is best suited for full disk cloning scenarios.
Pre-Migration Preparation
Hardware Requirements
Item | Minimum Requirement | Recommended Configuration |
|---|---|---|
CPU | Dual-core 1GHz | Quad-core 2GHz or higher |
Memory | 2GB | 8GB or more |
Storage | 16GB USB drive | 32GB USB drive |
Software Preparation
1. Download the Clonezilla Live ISO image
2. USB writing tool (e.g., Rufus or Etcher)
3. Target virtualization platform (e.g., VMware, KVM, VirtualBox, etc.)
Operational Notes
It is recommended that the source physical machine’s disk usage does not exceed 80%
Ensure a stable network connection (if using network storage)
Always back up important data before cloning to avoid data loss
How to create a Clonezilla Live USB?
Steps for Windows Environment
Insert a USB drive (capacity ≥ 4GB)
Launch the Rufus tool
Load the Clonezilla ISO file
Select partition scheme: GPT (UEFI) or MBR (Legacy BIOS)
Click “Start” to write the ISO to the USB
For Linux Users (Command Line Method)
Run the following command to write the Clonezilla ISO to your USB drive:
sudo dd if=clonezilla-live.iso of=/dev/sdX bs=4M status=progress
⚠️ Replace /dev/sdX with the correct device name of your USB drive.
After writing is complete, configure the BIOS boot order to boot from USB. You should see the Clonezilla boot menu upon startup.
How to perform a P2V migration with Clonezilla?
Step 1: Back Up the Physical Machine to an Image File
1. Boot the physical machine from the Clonezilla Live USB.
2. Select the default language (English).
3. Choose:
Start Clonezilla
Select device-image mode (disk to image).
4. Select Image Destination
Local disk (USB/external hard drive)
Network location (SSH / NFS / Samba)
5. Then, select the source disk (e.g., /dev/sda) or partition.
6. Configure Image Settings
Compression method: -z1 (fast compression)
Image name (e.g., 202406_win10_p2v)
(Optional) Enable integrity check
7. Start the image backup process
Step 2: Restore the Image on a VMware Virtual Machine
1. Prepare the Target VM
Create a new virtual machine with disk size equal to or larger than the original physical machine.
Mount the Clonezilla ISO to the virtual machine and boot from it.
2. Restore the Image
After entering Clonezilla, select image-device mode.
Mount the previously saved image file (from USB or network storage).
Select the target disk (e.g., /dev/vda).
Optionally adjust parameters based on disk size differences:
Parameter | Description | Use Case |
|---|---|---|
-k1 | Keep original partition proportion | When source and target disk sizes are different |
-r | Resize file system automatically | Automatically expand partitions |
-icds | Ignore disk size difference | Use when the target disk is slightly smaller |
-f | Force overwrite | Use with caution to avoid accidental data loss |
Limitations of Clone-Based P2V Migration
If your goal is only to complete a one-time, clone-based P2V migration, tools like Clonezilla are often sufficient and cost-effective.
However, in real-world scenarios, migration is rarely an isolated task. Once workloads are running as virtual machines, they must also address requirements such as backup, recovery, and operational continuity.
Clone-based migration tools focus on point-in-time system conversion. In contrast, more comprehensive migration solutions integrate migration with continuous, VM-aware data protection, ensuring workloads remain protected throughout their lifecycle.
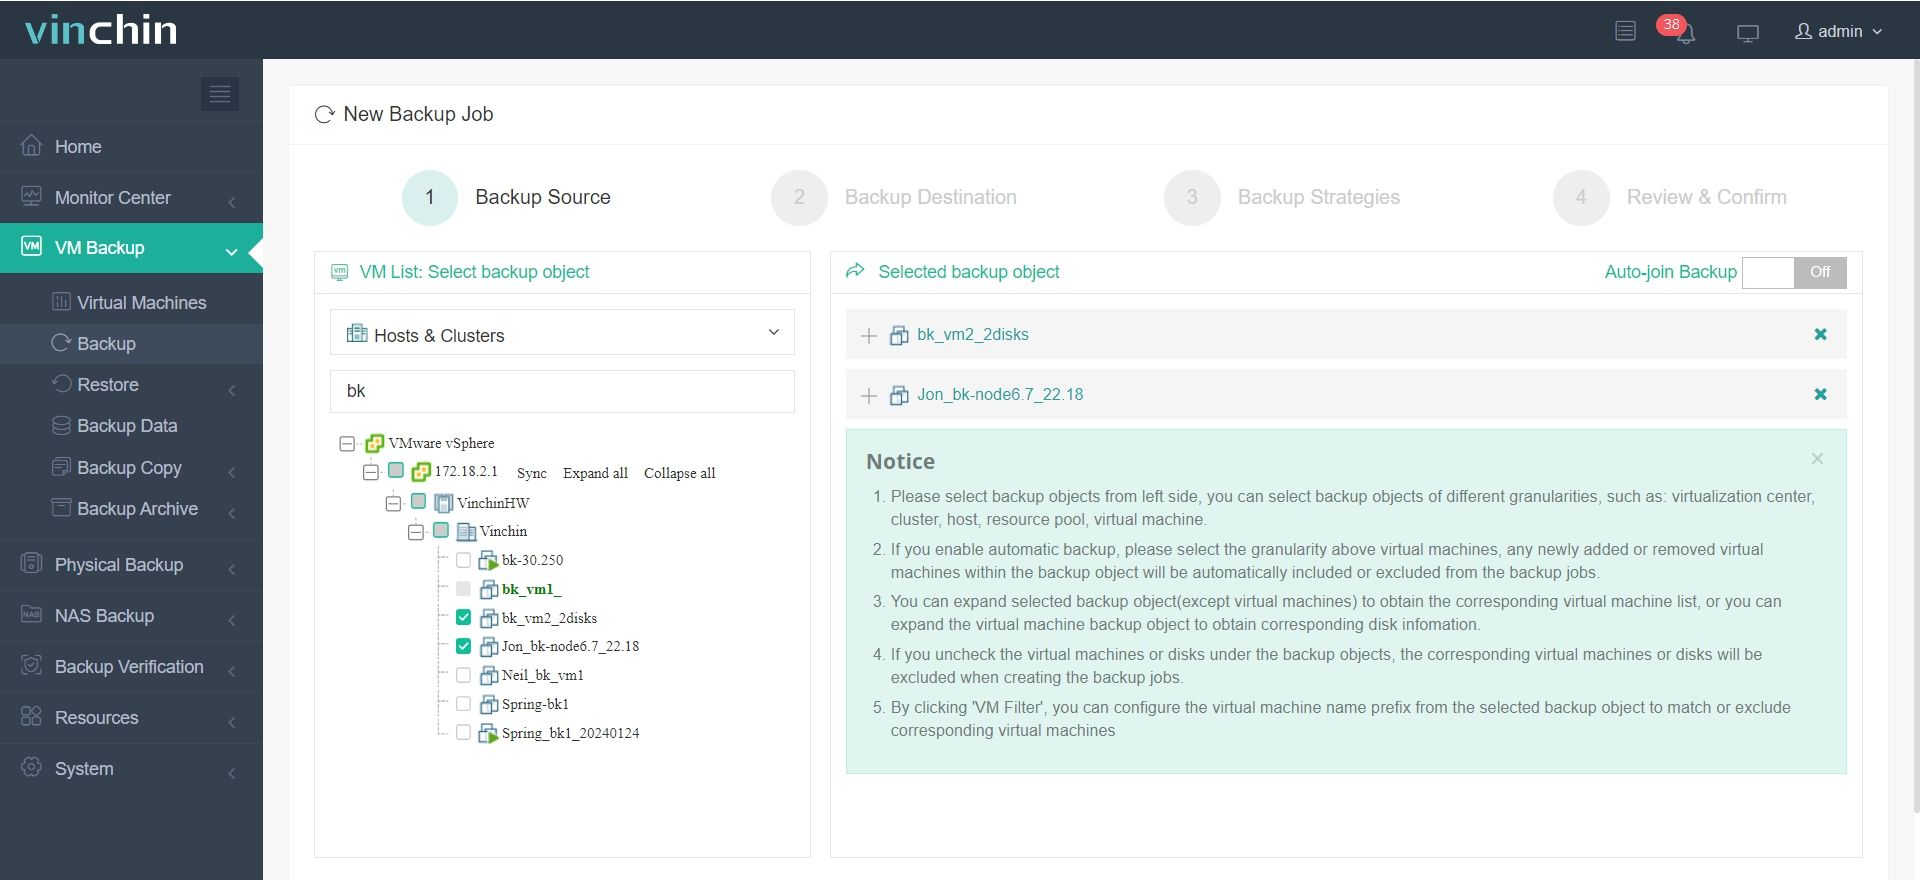
Vinchin Backup & Recovery provides a P2V migration solution that combines migration, backup, and recovery within a single workflow. Instead of treating migration as a one-time operation, Vinchin enables a more controlled and recoverable migration experience.
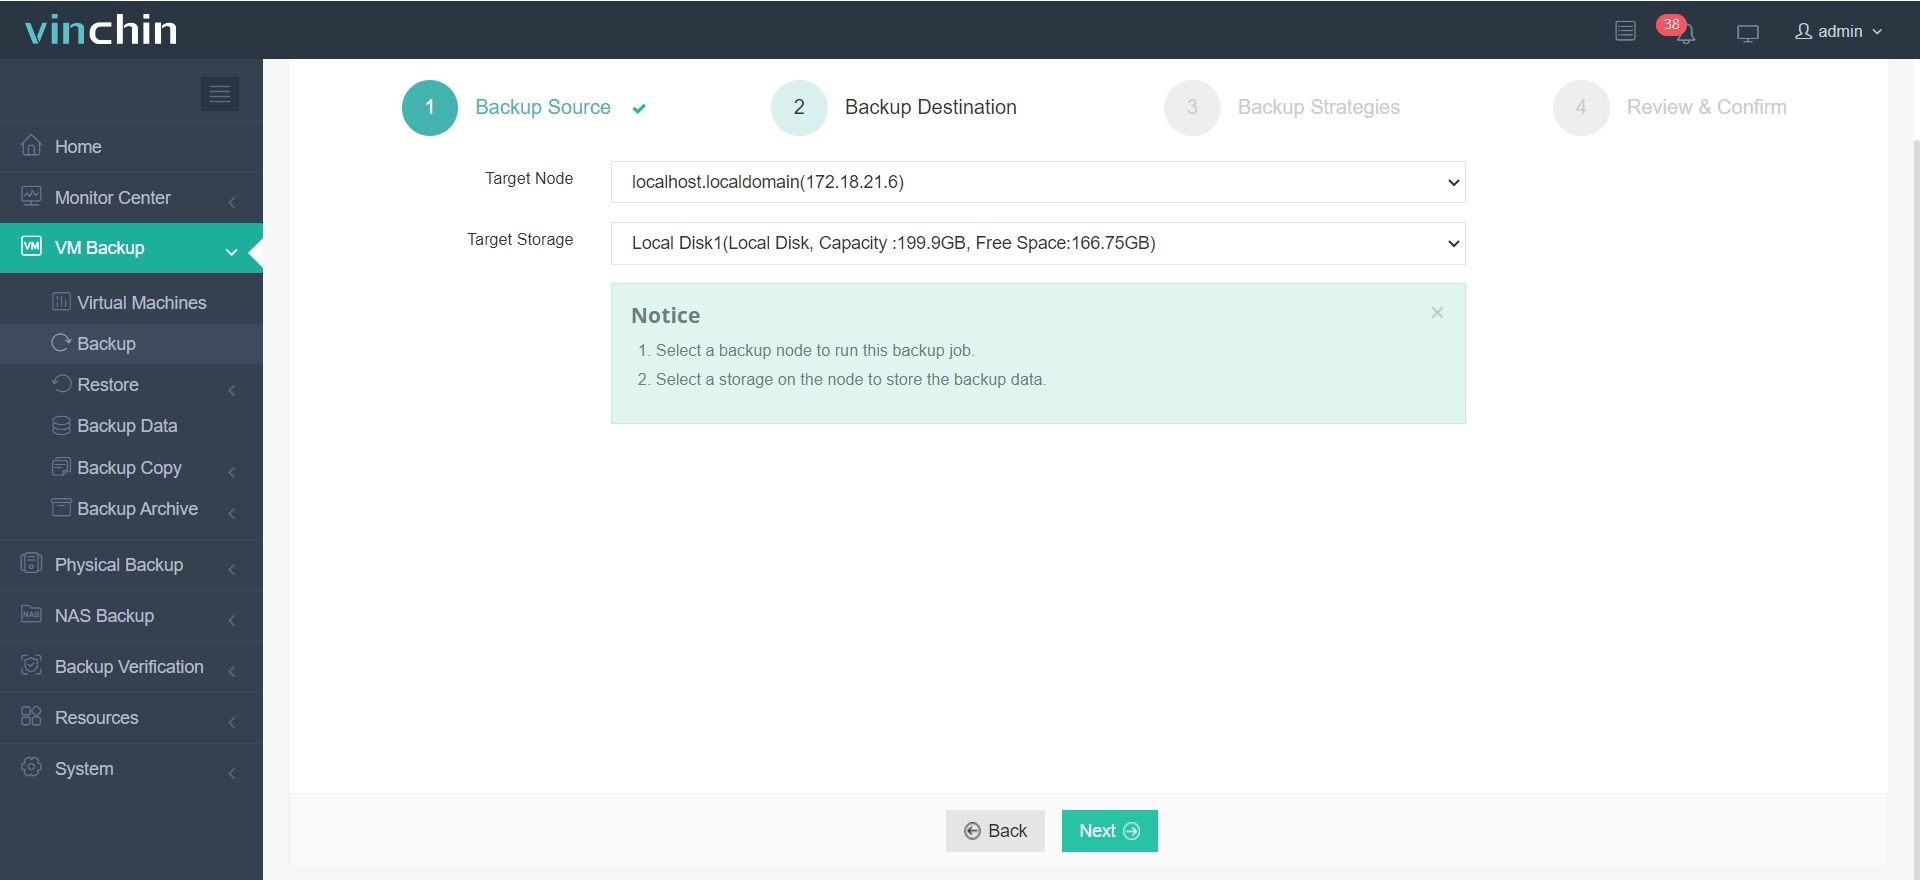
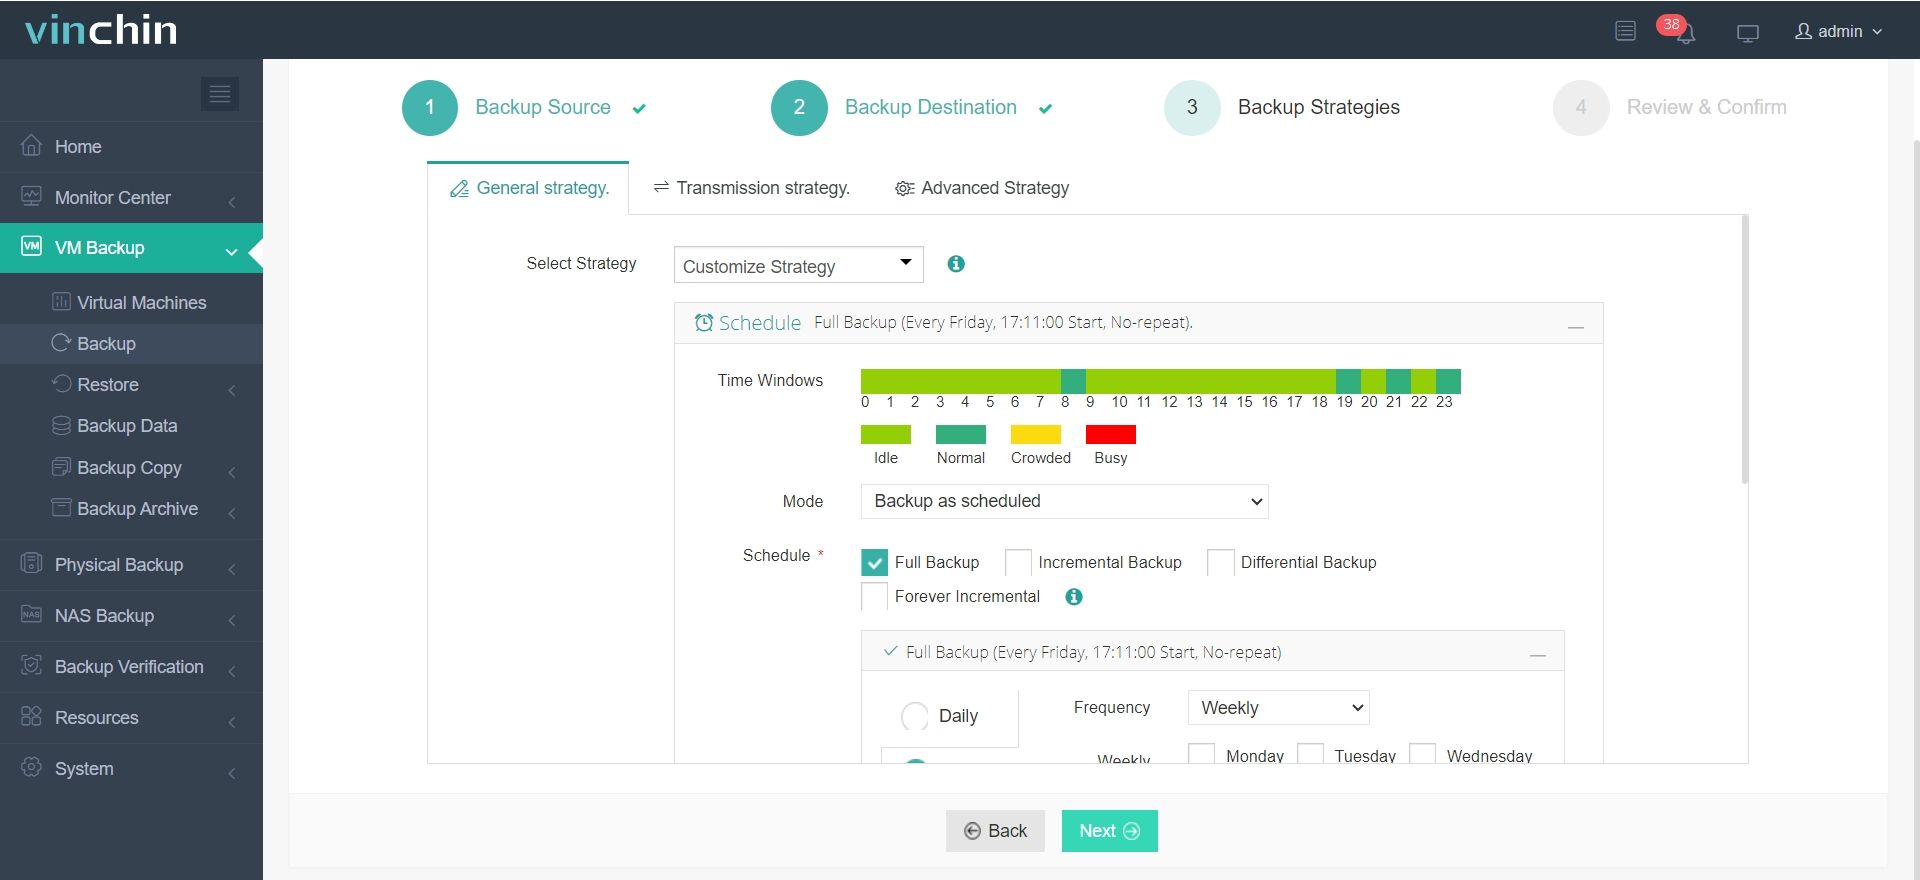
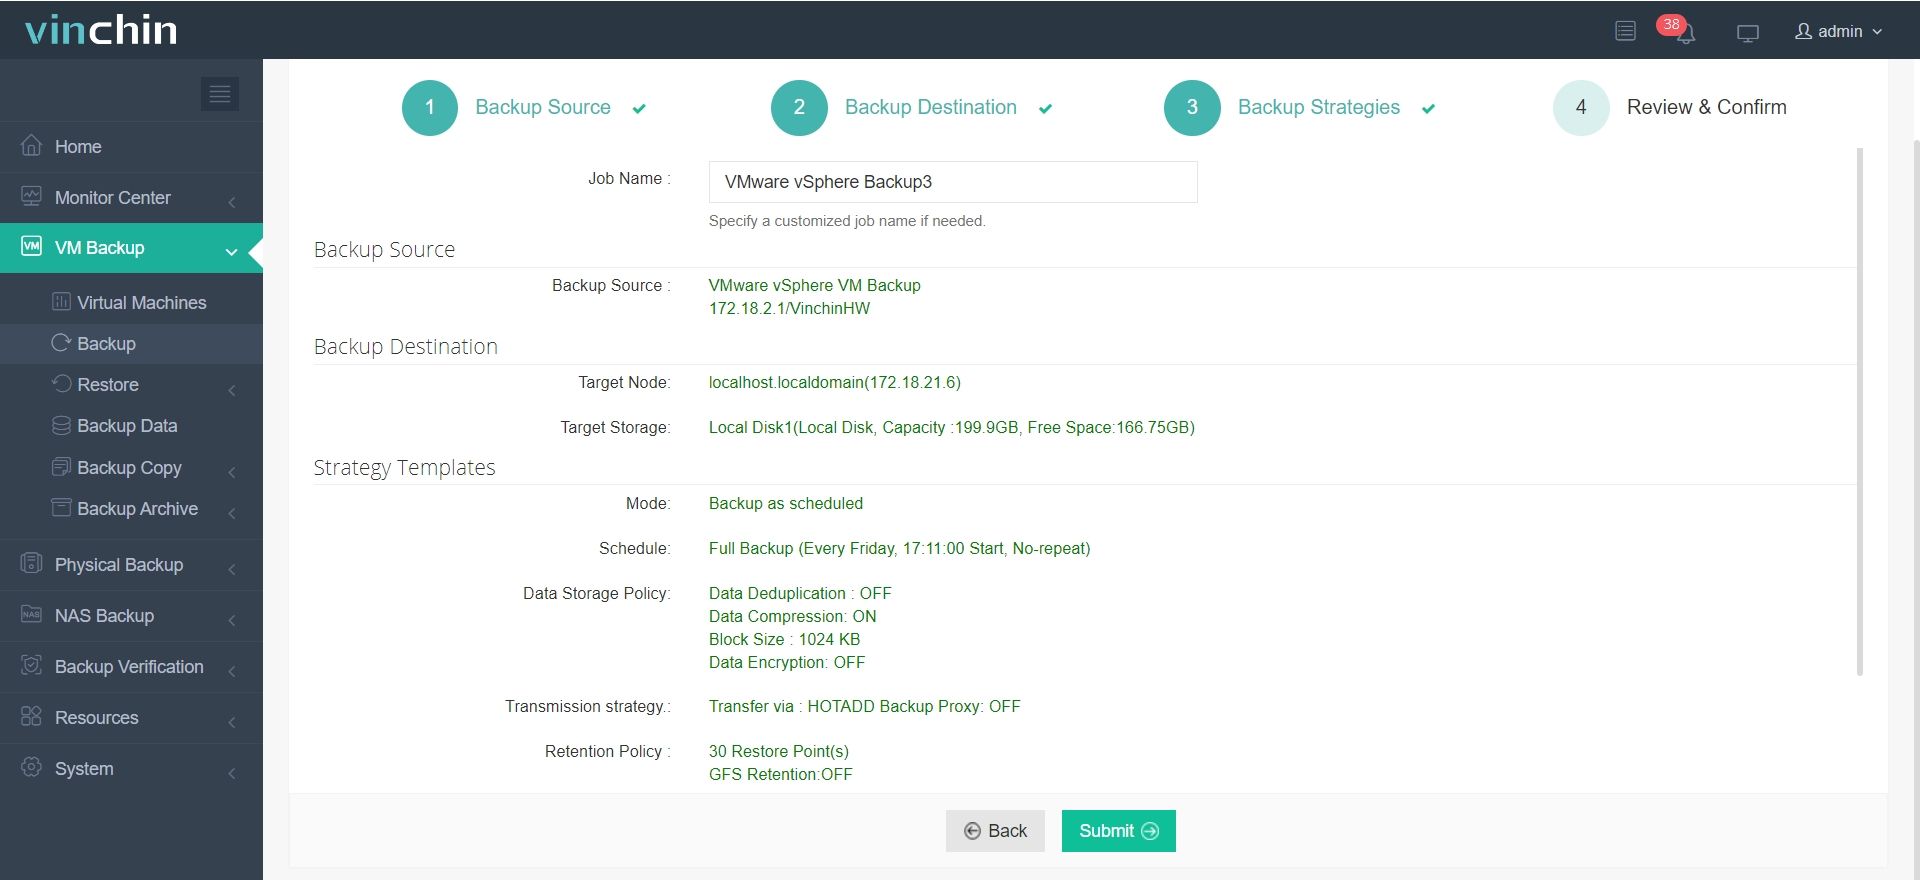
Vinchin Backup & Recovery's operation is very simple, just a few simple steps.
1.Just select VMs on the host

2.Then select backup destination

3.Select strategies

4.Finally submit the job

✅✅✅Vinchin offers a 60-day free trial, allowing users to fully explore its backup and recovery features in real-world scenarios. For more details, please contact Vinchin directly or reach out to one of our trusted local partners.
Clonezilla VMware esxi FAQs
❓Q1: Virtual machine fails to boot / shows a blue screen
Possible Causes:
BIOS mode mismatch between the VM and the physical machine (UEFI ↔ Legacy)
Incompatible disk controller type (IDE / SATA / NVMe)
Solution:
Adjust the VM BIOS mode and disk controller type to match the original system
Boot the VM using a Windows installation ISO and run the following commands to repair the boot configuration:
bootrec /fixmbr
bootrec /fixboot
bootrec /rebuildbcd
❓Q2: Network cloning interrupted
Solution:
Use the -c option to enable chunked (split) image transfer
Switch to NFS protocol instead of Samba for better stability
Add the -rescue parameter to allow the task to resume from the point of interruption
❓Q3: Virtual machine cannot detect disk / missing drivers
Solution:
Pre-install necessary drivers (e.g., VMware or VirtIO) on the physical machine before cloning:
drvload viostor.inf
Alternatively, use tools like Disk2vhd to create a more compatible virtual disk image, then import it into VMware or KVM
Conclusion
P2V migration with Clonezilla transforms physical systems into virtual machines, enabling better flexibility and disaster recovery. Combined with Vinchin Backup & Recovery, users gain a reliable, cost-effective solution for post-migration VM protection, ensuring business continuity and data integrity.
Share on:


