There is no single "best" backup method for every environment. The ideal solution depends on:
Desktop vs server
Physical vs virtual machine
Automation requirements
Recovery speed expectations
Enterprise compliance needs
Below are the most practical and widely used approaches.
Method 1. tar Backup
This method doesn't require additional software as it uses the built-in "tar" tool in Ubuntu, but it does have a certain learning curve.
Backup Process
screen -S bakscr
cd /
sudo su
tar -cvpzf /home/[username]/Downloads/backup.tgz --exclude=/proc --exclude=/lost+found --exclude=/home/[username]/Downloads/backup.tgz --exclude=/mnt --exclude=/sys --exclude=/media /
Command Explanation:
(You can also add “--exclude=/run”)
- “screen”: For those familiar with `screen`, this command is used to maintain the session, but it is optional.
- “tar”: The backup program.
- “c”: Creates a new backup archive.
- “v”: Verbose mode, which displays the backup process on the screen.
- “p”: Preserves file permissions and applies them to all files.
- “z”: Compresses the backup file using “gzip” to reduce its size.
- “f”: Specifies the file path for the backup, in this case, “Ubuntu.tgz”.
- “/”: The directory to be backed up, which in this case is the entire filesystem.
Directories such as “/proc”, “/lost+found”, “/sys”, and “/media” are excluded because they are either temporary or mounted directories. The “backup.tgz” file itself must be excluded from the backup to prevent unwanted results.
After the backup completes, a file named “backup.tgz” will be generated at the root of the filesystem. It may be quite large, so it is recommended to burn it to a DVD or store it in a safe location.
You may see a warning at the end: “tar: Error exit delayed from previous errors”, which can usually be ignored.
Recovery Process
If the original system is accessible and does not require a reinstall, you can recover it directly from the Ubuntu terminal by executing the following:
sudo tar -xvpzf /home/systemback/<backup_filename.tgz> -C /
sudo reboot
The “-C” option specifies the target directory for extraction.
If the original Ubuntu system is not bootable, you can use a live Ubuntu USB to access the recovery environment.
Steps for recovery using a live USB:
1. Insert the live USB and mount it in write mode:
mount -o remount,rw ./
2. Backup critical files from the current system to the live USB:
sudo cp /media/(Ubuntu)/boot/grub/grub.cfg ./
sudo cp /media/(Ubuntu)/etc/fstab ./
3. Find the partition containing the original system’s root directory, and delete its contents:
cd /media/disk name/partition A
rm -rf ./*
4. Copy the backup file “backup.tgz” to a partition with enough space:
sudo cp -i /media/(USB)/backup.tgz /media/disk name/partition B
5. Extract the backup archive to the root of the original system partition:
cd /media/disk name/partition B
sudo tar xvpfz backup.tgz -C /media/disk name/partition A/
6. Recreate the excluded directories during the backup:
sudo mkdir proc lost+found mnt sys media
7. Reboot the system.
Method 2. Timeshift Snapshot Backup
Timeshift is a popular system backup tool that can backup an entire system, including software environments and configuration files, making it especially useful for desktop users. It allows you to save system snapshots and restore them to a specific point in time.
Advantages:
The backup is incremental, meaning only changes after the initial backup are saved, saving storage space.
It does not backup personal data (i.e., “/home” folder), allowing you to choose whether to back up personal data separately.
Backup Steps:
1. Install Timeshift:
sudo apt install timeshift
2. Run Timeshift and choose the backup type (RSYNC or BTRFS, typically RSYNC).
3. Select a backup location (e.g., external hard drive).
4. Set a backup schedule (optional).
5. Start the backup process.
Method 3. Systemback to Create a Personal Live CD
Unlike Timeshift, Systemback allows you to create a personal live CD that can be used to fully back up your system, including all software and configurations. This live CD can also be used to install the system on other machines, transferring all software and configurations to the new machine, including saved browser passwords, system login passwords, and software login credentials.
Requirements:
A USB drive or hard drive large enough to hold the live CD image (e.g., 32GB).
The USB drive should be formatted to ext4.
Systemback Installation:
sudo sh -c 'echo "deb [arch=amd64] http://mirrors.bwbot.org/ stable main" > /etc/apt/sources.list.d/systemback.list'
sudo apt-key adv --keyserver 'hkp://keyserver.ubuntu.com:80' --recv-key 50B2C005A67B264F
sudo apt-get update
sudo apt-get install systemback
Steps to Clone Ubuntu Using Systemback:
1. Open Systemback from the application menu (search for it).
2. In the Systemback interface, click “Create Live System” and enter a name for the image.
3. Check “Include user data files” and click "Create new" to start the cloning process.
4. After completion, select the image you just created, choose the USB drive (formatted to ext4), and click "Write to target device" to begin creating the live CD.
5. Once writing is complete, you’ll have a live Ubuntu system disk.
The image created by this method is not a ghosted ISO file, but a live image. If you want to create an ISO file, use the “Save as CD Image” button, but note that ISO images are limited to 4GB in size, so large systems may exceed this limit.
6. Insert the USB drive into the new machine, set BIOS to boot from USB, and boot into the Systemback live recovery mode.
7. Select "System Installation" in Systemback.
8. Input the new system's user details and proceed with system installation.
9. Set up partitions, including at least "/"(ext4), "/home"(ext4), “swap”, and “boot/efi”. Allocate sufficient space for each.
10. Before re-partitioning, you need to delete the existing partitions first. After mounting the partitions, finally check the option “Carry over user configuration files and user data”, then click "Next" to start the system installation.
11. After installation, reboot and change BIOS boot order to boot from the new hard drive. The system after rebooting will be the cloned system.
When installing on another computer using the personal live CD, ensure that a “boot/efi” partition is created; otherwise, the installation will fail. You can create other partitions according to your personal needs.
Method 4. rsync Backup
Full System Backup:
sudo rsync -aAXv \
/ --exclude={"/dev/*","/proc/*","/sys/*","/tmp/*","/run/*","/mnt/*","/media/*","/lost+found"} \
/backup/ubuntu-system
Method 5. Create a Full Disk Image with Clonezilla
1. Using Rufus to Create Bootable Clonezilla USB
Insert USB drive, in Rufus select Clonezilla ISO and click Start.
2. Boot into Clonezilla Live
Insert Clonezilla USB, restart the Ubuntu server or PC
Enter BIOS/UEFI, set USB as boot device and boot into Clonezilla
Select: Clonezilla live (Default settings)
3. Setting Backup
Select backup mode, choosing device-image
Choose backup storage location: local disk, external USB drive, SSH servers,Samba shares, and NFS shares
Choose backup type, savedisk or saveparts
4. Start the Backup
Method 6. Backup with Vinchin Backup & Recovery
For enterprises running Ubuntu workloads inside virtualized environments, manual Linux backup tools often become difficult to manage at scale. This is where Vinchin Backup & Recovery becomes valuable.
It provides flexible options for partition-level or bare-metal restores, catering to diverse enterprise needs. With features like incremental backups, data compression, encryption, and CDP, Vinchin ensures real-time backups and near-zero RPO and RTO. It supports both agentless and agent-based backups, integrating seamlessly with popular KVM-based hypervisors like Proxmox, XenServer, and XCP-ng. Additionally, it safeguards Linux data against ransomware threats, offering robust protection for mission-critical systems.
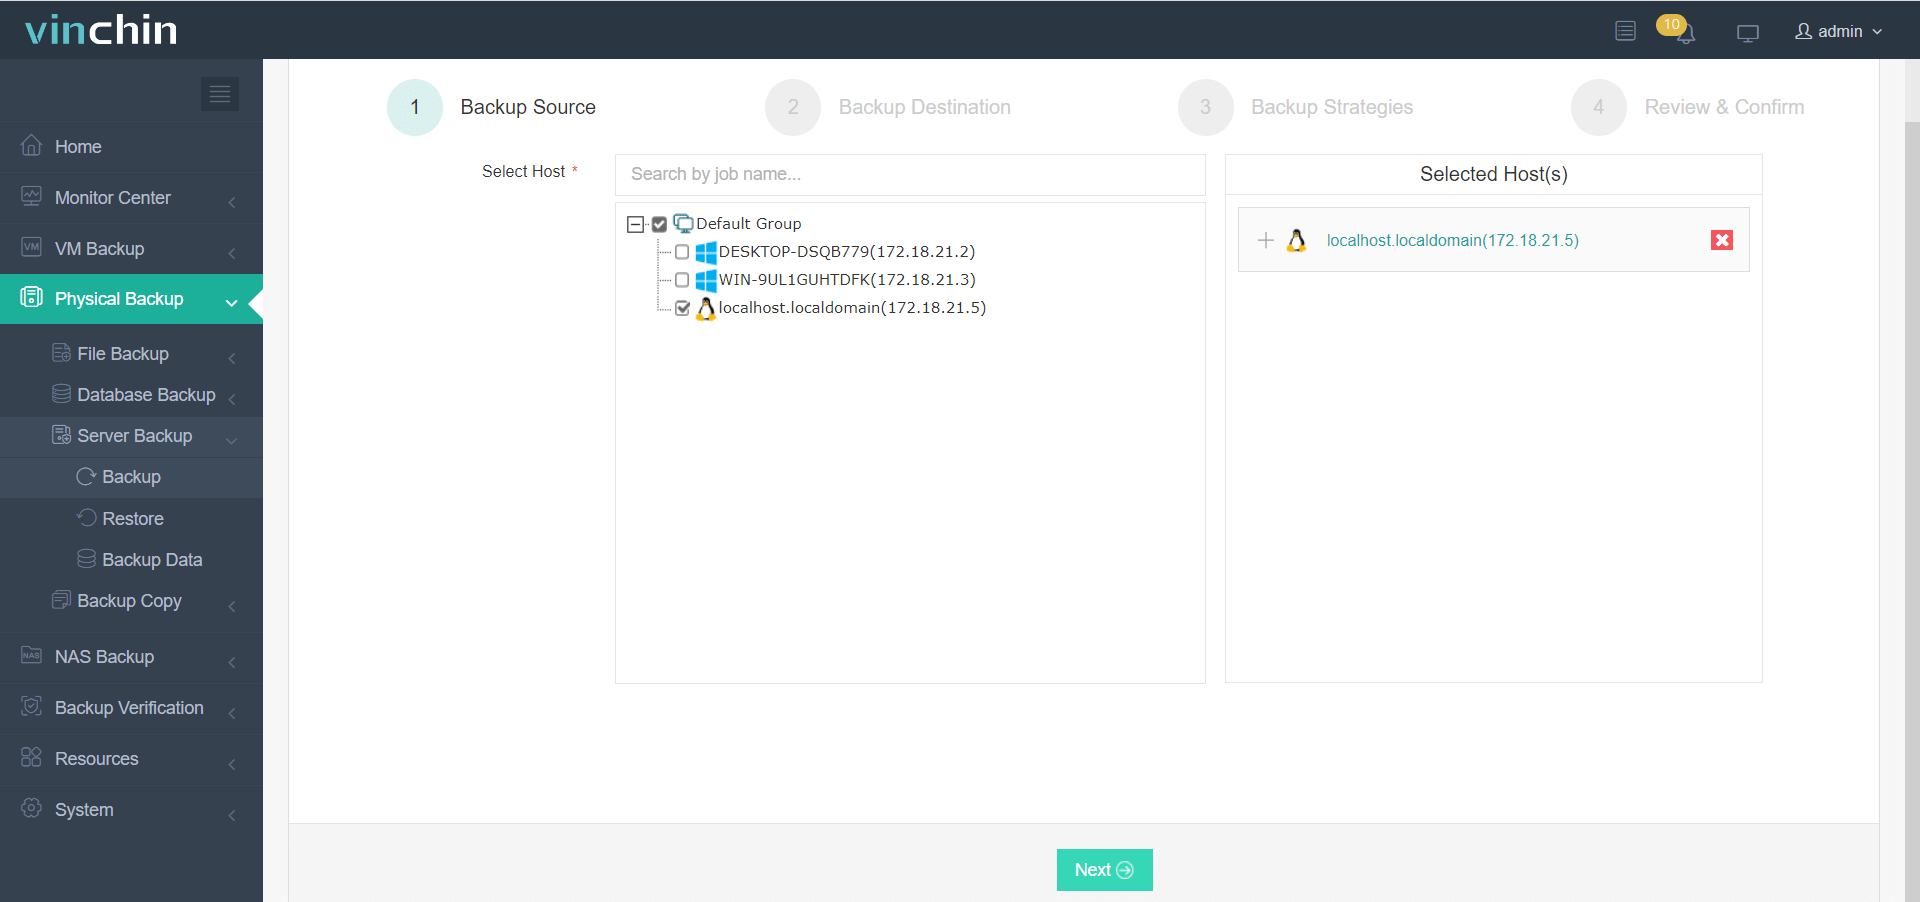
A user-friendly web console will help easily perform bare metal backup of Linux server:
1. Select the Linux server.
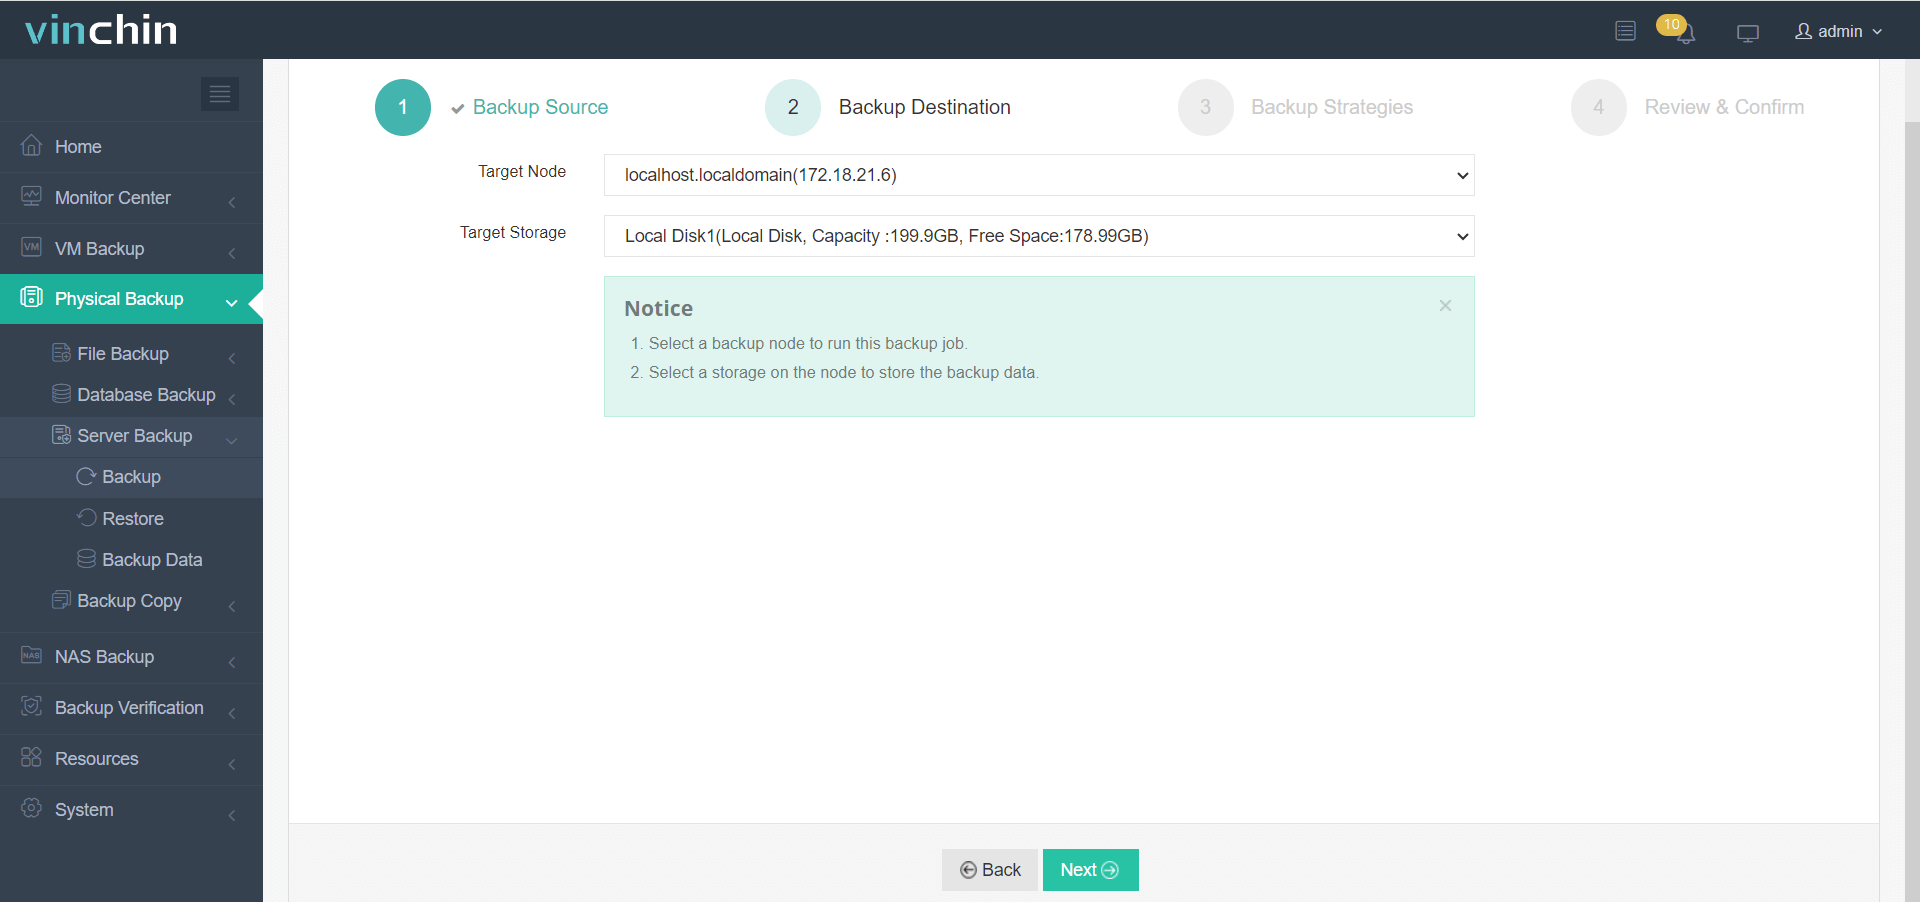
2. Select the storage to store the data backup.
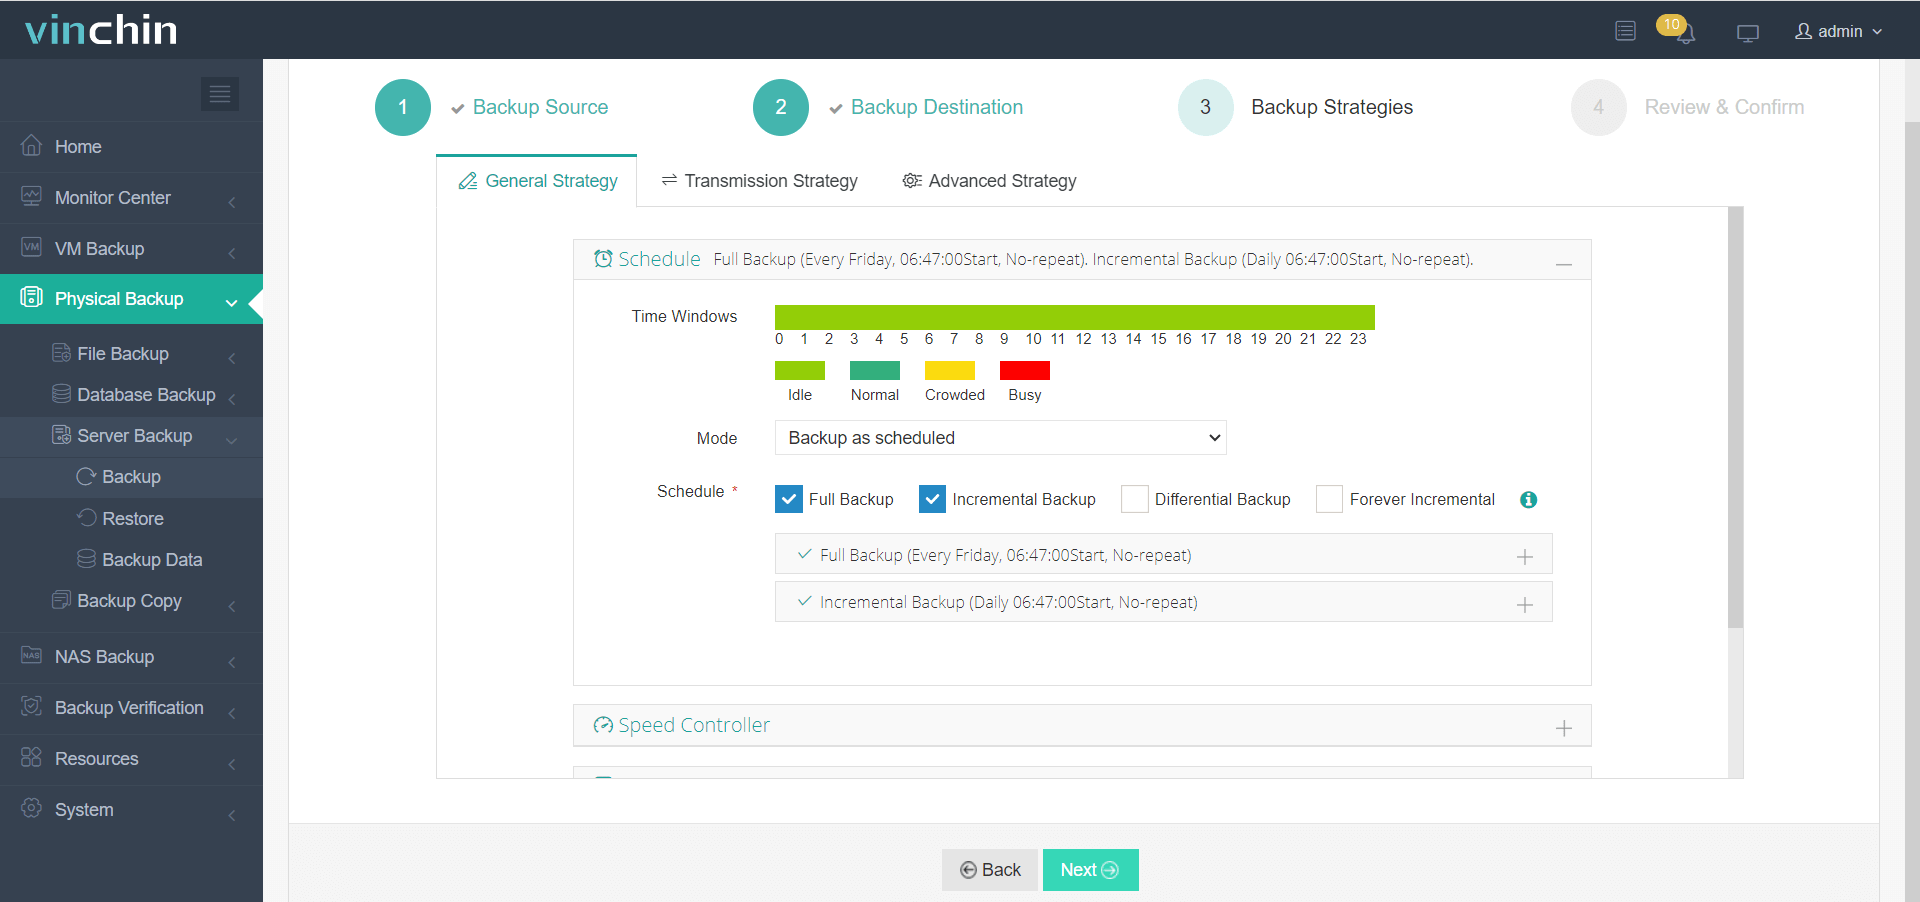
3. Select backup strategies like schedules and incremental backup.
4. Submit the job.
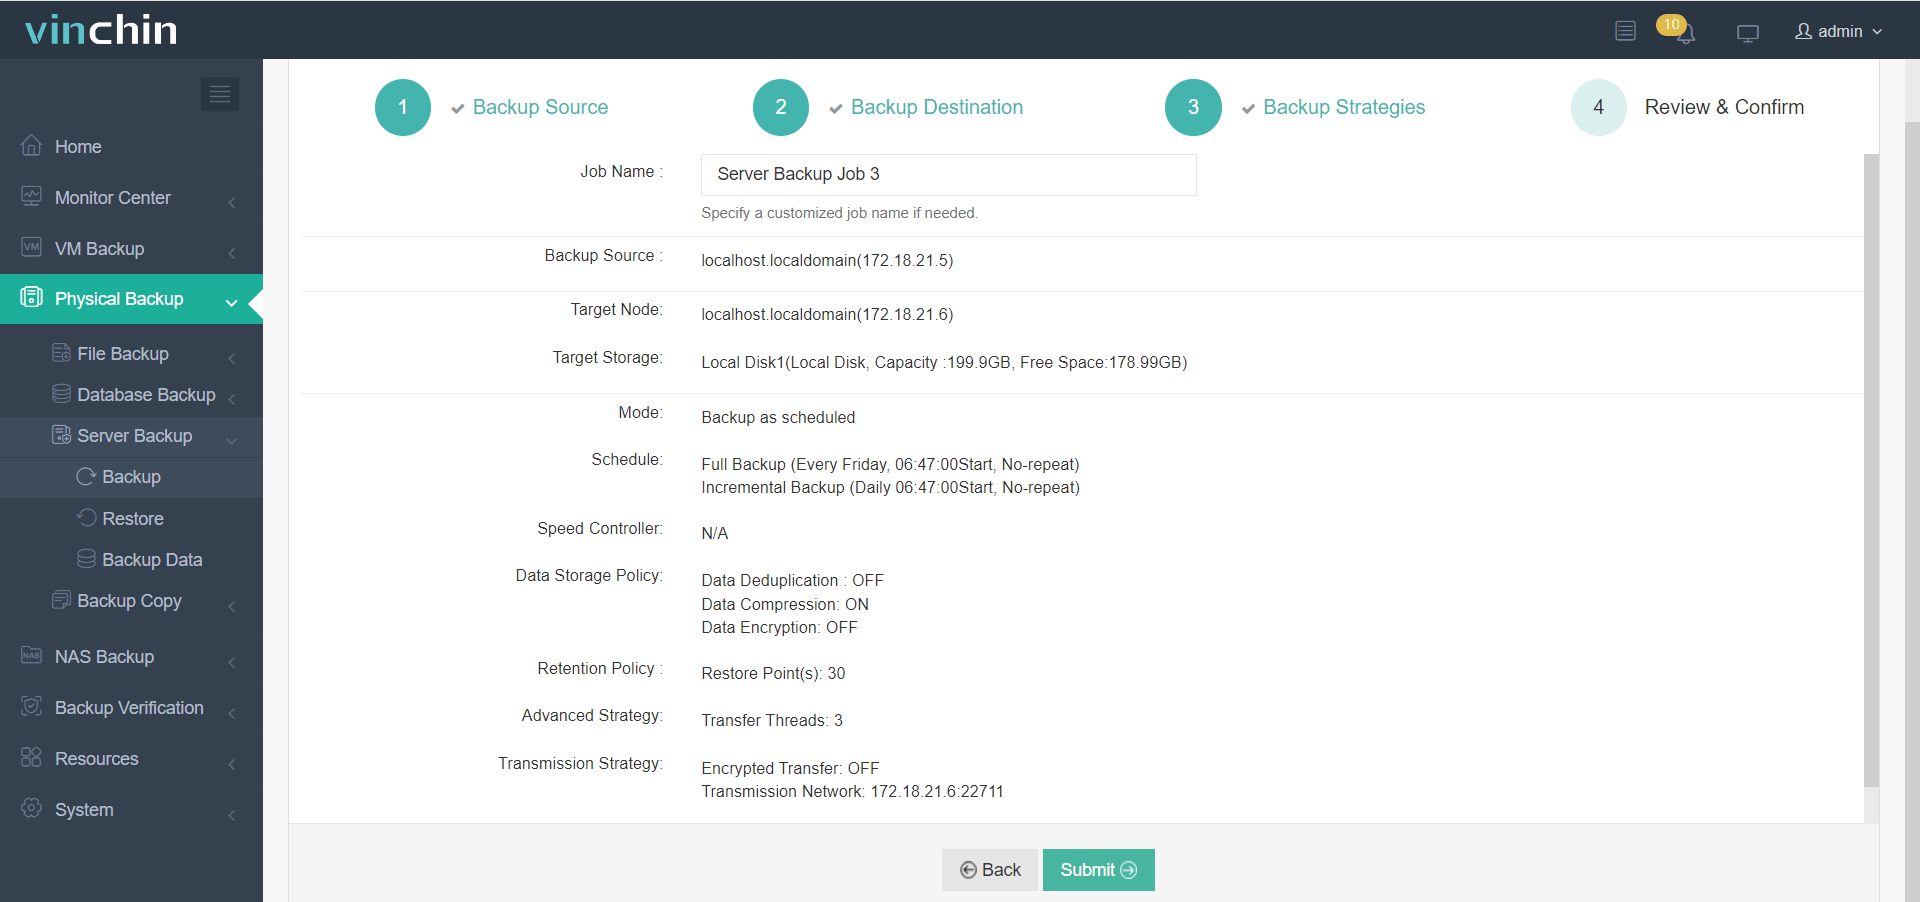
Now the entire Linux server including operating system and applications installed on it will be backed up.
Vinchin Backup & Recovery has been selected by thousands of companies and you can also start to use this powerful system with a 60-day full-featured trial! Also, contact us and leave your needs, and then you will receive a solution according to your IT environment.
FAQs about Ubuntu Backup Whole System
Q1: Can I backup the whole Ubuntu system without reinstalling?
Yes, full system backup tools can preserver the operating system, applications, configurations, and user data, allowing recovery without reinstalling Ubuntu from scratch.
Q2: Can Clonezilla restore Ubuntu to different hardware?
Yes, Clonezilla supports bare-metal recovery and can restore Ubuntu to different hardware, although additianl driver or bootloader adjustments may sometimes be required.
Q3: How can I automate Ubuntu whole-system backups?
You can automate backups using:
Automation helps ensure backups are performed consistently without manual intervention.
Conclusion
Choosing the right Ubuntu backup method depends on your environment and recovery needs. Tools like tar, rsync, Timeshift, Systemback, and Clonezilla provide reliable ways to protect Linux systems, while enterprise solutions like Vinchin Backup & Recovery offer centralized management, automated backup, and faster disaster recovery for large-scale virtualized environments. Regular backups and recovery testing are essential to ensure system security and business continuity.