Compared to external hard drives, Network Attached Storage (NAS) is a more convenient storage device that is connected to a network and allows multiple users and devices to access its data. With it, organizations can store and share data across a network without the need for a dedicated server.
Many organizations opt for NAS storage due to its great control over data security and privacy, low costs, and fast transfer speed. NAS data loss often occurs from accidental deletion and formatting, power failure, malware attacks, and more. Thus, the ability to backup and retrieve NAS data efficiently is very crucial for businesses. This blog gives 2 ways to restore Synology NAS and other NAS devices like QNAP, Buffalo, Asustor, WD, TerraMaster, etc. easily.

Method 1: Restore Synology NAS with Hyper Backup
Hyper Backup is a backup utility that schedules backup tasks via multiple backup modes to different backup destinations such as local shared folders, external hard drives, network drives, cloud services, and other Synology NAS devices. It has the following features:
Scheduling: run scheduled backups automatically.
Multi-versioning: keep backup versions as you need, delete older backups based on custom backup rotation policies, and save storage with block-level incremental backup.
Deduplication and compression: minimize storage consumption by removing data duplicates and compressing data size.
Combination with the cloud: complement by the web-based features of C2 Storage.
Centralized destination: you can download Hyper Backup Vault to transform your NAS into a backup location for other NAS devices.
Restore partial files/folders
1. Choose the backup job> Backup Explorer icon under Back up now. A password is needed if the backup job is encrypted.
2. Find the needed backup version with the timeline bar or the calendar icon.
3. Click the folders on the left and right-click the item to select Restore, Copy to…, or Download.
Restore: this will overwrite the folder/file on the NAS device.
Copy to: copy the file to a folder on NAS. This will lose the original privilege settings of files.
Download: download the single file on the current device. This will lose the original privilege settings of files.
Restore backup jobs from other backup destinations
1. In the Hyper Backup, click Restore> select Data or LUN*.
Restore data backup: choose Data> Restore from existing repositories> choose the backup destination.
Restore LUN: choose LUN*. Both block-level and file-level LUNs will be recovered into the latter.
2. Follow the wizard and enter the password if the task is encrypted.
3. Click Apply.
Restore configurations/applications/entire folder
4. Click Restore> select Data.
5. Select Restoration Task> Next.
6. Choose to Restore system configuration or not and click Next.
7. On the timeline at the bottom, choose the folders and version to restore the entire folder. Folders with the red exclamation point will be overwritten by the data in this backup. Click Next.
8. Restore application settings backed up before, which will replace the current data in the application. Click Next.
9. Click Done. A message showing the successful restoration will be sent after the process.
Note:
Only multi-version backup activities can use Backup Explorer.
Applications backup with DSM 5.1 or above cannot be recovered in 5.0 or below.
Restoration of the partial and previously damaged files is enabled with DSM 6.1 and newer.
Changed files during backup will be skipped when restoring, go to Backup Explorer> choose the files> click Copy to… for retrieval.
Shared folder file privileges may be altered by restoring User and Group settings.
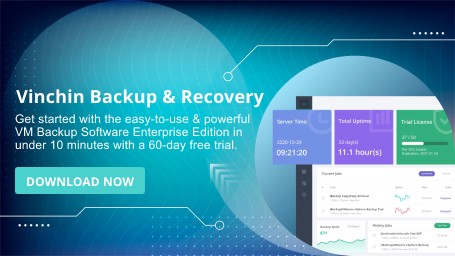
Method 2: Restore All NAS with Vinchin Backup & Recovery
Vinchin Backup & Recovery is an all-purpose backup solution that delivers simplified and effective backup and recovery services for NAS, Linux & Windows servers, multiple databases, and 10+ virtual platforms. It has the following features:
Automatic NAS backup: schedule automatic data backups and monitor the tasks via email alert.
High compatibility: support any NAS devices under the CIFS 2.0, 3.0, and NFS 3.0, 4.0, and 4.1 protocols regardless of the NAS brands like Synology or QNAP, or backup versions.
Compression and encryption: compress data to reduce storage consumption and encrypt data with AES-256 industry-standard algorithm.
Disaster recovery: restore NAS to the NAS share or file server quickly via multi-threading transfer.
Complement the cloud: archive NAS backups to public clouds including Amazon S3, Microsoft Azure, MinIO, and Wasabi.
Centralized management: centrally manage all backups from NAS or other sources in one web-based console.
Offsite backup copy: send extra backup copies to another location for emergencies.
Download the 60-day full-featured free trial of the new product v7.0 with anti-malware features and more surprises.
Restore NAS Easily to the NAS Share
1. Go to NAS Backup> Restore> select a restore point from NAS backups.

2. Choose to restore to NAS Share, check the share box, and select the restore path to either the manual way or to the original path. If you want to do it manually, select the path underneath.

3. Put a speed limit on the recovery and tune up the transfer threads.

4. View and submit the job.
Restore NAS Easily to the File Server
1. Go to NAS Backup> Restore> select a restore point from NAS backups.
2. Choose to restore to File Server, choose the agent from the drop-down, and select the path underneath manually.

3. Put a speed limit on the recovery and tune up the transfer threads.
4. View and submit the job.
Conclusion
NAS provides centralized management, scalability, and easy accessibility for organizations, and the proper NAS backups ensure that recovery is always feasible in data loss accidents or disasters such as hardware failure, software corruption, accidental deletion, or cyberattacks.
Users of NAS devices can depend on Hyper Backup for Synology NAS, whereas, when it comes to other NAS brands such as QNAP, Asustor, Buffalo, Drobo, Promise, D-LINK, and so on, you can choose Vinchin Backup & Recovery that supports all NAS devices under CIFS 2.0, 3.0 and NFS 3.0, 4.0, 4.1 protocols with smart backup and recovery strategies.