-
What Are VMDK Files?
-
How to Shrink Disk Partition in the Guest OS?
-
Preparing the Disk: Zeroing Free Space
-
Method 1: Shrink a VMDK Disk by Manually Editing the VMDK Descriptor File
-
Method 2: Shrink a VMDK Disk Using PowerShell & PowerCLI Automation
-
Method 3: Shrink a VMDK Disk Using vmware-vdiskmanager Tool (Workstation/Fusion Only)
-
Method 4: Shrink a VMDK Disk Using VMware vCenter Converter Standalone
-
Backup VMware VMs with Vinchin
-
Shrink VMDK FAQs
-
Conclusion
Virtual machines (VMs) power most modern IT environments. But what if your virtual disk (VMDK) grows too large? Unlike physical disks, you can’t just delete files inside the guest OS and expect storage savings at the infrastructure level. Shrinking a VMDK is a careful process that involves several steps both inside the VM and on your hypervisor platform. In this guide, you’ll learn what VMDK files are, how to shrink partitions safely in the guest OS, how to prepare disks for shrinking by zeroing free space, and how to reduce actual VMDK size using supported methods—manual or automated.
What Are VMDK Files?
A Virtual Machine Disk (VMDK) file is VMware’s format for virtual hard drives used by its products such as ESXi or Workstation. Think of it as a container holding all data, partitions, and file systems of a VM—much like a physical drive holds everything on a real server.
Every virtual disk consists of at least two files:
The descriptor file (
vmname.vmdk) contains metadata about geometry (size), provisioning type (thin or thick), parent-child relationships (for snapshots), and more.The flat file (
vmname-flat.vmdk) stores raw data blocks—the actual contents written by the VM’s operating system.
Thin-provisioned disks use an internal mapping called grain tables to track which blocks contain data versus which are empty or zeroed out. Thick-provisioned disks allocate all space up front regardless of usage.
When you delete files inside your VM's OS—even on thin disks—the underlying datastore doesn’t immediately reclaim that space. That’s because only the guest OS knows which blocks are truly unused; from VMware’s perspective those blocks may still hold valid data until explicitly marked otherwise.
How to Shrink Disk Partition in the Guest OS?
Before reducing a VMDK file itself, always shrink partitions within your guest operating system first. This ensures you don’t risk cutting off live data when resizing at the storage layer.
Shrinking partitions tells your OS which areas of disk are no longer needed so they can be safely removed later during VMDK reduction.
Before starting:
Make sure you have a full backup.
Check partition alignment using tools like
fdisk -lin Linux orwmic partition get BlockSize, StartingOffsetin Windows.Defragment volumes if possible—especially on Windows—to move immovable files away from partition ends.
For Linux root partitions or busy volumes: plan downtime so you can boot from live media if needed.
For Windows Guests
Use built-in Disk Management:
1. Log into Windows.
2. Right-click This PC or My Computer, choose Manage, then select Disk Management.
3. Right-click your target partition; click Shrink Volume.
4. Enter desired amount to shrink—note that maximum available depends on location of unmovable files like pagefile.sys.
5. Confirm changes; wait for completion.
If "Shrink Volume" offers less than expected space due to immovable files:
Run
defrag /X /H C:in Command Prompt as AdministratorTry shrinking again after defragmentation
For Linux Guests
Linux offers multiple tools depending on filesystem type:
1. Boot from GParted Live CD/ISO if shrinking root or mounted partitions.
2. Select target partition; choose Resize/Move option.
3. Adjust size slider or enter value directly; apply changes.
4. For ext-based filesystems: after resizing partition with GParted or parted, run resize2fs /dev/sdXN where X is device letter/number
5. Reboot into normal mode once done
For XFS: shrinking isn’t supported natively—you must back up data, recreate filesystem smaller, then restore data.
After successful shrinkage you’ll see unallocated space at end of disk—a requirement before reducing actual VMDK size later.
Preparing the Disk: Zeroing Free Space
Zeroing free space is essential before compacting thin-provisioned disks or using certain reduction tools—it marks unused blocks so VMware can identify them as reclaimable during cloning or compaction processes.
Why bother? When you delete files inside an OS they’re only flagged as deleted—not actually overwritten with zeros—so hypervisors cannot distinguish between “free” versus “used” sectors unless explicitly told via zero-filling utilities.
Zeroing Free Space in Windows Guests
You have two main options:
1. Use Microsoft Sysinternals’ SDelete tool:
Download SDelete.exe
Open Command Prompt as Administrator
Run:
sdelete.exe -z C:
This writes zeros across all free sectors on drive C:.
2. On newer versions (Windows 8+):
Open PowerShell as Administrator
Run:
Optimize-Volume -DriveLetter C -ReTrim -Verbose
This command issues TRIM hints but does not overwrite with zeros—it works best with SSD-backed datastores supporting UNMAP/TRIM commands natively.
Zeroing Free Space in Linux Guests
For ext-based filesystems:
1. If offline/unmounted:
zerofree /dev/sdXN
2. If online/mounted (not recommended for production):
dd if=/dev/zero of=zero.fill bs=1M || true && sync && rm zero.fill
This creates a large temporary file filled with zeros until disk fills up; then deletes it so only unused sectors remain zeroed out.
Always ensure enough working space exists before running these commands!
Once partitions are shrunk and free space has been zeroed out inside your VM’s OS, it’s time to actually reduce—or “shrink”—the underlying VMDK file itself at infrastructure level.
VMware vSphere Client GUI allows increasing but not decreasing disk sizes directly! You must use one of several manual or automated approaches described below:
Always back up your VM before making any changes at this stage! A tested backup is critical insurance against mistakes here.
Method 1: Shrink a VMDK Disk by Manually Editing the VMDK Descriptor File
This method gives maximum control but carries significant risk—only attempt if comfortable working directly with ESXi shell access!
First understand that every descriptor file contains an RW line specifying total number of 512-byte sectors allocated:
RW <sector_count> <type> "<flat_file>"
Steps:
1. Power off VM completely; ensure no active snapshots exist!
2. SSH into ESXi host; navigate to relevant datastore folder:
cd /vmfs/volumes/<datastore>/<VM_folder>
3. Back up both descriptor & flat files:
    cp vmname.vmdk backup_vmname.vmdk
    cp vmname-flat.vmdk backup_vmname-flat.vmdk
4. Edit descriptor using vi/nano/etc.; locate RW line:
    vi vmname.vmdk
    # Find 'RW' line near top
    # Calculate new sector count = Desired size in bytes / 512
    # Example for 20GB: 20*1024*1024*1024/512 = 41943040 sectors
    # Replace old value with new one & save changes
5–6 . To physically reclaim unused capacity clone disk using vmkfstools — this step copies only used/zeroed-out blocks if source was thin provisioned:
vmkfstools -i vmname.vmdk -d thin vmname_new.vmdk
7 . Register cloned VM via vCenter/ESXi web UI (Register VM) pointing at updated .vmx config file
8 . Power on & verify correct operation/disk sizing within guest
Manual edits can corrupt entire VM if sector math is wrong! Test thoroughly outside production first.
Method 2: Shrink a VMDK Disk Using PowerShell & PowerCLI Automation
PowerCLI provides scripting automation especially useful for larger environments managing many similar tasks repeatedly .
Prerequisites :
Install latest PowerCLI
Ensure WinRM enabled & accessible between management workstation & guests
Install VMware Tools within each guest for proper quiescing during snapshotting/backups
Typical workflow :
1 . Resize guest partition(s) via script — e.g., call native Windows cmdlets remotely :
Invoke-Command –ComputerName $VMName –ScriptBlock { Resize-Partition ... }2 . Shut down target VM ; confirm no active snapshots remain
3 . Script connects via Connect-VIServer , backs up descriptors , modifies RW values , triggers migration/cloning :
Set-HardDisk –HardDisk $disk –CapacityGB $newSize –Confirm:$false
# Or manually edit descriptor + invoke Move-HardDisk etc .
4 . Re-register/shutdown/startup sequence handled programmatically
Never store plain-text credentials ; use SecureString objects wherever possible .
Full script examples abound online — always review code security before running third-party scripts .
Method 3: Shrink a VMDK Disk Using vmware-vdiskmanager Tool (Workstation/Fusion Only)
If working outside datacenter context — e.g., lab/test/dev workloads running under Workstation/Fusion — use bundled CLI utility :
Note : Not available nor supported under ESXi/vSphere hosts !
Steps :
1 . Clean up unnecessary junk/files within guest ; empty recycle bin/trash etc .
2 . Zero out free space per earlier section .
3 . Shut down target VM .
4 . On host machine run :
vmware-vdiskmanager.exe -k "path_to_vmdk.vmdk"
The -k flag reclaims all-zero blocks , compacting overall image footprint .
On Linux/Mac hosts there may be no direct equivalent flag ; consider copying/thinning instead .
Method 4: Shrink a VMDK Disk Using VMware vCenter Converter Standalone
For admins seeking officially supported GUI workflows , vCenter Converter Standalone remains safest route — especially when moving production workloads .
Converter performs virtual-to-virtual (“V2V”) migrations creating fresh copy sized exactly per user specification .
Key points:
Requires enough spare storage temporarily hold both source + destination images simultaneously .
Source CBT (“Changed Block Tracking”) should be disabled pre-conversion .
Network/IP conflicts may arise if cloning onto same subnet/environment without changing MAC addresses/IPs post-migration .
How-to :
1 . Download/install Converter Standalone onto management workstation.
2 . Launch app; connect source/destination hosts accordingly.
3 . Select source VM; define destination location/storage pool.
4 . Under Data To Copy > Edit > Select Volumes To Copy set new smaller sizes per volume required.
5 . Start conversion job; monitor progress/logs closely.
6 . Once complete boot new instance , validate application/data integrity thoroughly!
7 . Remove/decommission original once satisfied.
Backup VMware VMs with Vinchin
Before proceeding with any risky operations like shrinking VMDKs, having robust backups is essential—and this is where Vinchin stands out as an enterprise-grade solution tailored for virtualization environments such as VMware first and foremost, along with Hyper-V, Proxmox VE, oVirt/RHV/OLVM, XCP-ng/XenServer, OpenStack, ZStack and more than fifteen mainstream platforms overall.
Vinchin delivers comprehensive protection features including forever-incremental backup for efficient long-term retention without repeated full backups; advanced deduplication and compression technologies that minimize storage consumption; seamless cross-platform V2V migration capabilities; granular restore options down to individual files/folders; plus scheduled strategies like repetitive backup jobs—all managed through an intuitive web console designed for ease-of-use even at scale.
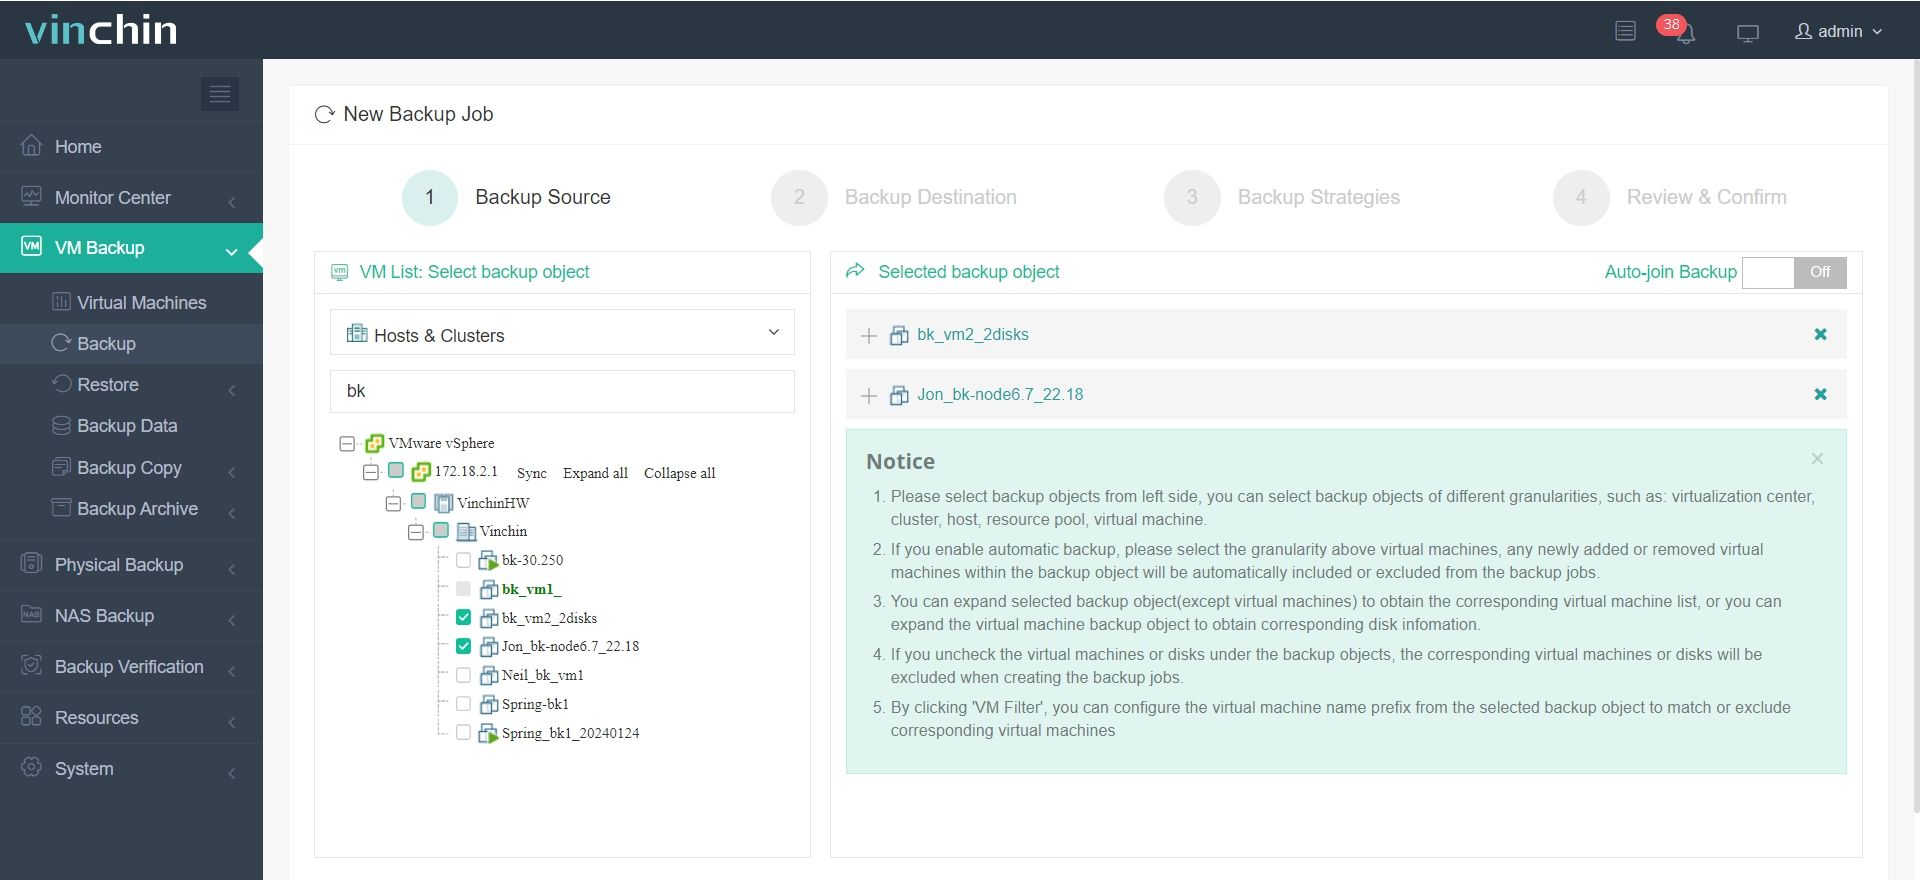
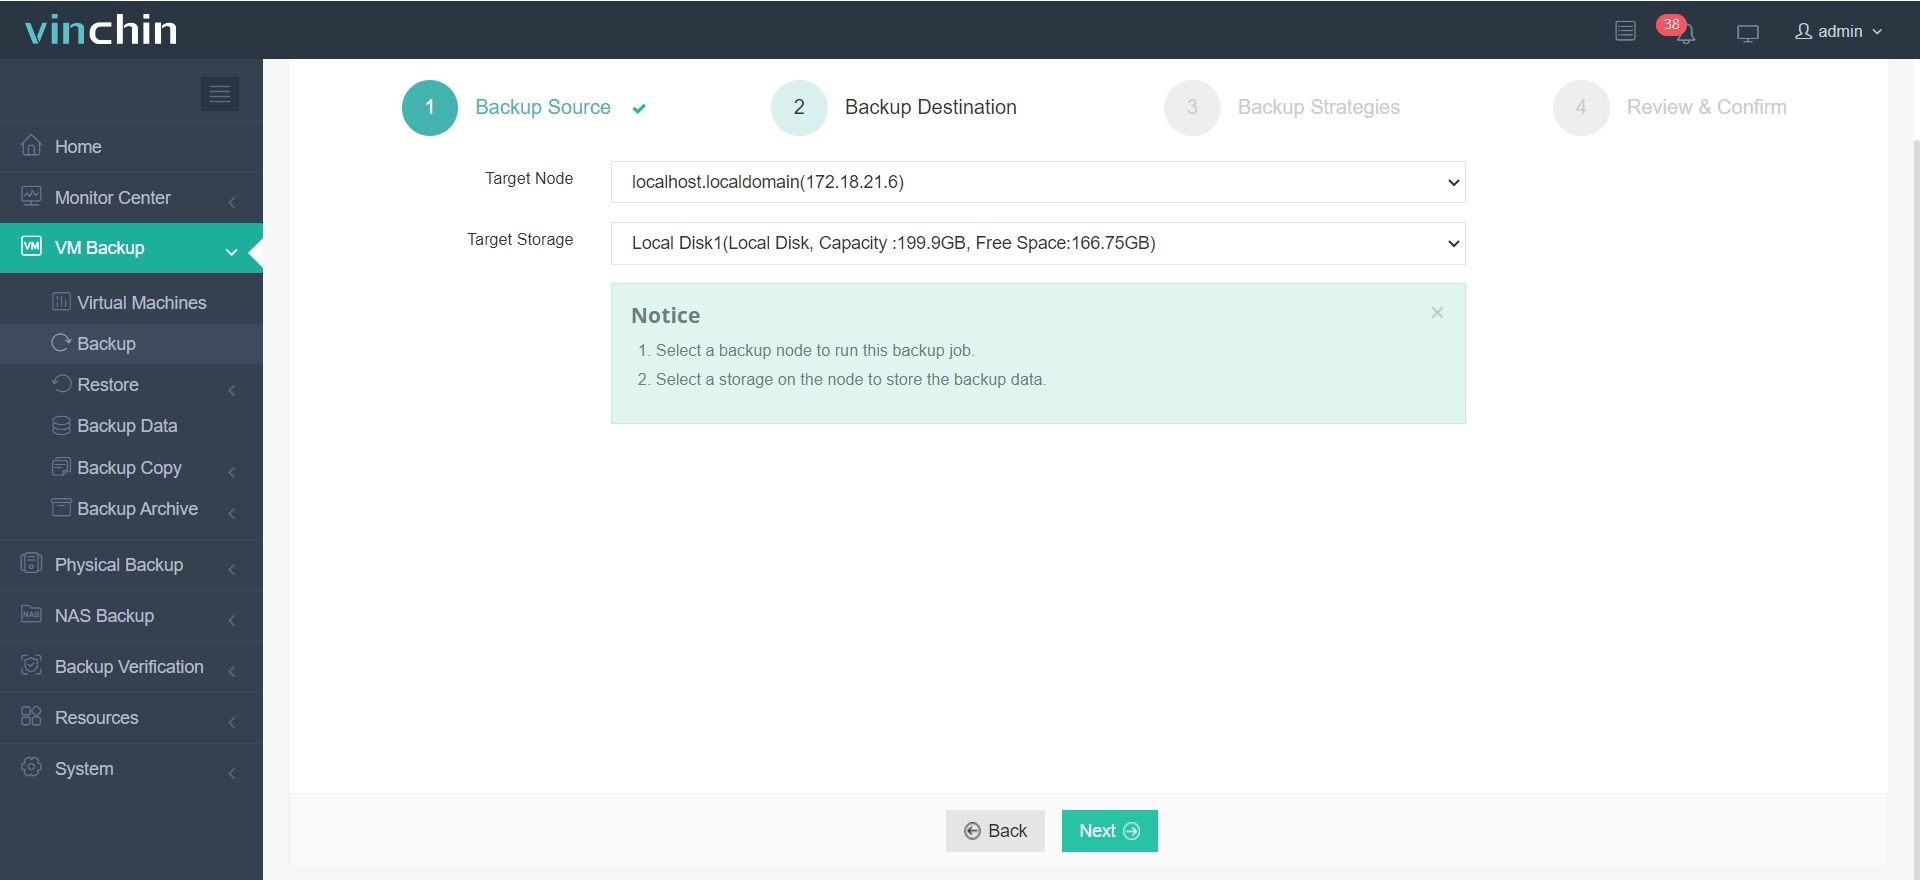
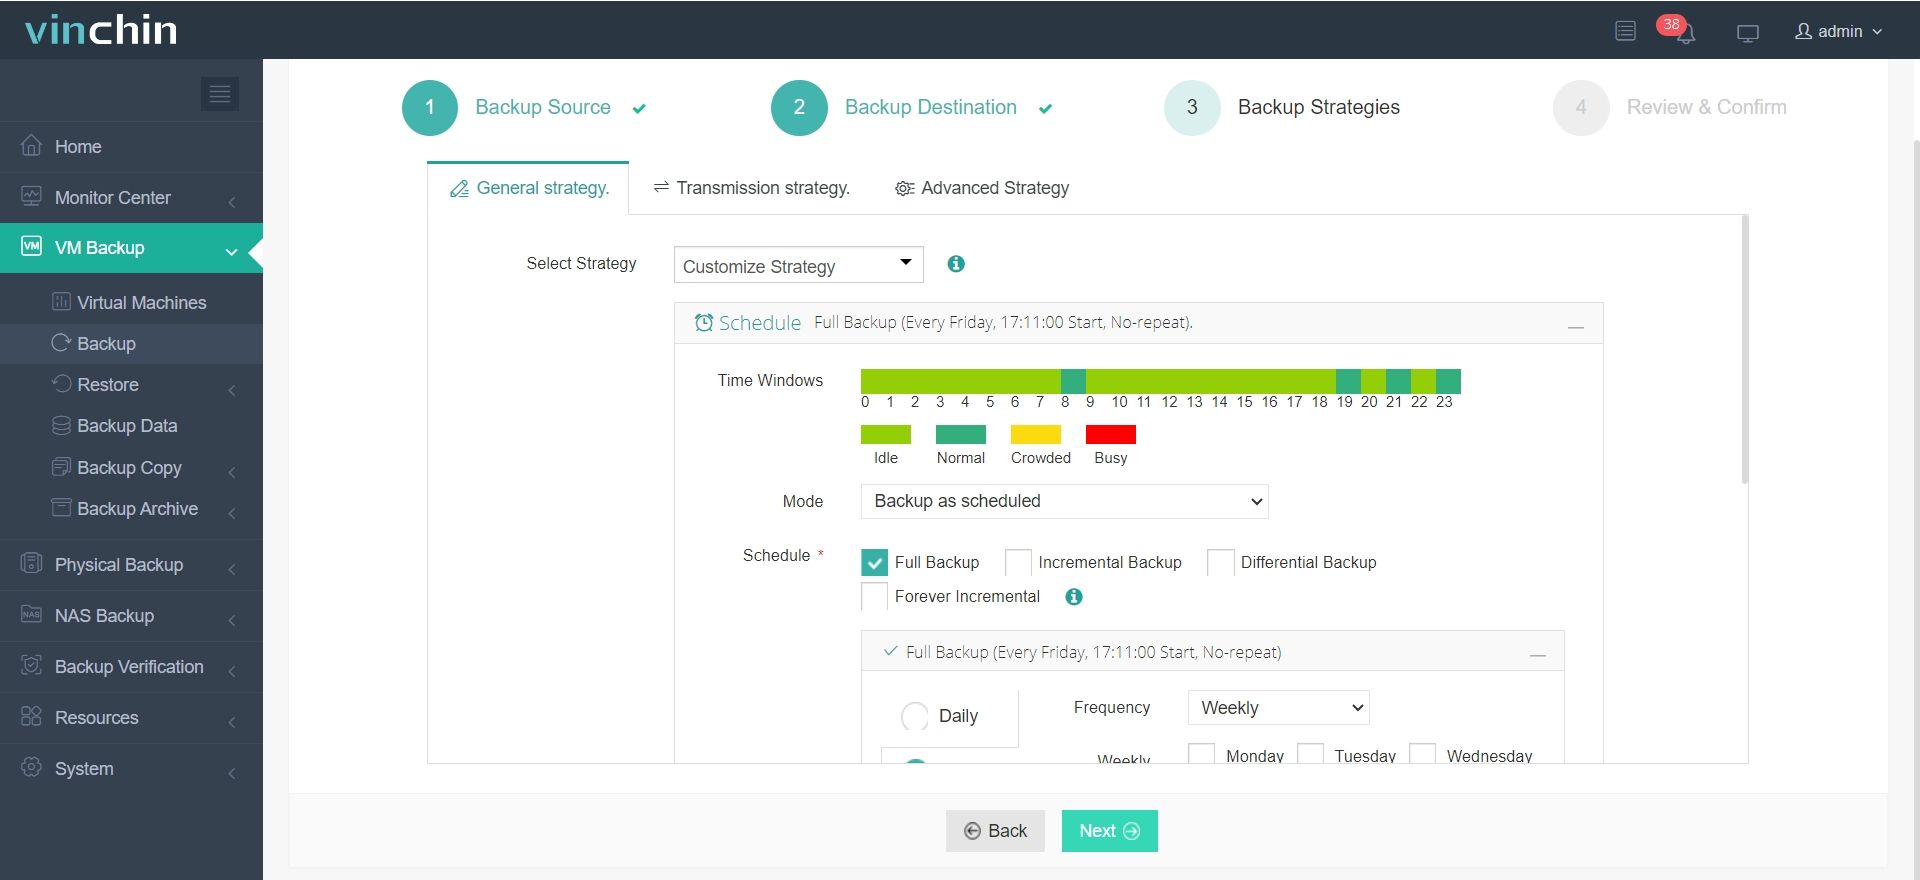
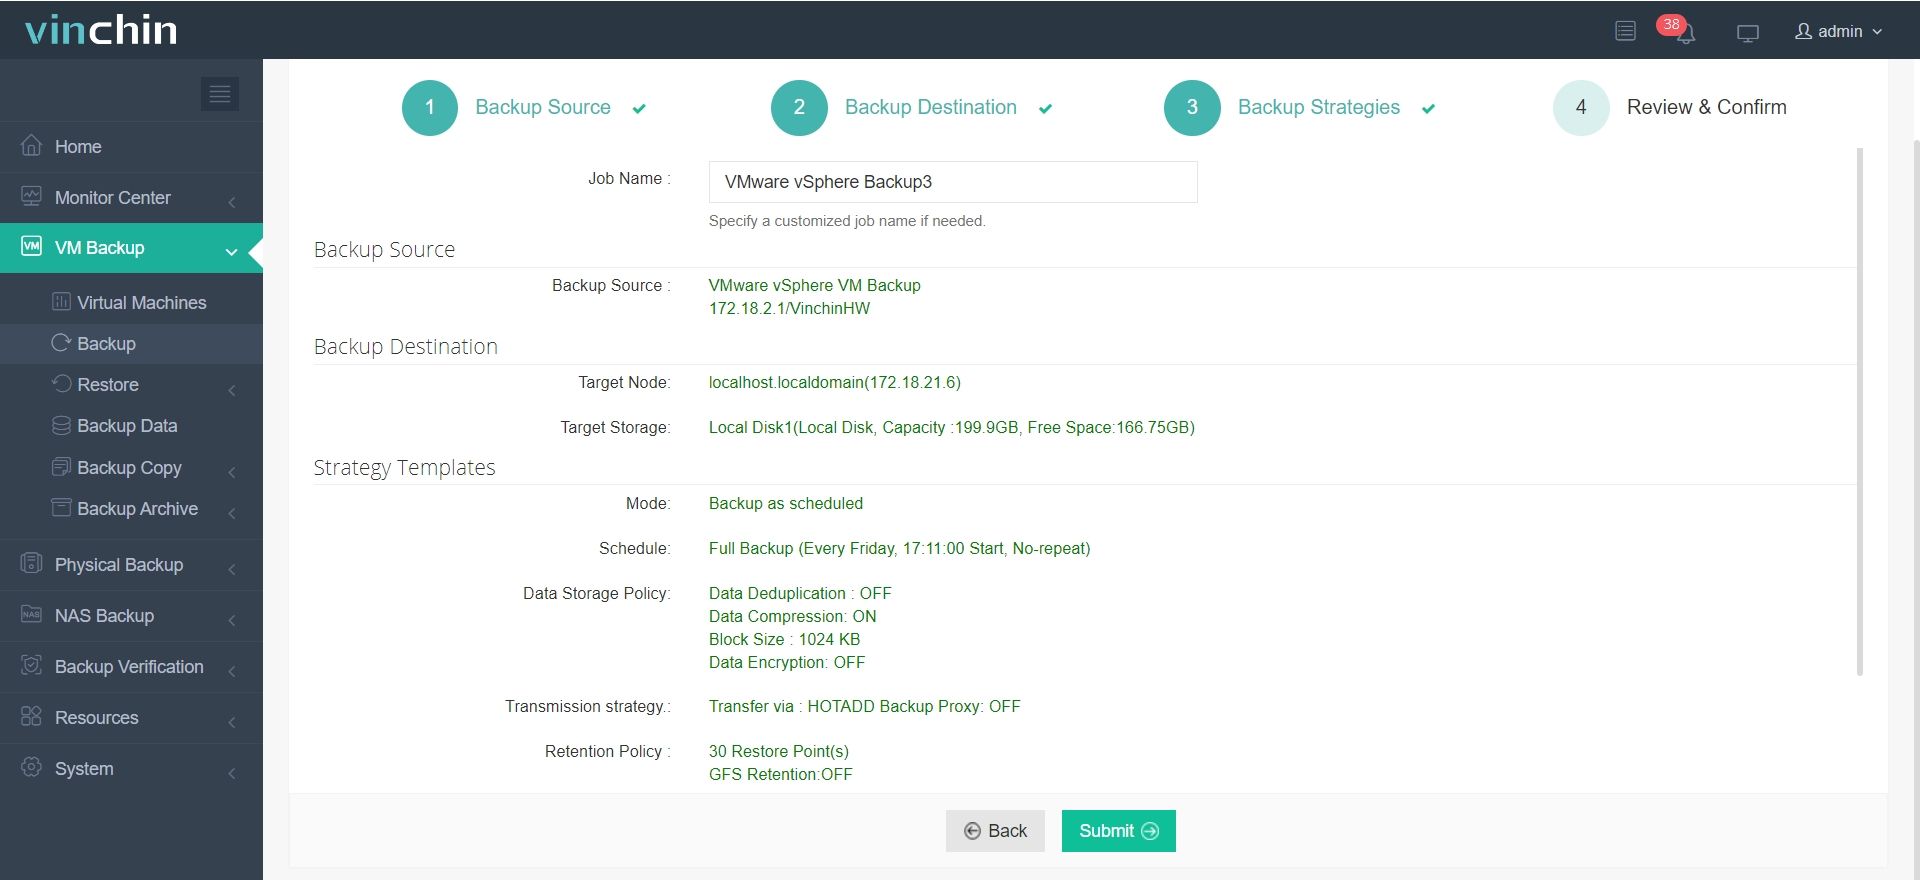
Backing up a VMware VM takes just four steps:
1. Select your target VMware virtual machine(s);

2. Choose appropriate backup storage repository;

3. Configure backup strategy settings;

4. Submit the job.

Recognized globally by thousands of customers—with high ratings across industry review sites—Vinchin offers a fully-featured 60-day free trial so you can experience its power firsthand risk-free! Click below to download the installer now and deploy secure backups effortlessly across your environment.
Shrink VMDK FAQs
Q1: Can I shrink a VMDK without powering off the VM?
No—you must power off the VM completely before attempting any reduction procedure to avoid corruption risks.
Q2: What happens if I skip shrinking the partition inside the guest OS?
You risk severe data loss or rendering your system unbootable since vital structures could be truncated unexpectedly during resize operations.
Q3: How do I check if my VMDK is thin or thick provisioned?
In vSphere Client select target VM > click EDIT SETTINGS > expand HARD DISK > review PROVISIONING TYPE field shown there.
Q4: Can I shrink thick-provisioned lazy-zeroed disks?
Only by converting them into thin format first using cloning tools such as vmkfstools then proceeding with standard compaction methods afterward.
Q5: Why does my shrunk VMDK still show its original size in datastore browser?
Check whether UNMAP/TRIM support exists end-to-end—from hypervisor through storage array—and trigger manual reclamation via esxcli storage vmfs unmap command where applicable.
Conclusion
Shrinking a VMDK takes careful planning—from prepping partitions inside guests through safe reduction steps outside—all while protecting yourself with solid backups along every step! With Vinchin handling protection duties behind-the-scenes you’re ready to optimize storage confidently across even complex enterprise environments today.
Share on:


