Introduction
Proxmox VE and XCP-ng are the easiest targets for a native VMware migration because each ships with a tool that pulls VMs straight from ESXi. Hyper-V takes more manual steps, but it fits Windows-centric environments well.
Since Broadcom acquired VMware, many IT teams have faced new licensing models and higher renewal costs, and have started looking for alternatives. Proxmox VE, Microsoft Hyper-V, and XCP-ng are the three platforms that appear on most shortlists. All three can replace VMware, but their migration paths are very different: an import wizard, a manual disk conversion, or a dedicated migration tool.
This guide walks through the exact steps for each platform, compares them side by side, and shows how Vinchin Backup & Recovery can act as a single VMware migration tool for all three.
Before You Migrate: Preparation Checklist
Most failed VMware migration projects come from skipped preparation, not from the migration tool. Spend an hour on this checklist before you touch the first VM.
Inventory your VMs. Record the name, guest OS, vCPU and RAM, number and size of disks, firmware type (BIOS or UEFI), and network or VLAN mapping for each VM.
Check feature dependencies. If you rely on vSAN, NSX, DRS, HA, or vMotion, decide how each one will be replaced on the target platform.
Clean up snapshots. Delete or consolidate snapshots before exporting disks, because snapshot chains complicate every conversion method.
Plan the downtime. Even live or warm migration needs a short cutover window. Agree on it with application owners.
Back up first. Take a full backup of every VM and keep the source VM until the migrated copy is validated. This is also your rollback plan.
Pilot one VM. Migrate a non-critical VM end to end, including drivers and networking, before you scale up.
How to Migrate from VMware to Proxmox, Hyper-V, and XCP-ng
A VMware migration looks different on each of the three platforms. Proxmox VE has a built-in ESXi import wizard and a command-line alternative. Hyper-V has no native ESXi importer, so you convert the disk to VHDX and build the VM around it. XCP-ng migrates VMs through the V2V feature in Xen Orchestra.
Each section below follows the same pattern: prepare, migrate, then clean up inside the guest. Run the steps on a test VM first, and keep the original VM powered off, not deleted, until the new one is verified.
VMware to Proxmox Migration
Proxmox VE offers the most direct answer to how to migrate a VMware VM to Proxmox. Starting with version 8.1, its import wizard connects to ESXi and maps most of the VM configuration automatically.
Method 1: Use the ESXi import wizard (recommended)
1. Confirm that Proxmox VE is version 8.1 or later and that it can reach your ESXi host or vCenter over the network. For Windows guests, upload the VirtIO driver ISO to Proxmox in advance.
2. In the web interface, go to Datacenter → Storage → Add → ESXi. Enter an ID, the ESXi or vCenter address, and your credentials. If the host uses a self-signed certificate, skip certificate verification.
3. Expand the new storage in the left-hand tree, select the VM you want to move, and click Import.
4. Choose the target storage, network bridge, and disk bus, then start the import. You can also enable live-import: shut the VM down on ESXi, boot it on Proxmox right away, and the remaining disk data is fetched in the background.
5. After the first boot, uninstall VMware Tools. On Windows, install the VirtIO drivers and the QEMU guest agent. On Linux, install the qemu-guest-agent package.
Method 2: Import a VMDK from the command line
If the wizard cannot reach your ESXi host, copy the VMDK to the Proxmox node and import it manually. The qm disk import command converts the disk to the target storage's native format as it imports.
# 1. Create an empty VM shell (adjust ID, name, memory, cores, bridge)
qm create 200 --name web01 --memory 4096 --cores 2 \
  --net0 virtio,bridge=vmbr0 --scsihw virtio-scsi-single --ostype l26
# 2. Import the VMDK into the target storage
qm disk import 200 /var/lib/vz/import/web01.vmdk local-lvm
# 3. Check the imported disk name, attach it, and set it as the boot disk
qm config 200
qm set 200 --scsi0 local-lvm:vm-200-disk-0 --boot order=scsi0
# 4. Start the VM
qm start 200
If the source VM used UEFI, add --bios ovmf --efidisk0 local-lvm:1 when you create the shell. For Windows guests, set --ostype to the matching Windows type.
Common pitfall: the firmware type must match the original VM. A Windows VM that blue-screens on a VirtIO disk can be booted from a SATA disk first, then switched to VirtIO once the drivers are installed.
VMware to Hyper-V Migration
Hyper-V has no built-in VMware migration tool that reads VMs from ESXi, so a VMware to Hyper-V migration means converting the disk, then building a VM around it. Microsoft's older Virtual Machine Converter is no longer maintained, so this guide uses the open-source qemu-img utility instead.
1. Prepare the source. Shut down the VM, delete its snapshots, uninstall VMware Tools, and note whether it boots with BIOS or UEFI.
2. Copy the disk. Download the .vmdk descriptor and its -flat.vmdk file from the datastore (for example with the datastore browser) to the Hyper-V host.
3. Convert VMDK to VHDX with qemu-img (command below).
4. Create the VM. Use Generation 1 for BIOS guests and Generation 2 for UEFI guests, and attach the converted VHDX.
5. Boot and clean up. Check that the integration services are running, then reconfigure the network adapter and IP address.
# Convert the disk (qemu-img for Windows must be installed)
qemu-img.exe convert -p -f vmdk -O vhdx D:\import\web01.vmdk D:\VMs\web01.vhdx
# Create and start the VM (use -Generation 1 for BIOS guests)
New-VM -Name web01 -Generation 2 -MemoryStartupBytes 4GB `
  -VHDPath "D:\VMs\web01.vhdx" -SwitchName "External"
Set-VMProcessor -VMName web01 -Count 2
Start-VM -Name web01
# Confirm the integration services are running
Get-VMIntegrationService -VMName web01
If a Generation 2 Linux VM does not boot, change its secure boot template with Set-VMFirmware -VMName web01 -SecureBootTemplate MicrosoftUEFICertificateAuthority.
Common pitfall: choosing the wrong generation. A BIOS guest placed on a Generation 2 VM, or the reverse, will not start.
VMware to XCP-ng Migration
A VMware to XCP-ng migration runs through the V2V (VMware to Vates) feature in Xen Orchestra (XO), the management console for XCP-ng. The V2V migration guide covers the details. The process runs from the interface, so there are very few commands.
1. Prepare XO and VMware. Update Xen Orchestra to a current version. Since XO 5.110, V2V uses a backend built on nbdkit and VMware's VDDK libraries, so you first add the VDDK archive by dropping it into the XO interface. Uninstall VMware Tools from the guest.
2. Start the import. In the XO 5 interface, go to Import → VM → From VMware, enter your vCenter or ESXi address and credentials, and select the VM.
3. Choose the target. Pick the destination XCP-ng pool, storage repository (SR), and network, then start the transfer.
4. Let the warm migration run. The source VM keeps running during the first copy. XO then stops it, sends the final changes, and starts the VM on XCP-ng, so downtime is limited to the cutover.
5. Install the guest tools. On Linux, install the XCP-ng guest tools from your distribution (the xe-guest-utilities package on Debian and Ubuntu). On Windows, install the XCP-ng PV drivers. Then confirm the VM state from the XCP-ng host:
xe vm-list name-label=web01 params=name-label,power-state
For a single VM, you can also export an OVA from VMware and import it through the XO Import menu. Two limits to remember: since XO 5.110, NFS-based migration and vSAN exports are no longer available, and disks larger than about 2 TB cannot be migrated automatically.
Common pitfall: skipping the guest tools. Without them, network and disk performance on XCP-ng is poor.
Which Is Easiest? Side-by-Side Comparison
For a VMware migration, Proxmox VE has the shortest native path, XCP-ng comes close once Xen Orchestra is running, and Hyper-V needs the most manual work.
| Platform | Native migration tool | Disk conversion by hand | Live or warm migration | Command line needed | Overall effort |
|---|
| Proxmox VE | ESXi import wizard | No | Yes (live-import) | Optional | Low |
| Hyper-V | None for ESXi | Yes (VMDK to VHDX) | No | Yes (qemu-img, PowerShell) | Medium |
| XCP-ng | Xen Orchestra V2V | No | Yes (warm migration) | No | Low to medium
(needs XO and VDDK setup) |
How to choose:
Windows-centric environment with Microsoft licensing: a VMware to Hyper-V migration, accepting the extra conversion steps.
No license fees and the fewest migration steps: Proxmox VE.
A vSphere-style workflow with a dedicated management console: XCP-ng with Xen Orchestra.
The Hidden Challenges of Native VMware Migration
The native methods work, but they share problems that show up as soon as you move beyond a pilot VM.
Three platforms, three toolchains. An import wizard, qemu-img with PowerShell, and Xen Orchestra with VDDK each have their own prerequisites. What your team learns for one does not carry over to the next.
Manual steps on every VM. Disk format conversion, firmware matching, driver installation, and network mapping are repeated for each machine, which is where mistakes creep in.
Hard to scale. Wizards and command sequences are designed around one VM at a time, so large environments take a long time.
Downtime and rollback risk. Cutover windows are difficult to predict, and if a migrated VM fails to boot, going back means redoing work by hand.
No built-in validation. Checking that the migrated VM is consistent and usable is left to you.
If you want one repeatable process that works whichever platform you pick, there is a simpler option.
Simplify VMware Migration with Vinchin in 3 Steps
Vinchin Backup & Recovery supports cross-platform migration, so one workflow moves VMware VMs to Proxmox VE, Hyper-V, or XCP-ng. As a VMware migration tool, it replaces the platform-specific tools above with a single console and a single procedure.
1. Select the VMware VM backup. Connect your VMware environment to Vinchin and choose the backup of the VM you want to migrate. If the VM has no backup yet, create one first.
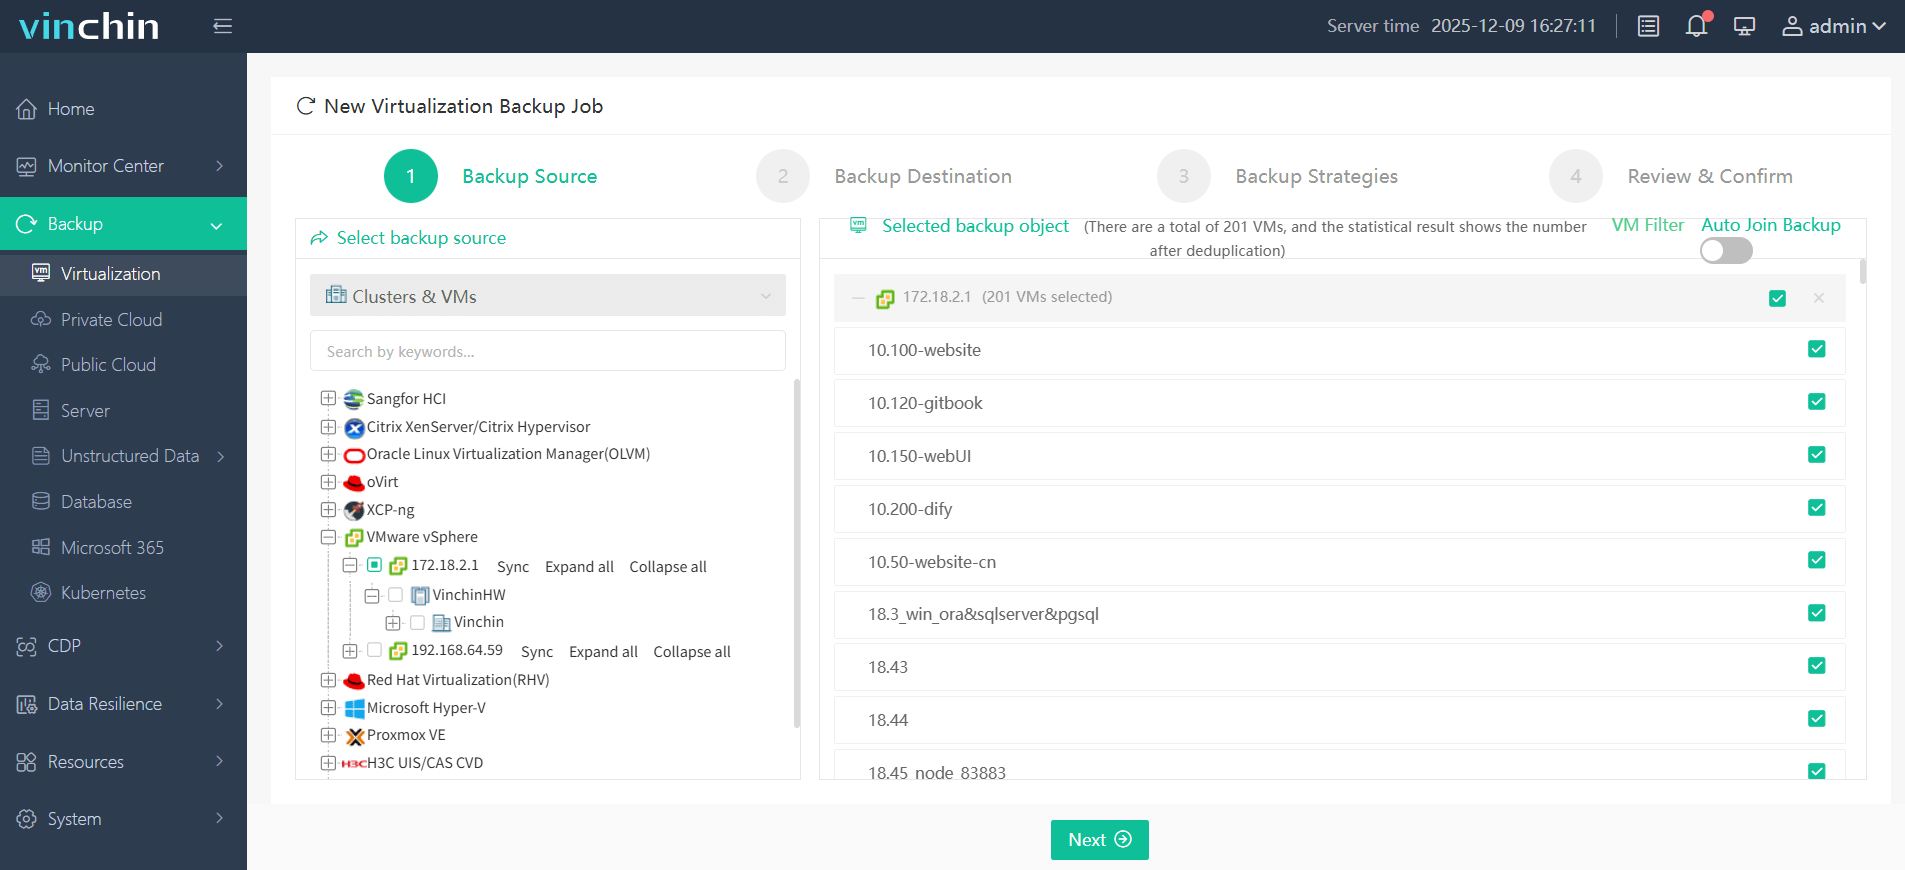
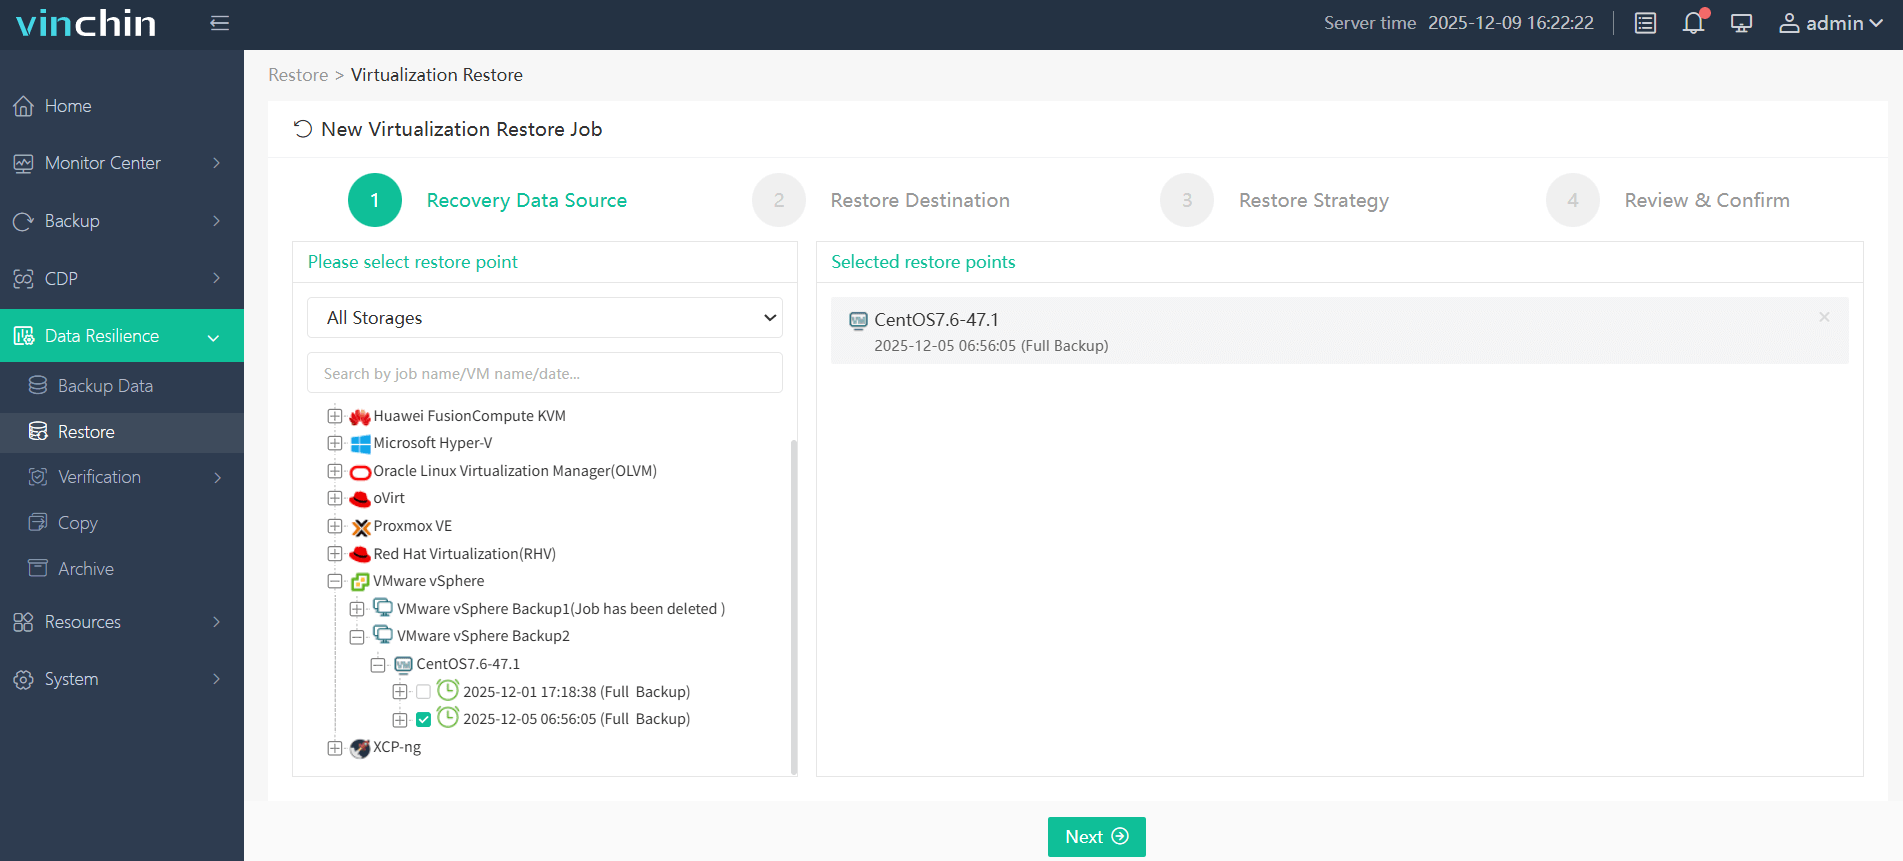
2. Choose the target platform and host. Select Proxmox VE, Hyper-V, or XCP-ng as the destination, then pick the target host, storage, and network.
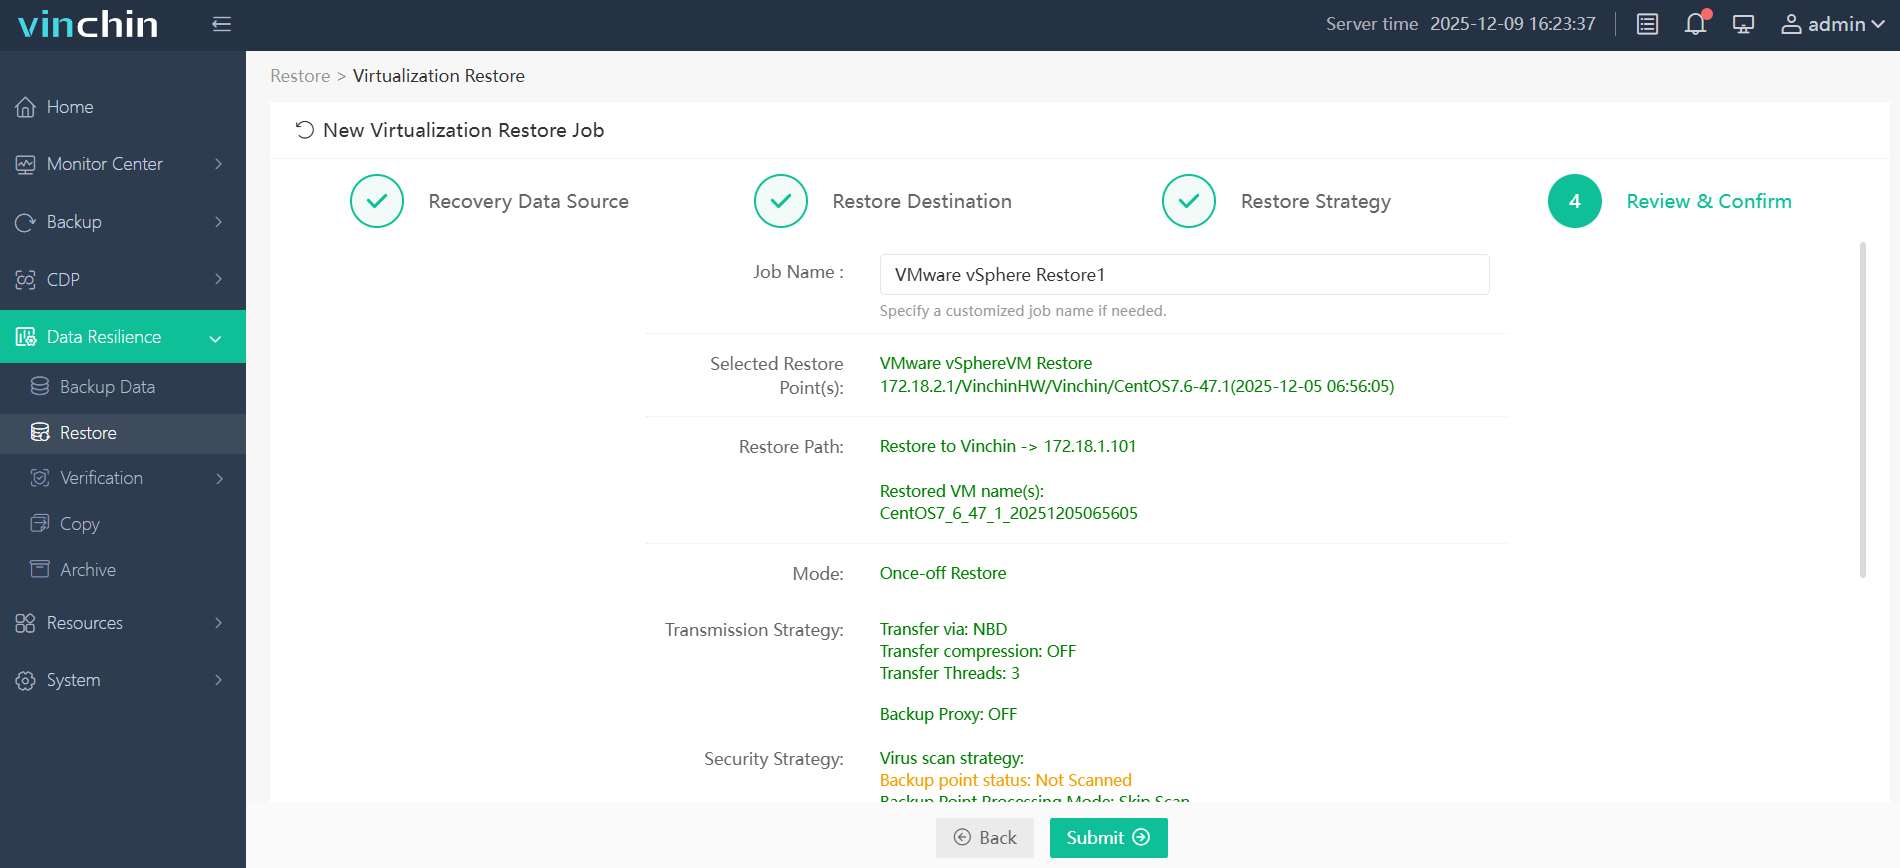
3. Submit the migration job. Run the job and Vinchin restores the VM on the target host. Power it on and check the result.
This approach answers the problems of native migration directly:
One workflow for every target. Your team learns one procedure, whichever platform you choose now or later.
No manual disk conversion. You do not convert VMDK files or map disk formats by hand.
A safe starting point. The migration works from a backup, so the original VM stays untouched until you are ready to switch over.
Protect Your VMs After Migration with Vinchin
A finished VMware migration is not the end of the project. Backup jobs built for VMware do not follow your VMs to a new hypervisor, so the new environment is unprotected until you rebuild them.
The same Vinchin Backup & Recovery console that handled the migration can back up the VMs now running on VMware, Proxmox VE, Hyper-V, or XCP-ng. You can schedule recurring backup jobs, keep incremental backups to reduce storage and backup time, and restore a VM when something goes wrong.
Using one tool for both migration and backup also means fewer products to learn, license, and monitor. Set up backups for the first migrated VMs right after cutover, before you move the next batch.
Vinchin Backup & Recovery specializes in enterprise disaster recovery and data protection. If your organization is planning a migration and values reliability and scalability, Vinchin can be a trusted choice. You can start with a 60-day fully featured free trial to evaluate its capabilities and see how it addresses your migration and data protection needs.
FAQ
Q: Is Proxmox or Hyper-V easier for migrating from VMware?
A: Proxmox VE is easier. To migrate a VMware VM to Proxmox, you can use the built-in ESXi import wizard, while Hyper-V requires you to convert the VMDK disk to VHDX and create the VM yourself.
Q: Can I migrate VMware VMs without downtime?
A: Not completely. Proxmox live-import and the XCP-ng warm migration keep downtime short, but every method needs a brief cutover while the VM is switched over.
Q: Do I need to uninstall VMware Tools after migration?
A: Yes. Remove VMware Tools from the guest and install the target platform's tools instead: the QEMU guest agent for Proxmox, integration services for Hyper-V, and XCP-ng guest tools for XCP-ng.
Q: Is Vinchin a VMware migration tool for different hypervisors?
A: Yes. Vinchin Backup & Recovery supports cross-platform migration, including VMware to Proxmox VE, Hyper-V, and XCP-ng. Check the current compatibility list for supported versions.
Conclusion
Proxmox VE has the shortest native route off VMware, a VMware to XCP-ng move follows with Xen Orchestra V2V, and Hyper-V asks for the most manual work but suits Windows-centric teams. The right target depends on your environment, but your VMware migration does not have to depend on a different toolchain for each choice.
With Vinchin Backup & Recovery, you can migrate to any of the three platforms in three steps, then protect the new environment with the same tool.