This article introduces how to back up VMware virtual machines with Vinchin Backup & Recovery.
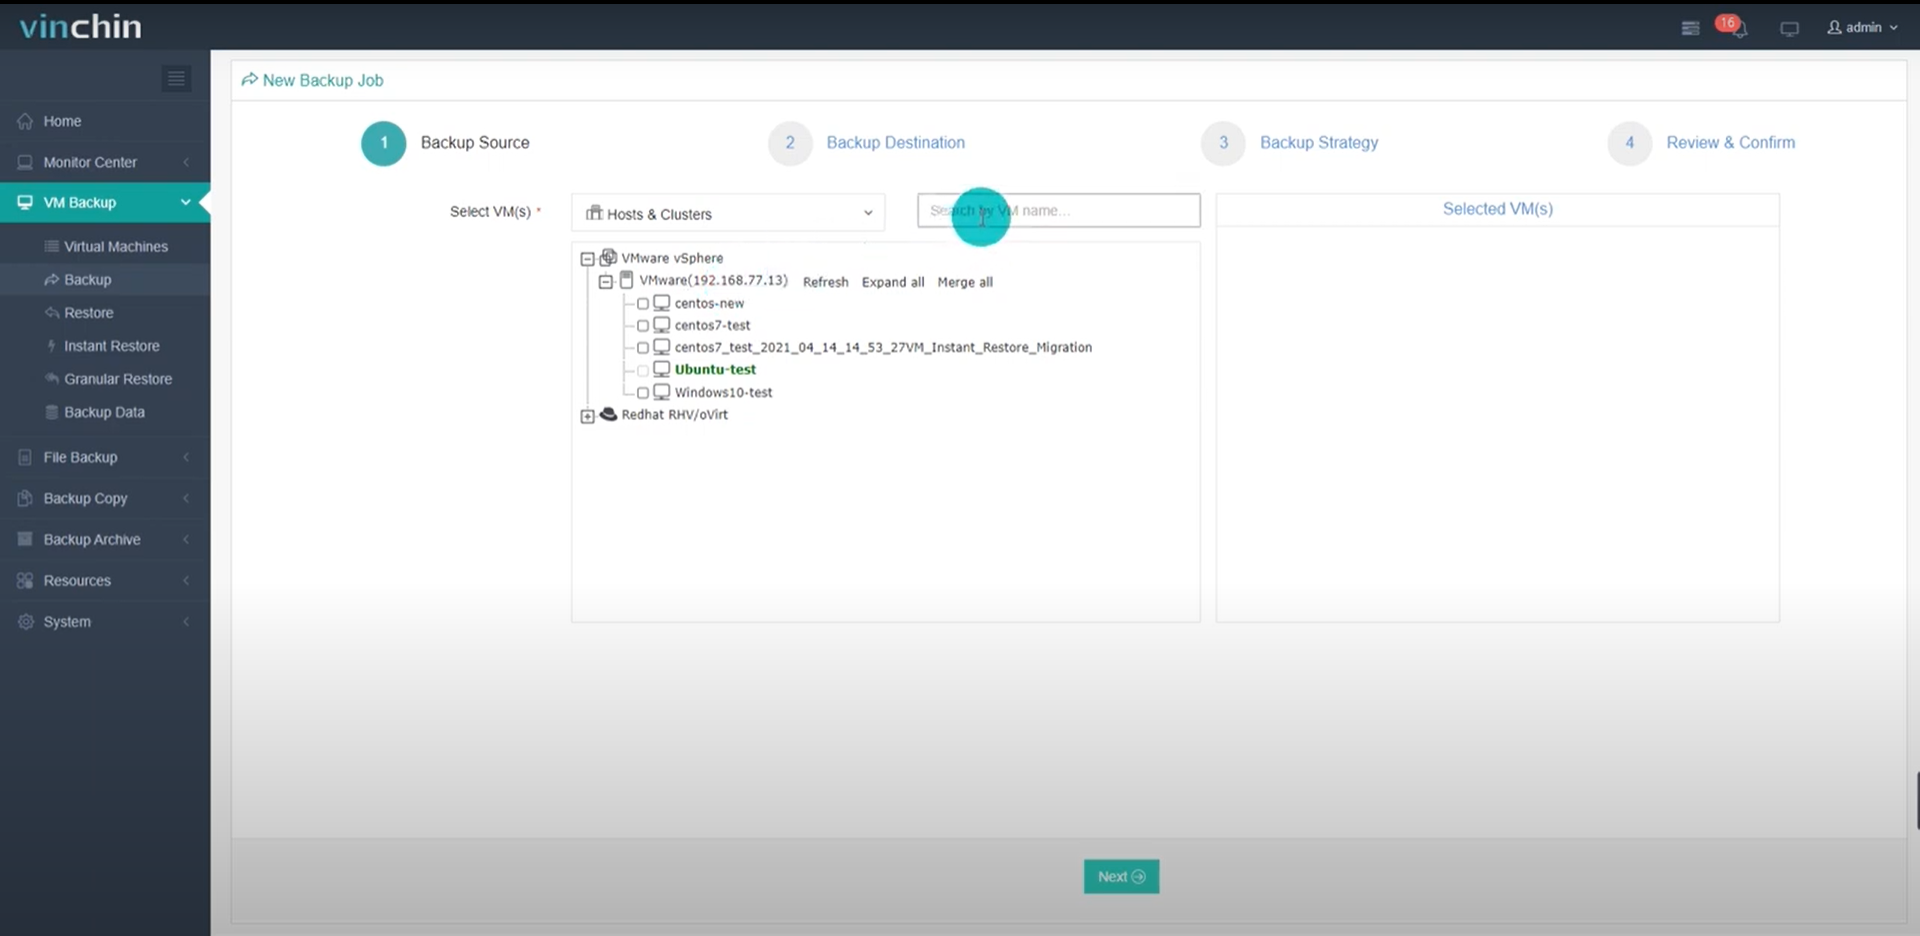
Go to VM Backup -> Backup page to start creating a new backup job. Expand the VMware vSphere virtual infrastructure and select target VMs that you want to backup, multiple VMs can be selected to add to one job.
You can also use keywords in the search box to search specific VMs from the VM list.
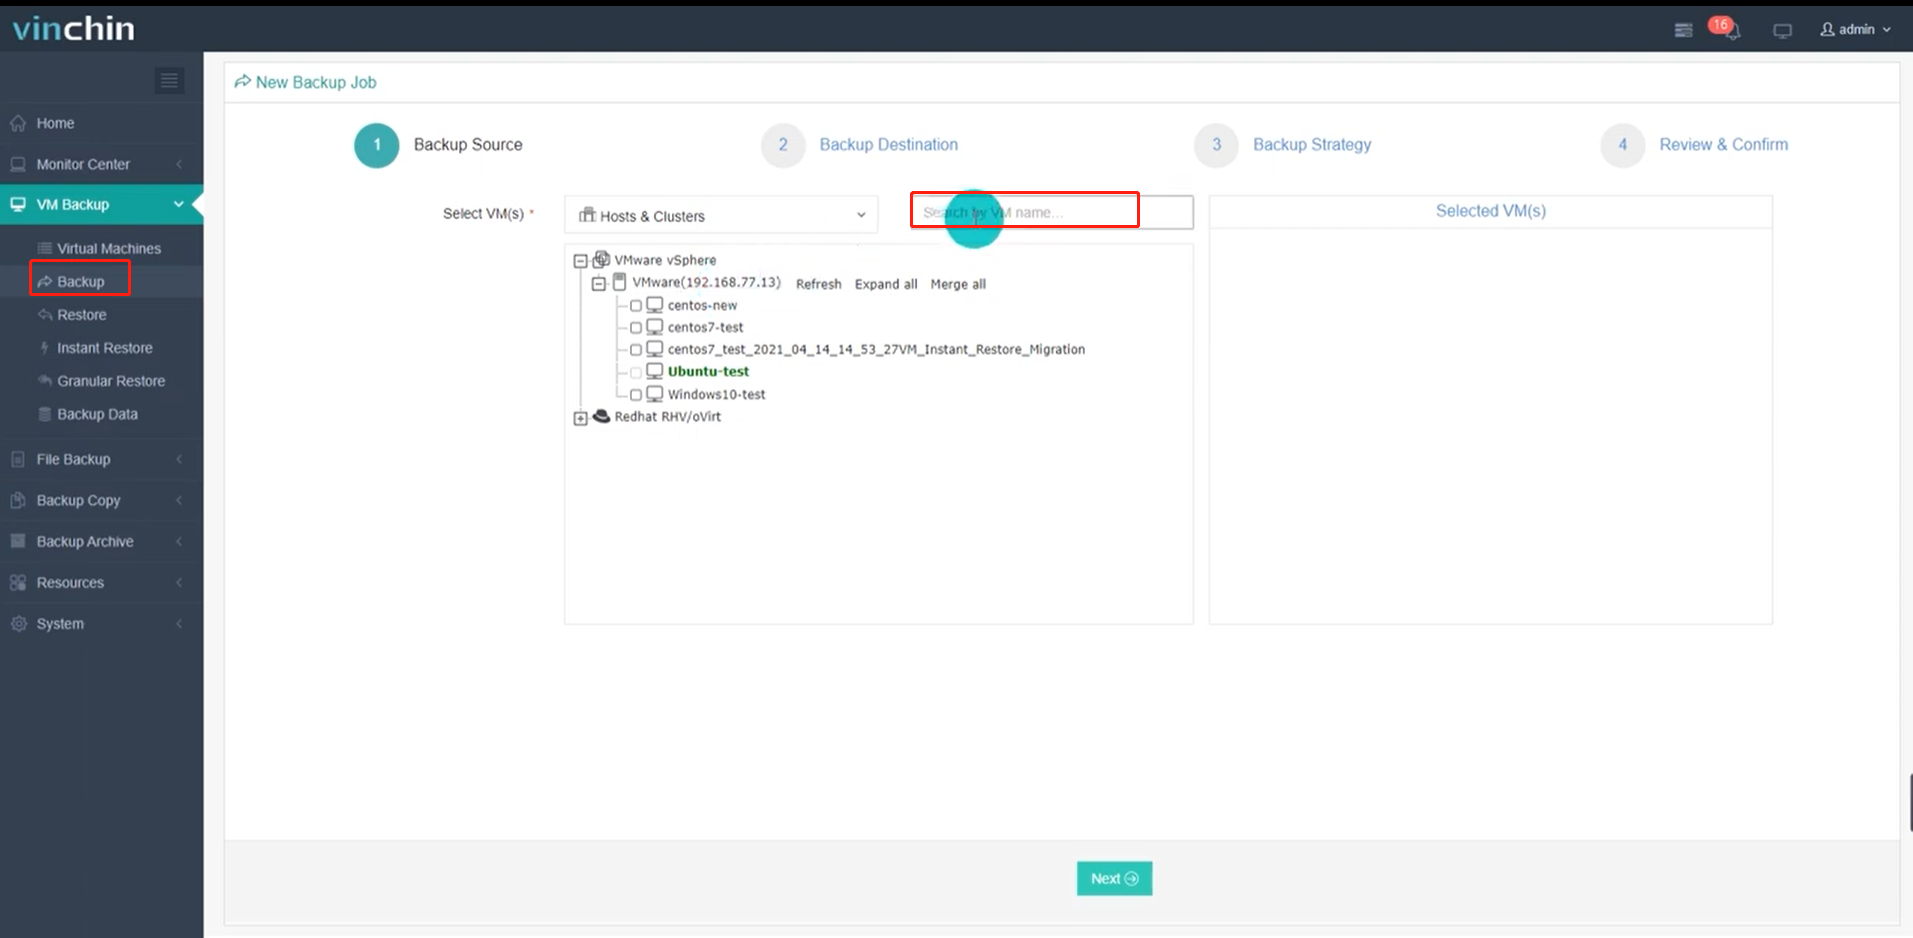
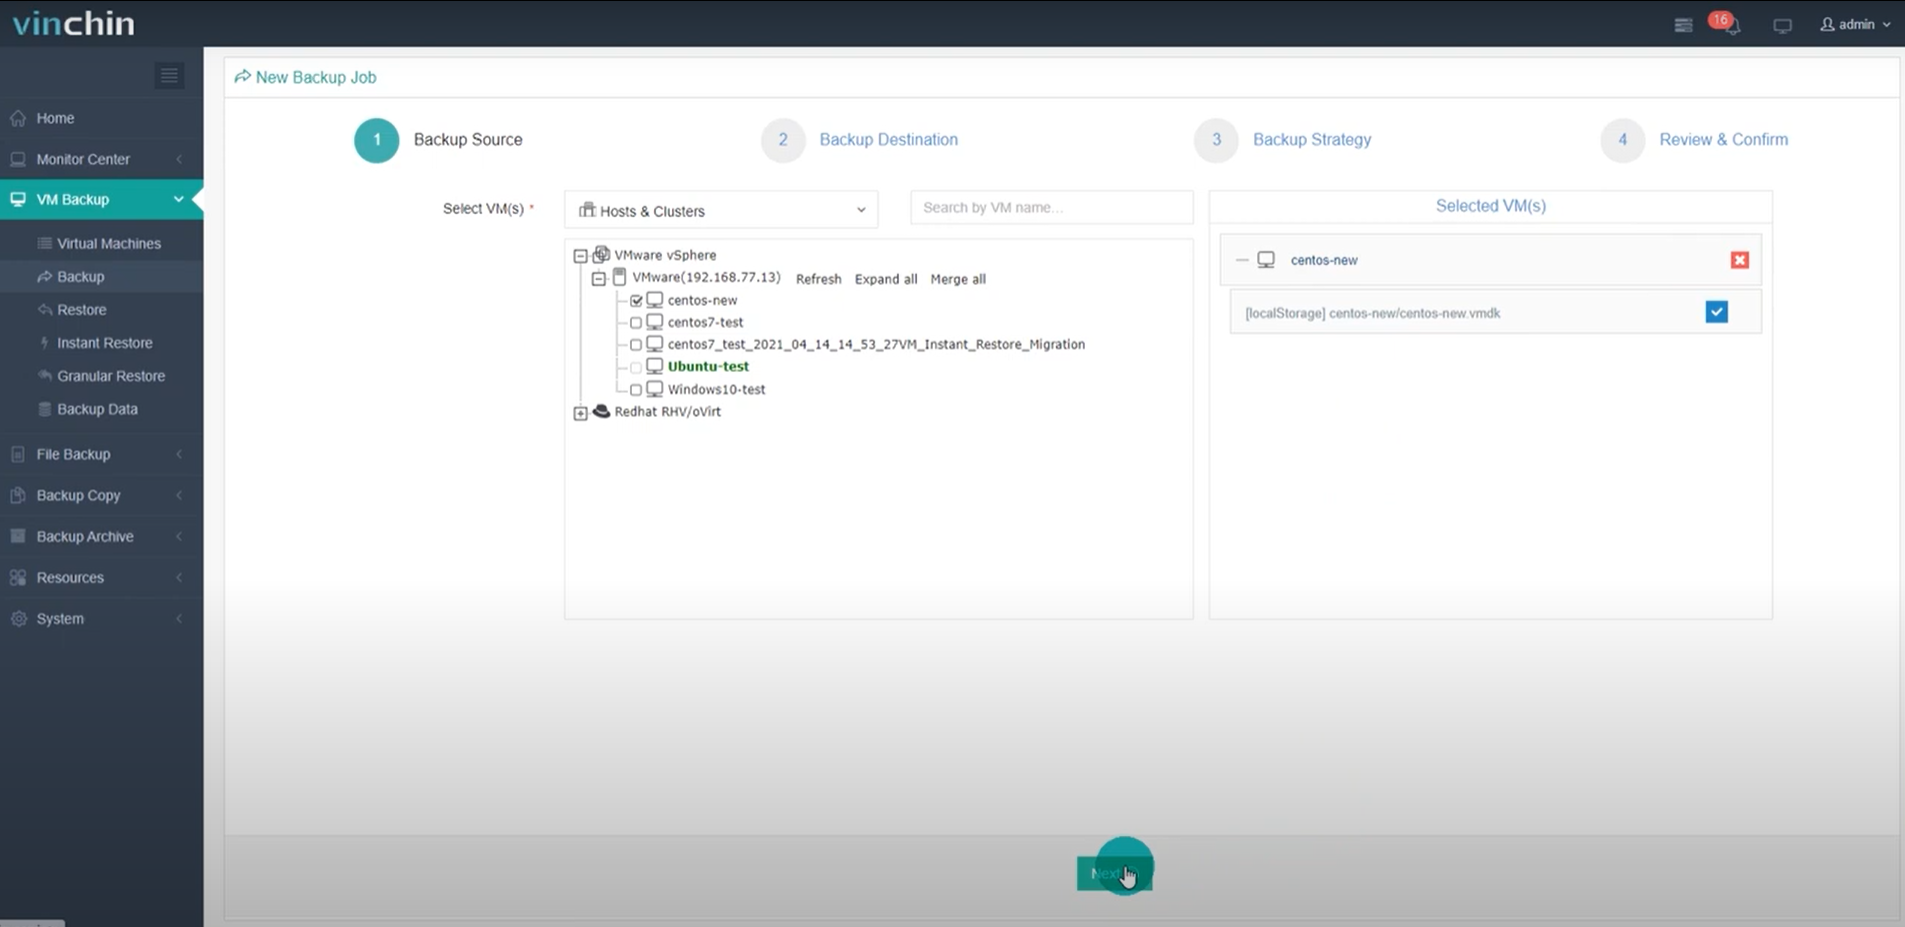
The selected VMs will be shown in the right column. Click on the VM name, the attached virtual disks of this VM will show up and you can choose to exclude specific disks from backing up. When finished selecting VMs, click on Next to continue.
In this step, you need to choose storage as the backup destination.
First, in the Target Node drop list, you can optionally select a target node, if you had deployed any backup node with this backup server.
Then, in the Target Storage drop list, you are able to select storage added to the selected node.

The backup job will run on the selected node, and the backup data will be saved into the selected storage.
In this example, it’s a standalone backup server that has no extra backup node connected, so I will only select the storage.
When done click on Next to continue.
In this step, detailed backup strategies need to be configured, these settings will tell Vinchin Backup & Recovery when and how to run the backups.
In the Select Strategy drop list, you can choose a strategy template if you had a pre-configured one. Here we will set up a customized strategy for this new job.
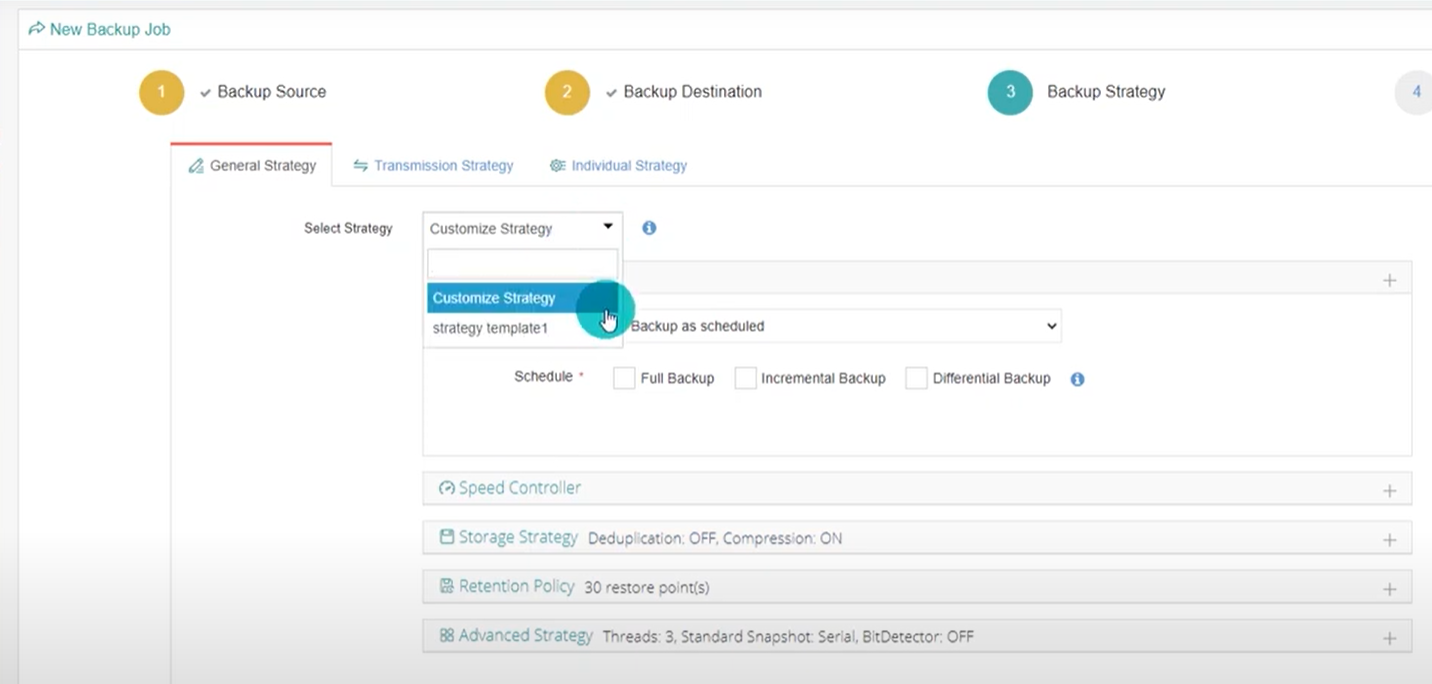
In time schedule section, the backup mode and time schedules can be configured. In the Mode drop list, you can set the job to run as scheduled or once off.
A once-off job will run only once at a specified point of time, and will only generate a full backup for each selected VM.

For a Backup as scheduled job, you are able to schedule full, incremental, or differential backups.

If you only select a full backup, then it will only run full backups; If you select full backup with the incremental backup, it will run full backups with incremental backups; if you select full backup with differential backup, it will run full backups with differential backups; if you only select an incremental backup, then you’ll create a forever incremental backup job.

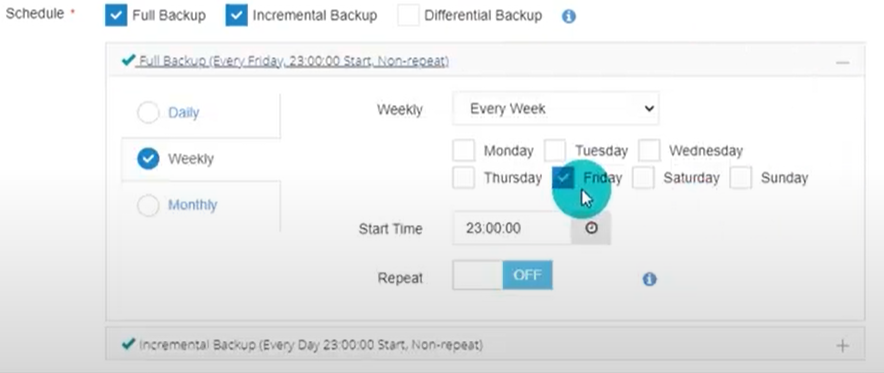
The recommended backup strategy is an incremental backup, and here we will take the incremental backup job for example, you need to select both full backup and incremental backup, the default schedules are full backups every week on Friday night, and incremental backups every day at night. Of course, you can change the schedules according to your actual demands. And the timing could be configured on a daily, weekly, and monthly basis.

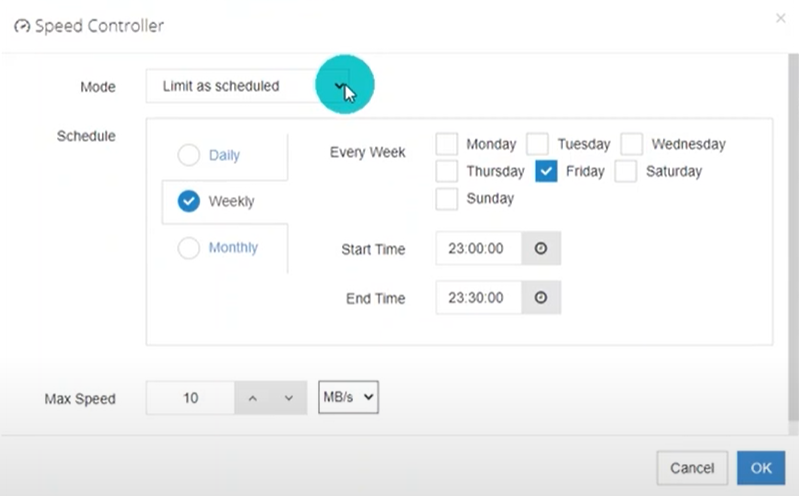
In the Speed Controller section, if you don’t want this job to take up too much network bandwidth of the production environment at some specific time, you can configure a speed limit rule to limit the max bandwidth usage of this backup job at a specific time duration. The speed controller is optional.
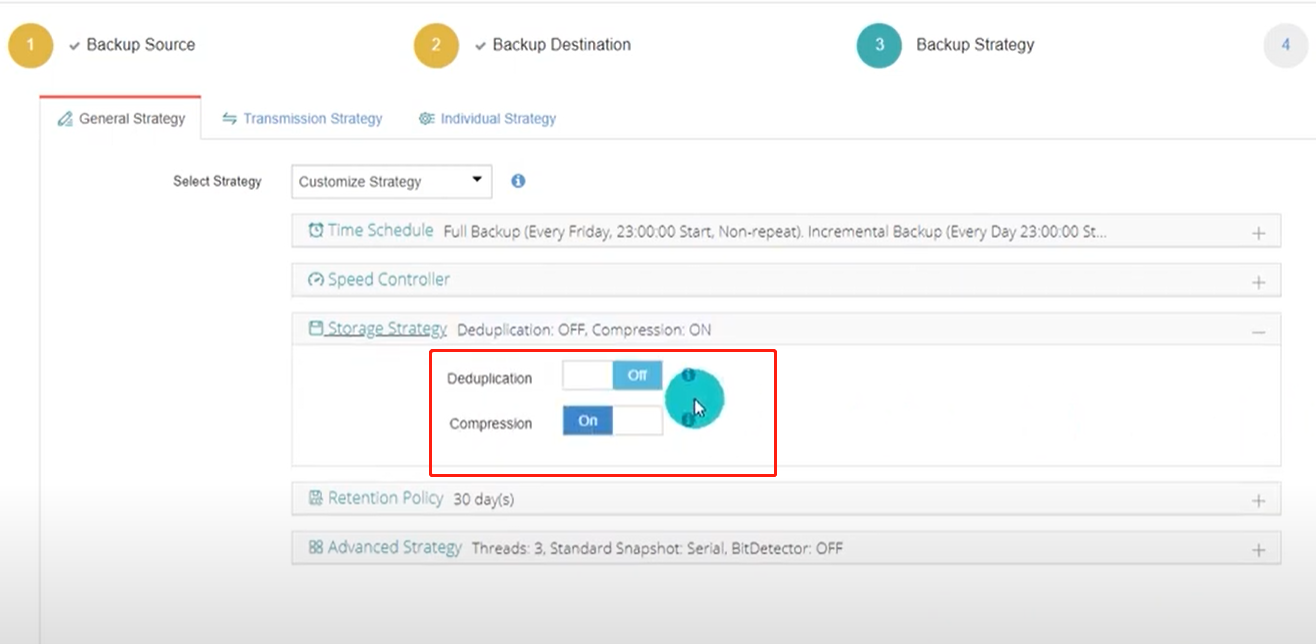
Next comes the storage strategy. Deduplication and Compression. These 2 options will help reduce the backup data size. But they will need more backup server computing resources.
Then it’s Retention Policy. The retention policy tells Vinchin backup server how long or how much data to be kept in the backup storage. It can be configured by the number of restore points or the number of days, for example, if I configure it to retain 30 restore points, then Vinchin backup server will maximally save 30 restore points for each VM in this job.
You can configure the retention policy as per the actual requirements of your organization.

Now let’s go to the advanced strategy.
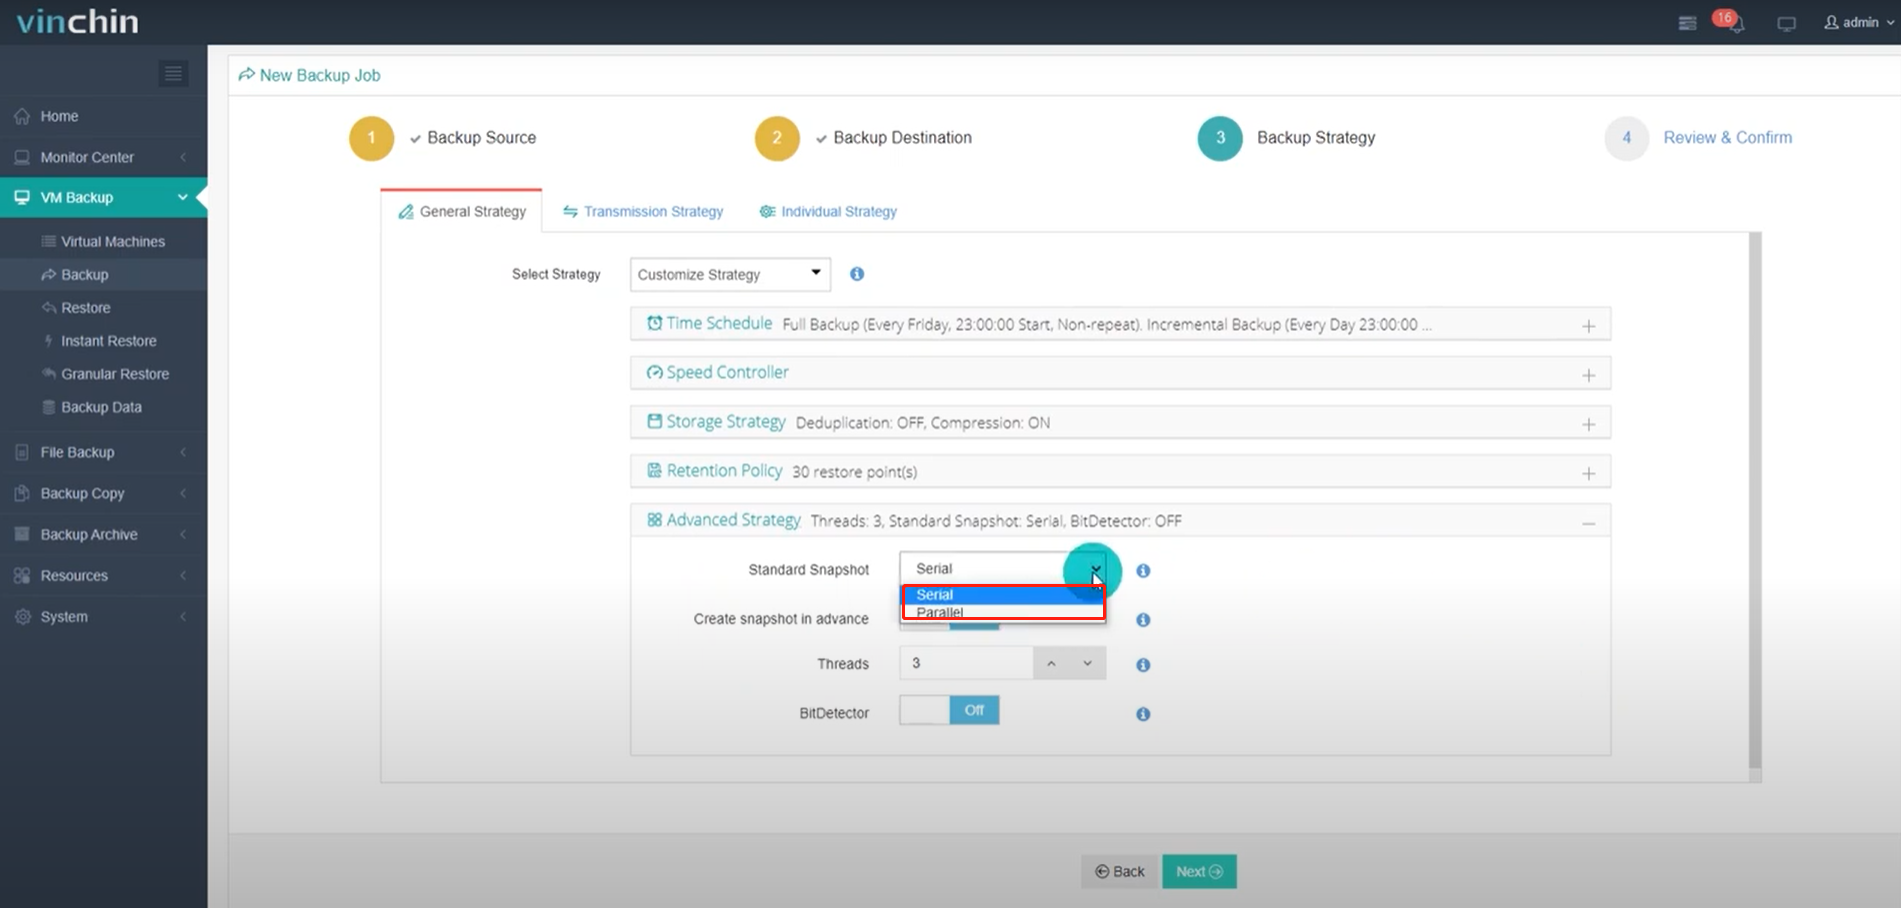
For the standard snapshot, you can choose between serial and parallel snapshot mode. It is recommended to use serial snapshot mode, and with serial snapshot, Vinchin backup server will request VMware to create snapshots for the VMs in the job one by one.
For parallel snapshot, it is not recommended, only if the VMs in this job is service correlated, and the snapshots need to be time consistent, so you can use parallel snapshot mode.
With parallel snapshot mode, Vinchin backup server will request VMware to take snapshots of all VMs in this job simultaneously.
Next, the Create snapshot in advance option is useful when the snapshot mode is serial. It will cause Vinchin backup server to request VMware to create a snapshot of the next VM when the previous one is being transferred to the backup storage.
So it can be used to shorten the backup time window.

Next, the threads option is used to configure multithreaded data transmission. Usually, 3 threads will be enough, and you don’t have to adjust the value.
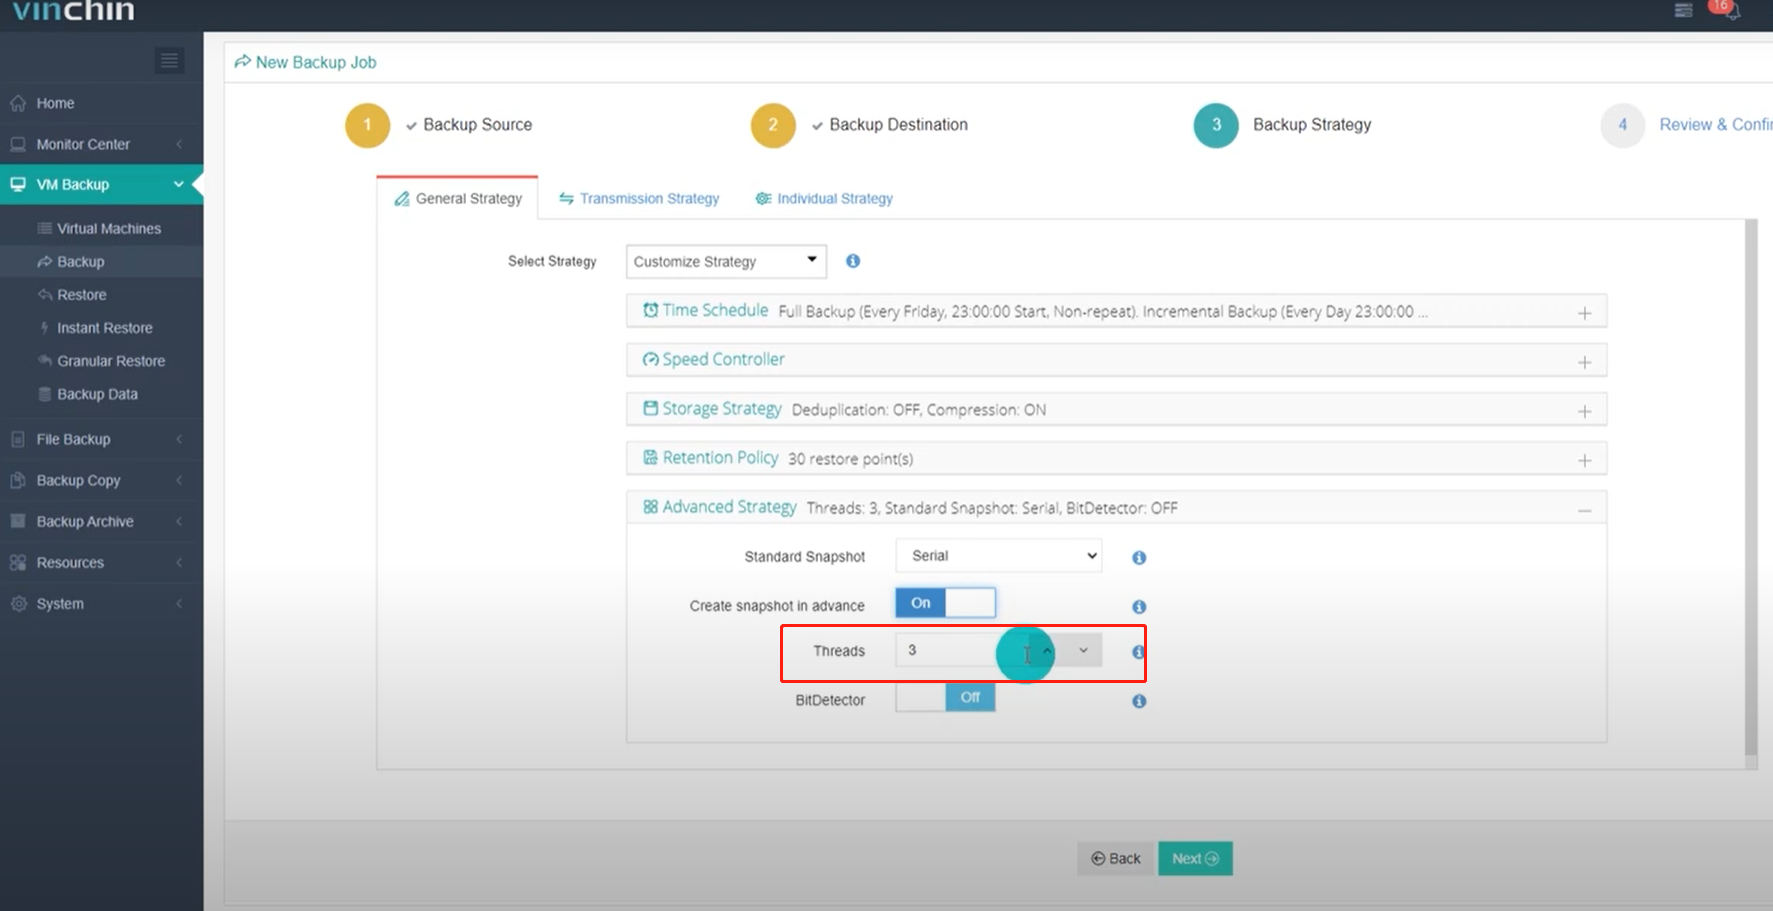
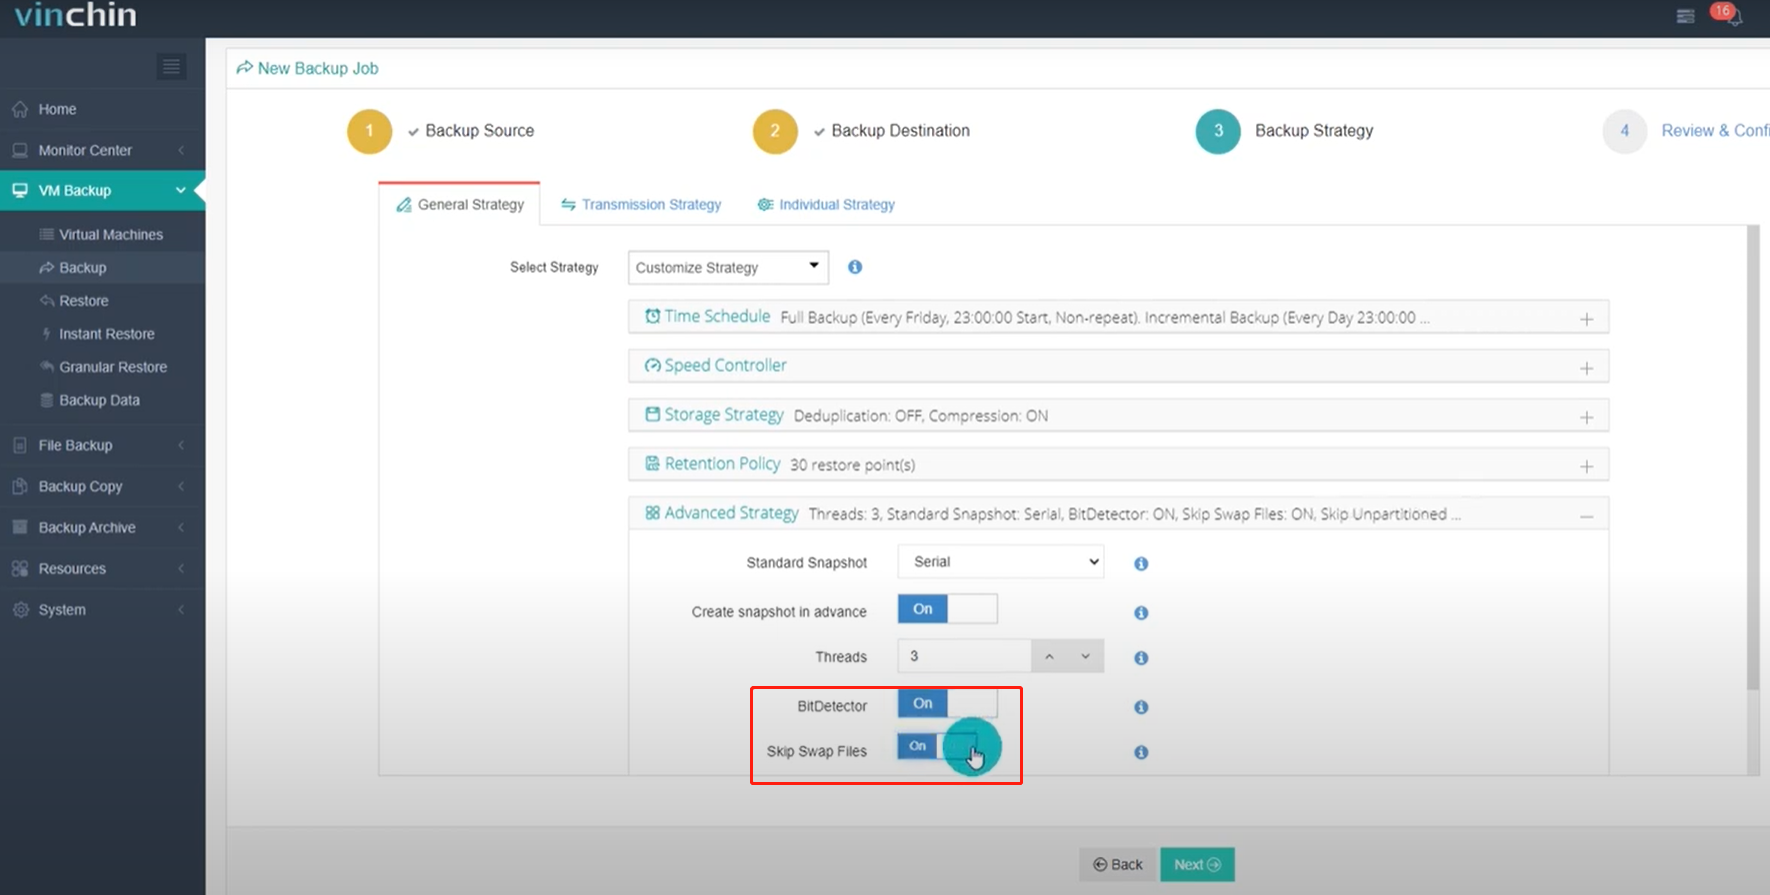
The last one is BitDetector function, it is a Vinchin unique feature.
Besides deduplication and compression, it is another feature that can be used to further reduce the backup data. It can exclude the swap files, unpartitioned spaces, and the deleted files blocks from backing up, and it is done from the source VM, so it also reduces the bandwidth usage.
From here, let’s go to the transmission strategy configurations.
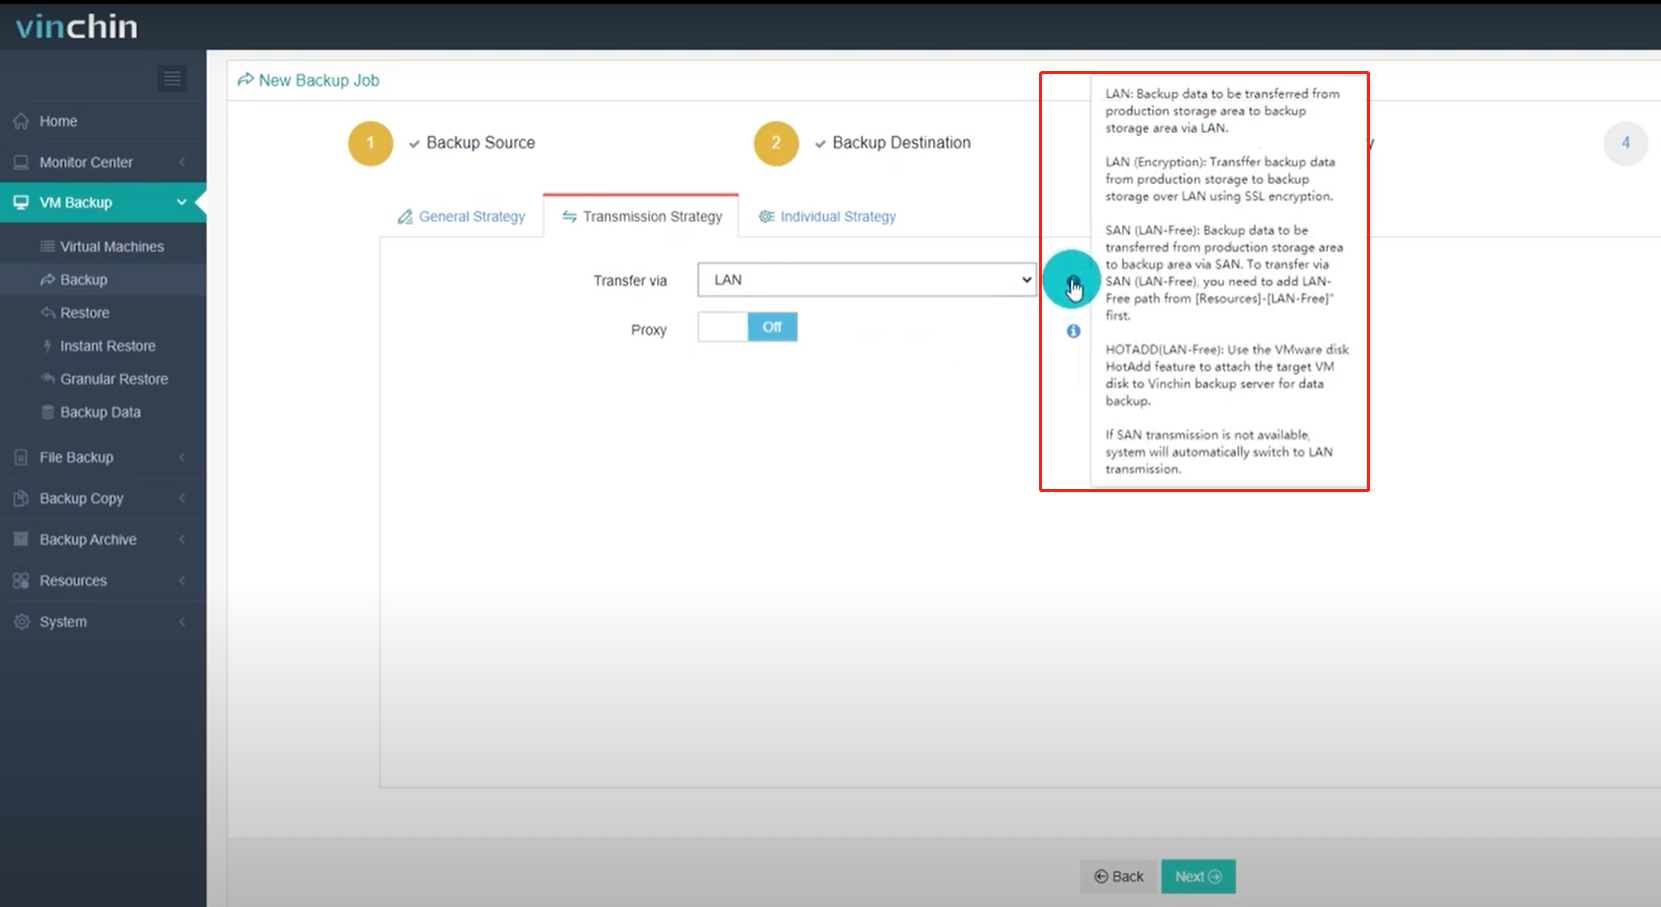
For VMware vSphere, the backup data can be transferred through LAN, LAN with Encryption, SAN, or HOTADD.
For more information about these transport modes, you can click on the help icon to check the detailed explanations.
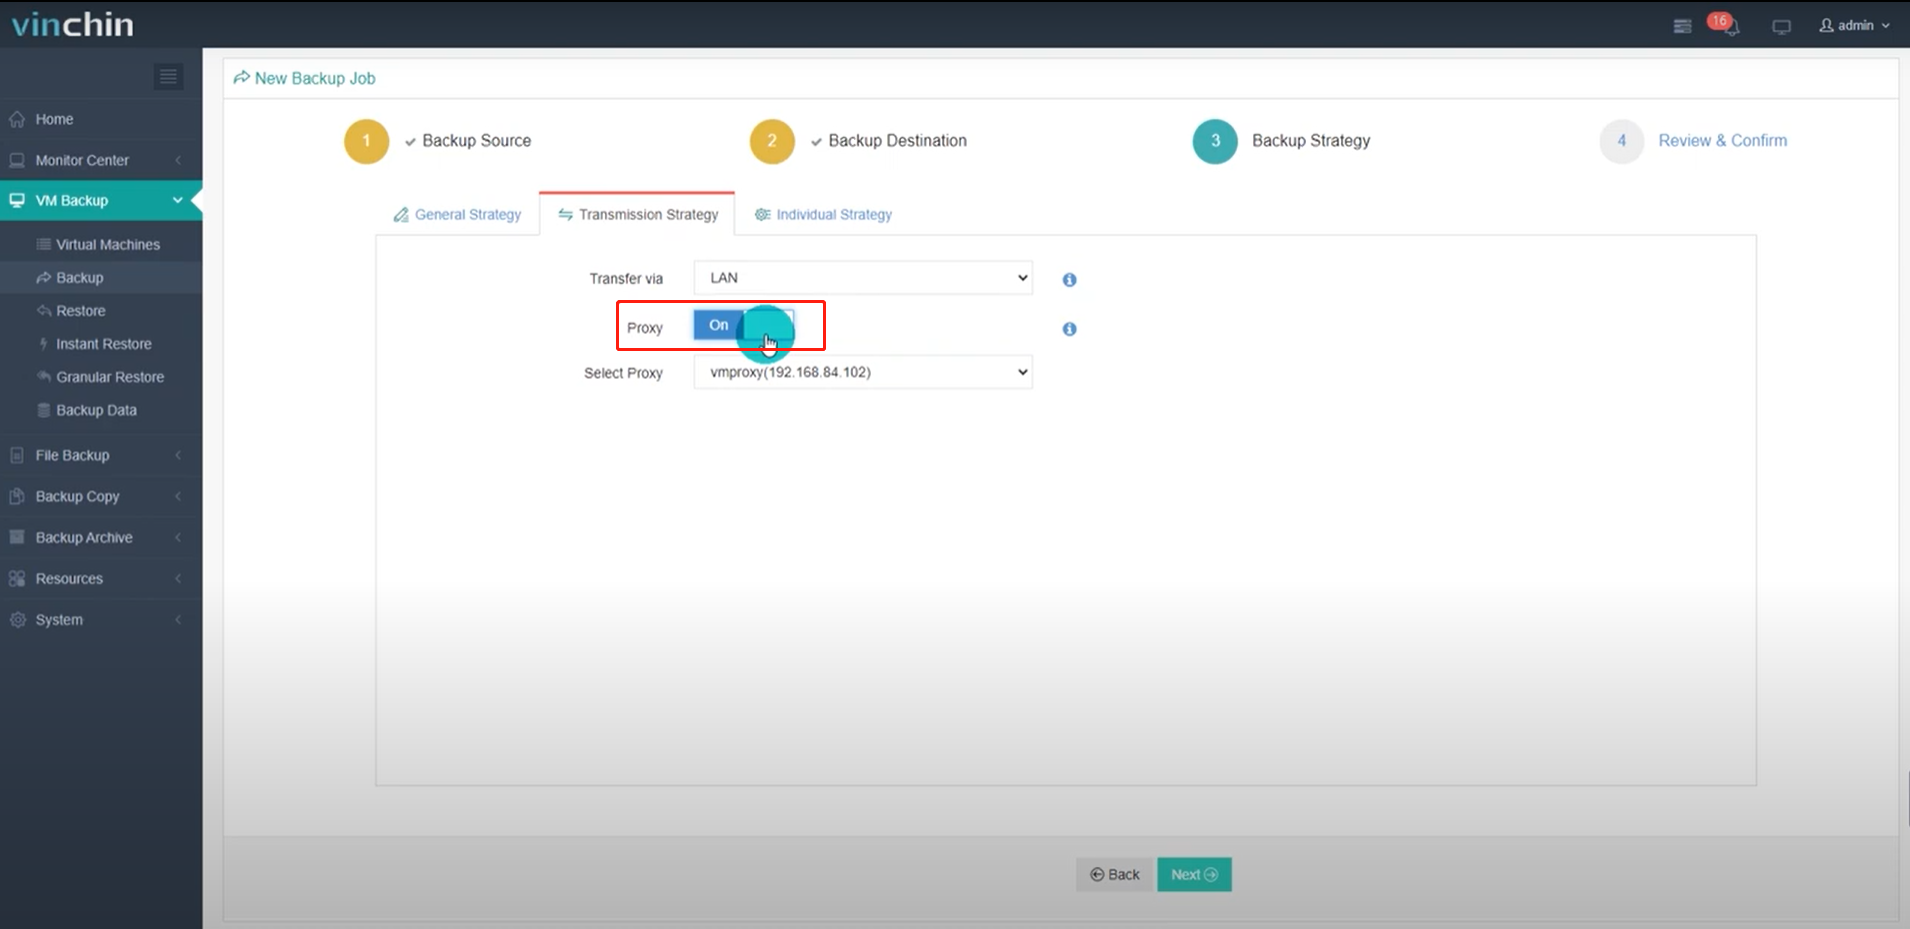
The backup proxy is an optional Vinchin backup architecture component to be installed on the VMware platform, it utilizes the HOTADD technology of VMware ESXi host for direct VM disk access. When Vinchin backup server is deployed outside the VMware cluster, a proxy VM can be deployed for faster data transmission.
Let’s go ahead and go to the Individual strategy.
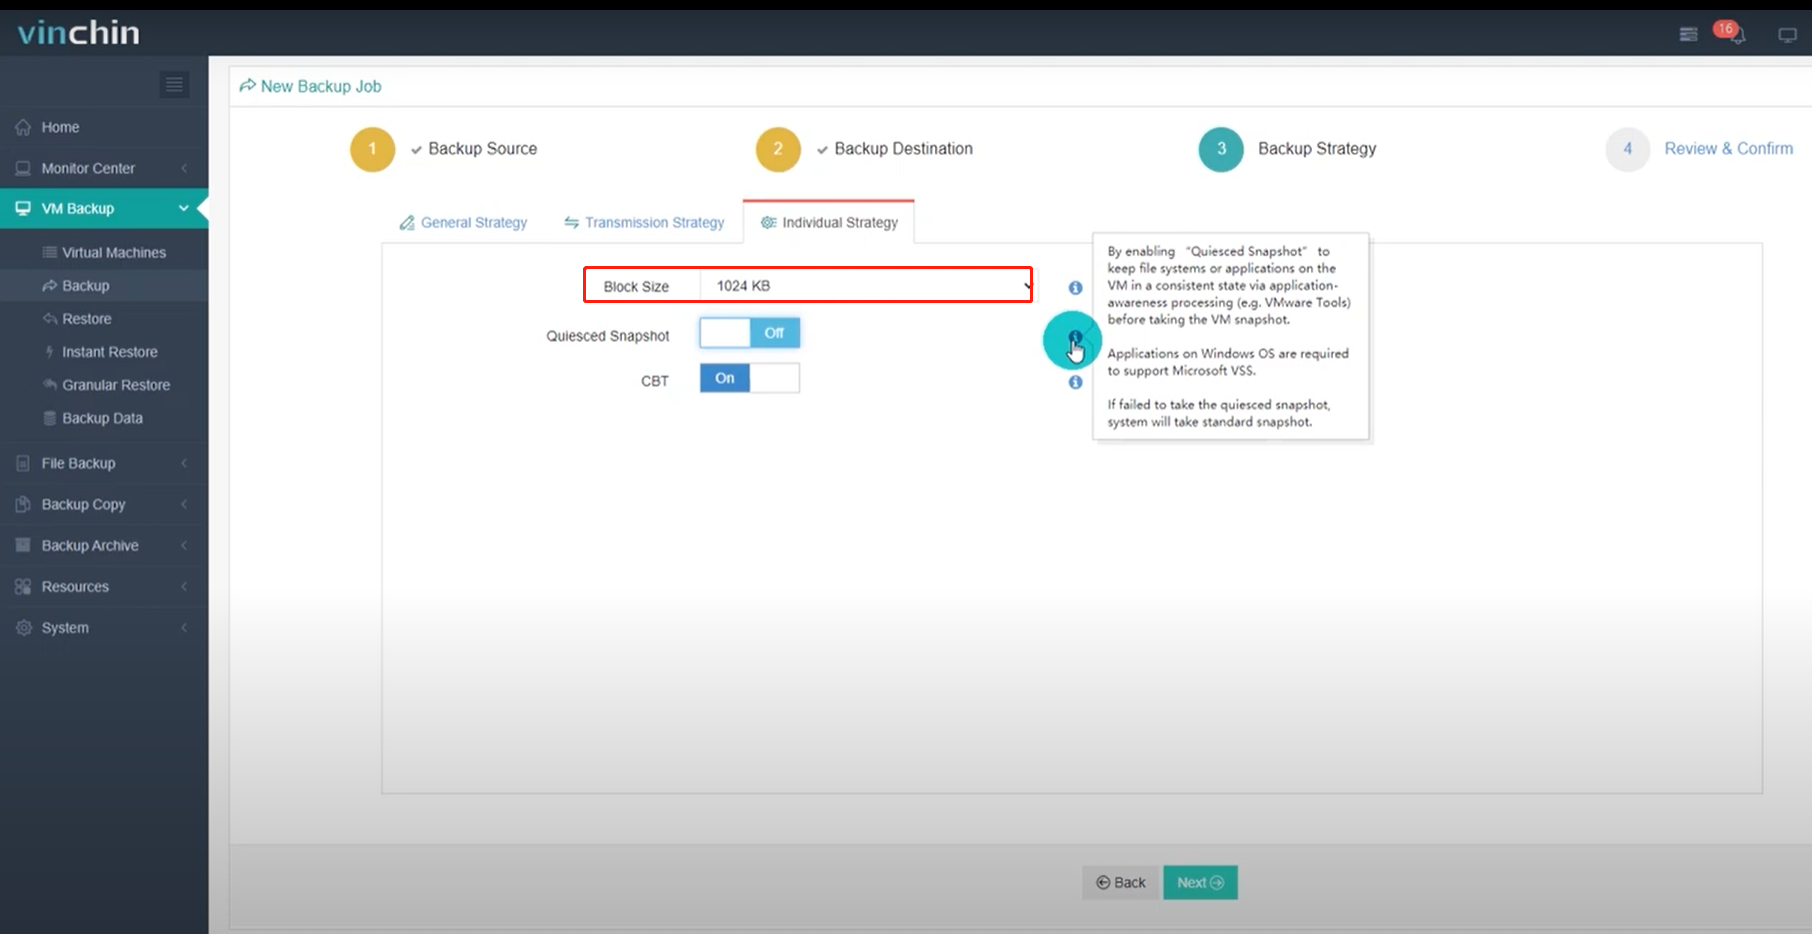
In this section, you are able to configure the block size to be used when processing backup data in backup storage. The default setting is 1024 KB, and it is recommended to keep this value.
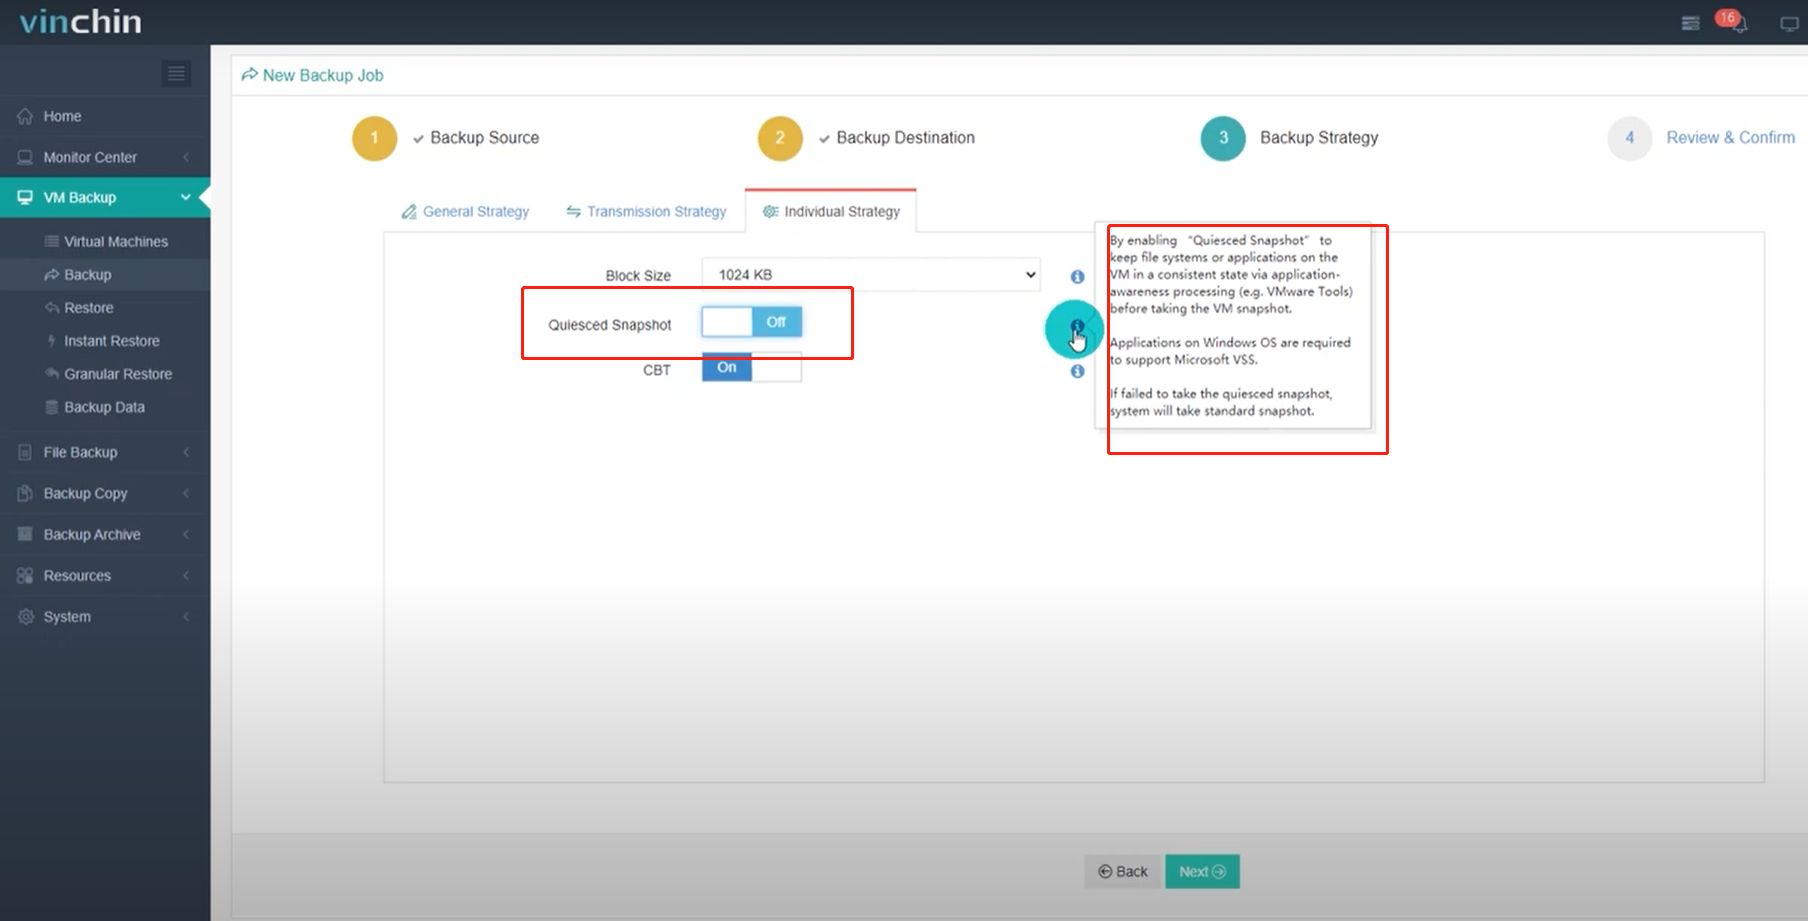
Next is Quiesced Snapshot. If enabled, the file system or application on the Windows VM will be kept in a consistent state via application-awareness processing before the VM snapshot is taken. If failed to take Quiesced snapshot, the backup server will take a standard snapshot.
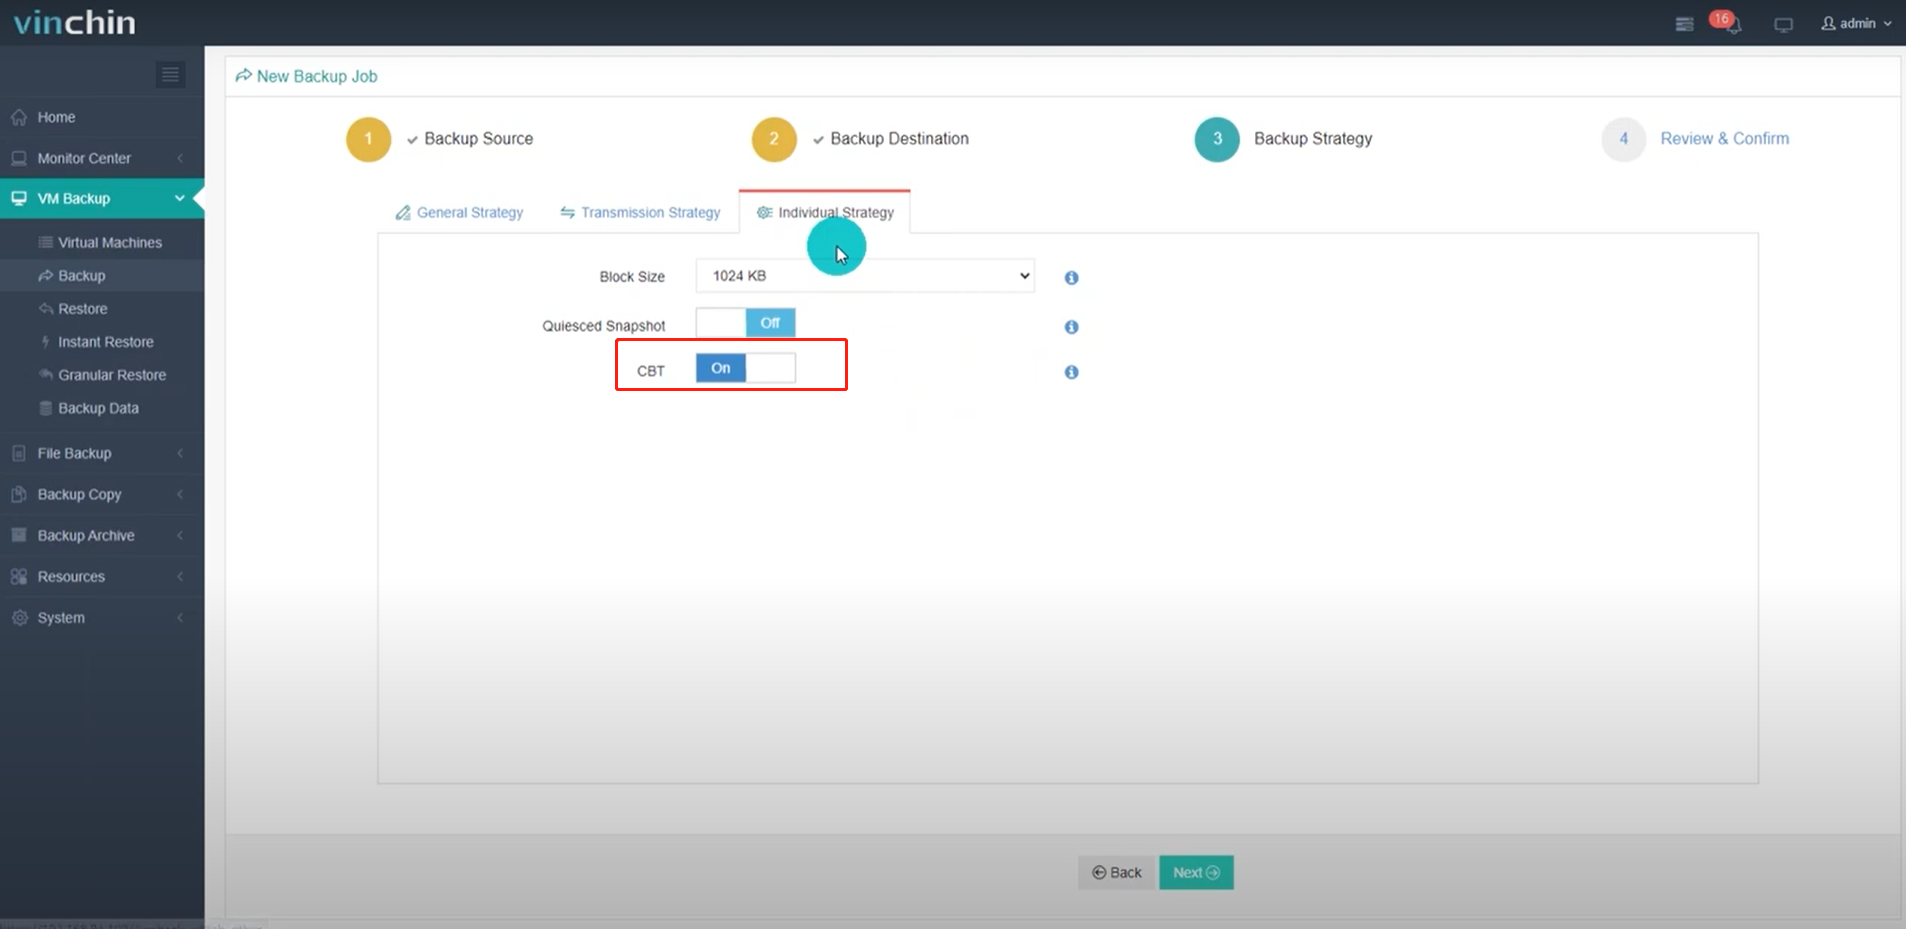
The last option is VMware CBT function, which can improve the speed of the incremental backups. And it is highly recommended to keep this option enabled.
Let’s click on Next to continue.
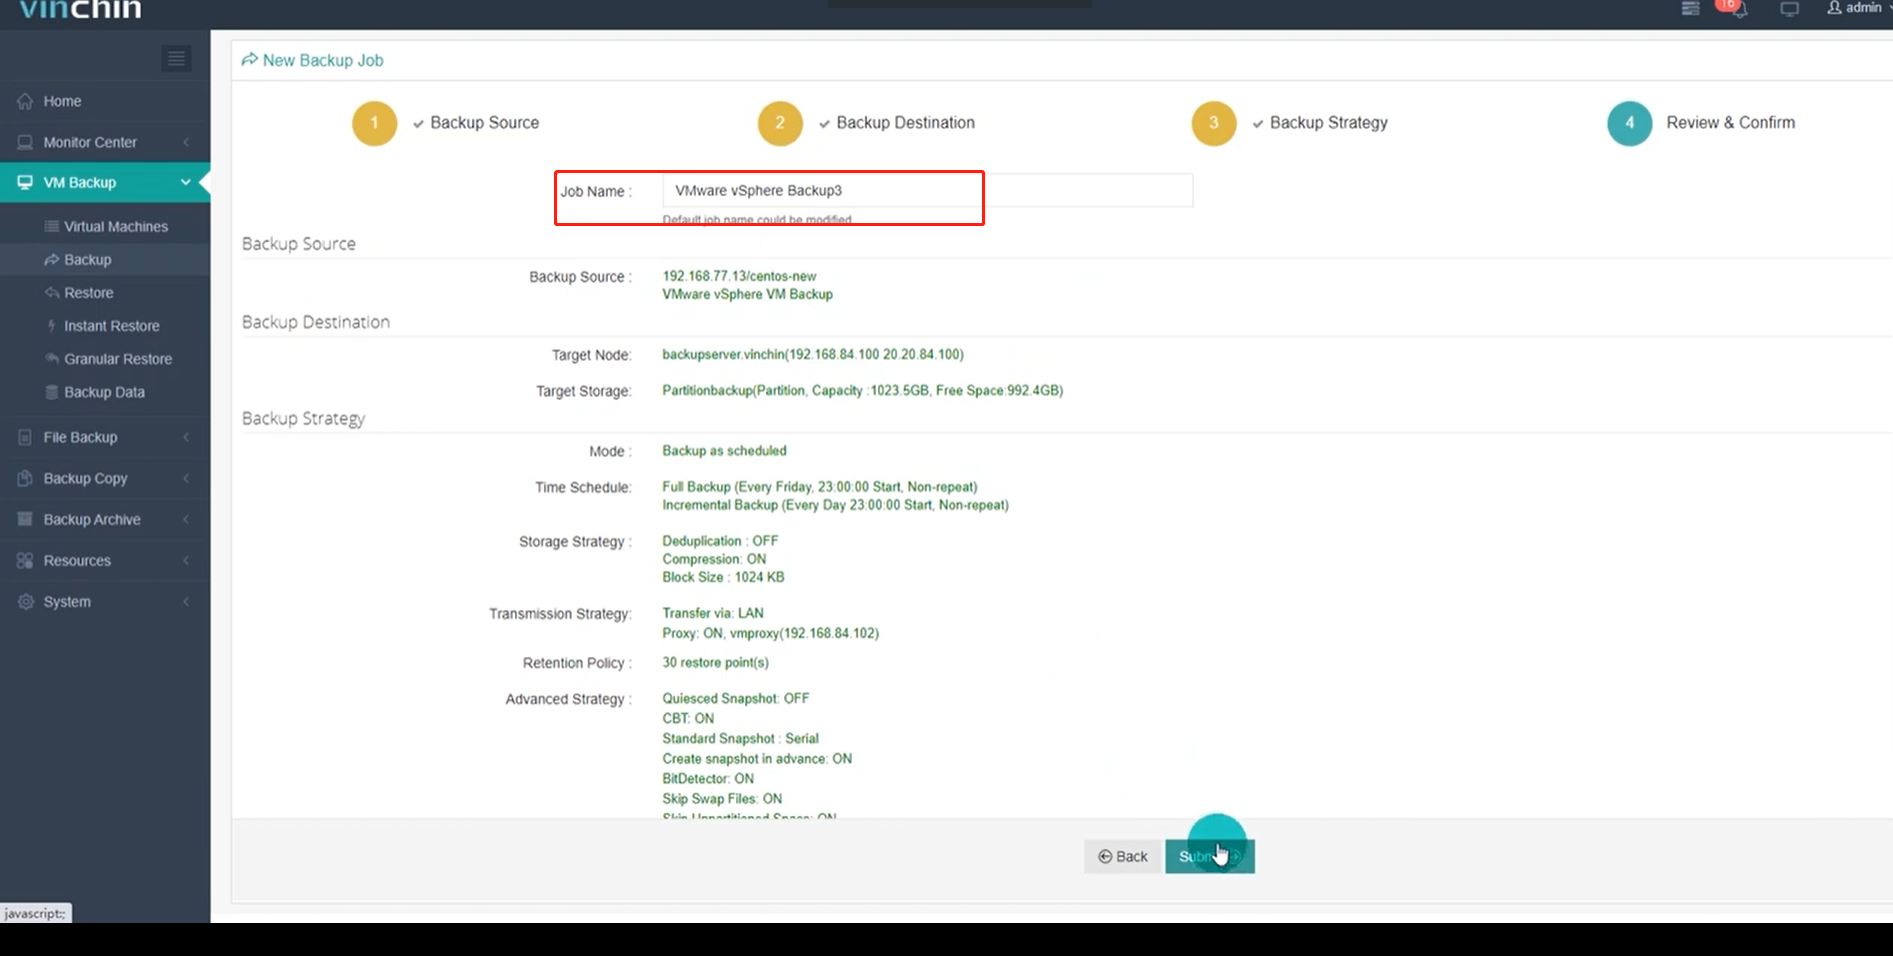
In this step, you are able to review and confirm the settings on one screen.
And a job name can be specified for identification of this backup job, and by clicking on the Submit button to confirm the settings and create the backup job.
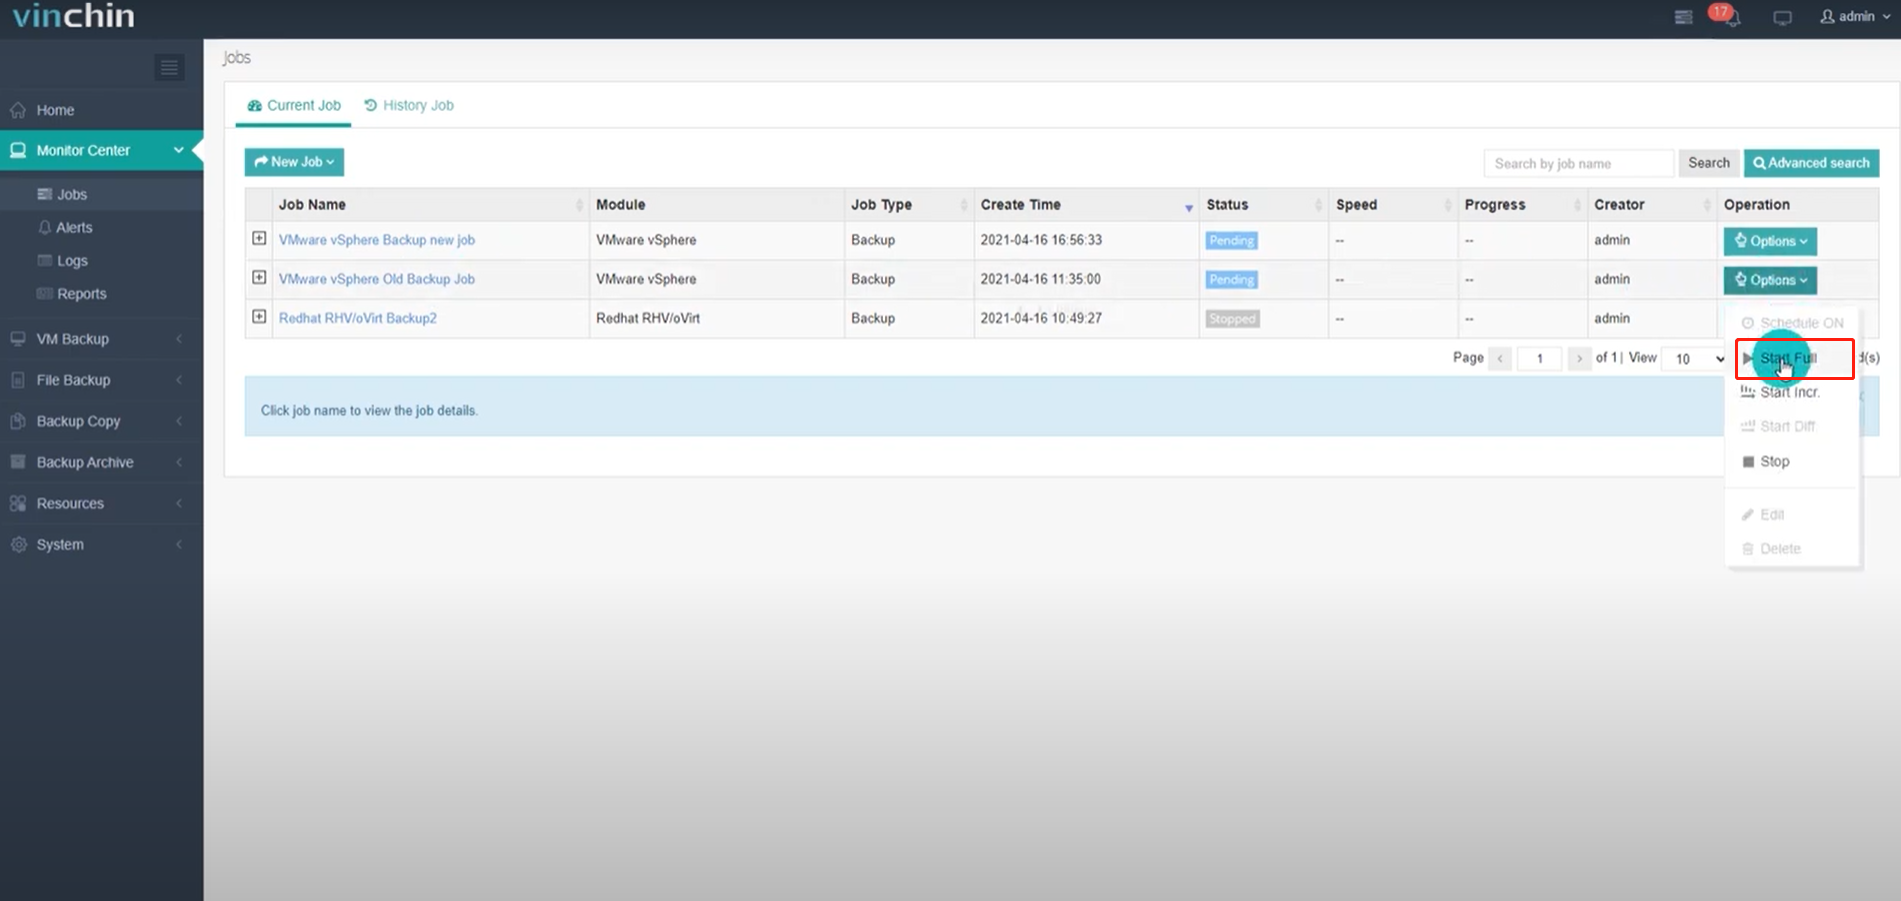
After the creation of a backup job, you will be redirected to the Job list page. And the job is now in a pending state. when the time condition matches the schedule, it will automatically run. And the status will change to Running state, you can also see the transfer speed and job progress of the running jobs here within the job list.
By clicking on the options button, you are able to manually run the job, stop, edit and delete the job.
And by clicking on the job name, you will be redirected to the job details page.
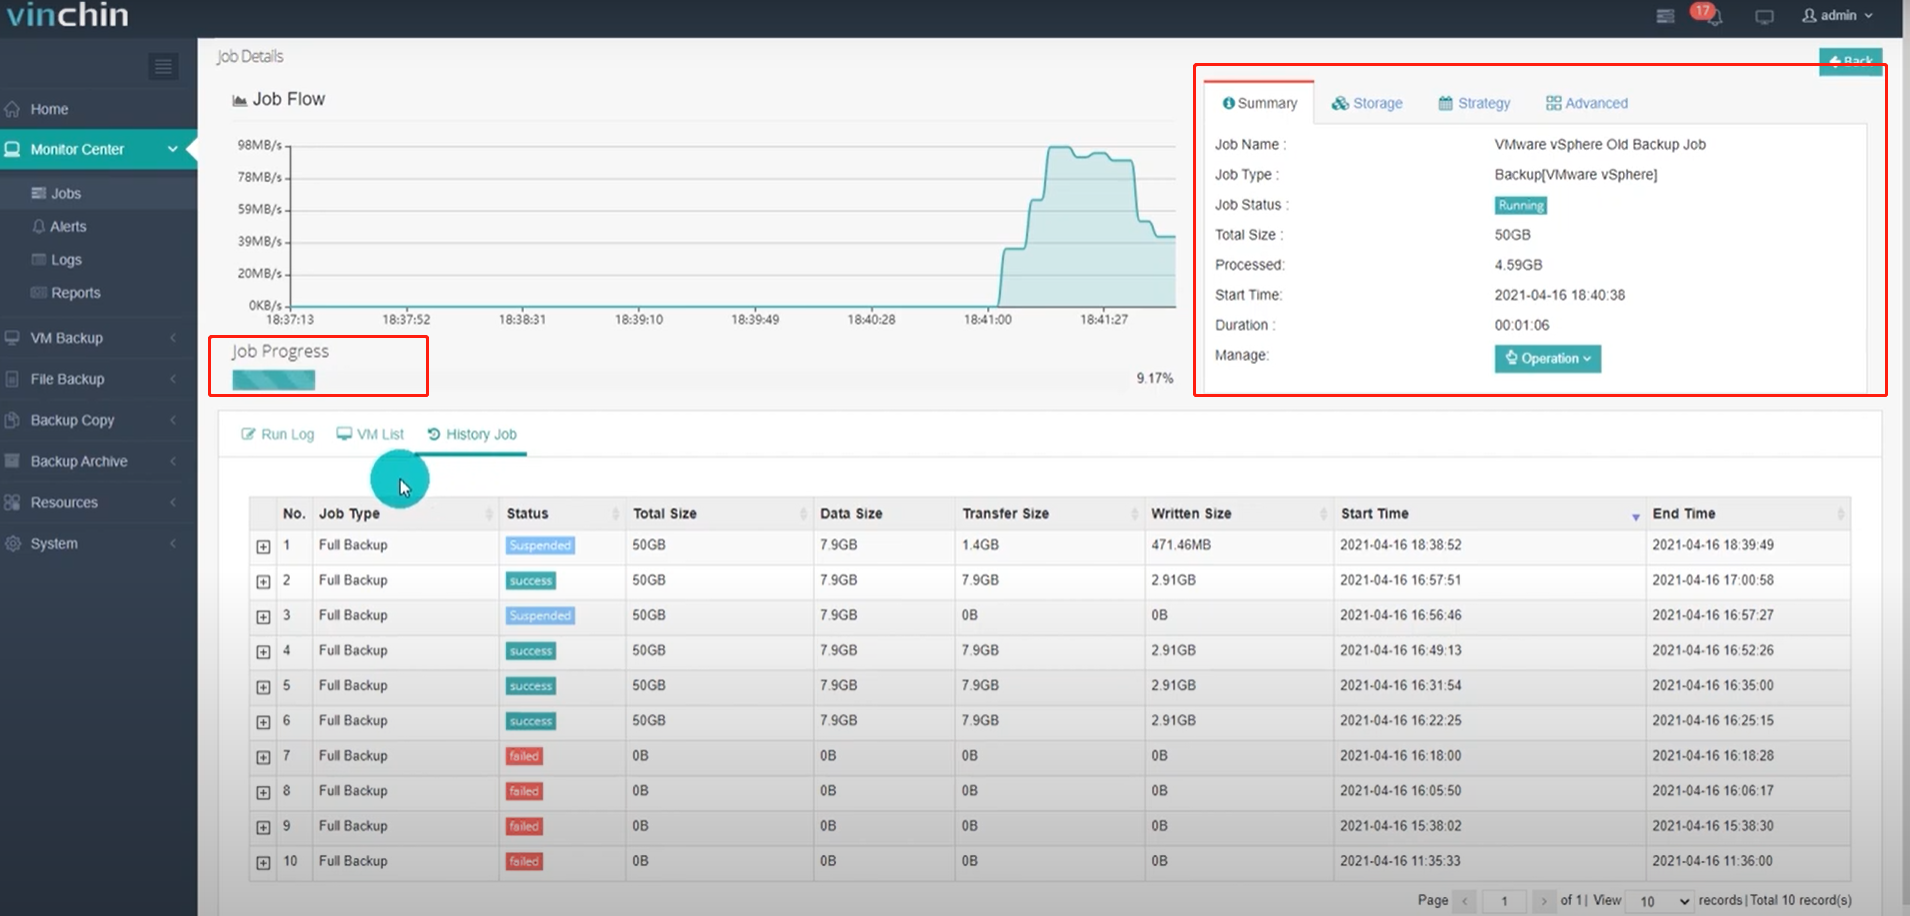
From within the job details page, some historical information about the job will be given. So let’s start an old job and see some details of the running job.
In the job flow section, the real-time transmission speed of this job will be given when the transmission begins.
And on the top right, you are able to review the strategy configurations of the job.
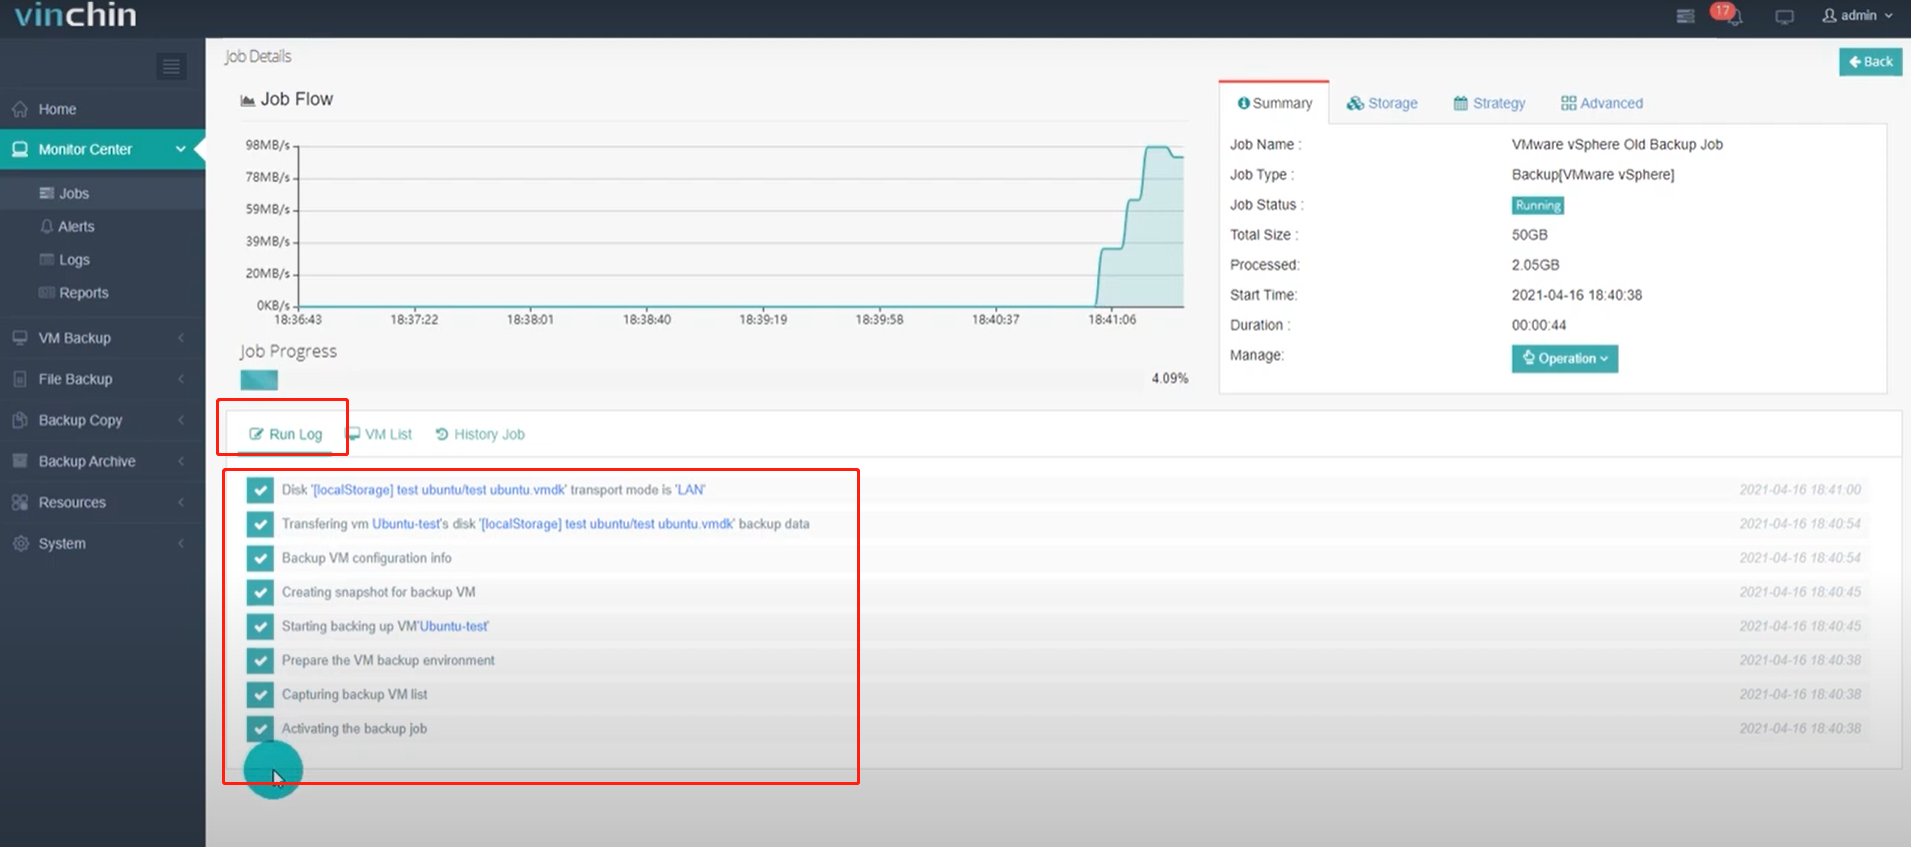
Below is the Run log of this job, the logs of running each step of the job will be printed here.
And here in the VM list, all the VMs included in this job will be listed here. And you can see the statistics of the VMs which is been or have already been processed by the current job session.
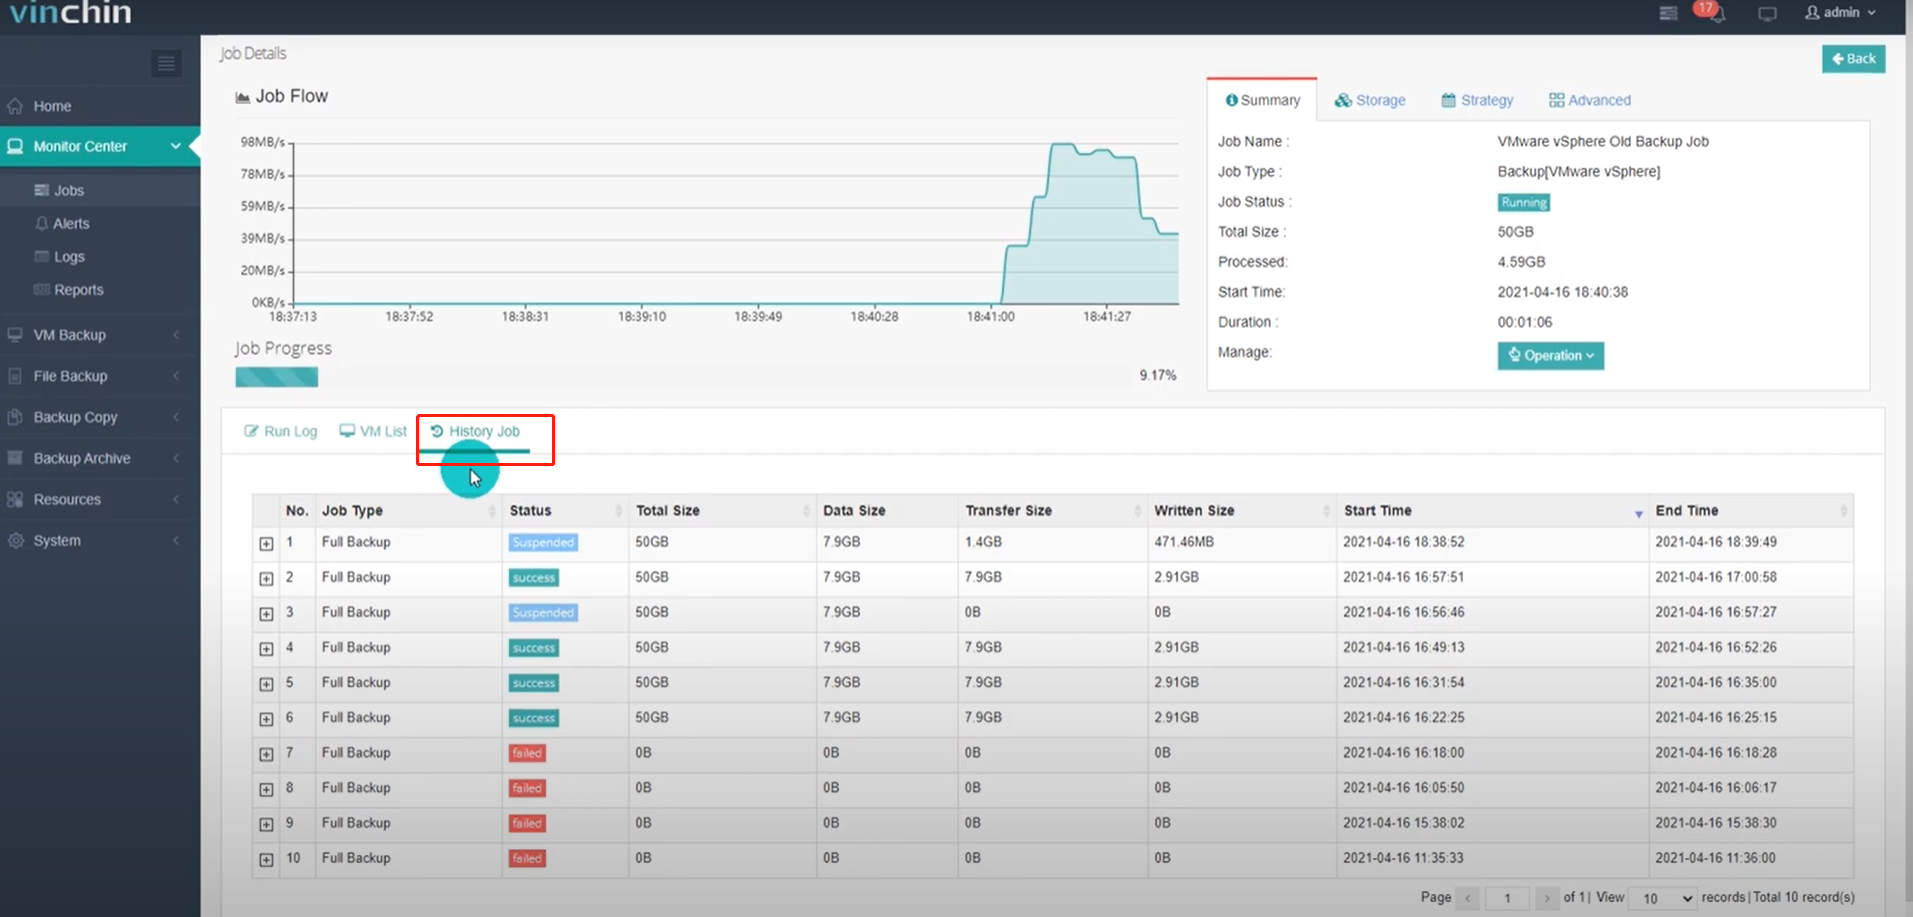
After this job session is completed, it will be recorded into the history job list. Here we can see how many times this backup job had been accomplished already.
Unfold one of the job sessions, you are able to check all VMs backup information within this job session.
And for the backup data, let’s go to the VM Backup -> Backup Data page for the VM backup data management.
By unfolding the backup job name, the VMs of this job will be listed, and by clicking on one of the VMs, you’ll be able to see its backups both within this list and also on the right-side table.
With these backups, also as known as restore points, you are able to restore the VMs to the states of any of these time points.
Share on:


