-
Why Verify the Backup Data?
-
Vinchin Backup Verification
-
How Does Vinchin Backup & Recovery Verify Data?
-
Sum up
Why Verify the Backup Data?
Play safe for recovery: The primary and most essential reason to verify your backup data is to make sure of the recovery capabilities of backups in advance. If you never verify your data backups, you may end up with data loss in a disaster recovery situation. And this would lead to staff panic, system downtime, and reputation damage for sure.
Get the hang of backup status: If you don't frequently check to make sure your backups are functioning as expected, you might not find that they have ceased duplicating data or that data has become corrupted because of a software error until you use the data. You’ll have to back up again since the backup is invalid, which costs time and resources.
Important data can be left out: Users must specify the backup resources of the whole VM or specific folders when they set up backup strategies in a professional backup solution. Now, a significant portion of the user's data may not have been transferred if they forget to back up a crucial folder. This may go unnoticed until it is too late if you don't regularly check your backup.
Vinchin Backup Verification
Backup validation/verification is a procedure to check the VMware backup data for mistakes or data loss, which ideally should be covered by the backup and recovery strategy. A validated backup provides a better guarantee that the data is accurate, readable, and error-free. Currently backup verification only works with VMware virtual platform and its backups.
Vinchin Backup & Recovery can validates VMware backup data in a virtual lab of the Vinchin server to ensure the data accuracy and the backup is valid for all kinds of operations.
A virtual lab in virtualization is a website or software for interactive learning that simulates real-world phenomena. That way, admins could test the features or get running results of the certain dataset in an isolated, mock IT environment where everything configures just like the production environment.
Similar to the HA in VMware vSphere that detects the host heartbeat to confirm whether it is running, the backup verification in a virtual lab works through ping, heartbeat test, and other methods to define the backup reliability.
How Does Vinchin Backup & Recovery Verify Data?
Step 1. Create a virtual lab
a. Enter the virtual lab and gateway proxy names.
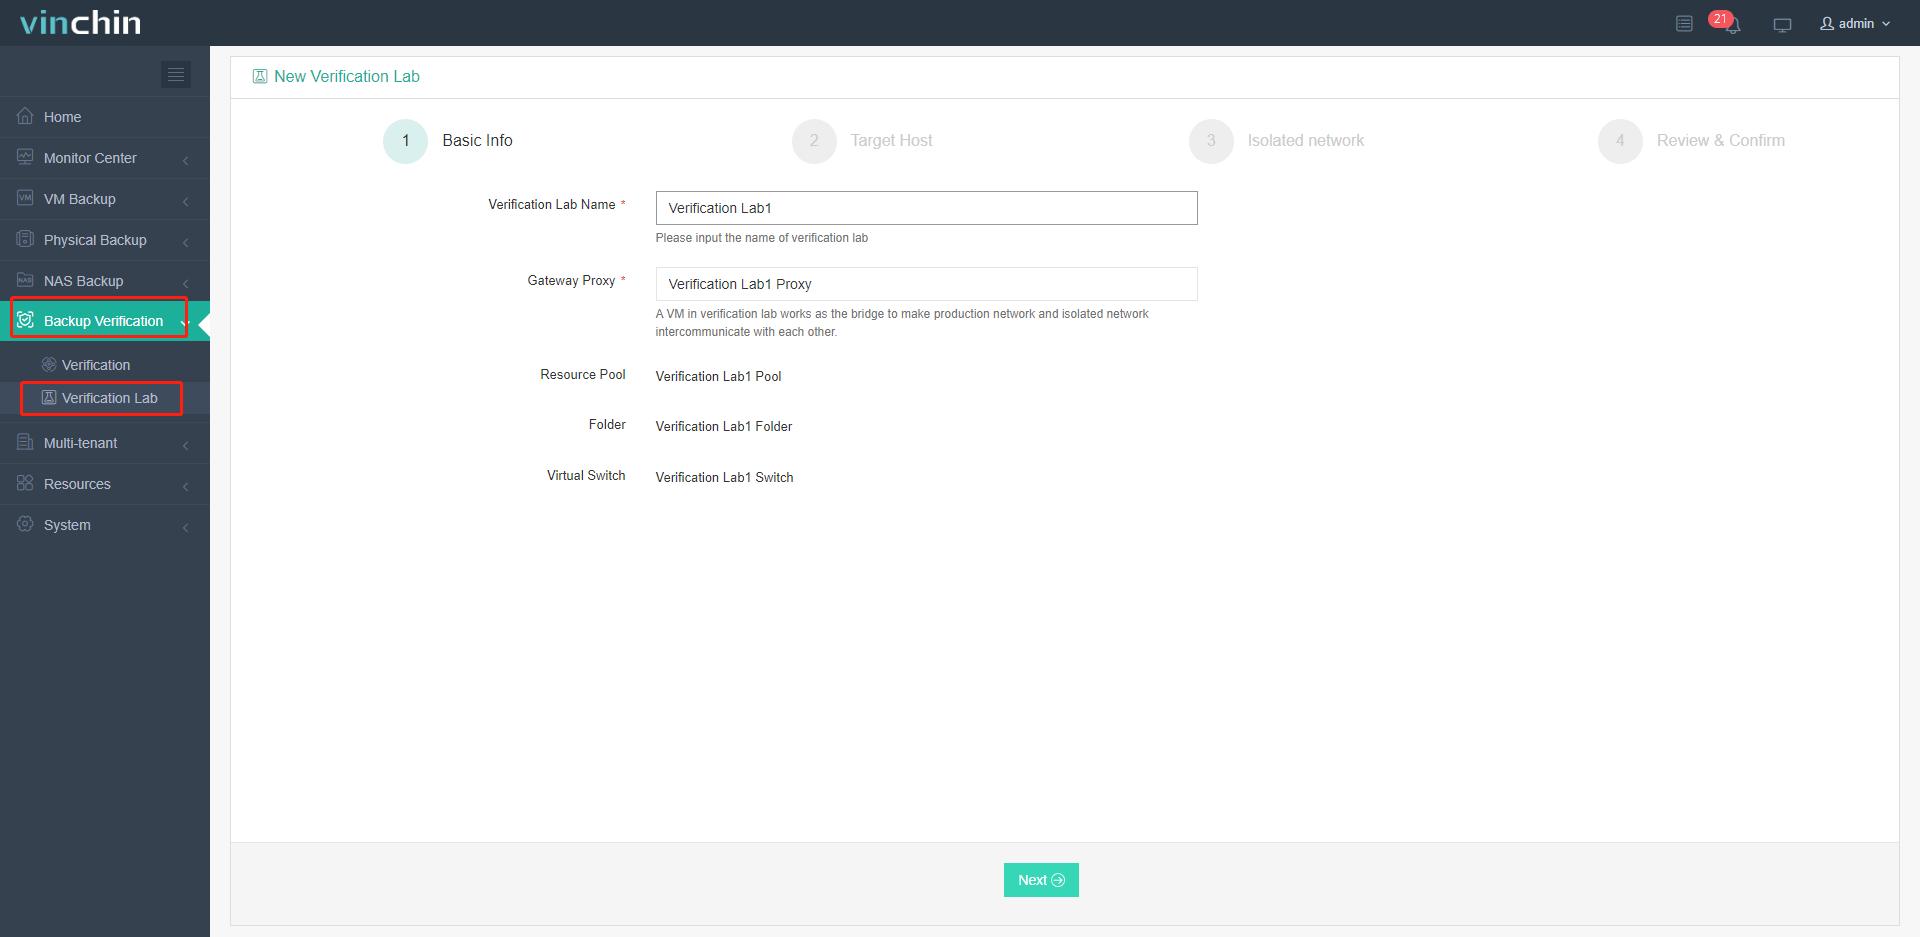
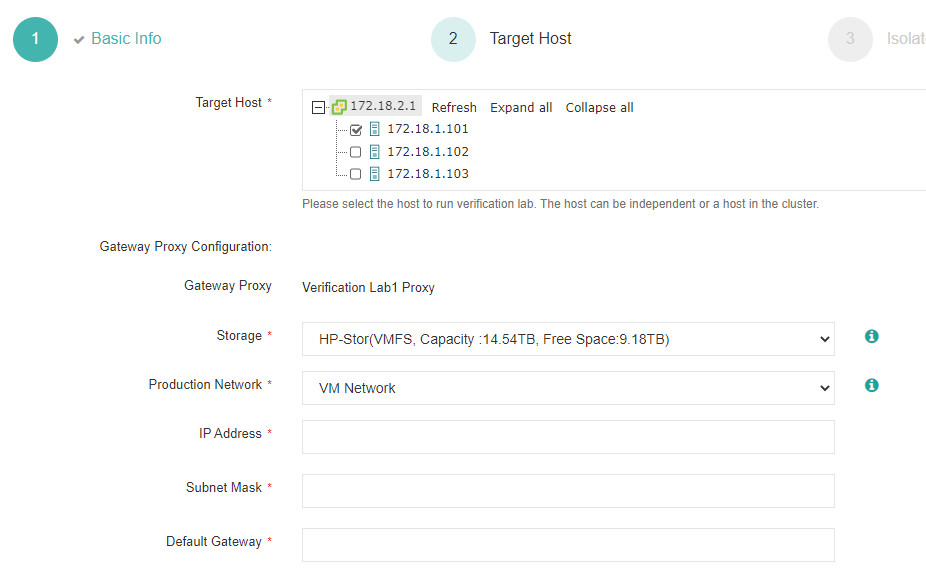
b. Select the target hosts that could be independent or a part of the clusters. Then configure the target storage, production network, and others for the proxy storage network.
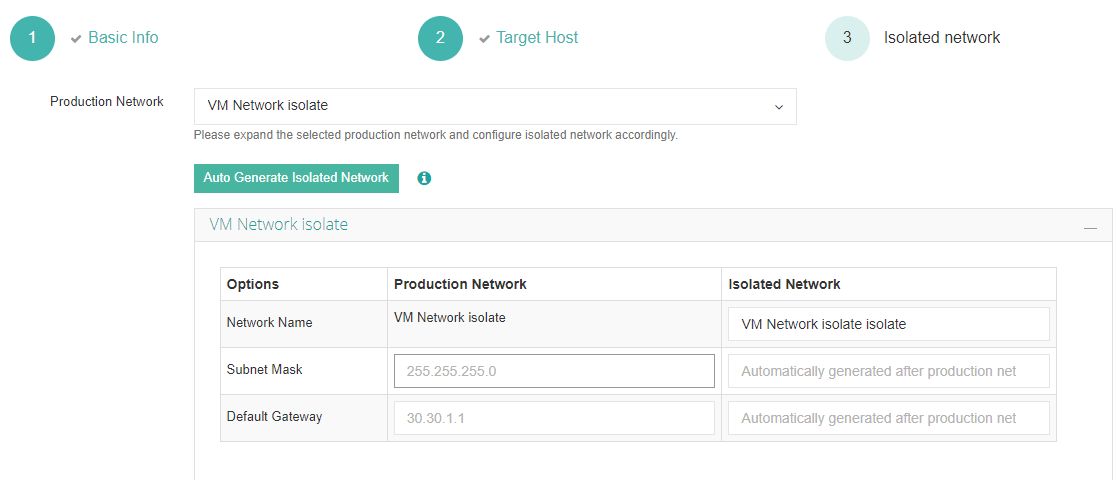
c. Select the production network of the validated VM from the networks under the vCenter of the virtual lab. The isolated network will be generated automatically for convenience.
d. Review all settings and click Submit.
In the virtualization environment, the creation of a virtual lab will be: create a virtual switch, add port groups, set up folders and resource pools, then create and configure a proxy gateway.
e. There are 5 states of a virtual lab: deploying, deployed, using, modifying, and failed.
You could check the lab name box to change its configurations to align with the way you create a virtual lab (unless the only thing changed is the lab name).
You can also delete a configured lab without any verification job, or quickly search a lab by inputting the partial/whole name.

Step 2. Create a backup validation job
a. Select the method. You could switch to another node for backups affiliated with it.
Then specify validation source based on the job, restore point, or VM.
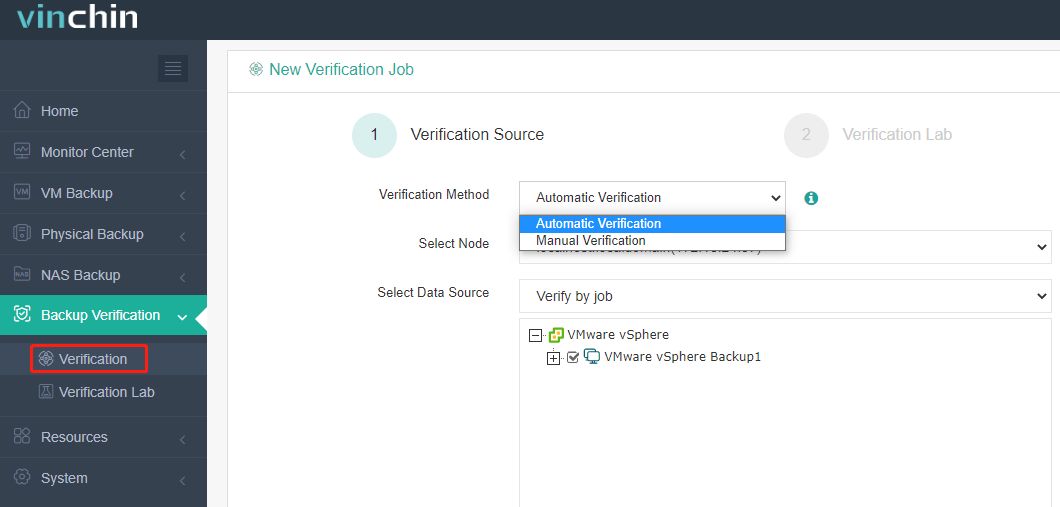
b. Select a configured virtual lab.
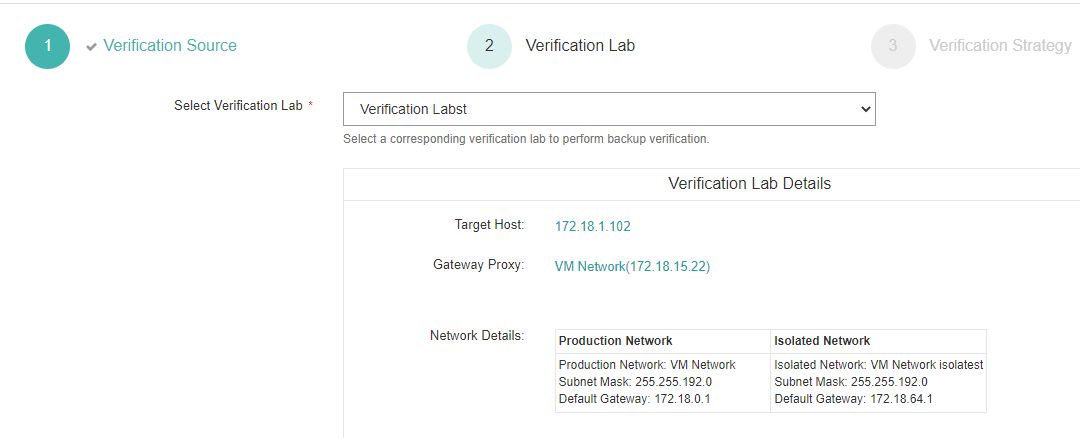
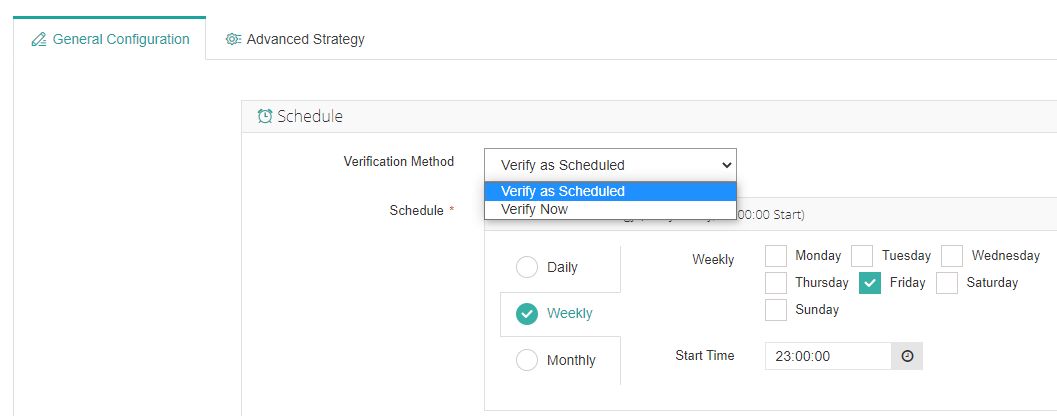
c. Configurations include common setups and advanced ones. Set the task time as instant or repeated verification. While choosing the backup node address that could connect to the host machine.

d. Check all configurations and click Submit.
e. You can download the verification report or send it to the email by clicking the job name > History Jobs > Verification Report > Download Report or Send by email.
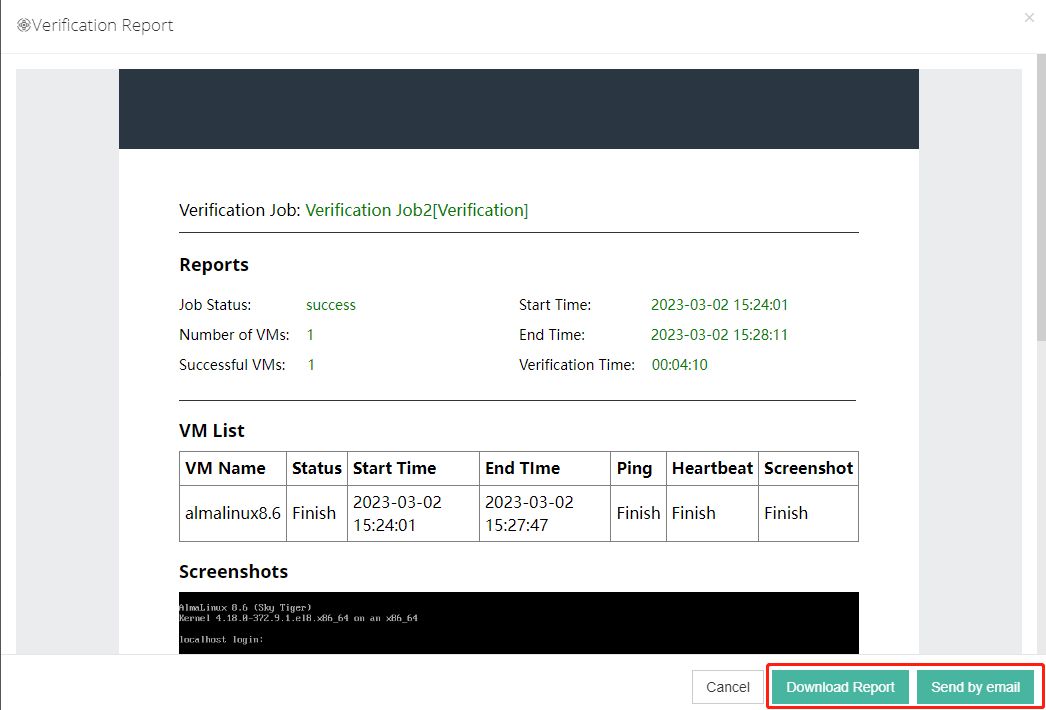
And that’s all for VMware backup verification, and you are welcome to download the 60-day full-featured free trial of Vinchin Backup & Recovery below to give it a try.
Sum up
To ensure the backup and recovery strategies go well, backup data verification is necessary because it identifies neglected vulnerabilities beforehand and makes sure every file is counted.
Vinchin Backup & Recovery 7.0 introduces VMware backup verification in a virtual lab isolated from the production environment for effective and resultful VM backup.
Share on:


