-
Requirements for Synology Hyper-V backup
-
Backup Hyper-V with Active Backup for Business
-
Backup Hyper-V to NAS with Vinchin Backup & Recovery
-
Sum Up
Are you looking for a robust backup solution to save Hyper-V VM to Synology NAS? Try Vinchin Backup & Recovery!
Server virtualization makes companies’ IT environments more efficient and flexible and it is easy to virtualize a Windows server to start using Hyper-V virtual machines. When virtual machines are used to run important business systems it is necessary to backup Hyper-V VM data.
Synology is a popular NAS for companies to store data and it provides the built-in solution, Active Backup for Business to help you directly backup Hyper-V VM to your Synology NAS.
Requirements for Synology Hyper-V backup
Synology Active Backup for Business can save you from manually copying Hyper-V export to NAS every day. You can download it from Package Center on Synology NAS and easily add Hyper-V host and create backup jobs but before that, you should know some requirements and limitations of using Active Backup for Business.
Some Synology NAS requirements like hardware resources and NAS OS can be checked in another post: How to backup VMware ESXi to Synology NAS. The following requirements are for Hyper-V environment.
● You can use it to backup VMs on Windows Server Hyper-V 2019/2016.
● VM configuration version should be higher than 5.0. You can check the VM version with the command Get-VM * | Format-Table Name, Version. If it can’t meet the requirement, try upgrade it.
● WinRM should be enabled for remote control of PowerShell. It is enabled by default on Windows server operating system. You can check it with the command WinRM enumerate winrm/config/listener or manually enable it with the command winrm quickconfig.
● WinRM should be configured for HTTPS for encrypting data transfer later. Microsoft has a post to help you finish the configuration step by step.
● SMB v2/v3 should be enabled via PowerShell: Set-SmbServerConfiguration -EnableSMB2Protocol $true. After that, also enable File and Printer Sharing to transfer data through the firewall: open Control Panel > select System and Security > select Windows Defender Firewall > select Advanced Settings > select Inbound Rules > enable File and Printer Sharing (NB-Session-In) and File and Printer Sharing (SMB-In)
● Administrative shares of C drive and the drives storing VM configuration files should be enabled.
● PowerShell permission on Hyper-V host should be enabled.
● These ports should be open: 445, 5510, 5986, 5985.
● Pass-through virtual disks and guest disks might not be backed up.
Backup Hyper-V with Active Backup for Business
With everything properly configured, you can start to add Hyper-V host and backup the virtual machines.
1. Download Active Backup for Business in Package Center on your Synology NAS
2. Launch it > select Virtual Machine > Select Microsoft Hyper-V > click Manage Hypervisor > click Add to add Hyper-V host with its credentials
3. Still under Microsoft Hyper-V, click Create Task > in the backup wizard, select the VMs to backup > click Next > select backup destination > click Next > select backup strategies > click Next > configure the schedule to automatically backup VM > click Next > select retention policy > click Next > review the Summary > click Done
Backup Hyper-V to NAS with Vinchin Backup & Recovery
Active Backup for Business can only help you backup Hyper-V VM to Synology NAS and has many requirements and limitations. You can have a better backup solution to backup VM to NAS.
Vinchin Backup & Recovery is a professional backup and disaster recovery solution for enterprise IT environment, supporting backing up Hyper-V VM on Windows Server 2019/2016/2012 R2/2012. You can add any brand of NAS like Synology, QNAP, Buffalo, etc. as the backup destination. If you wish, you can also backup the NAS device itself.
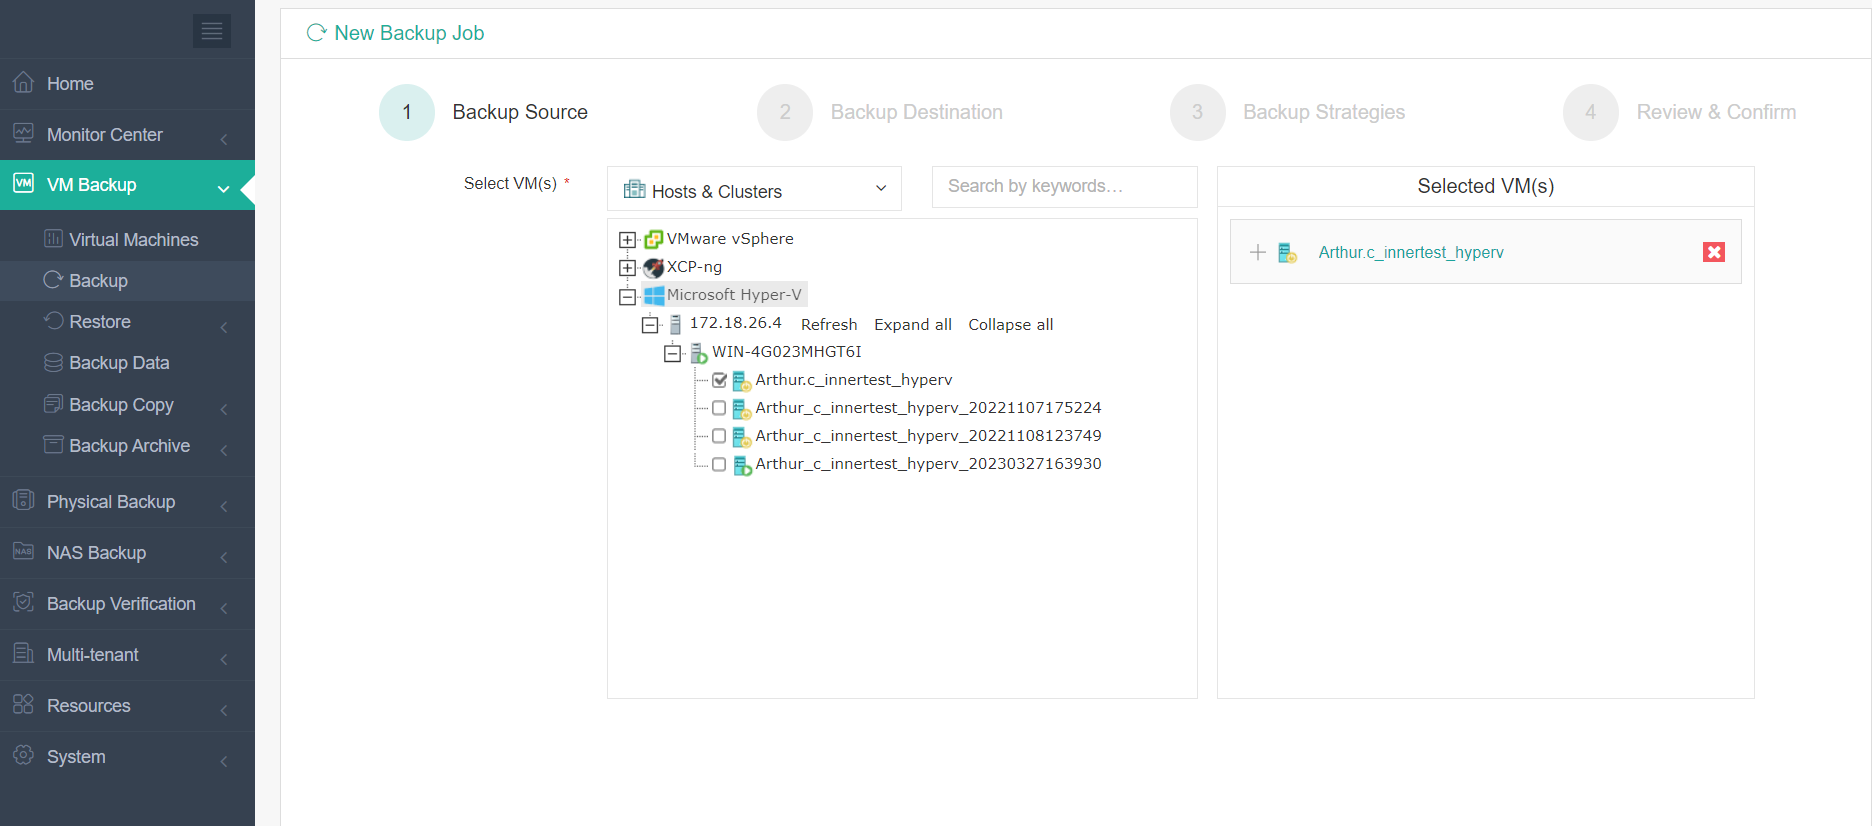
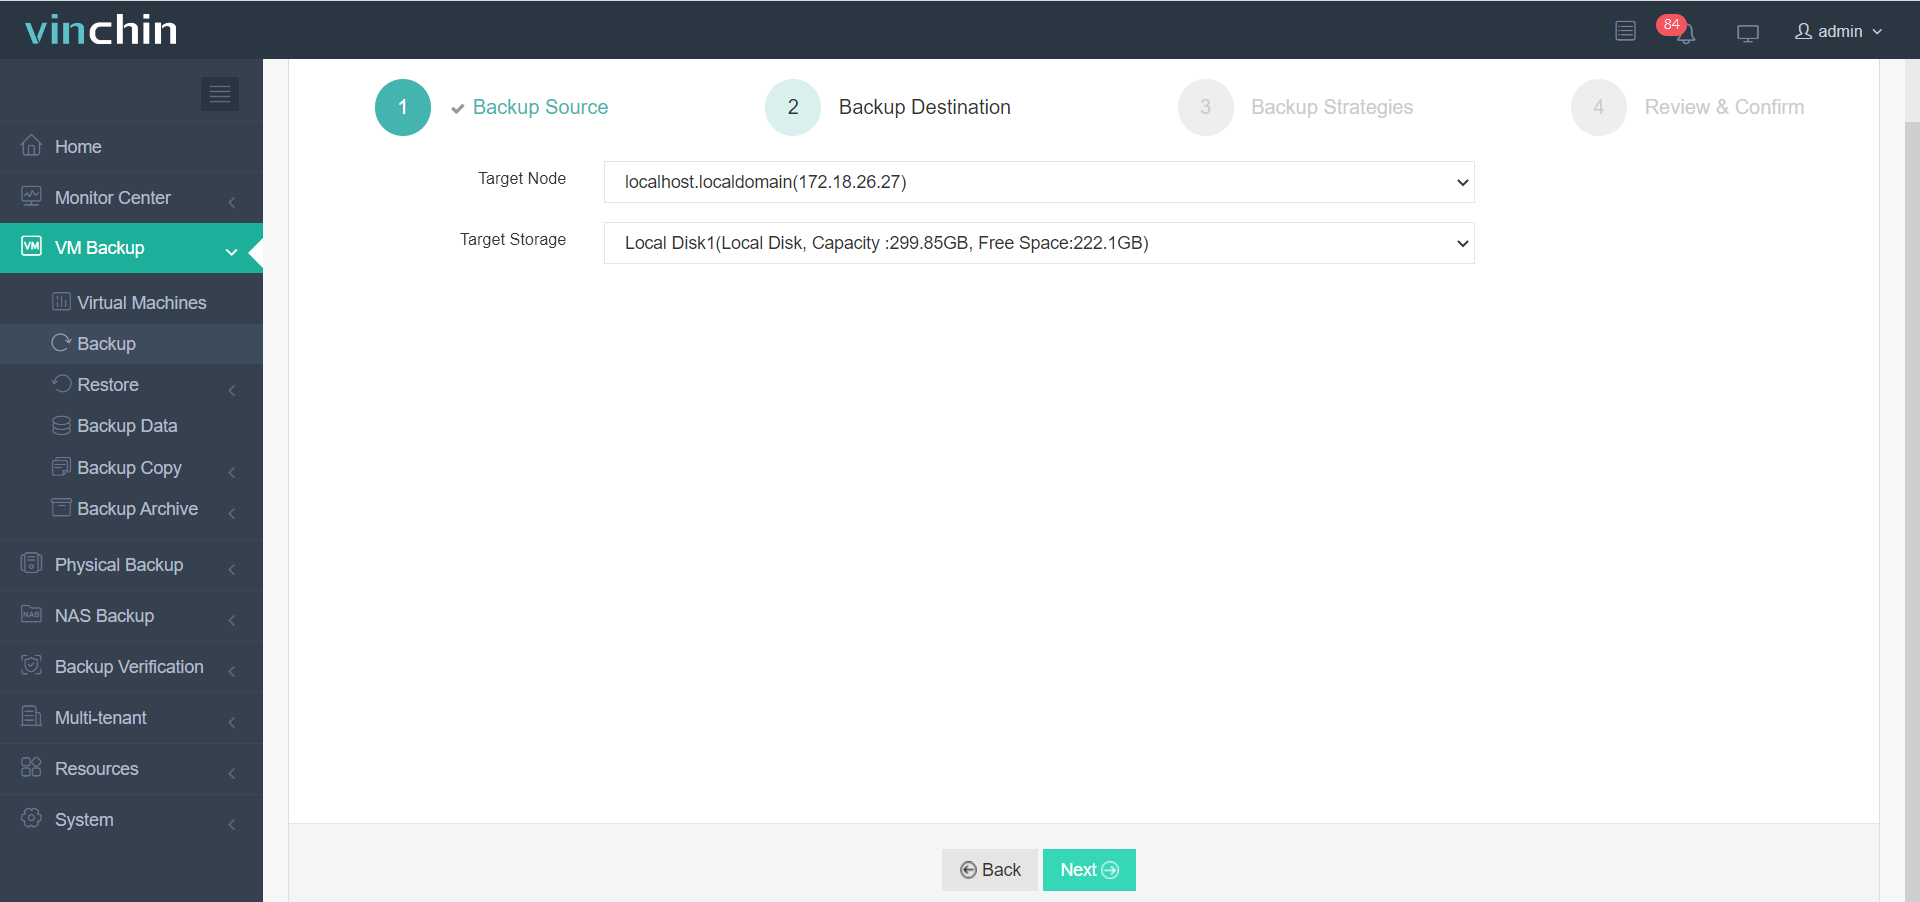
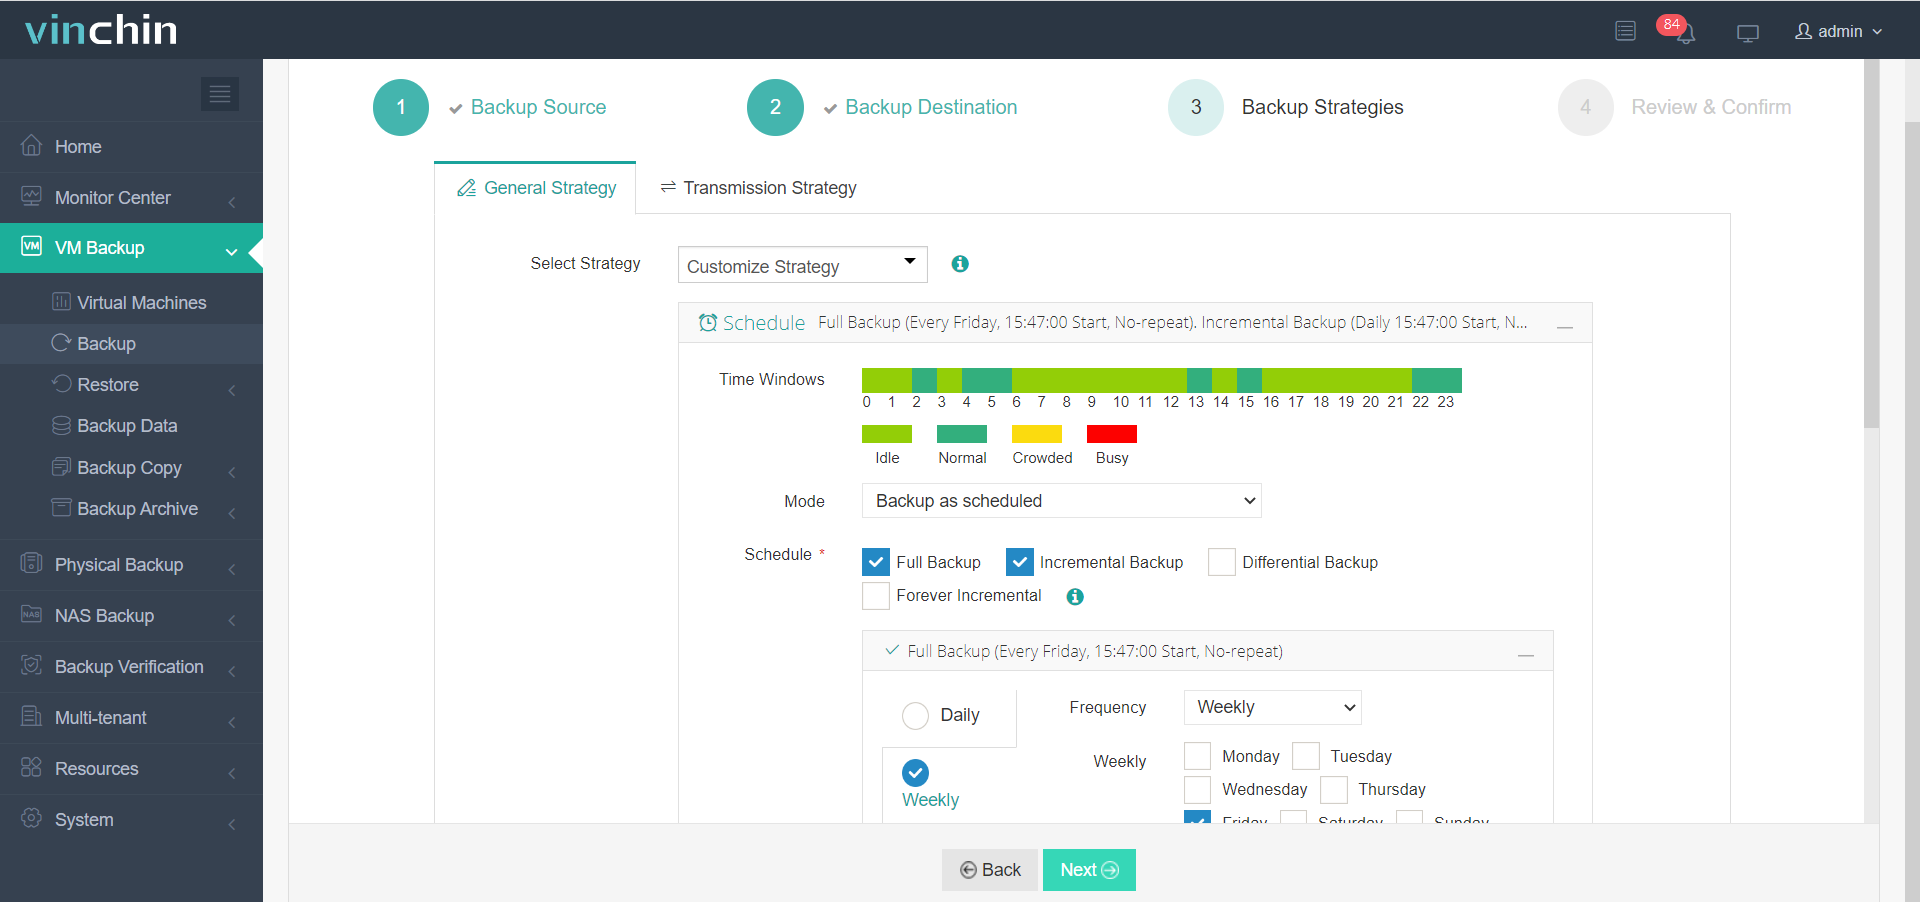
There will be a user-friendly web console to help you create backup and restore jobs with wizards and agentless backup makes it easy to add VMs by adding just Hyper-V host. Every time you need to backup Hyper-V VM, you just need 3 steps.
1. Select VMs on Hyper-V host > click Next

2. Select an added NAS as the backup destination > click Next

3. Select backup strategies. Setting up the schedule can trigger the backup job automatically every time. Then you can submit the job.

Vinchin Backup & Recovery has been selected by thousands of companies and you can also start to use this powerful system with a 60-day full-featured free trial. Just click the button to get the installation package.
Sum Up
Synology is a popular NAS for companies and considering that companies often virtualize servers with Hyper-V it also lets companies directly backup Hyper-V VM to NAS. You need to check the requirements and know the limitations before adding Hyper-V host and creating back and restore jobs.
Vinchin Backup & Recovery provides more options to help you backup Hyper-V VM to NAS. It is a powerful enterprise backup solution so don’t miss the free trial.
Share on:


