-
How to export Hyper-V virtual machine via Hyper-V Manager?
-
How to restore/copy hyper-v virtual machine via Hyper-v Manager?
-
How to export and import Hyper-V virtual machine via PowerShell?
-
How to backup and restore Hyper-V VM with professional solution?
-
Hyper-V Export Virtual Machine FAQs
-
Sum Up
Virutualization technology lets companies and organizations deploy IT environment at lower price and also indirectly accelerates the development of all kinds of business systems.
Hyper-V is one of the most popular virtualization solutions in the world, attracting thousands of users for its powerful performance and Windows OS userbase. After virtual environment deployment, daily maintenance is still indispensable.
The jobs of IT administrators include ensuring the status of VMs and managing the Hyper-V virtual environment. To finish the task, exporting virtual machine is very helpful. See what you can do with VM export and how to export Hyper-V VM step by step.
How to export Hyper-V virtual machine via Hyper-V Manager?
Hyper-V Manager is frequently used for Hyper-V virtuao environment management. You could export VM while it is running with Hyper-V Manager.
1. Open Hyper-V Manager on Windows operating system
2. Locate the VM you would like to export
3. Click Export on the right
4. Click Browse to select the location to store the VM export
5. Click Export and wait for a while
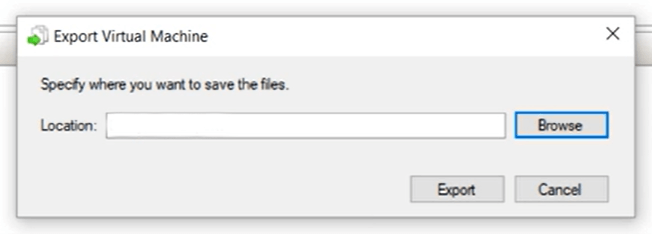
Then you could find the VM export at the selected location. There would be a fold with the same name of the VM. If you open the folder, you would find 3 subfolders, Snapshots, Virtual Hard Disks, and Virtual Machines in it.

The three folders contain the hyper-V VM snapshots, virtual hard disks and configurations to let you restore entire data when you restore or clone the VM.
Snapshots are used to revert VM to the previous state when VM failed for certain issues. They are saved as .avhdx (.avhd) format files. The post how to merge Hyper-V snapshots might help you understand how snapshot works in Hyper-V virutal environment and how to safely delete too much snapshot files.
Virtual hard disks work like the hard disks of physical machine, storing necessary data. In Hyper-V virtual environment, virtual hard disk is saved as .vhdx (.vhd) file. Because it works like hard disk, is it able to directly copy .vhdx files to make Hyper-V VM backup?
.vhdx file contains a large amount of data. Copying .vhdx file is a kind of VM backup but it must be performed in a proper way. It is easy to get the location of the .vhdx file via Hyper-V Manager and locate the file in File Explorer, but simply copying the file to another folder or storage is not safe. Even if you create a new Hyper-V VM with the .vhdx file, the data could be lost. The safest way to copy .vhdx is exporting the entire VM in the way introduced in this section.
How to restore/copy hyper-v virtual machine via Hyper-v Manager?
With the VM export you get, you could easily restore or clone a VM in Hyper-V Manager. This is also the method to move VM from Hyper-V VM to another host.
1. Open Hyper-V Manager
2. Right-click the host and select Import VM
3. Read the introduction and click Next
4. When asked to locate folder, click Browse to locate the VM export and select the folder. Click Next
5. Hyper-V Manager would recognize the original VM so you just need to select the VM and click Next
6. In Import Types section, there are Register in-place, Restore the virtual machine, and Copy the virtual machine to choose. You could select Copy the virtual machine(create a new unique ID) if the original VM still works on the host
7. Select the folder to store data for new VM or use the default folder. Click Next
8. Select a folder to store virtual hard disks for the new VM and click Next
9. Review the information of the new VM and click Finish
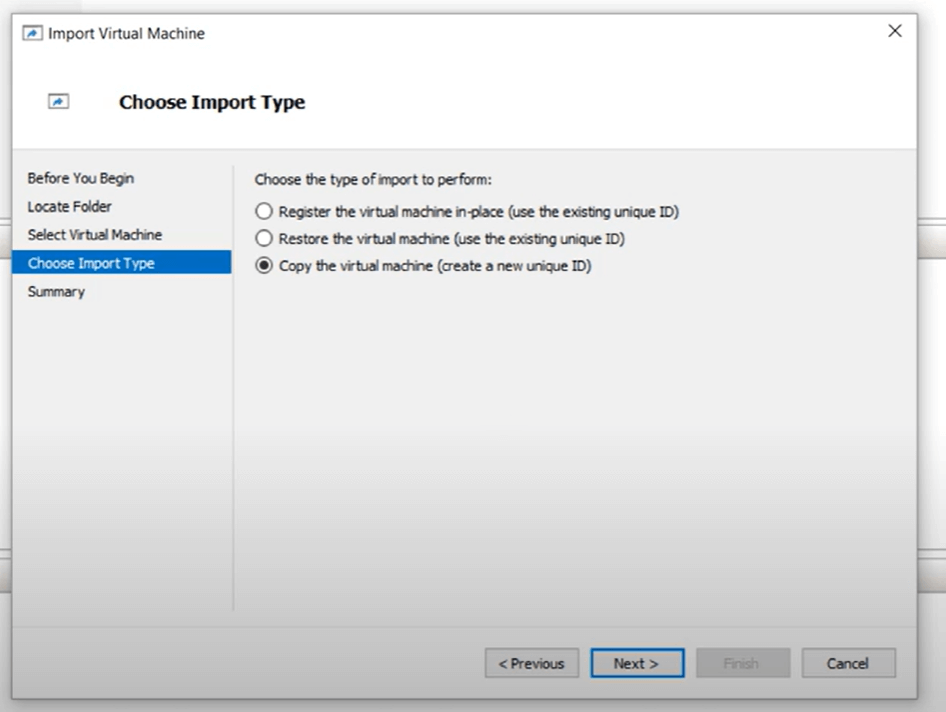
How to export and import Hyper-V virtual machine via PowerShell?
Except for Hyper-V Manager, PowerShell could also be used to export Hyper-V VM. PowerShell is a task automation and configuration management program from Microsoft, consisting of a command-line shell and the associated scripting language. You need to make sure it has been installed in your operating system before any operation.
To export VM via PowerShell, type the command below:
Export-VM -Name <vm name> -Path <path>
You need to be aware that the "<vm name>" is the name of the VM needed to be exported and "<path>" is the destination.
To import VM, there are also three kinds of commands for the three kinds of import types in the last section:
Register in-place:
Import-VM -Path 'C:<vm export path>2B91FEB3-F1E0-4FFF-B8BE-29CED892A95A.vmcx'
Restore the virtual machine:
Import-VM -Path 'C:<vm export path>2B91FEB3-F1E0-4FFF-B8BE-29CED892A95A.vmcx' -Copy -VhdDestinationPath 'D:Virtual MachinesWIN10DOC' -VirtualMachinePath 'D:Virtual MachinesWIN10DOC'
Copy the virtual machine:
Import-VM -Path 'C:<vm export path>2B91FEB3-F1E0-4FFF-B8BE-29CED892A95A.vmcx' -Copy -GenerateNewId
You should match the corresponding value by checking the VM export folder.
Except for the methods above, you can have better Hyper-V disaster recovery tool for virtual environment.
How to backup and restore Hyper-V VM with professional solution?
VM export is one way to make VM backup but you could have a better backup system. Vinchin Backup & Recovery is a professional Hyper-V backup solution, which makes you easily backup Hyper-V VM and manage the backup files via a web console.
Vinchin Agentless Backup technology makes backup process simplified. Just add the Hyper-V host to backup system and you could backup any VM on the host. Your backup files are orderly stored in backup storage, so you could easily locate them to restore or copy the VMs to another Hyper-V host.
Sometimes you might want to extract certain file from VM backup. This could be realized by the feature Granular Restore of Vinchin Backup & Recovery.
You just need 4 steps to backup Hyper-V VMs:
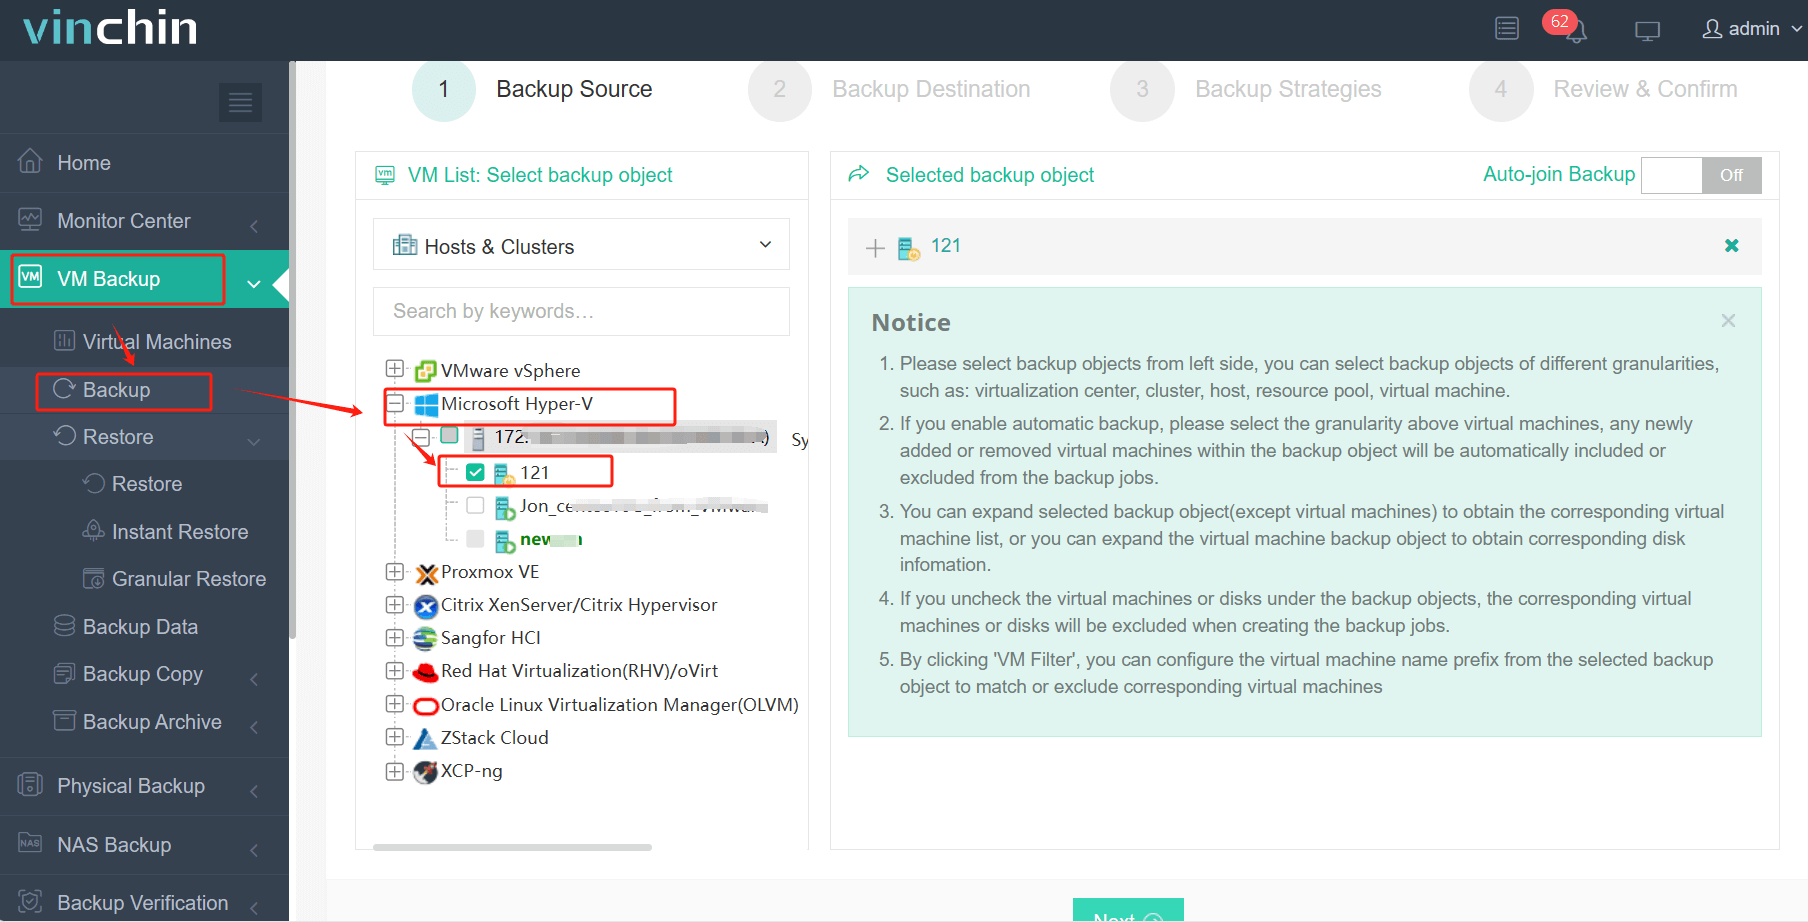
1. Select the Hyper-V VMs
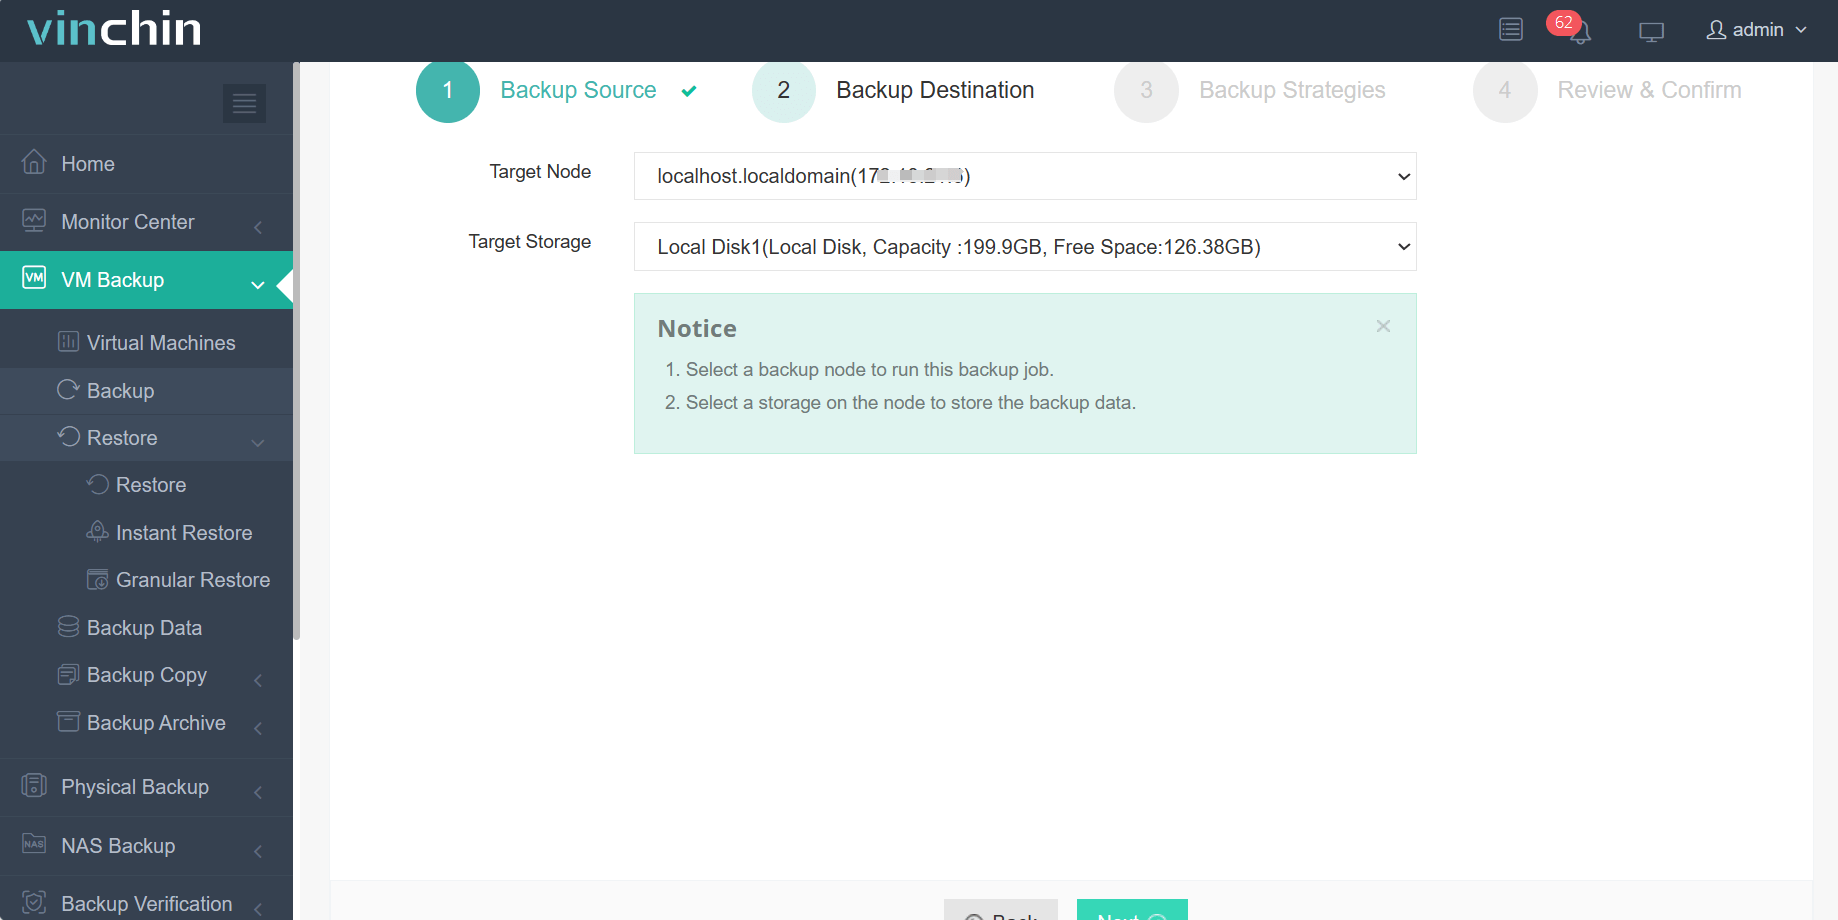
2. Select the backup storage
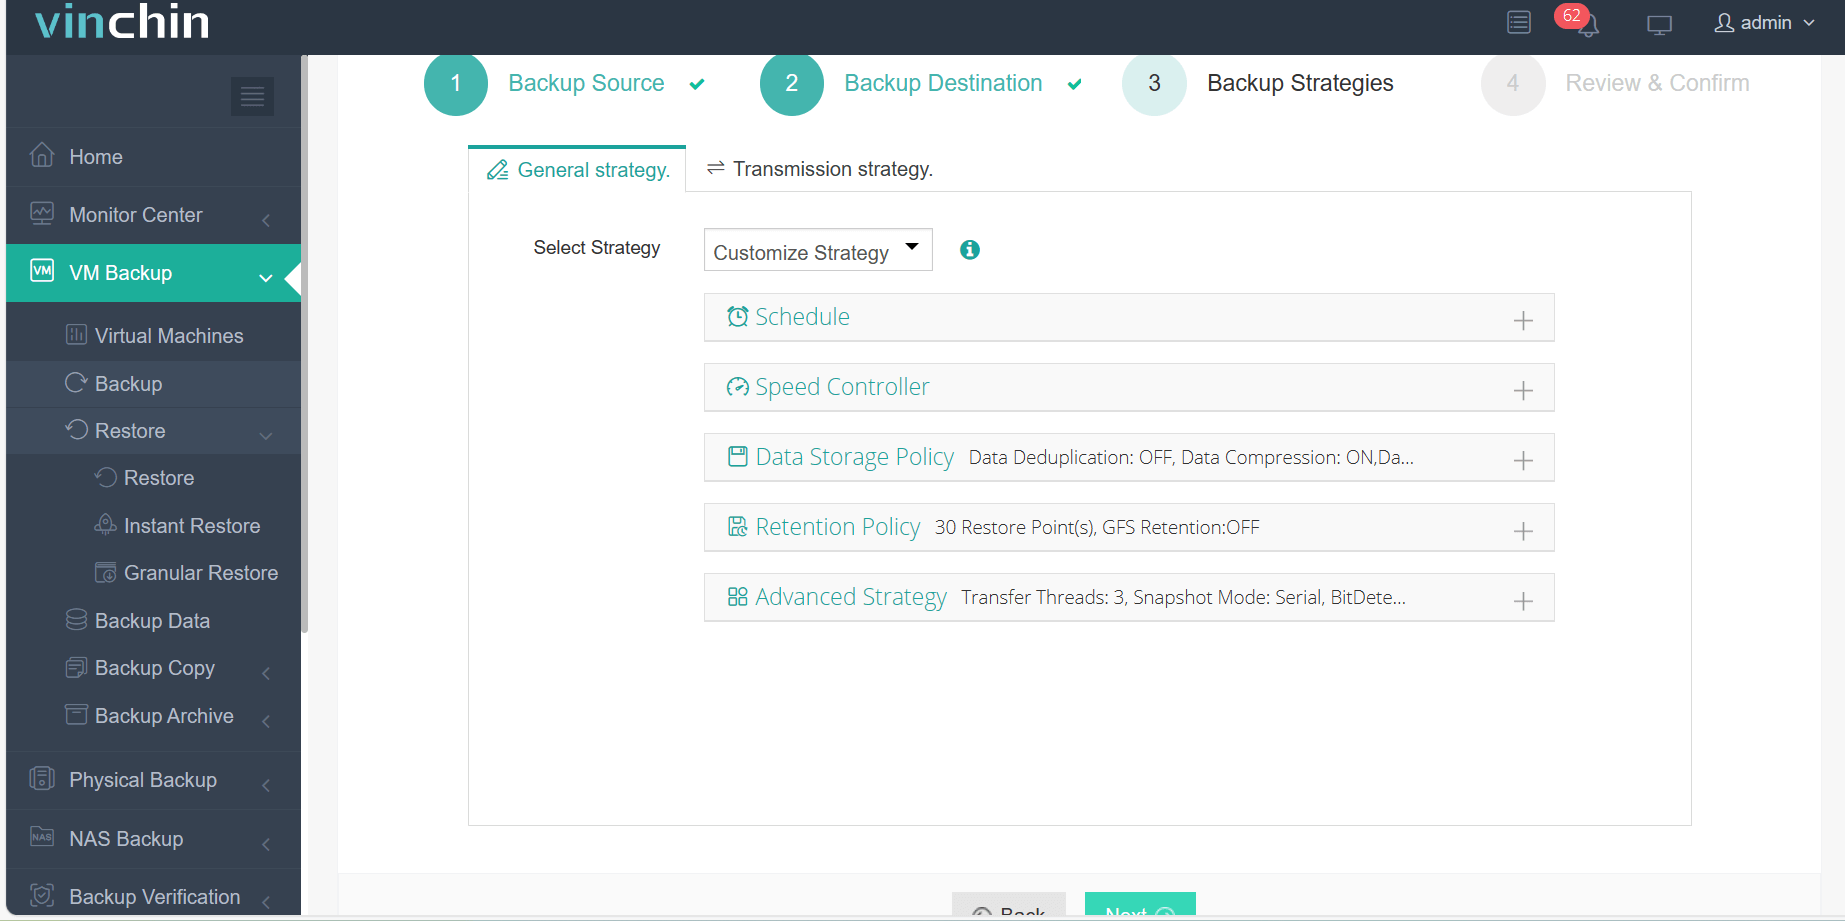
3. Select the backup strategies
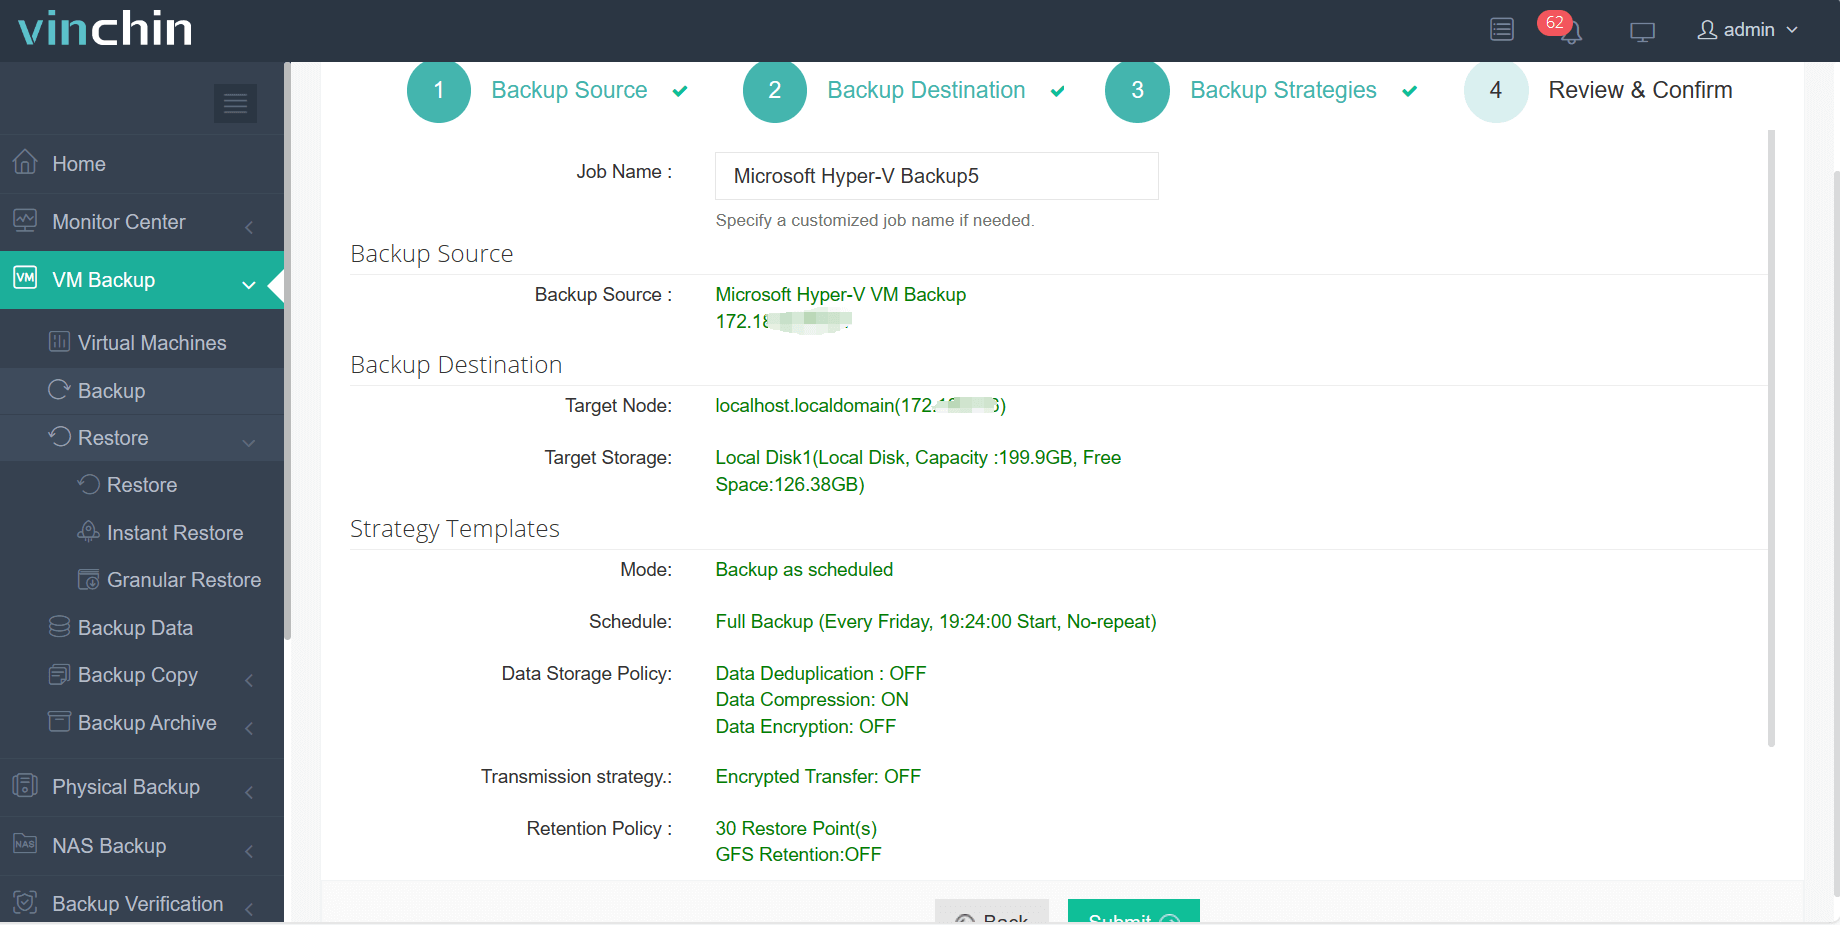
4. Submit the job
Start a 60-day full-featured trial and then you could experience more features including SpeedKit (speeding up incremental backup), Data Deduplication and Compression (saving much backup storage), Backup Node Expansion (expanding backup infrastructure for large environment), etc.
Hyper-V Export Virtual Machine FAQs
Q1: How can I export a VM directly to a network share?
A1: Use PowerShell with a UNC path and ensure share permissions: Open PowerShell > Export-VM -Name <VM> -Path "\Server\Share\VMExports"
Q2: What should I do if live export fails due to VM size?
A2: Shut down the VM before export: Stop-VM -Name <VM> > Export-VM -Name <VM> -Path <Path>
Q3: How do I restrict access to exported VM files?
A3: Apply NTFS permissions on the export folder via the Security tab or icacls "<Path>" /grant Administrators:(RX)
Sum Up
Hyper-V is one of the most popular virtualization solutions. To protect VM data, you could export VM to make backup or restore or copy VM later.
Your virtual environment could be better protected with the robust backup system Vinchin Backup & Recovery. The VM exports would be better stored and the process of exporting and importing VM, and extracting data would be much simpler.
Don't forget to try it for free.
Share on:


