How Do You Change the Pool Master in XenServer?
Managing a XenServer resource pool means you must understand how to handle the pool master role. Sometimes you need to change the pool master - maybe for maintenance, hardware failure, or balancing resources across hosts.
This guide explains:
It also covers best practices and how Vinchin can help protect or migrate VMs during the process.
Vinchin Help Back Up or Migrate VMs When Changing XenServer Pool Master
When planning infrastructure changes such as switching your XenServer pool master, ensuring VM safety through backup or migration is crucial for business continuity.
Vinchin Backup & Recovery:
Provides enterprise-grade backup
Supports agentless VM migration
Minimizes production impact
Supported platforms include:
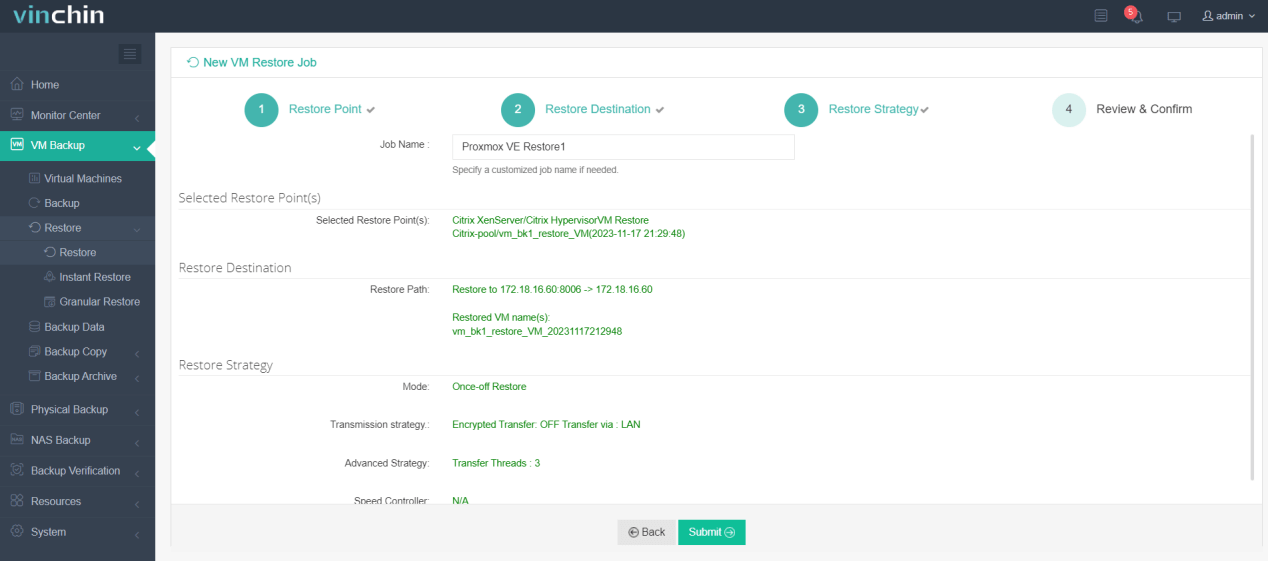
Migration workflow:
1. Select the backed-up VM
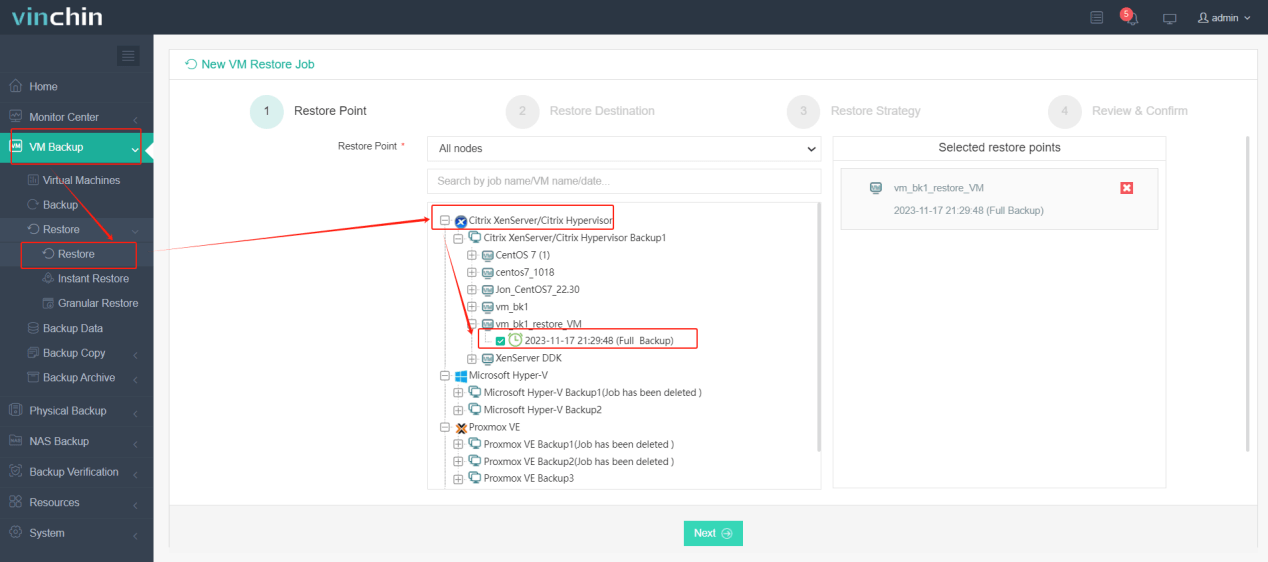
2. Choose target hypervisor
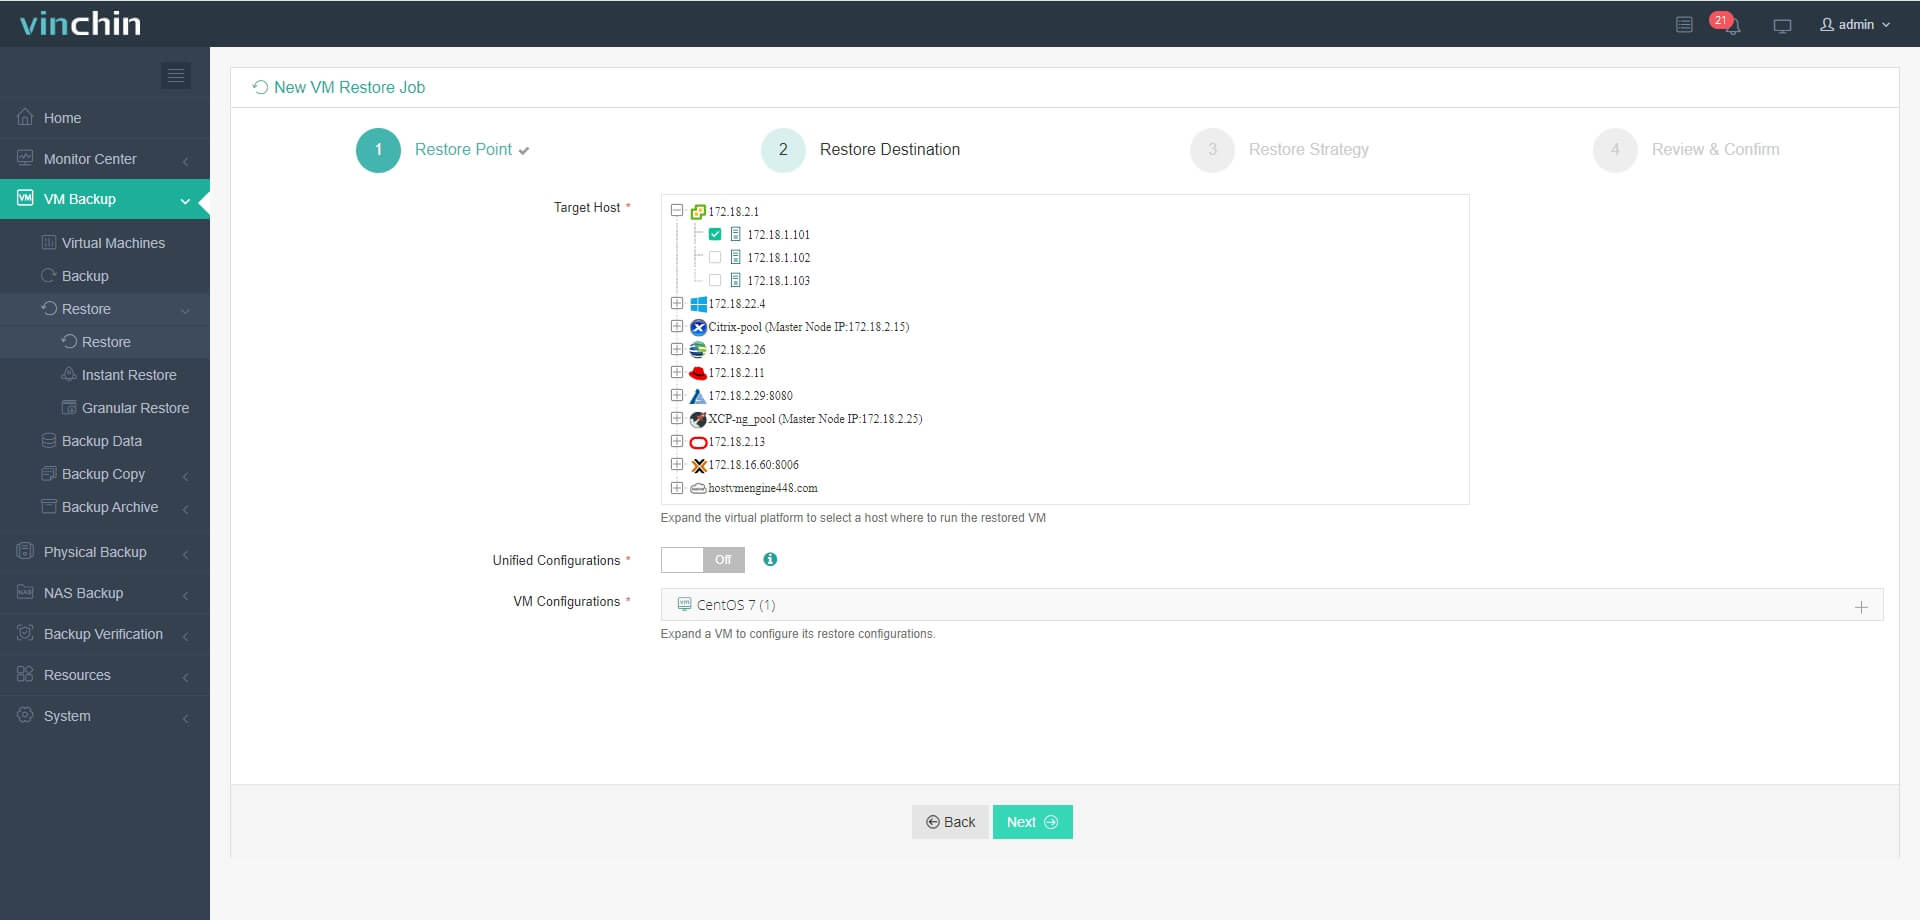
3. Select migration strategy
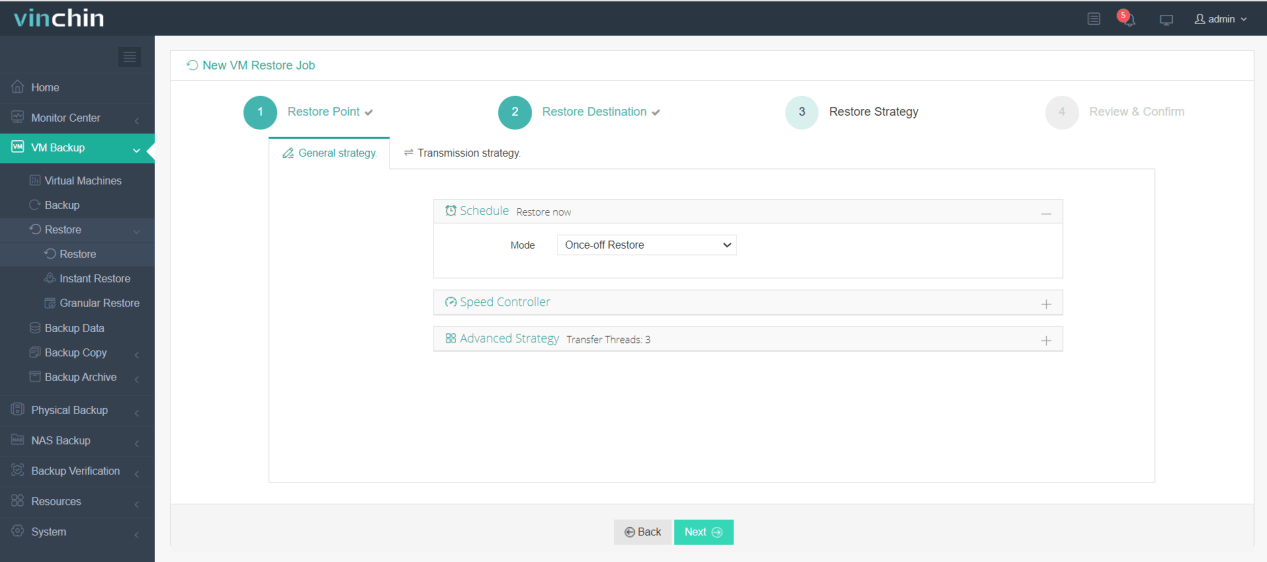
4. Submit the job
Thousands of organizations use Vinchin globally.
What Is XenServer Pool Master?
The pool master is the main server in a XenServer resource pool. It:
If the master fails, central control is lost until a new one is assigned.
Why Change XenServer Pool Master?
Common reasons:
Planned maintenance
Hardware failure
Performance optimization
Infrastructure redesign
Always proceed carefully to avoid downtime or VM impact.
Pre-Change Checklist & Common Pitfalls
Before making changes:
Checklist:
Disable HA → xe pool-ha-disable
Verify host health
Ensure identical versions/patches
Confirm shared storage access → xe sr-list
Backup pool metadata → xe pool-dump-database
Check no active tasks → xe task-list
Sync time via NTP
Prepare rollback plan
Common pitfalls:
HA still enabled
Offline hosts
Network instability
Storage issues
How to Change Pool Master via XenCenter GUI
Steps:
1. Open XenCenter
2. Select pool
3. Go to Pool → Designate New Master
4. Choose host
5. Confirm
6. Expect brief disconnection during transition.
Console Method (xsconsole)
1. Run xsconsole
2. Go to Resource Pool Configuration
3. Select Designate New Master
4. Confirm
How to Change Pool Master Using CLI (xe)
Disable HA
xe pool-ha-disable
Normal Scenario
xe host-list
xe pool-designate-new-master host-uuid=<uuid>
xe pool-list
Re-enable HA
xe pool-ha-enable
Emergency Scenario
xe pool-emergency-transition-to-master
xe pool-recover-slave
xe host-list
FAQs
Q1: Can I change the pool master remotely?
Yes, via SSH and xe commands.
Q2: What if two masters exist?
This is split-brain—shut down one side and recover properly.
Q3: Will VM data be lost?
No, if shared storage remains accessible.
Q4: Can you change the pool master while VMs are running?
Yes, changing the pool master does not affect running VMs as long as shared storage remains accessible.
Q5: Will changing the pool master cause downtime?
No major downtime, but management connectivity may briefly disconnect during the transition.
Conclusion
Changing the XenServer pool master is a routine but critical operation. With proper preparation and execution, you can ensure:
Following best practices—and using tools like Vinchin—helps maintain a stable and resilient virtual environment.