-
What is a Hyper-V Virtual Network Adapter?
-
Setting Up a Hyper-V Virtual Network Adapter in Hyper-V Manager
-
Managing Hyper-V Network Adapters Using PowerShell
-
Security Considerations When Using Hyper-V Virtual Network Adapters
-
Professional Hyper-V VM Backup Solution
-
Frequently Asked Questions About Hyper‑V Virtual Network Adapters
-
Conclusion
Networking is at the heart of every virtual environment. In Microsoft Hyper-V, the virtual network adapter connects your VMs to each other, your host server, and external networks. But what does this mean in practice? How do you set up these adapters for reliability and speed? This guide explains everything. Whether you’re just starting or want to optimize a large deployment, you’ll find clear steps and expert tips here.
What is a Hyper-V Virtual Network Adapter?
A Hyper-V virtual network adapter acts like a physical network card but exists only in software inside your VM. It lets VMs send data across networks just as if they had their own hardware NICs installed on a server.
Each VM can have one or more adapters connected to different virtual switches—the software hubs that route traffic between VMs or out to physical networks.
Key Concepts: Emulated vs. Synthetic Devices
Hyper-V offers two main types of virtual network adapters:
Legacy Network Adapter: Designed for Generation 1 VMs or older guest operating systems that lack integration services support. It emulates an old-style Intel 21140-based NIC so even unsupported OSes can boot from PXE or connect during installation.
Synthetic Network Adapter: The default choice for most modern VMs (Generation 1 with integration services or any Generation 2). These use Microsoft’s VMBus technology to deliver much higher throughput with less CPU overhead than legacy adapters.
Why does this matter? Synthetic adapters bypass hardware emulation by communicating directly through the hypervisor’s optimized channels (VMBus). This means faster speeds and lower resource usage—critical when running many VMs on one host.
You can assign multiple IP addresses per adapter if needed—for example, connecting a VM to several subnets at once.
By default, new VM adapters are disconnected until you attach them to a switch—a step you must complete before networking works.
Types of Virtual Switches
Virtual switches are essential building blocks in Hyper-V networking:
External Virtual Switch: Connects VMs directly to your physical LAN via a selected host NIC. This allows communication between VMs, hosts, and outside devices.
Internal Virtual Switch: Allows communication between all VMs on the same host plus the host itself—but not beyond.
Private Virtual Switch: Restricts communication strictly among VMs on that host; neither the host nor external networks are accessible through this switch type.
VLAN tagging is supported across all switch types (except Private), letting you segment traffic for security or performance reasons by assigning VLAN IDs at either the switch or adapter level.
Setting Up a Hyper-V Virtual Network Adapter in Hyper-V Manager
Setting up networking correctly ensures smooth operation of your workloads—and avoids common pitfalls like isolation or bottlenecks later on.
To add a new virtual network adapter using Hyper-V Manager:
1. Open Hyper-V Manager.
2. Right-click your target VM and select Settings.
3. In the left pane under Hardware list, click Add Hardware.
4. Choose either Network Adapter (for most cases) or Legacy Network Adapter (only if required by older OSes).
5. Click Add, then select your desired Virtual Switch from its dropdown menu.
6. Optionally enable features like Enable VLAN identification, entering an appropriate VLAN ID if segmenting traffic.
7. Adjust settings under Bandwidth Management, such as minimum/maximum bandwidth limits if needed.
8. Click Apply, then close Settings when finished.
If you need to remove an adapter later:
Select it from the hardware list
Click Remove
Confirm changes with Apply
Creating a Virtual Switch
Before attaching an adapter to a VM, ensure there’s at least one suitable virtual switch available:
1. In Hyper-V Manager’s left pane select your host machine.
2. On right side click Virtual Switch Manager…
3. Under Create virtual switch choose either:
External
Internal
Private
4. Click Create Virtual Switch
5. Name it clearly; for External switches pick which physical NIC it should bind with (note: this disables direct management access via that NIC unless shared mode is enabled).
6. Configure additional options as needed—such as enabling SR-IOV if supported by hardware/NIC drivers.
7. Click OK
Once created assign this switch when configuring any VM’s network adapter(s).
Managing Hyper-V Network Adapters Using PowerShell
PowerShell brings automation power—and deeper control over complex environments where manual clicks become impractical fast!
Before running commands below open PowerShell as Administrator on your management workstation/server hosting Hyper-V role.
Adding & Removing Adapters
To add an adapter:
Add-VMNetworkAdapter -VMName "DemoVM" -SwitchName "DemoVSwitch" -Name "Demo Network Adapter"
For adding directly onto Host OS (“management OS”):
Add-VMNetworkAdapter -ManagementOS -Name "Second Network Adapter"
To remove an existing adapter:
Remove-VMNetworkAdapter -VMName "DemoVM" -VMNetworkAdapterName "NewNetworkAdapter"
Note: Removing disconnects permanently; disconnecting simply detaches from current switch without deleting config.
Connecting & Disconnecting Adapters
Attach an existing adapter back onto another switch:
Connect-VMNetworkAdapter -VMName "DemoVM" -SwitchName "Default Switch"
Disconnect all adapters from their current switches without removing them entirely:
Disconnect-VMNetworkAdapter -VMName "DemoVM"
Or disconnect all attached specifically via named vSwitch across every VM:
Get-VMNetworkAdapter -VMName * | Where {$_.SwitchName -eq 'Default Switch'} | Disconnect-VMNetworkAdapterBe careful! Disconnected adapters mean instant loss of connectivity until reattached.
Renaming Adapters
Give meaningful names so scripts stay readable later!
Rename-VMNetworkAdapter -VMName "DemoVM" -Name "Old Name" -NewName "HyperV-NIC01"
Configuring Advanced Features via PowerShell
Enable DHCP Guard protection against rogue DHCP servers inside guest networks:
Set-VMNetworkAdapter -VMName "DemoVM" -DhcpGuard On
Configure port mirroring source/destination pairs—for packet capture/monitoring setups:
Set-VMNetworkAdapter -VMName "SourceServer"  -PortMirroring Source
Set-VMNetworkAdapter -VMName "MonitorServer"  -PortMirroring Destination
Enable VLAN tagging per-adapter basis (note: Gen1 requires shutdown first):
Set-VMNetworkAdapterVlan –vmname “DemoVm” –Access –VlanId 20
Disable VLAN tagging again easily:
Set‑Vmnetworkadaptervlan ‑Vmname “DemoVm” ‑Untagged
Viewing Current Configuration Details
List all adapters attached anywhere within single VM context:
Get‑Vmnetworkadapter ‑Vmname “DemoVm”
See those attached directly onto Host OS (“management OS”):
Get‑Vmnetworkadapter ‑ManagementOS
Or enumerate everything everywhere—including hosts/VMS together!
Get‑Vmnetworkadapter ‑All
Automating Bulk Operations With Scripts
Managing dozens—or hundreds—of similar VMs? Try scripting repetitive tasks! For example,
to add identical named adapters across multiple machines quickly:
$vmNames = Get‑Vm | Where {$_.State –eq ‘Off’} | Select –ExpandProperty Name
foreach ($vm in $vmNames) {
    Add‑Vmnetworkadapter –Vmname $vm –Switchname “ProductionLAN” –Name “ProdNet”
}
This approach saves hours compared with clicking through GUIs repeatedly!
Security Considerations When Using Hyper-V Virtual Network Adapters
Security matters—even inside private clouds! Misconfigured networking exposes sensitive data unintentionally, so take time upfront reviewing built-in protections:
Activate DHCP Guard/Rogue Router Guard wherever guests shouldn’t advertise themselves as infrastructure servers; this blocks malicious attempts at hijacking address assignment/routing tables internally.
Use static MAC addresses only when absolutely necessary—randomized defaults help prevent accidental duplication/conflicts especially during rapid cloning/deployment cycles!
Limit promiscuous mode/port mirroring strictly; enable only while actively troubleshooting since mirrored packets could leak confidential info otherwise.
Professional Hyper-V VM Backup Solution
Before performing these operations, it is recommended to back up your Hyper-V VMs in case something goes wrong and results in data loss.
Vinchin Backup & Recovery is a professional solution which supports data backup of VM like VMware vSphere, Hyper-V, XenServer, XCP-ng, oVirt, RHV, OpenStack, Proxmox, etc. and other data like database, NAS, file server, Linux & Windows Server, etc.
Tailored for virtual environments, it offers automated backups, agentless backup, LAN/LAN-Free options, offsite copying, instant recovery, data deduplication, and cloud archiving. By following the 3-2-1 backup rule, Vinchin ensures robust data security. With data encryption and ransomware protection, it provides dual insurance for Hyper-V VM backups and supports easy migration between Hyper-V and other platforms.
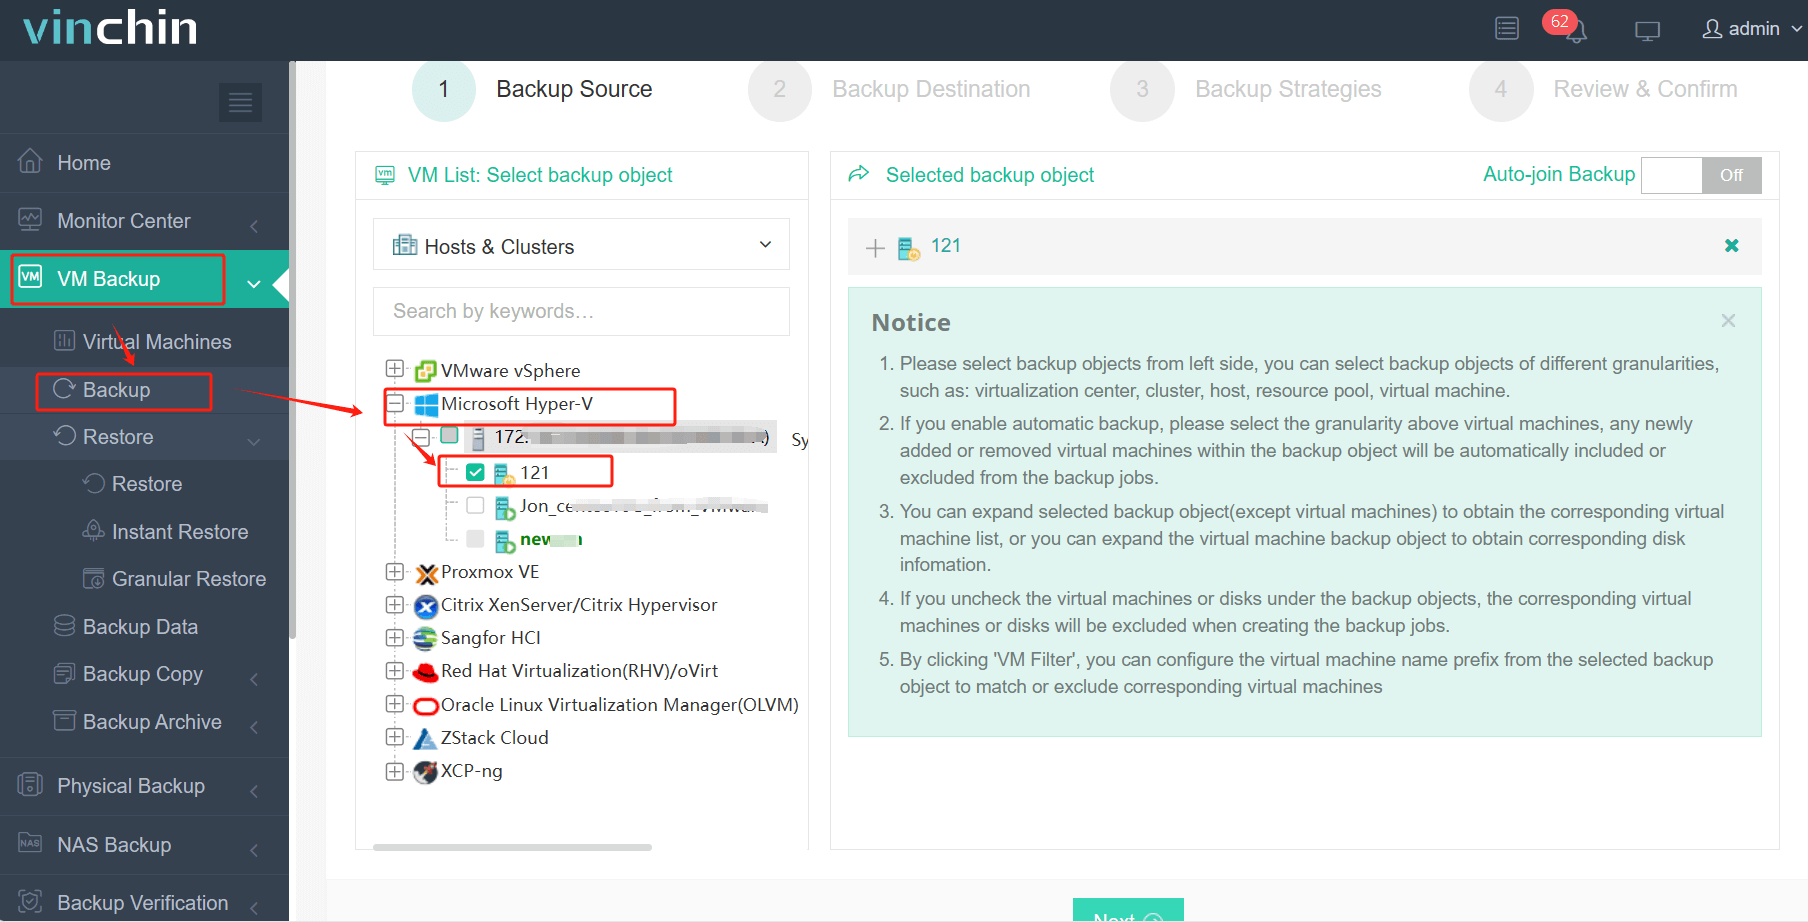
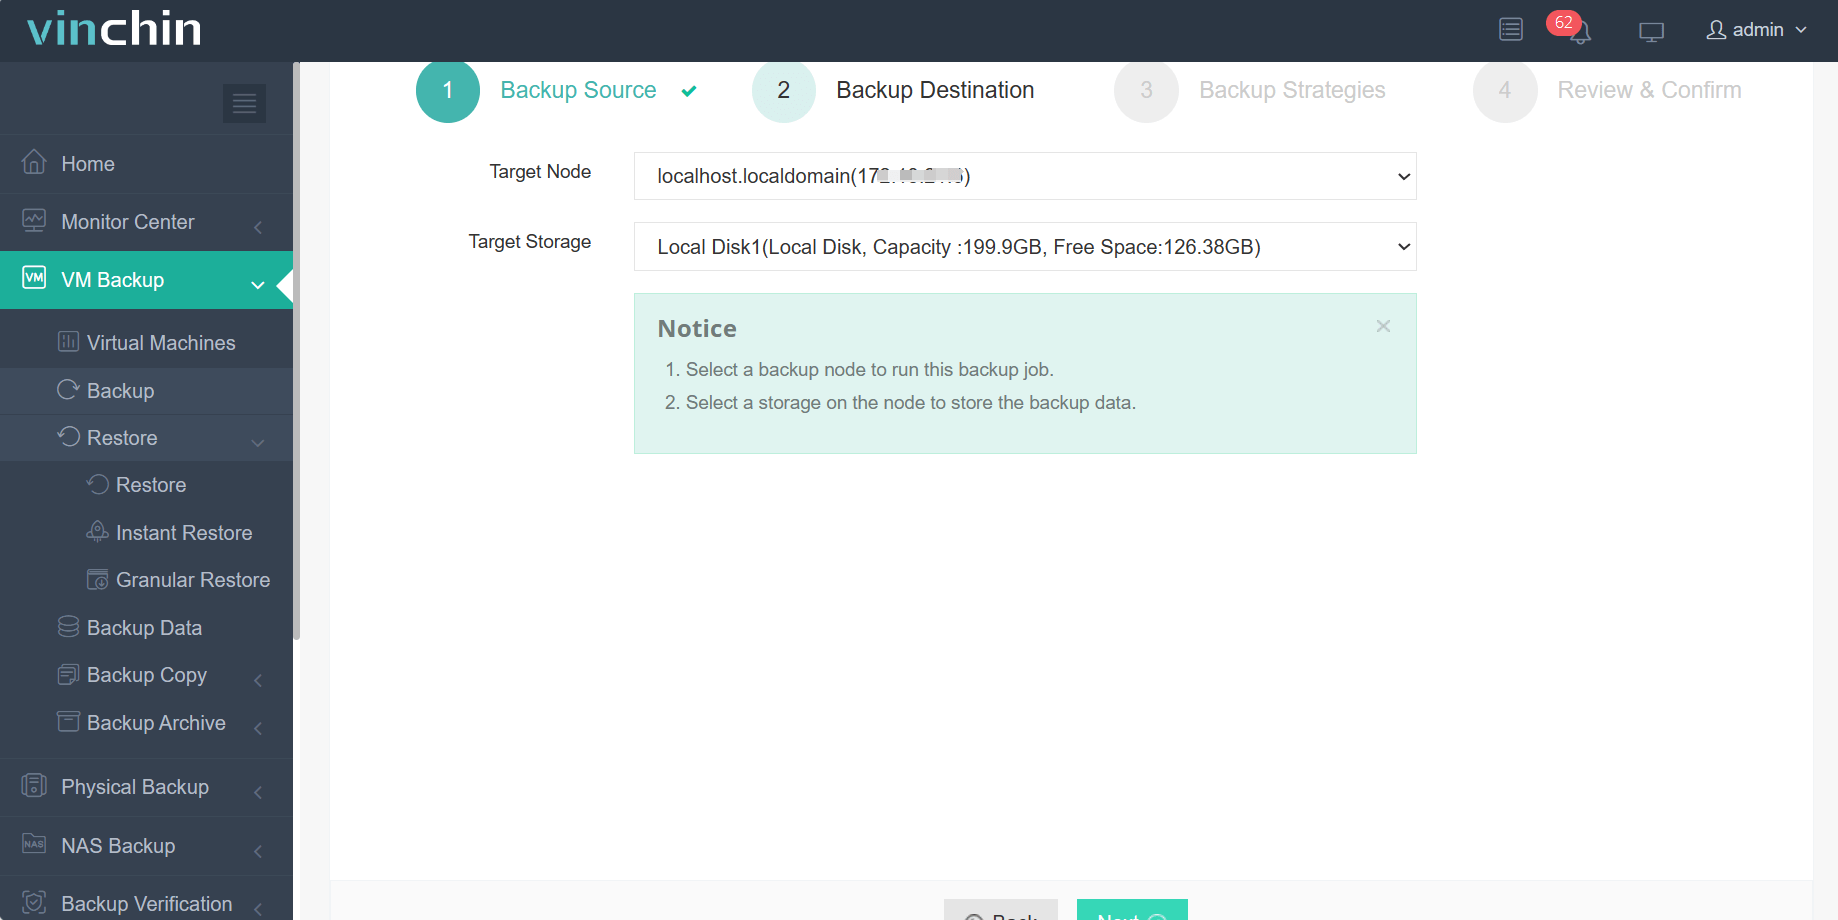
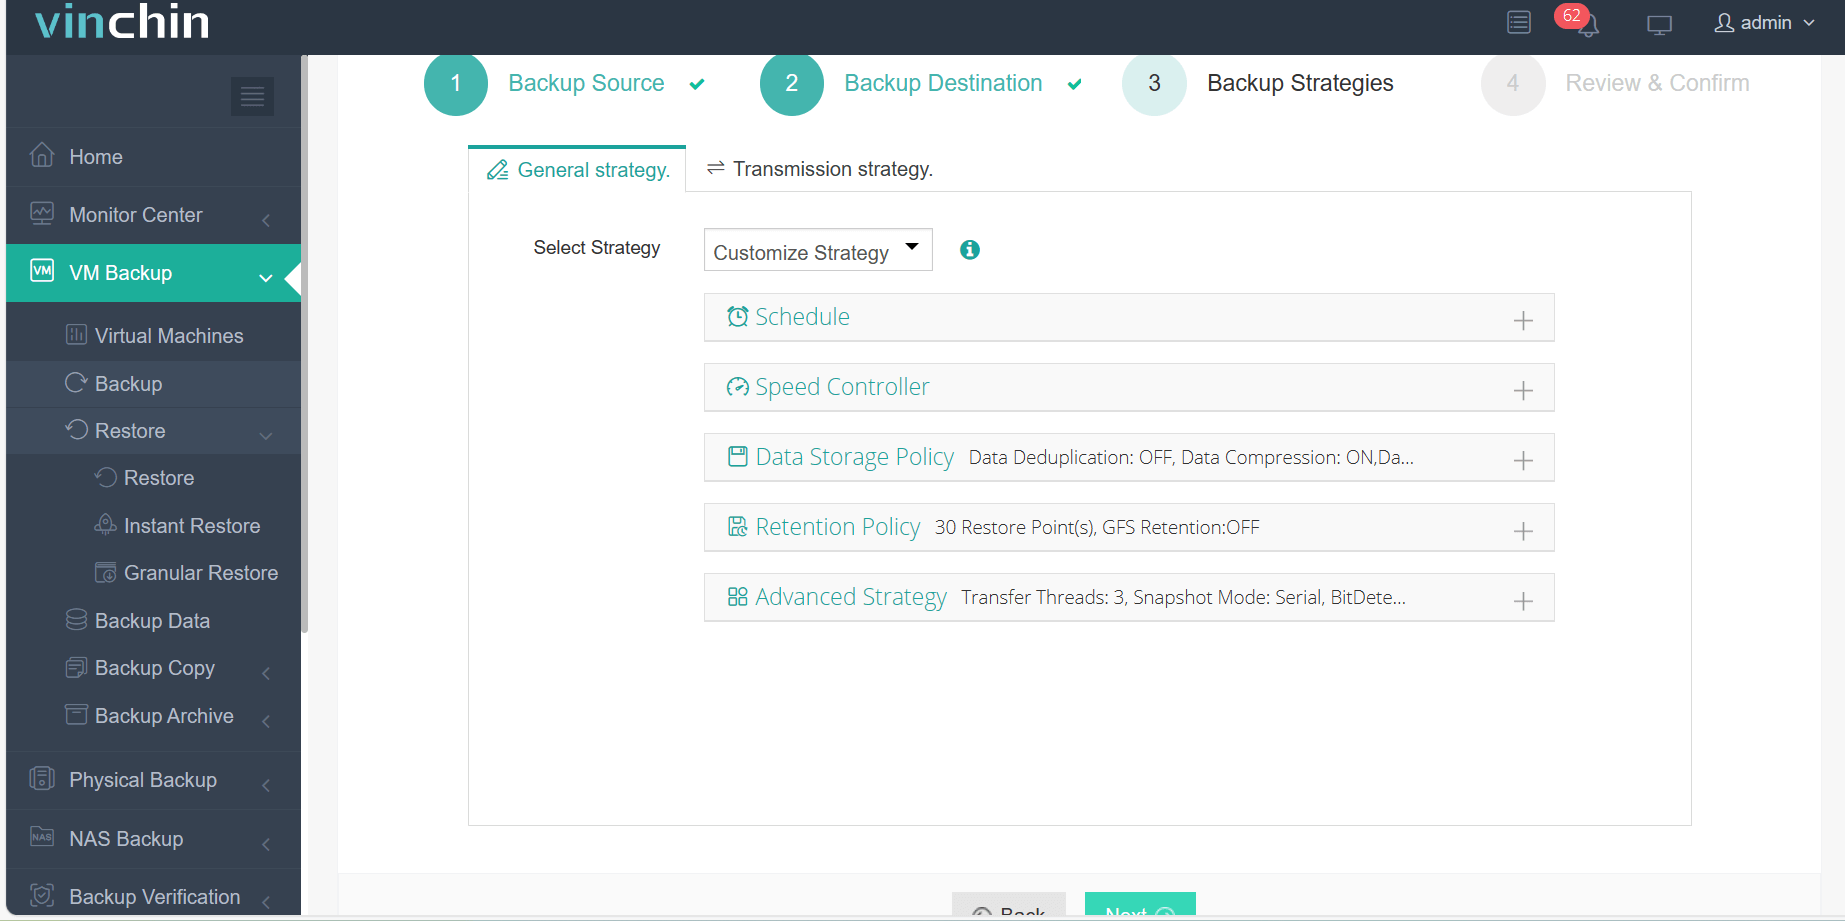
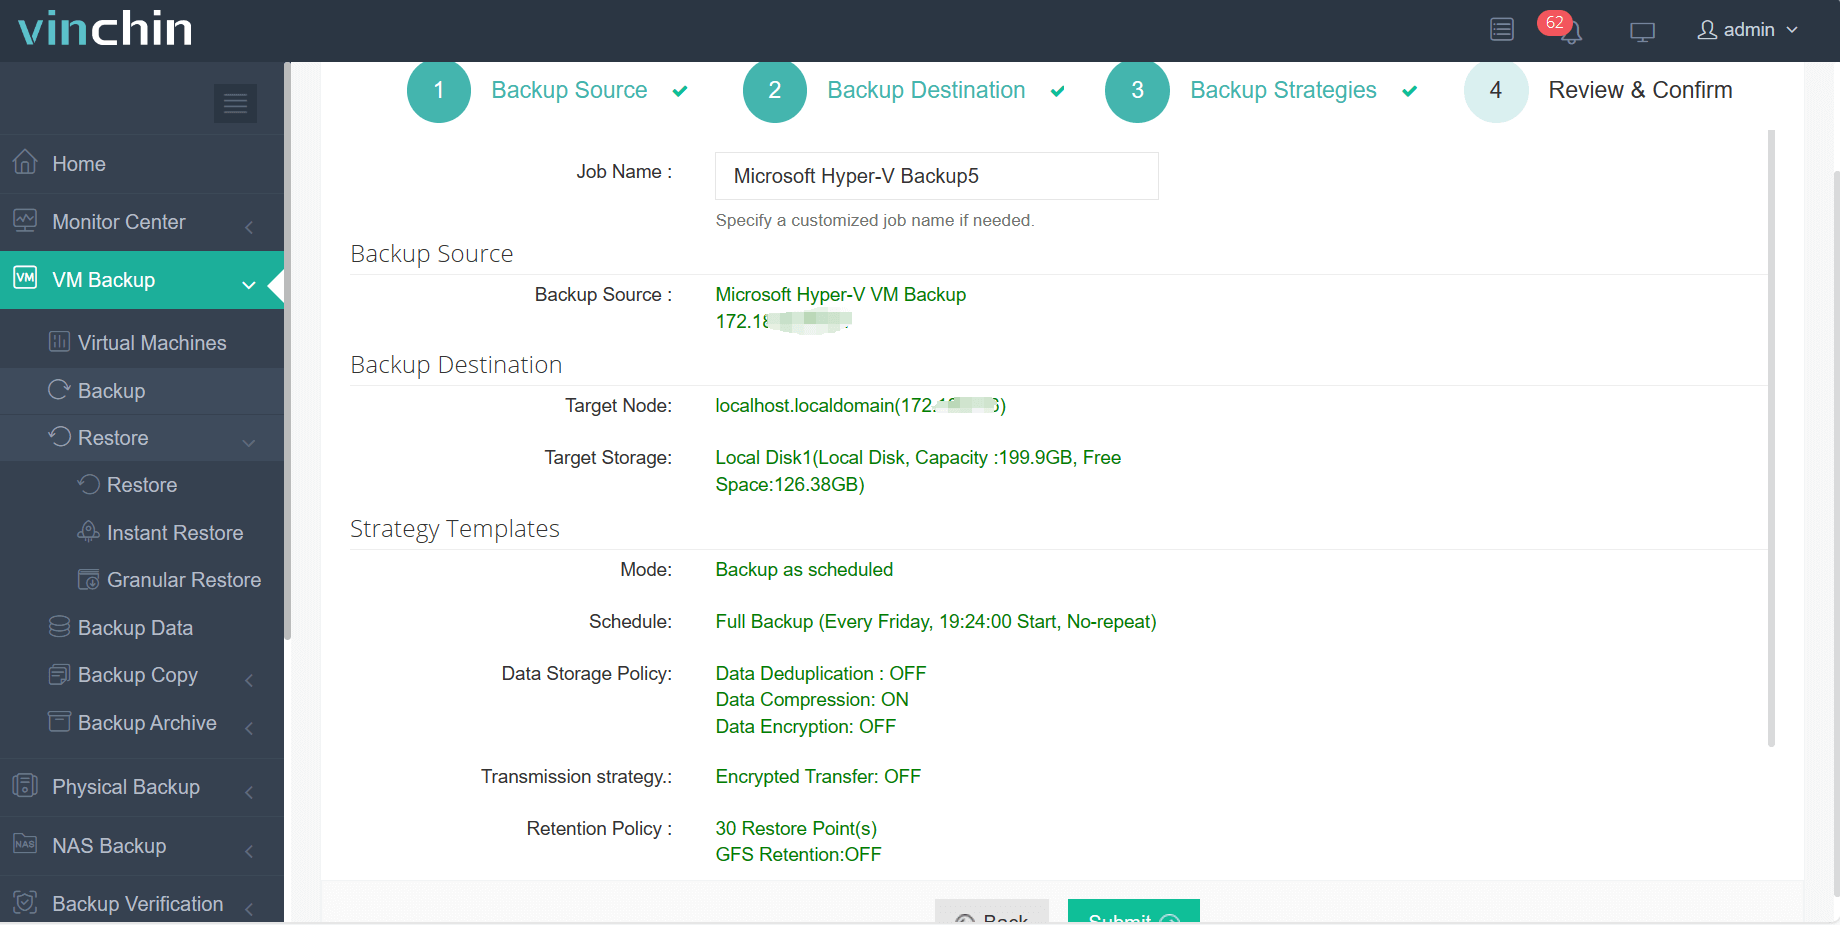
It only takes 4 steps to backup Hyper-V VMs with Vinchin Backup & Recovery:
1. Select the backup object.

2. Select backup destination.

3. Select backup strategies.

4. Review and submit the job.

Vinchin Backup & Recovery has been selected by thousands of companies and you can also start to use this powerful system with a 60-day full-featured trial! Also, contact us and leave your needs, and then you will receive a solution according to your IT environment.
Frequently Asked Questions About Hyper‑V Virtual Network Adapters
Q1: Can I hot-add synthetic network adapters while my Generation 2 VM runs?
A1: Yes—you can add synthetic adapters without shutting down Generation 2 VMs using Settings > Add Hardware > Network Adapter > Add > Apply .
Q2 : Why won’t my new external vSwitch provide internet access?
A2 : Check whether selected physical NIC still has IPv4/v6 bound ; unbind disables routing outside unless explicitly bridged elsewhere .
Q3 : How do I reset all customizations made via PowerShell back default?
A3 : Remove affected adapter(s) using REMOVE button ,then re-add cleanly reconnect desired vSwitch .
Conclusion
Hyper‑V virtual network adapters form vital bridges linking workloads securely , efficiently ,and flexibly . By mastering both GUI-based tools like HYPER–V MANAGER plus automation via POWERSHELL ,you build resilient scalable platforms ready any challenge . Protect investments further leveraging VINCHIN ’ s reliable backup solutions designed modern hybrid datacenters .
Share on:


