-
Method 1. Backup Hyper-V VMs with Windows Server Backup
-
Method 2. Backup Hyper-V with System Center Data Protection Manager
-
Method 3. Export VM with Hyper-V Manager
-
Method 4. Backup Hyper-V VM with Vinchin Backup & Recovery
-
Hyper- VM Backup FAQs
-
Sum Up
Virtualization solutions can let companies upgrade physical environment to virtual environment and Hyper-V is one of them. Hyper-V is often used on Windows server operating system. With the VMs on the host, companies can fully utilize the hardware resources to deploy all kinds of backup systems.
Hyper-V VMs contains essential applications and data to support business systems so it is necessary to make VM backup.
Before you select the backup solution, there is something you need to know about Hyper-V backup. Do not use Hyper-V snapshot as backup. Snapshot can recover VM in the short term, but can not recover VM when the original files are damaged by natural disasters or other disasters in the long term. In addition, keeping snapshot for a long time might influence the performance of VM.
Method 1. Backup Hyper-V VMs with Windows Server Backup
Windows Server Backup is designed for data backup in Windows server environment. It can be used to backup the entire hosts or selected VMs.
Before using Windows Server Backup, you need to install it first.
1. Open Server Manager. On the Dashboard, click Manage on the right and select Add Roles and Features
2. Add Roles and Features Wizard will pop up. Read Before You Begin and click Next
3. Select Role-based or feature-based installation and click Next
4. Select Select a server from the server pool and click Next
5. In Sever Roles, click Next
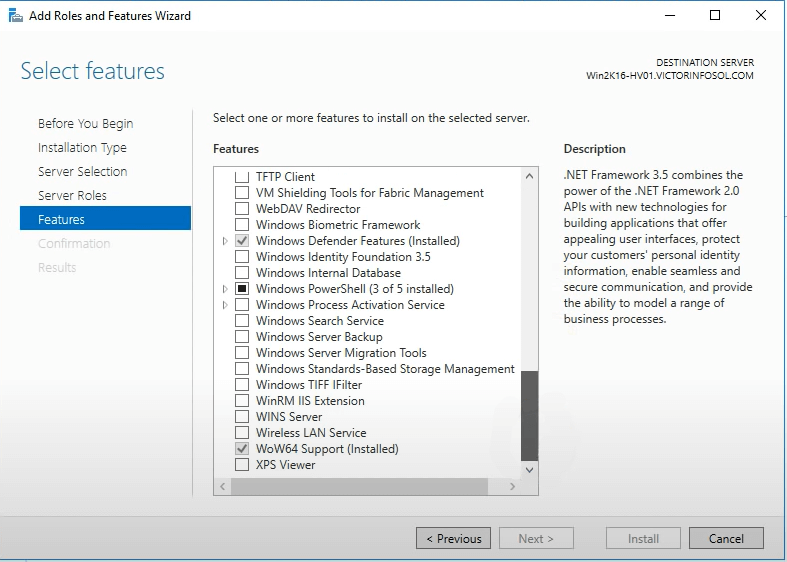
6. In Features, check Windows Server Backup and click Next
7. Click Install
8. After the installation is finished, click Close
Except for VM backup, you can also try VM clone in Hyper-V to easily create a new VM.
With Windows Server Backup installed, you can backup Hyper-V VMs now.
1. On the dashboard of Serve Manager, click Tools on the right and select Windows Server Backup
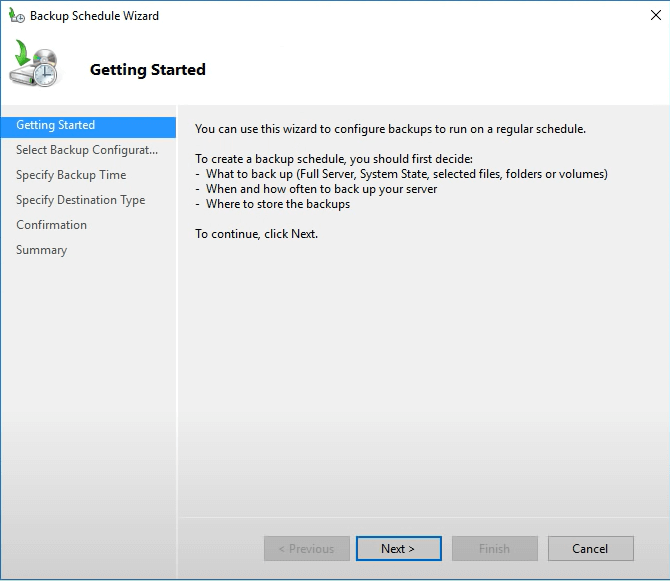
2. A new window will be opened. On the right, you can select to backup regularly or only once.
3. No matter whether you select Backup Schedule or Backup Once, you can easily finish the next steps with a wizard.
If you have enabled Hyper-V, you can also use Hyper-V Replica to replicate Hyper-V VMs to a secondary host.
Method 2. Backup Hyper-V with System Center Data Protection Manager
System Center DPM can let you make host-level and guest-level backup. You need to download the installation package from Microsoft's page, install it on the host and then you can use it to backup Hyper-V environment.
1. In DPM, click Protection at the bottom and then click New on the top to create a protection group
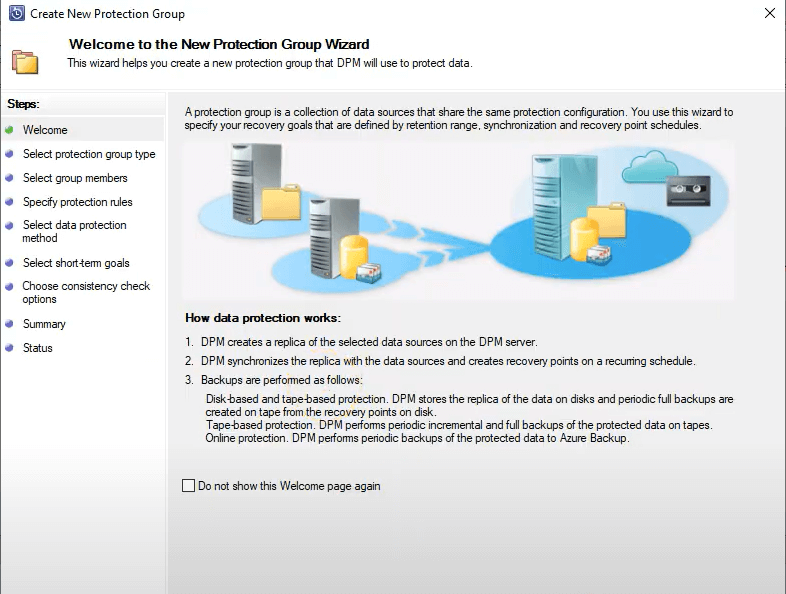
2. New Protection Group Wizard will be opened. Read how data protection works and click Next
3. Select Servers as protection group type and click Next
4. Select the host or VMs to backup and click Next
5. Give a name to the job and select backup storage type. Click Next
6. Select backup strategies and click Next
7. Select the destination to store VM backup and click Next
8. Choose replica creation method and click Next
9. Choose consistency check options and click Next
10. Review the summary of the job and click Create Group
Method 3. Export VM with Hyper-V Manager
The entire VM export will save all the data. You can save the folder in any storage and restore data by importing VM. The procedures are often completed with Hyper-V Manager.
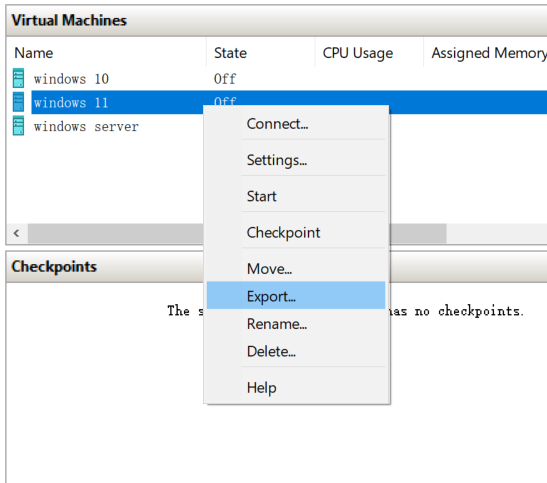
1. Open Hyper-V Manager and locate the VM to backup
2. Right-click it and select Export
3. Click Browse to specify the destination to store the backup
4. Click Export to get the VM export
If you wish, you can export Hyper-V VM with PowerShell to create backup.
Method 4. Backup Hyper-V VM with Vinchin Backup & Recovery
The tools above can let you backup Hyper-V VMs, but you can better protect Hyper-V environment with Vinchin Backup & Recovery.
You can add your Windows server to the backup system to backup its partions or the entire physical server in a user-friendly web console.
If you would like to backup the VMs. Agentless Backup technology will let you select VMs to backup by adding Hyper-V hosts to backup system.
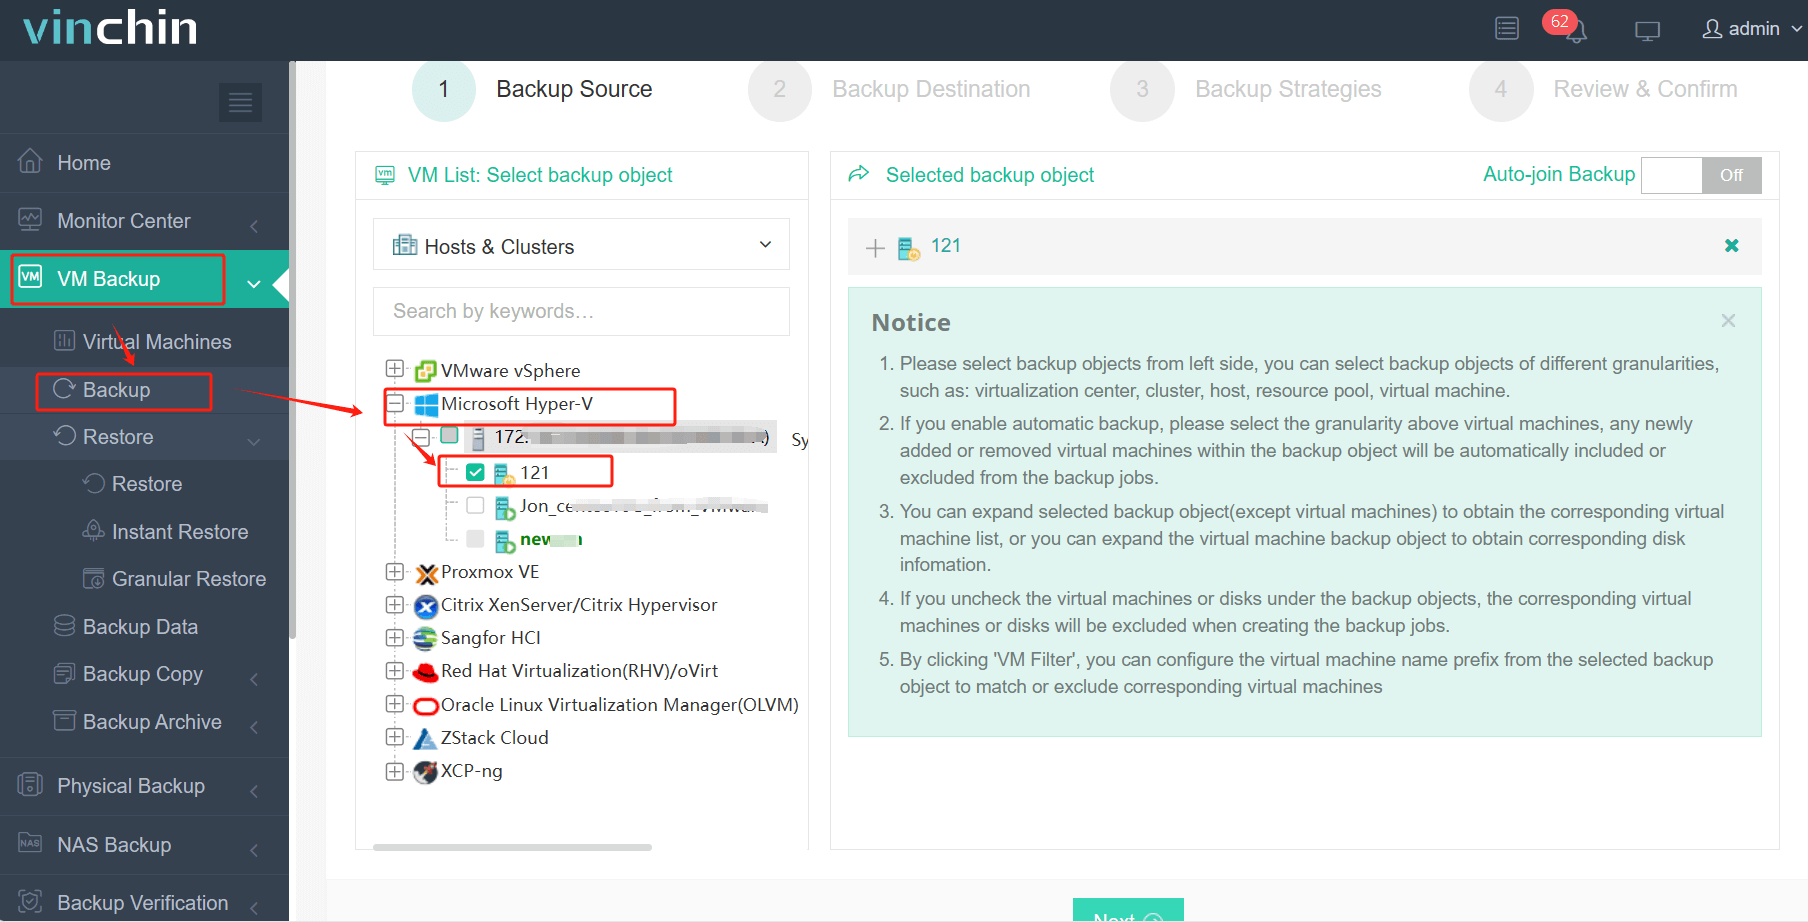
Step 1. Select VMs as backup source
Log into Vinchin Backup & Recovery via a web browser > expand VM Backup > select Backup > select Hyper-V VMs from the added hosts > click Next
Step 2. Select backup storage
Select Target Node > select Target Storage > click Next
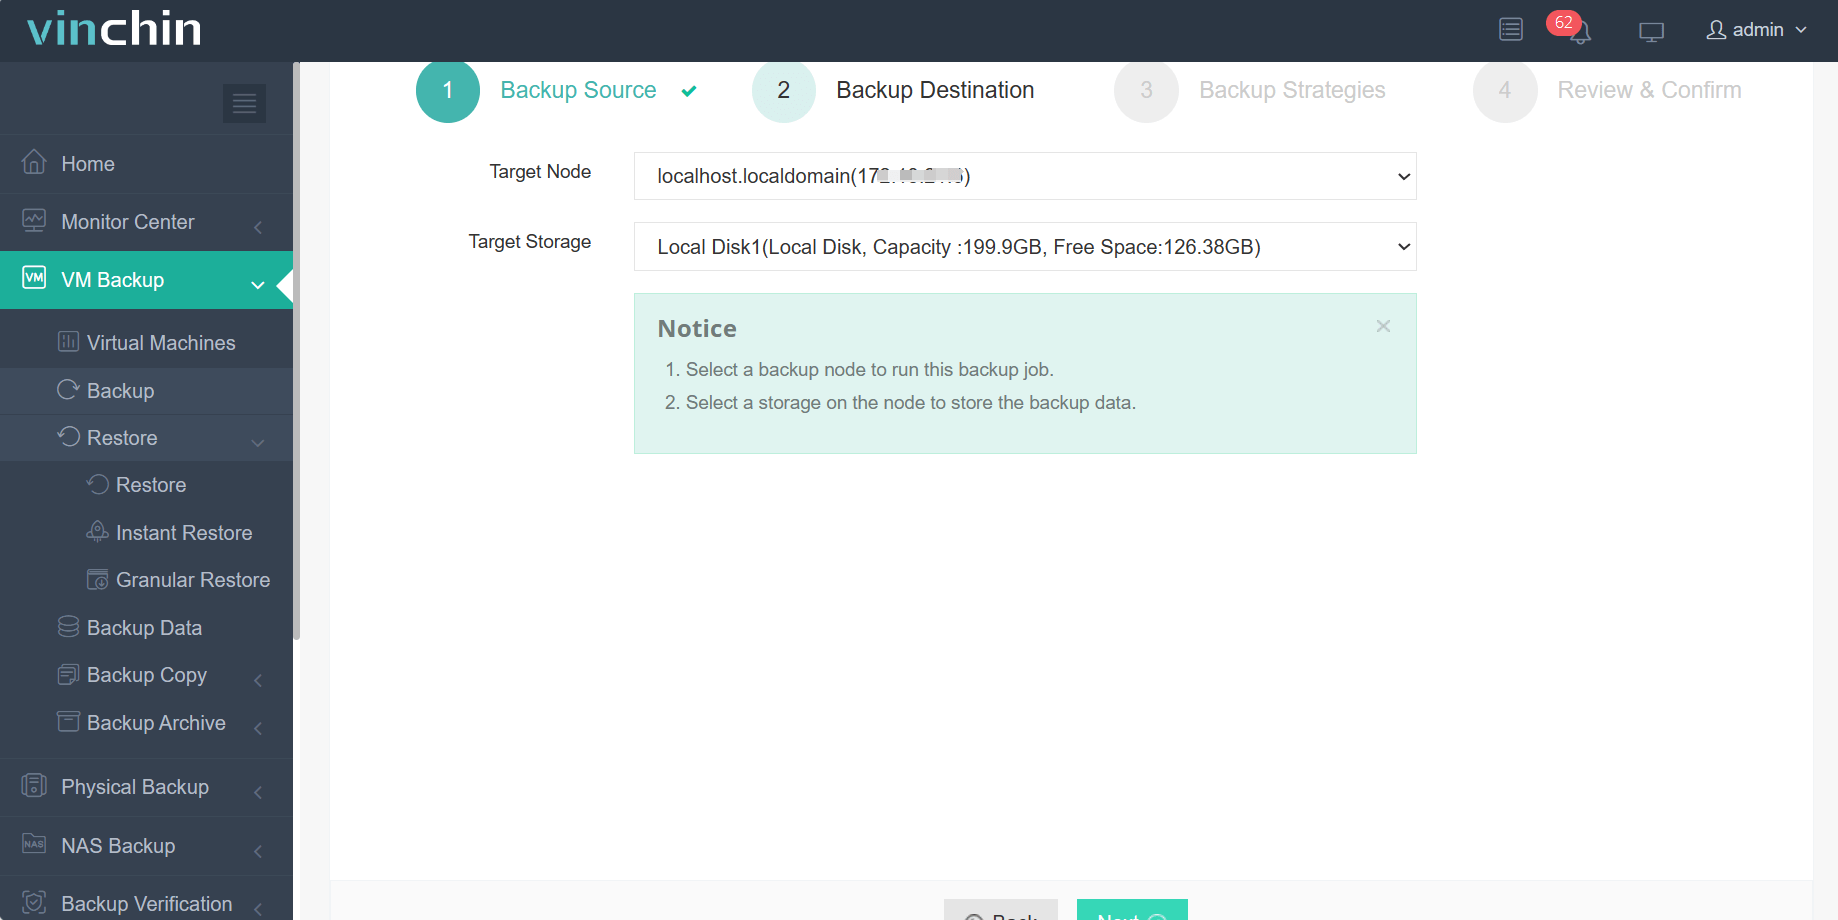
You can add backup storage in advance including local partition or disk, logical volume, local directory Fiber Channel Storage Area Network (FC SAN) storage, iSCSI storage, NFS storage, and CIFS storage, etc.
Step 3. Select backup strategies
Vinchin Backup & Recovery has more backup strategies than the above tools. You can select full, incremental, and differential backup, daily, weekly, and monthly backup, data compression and deduplication, etc.
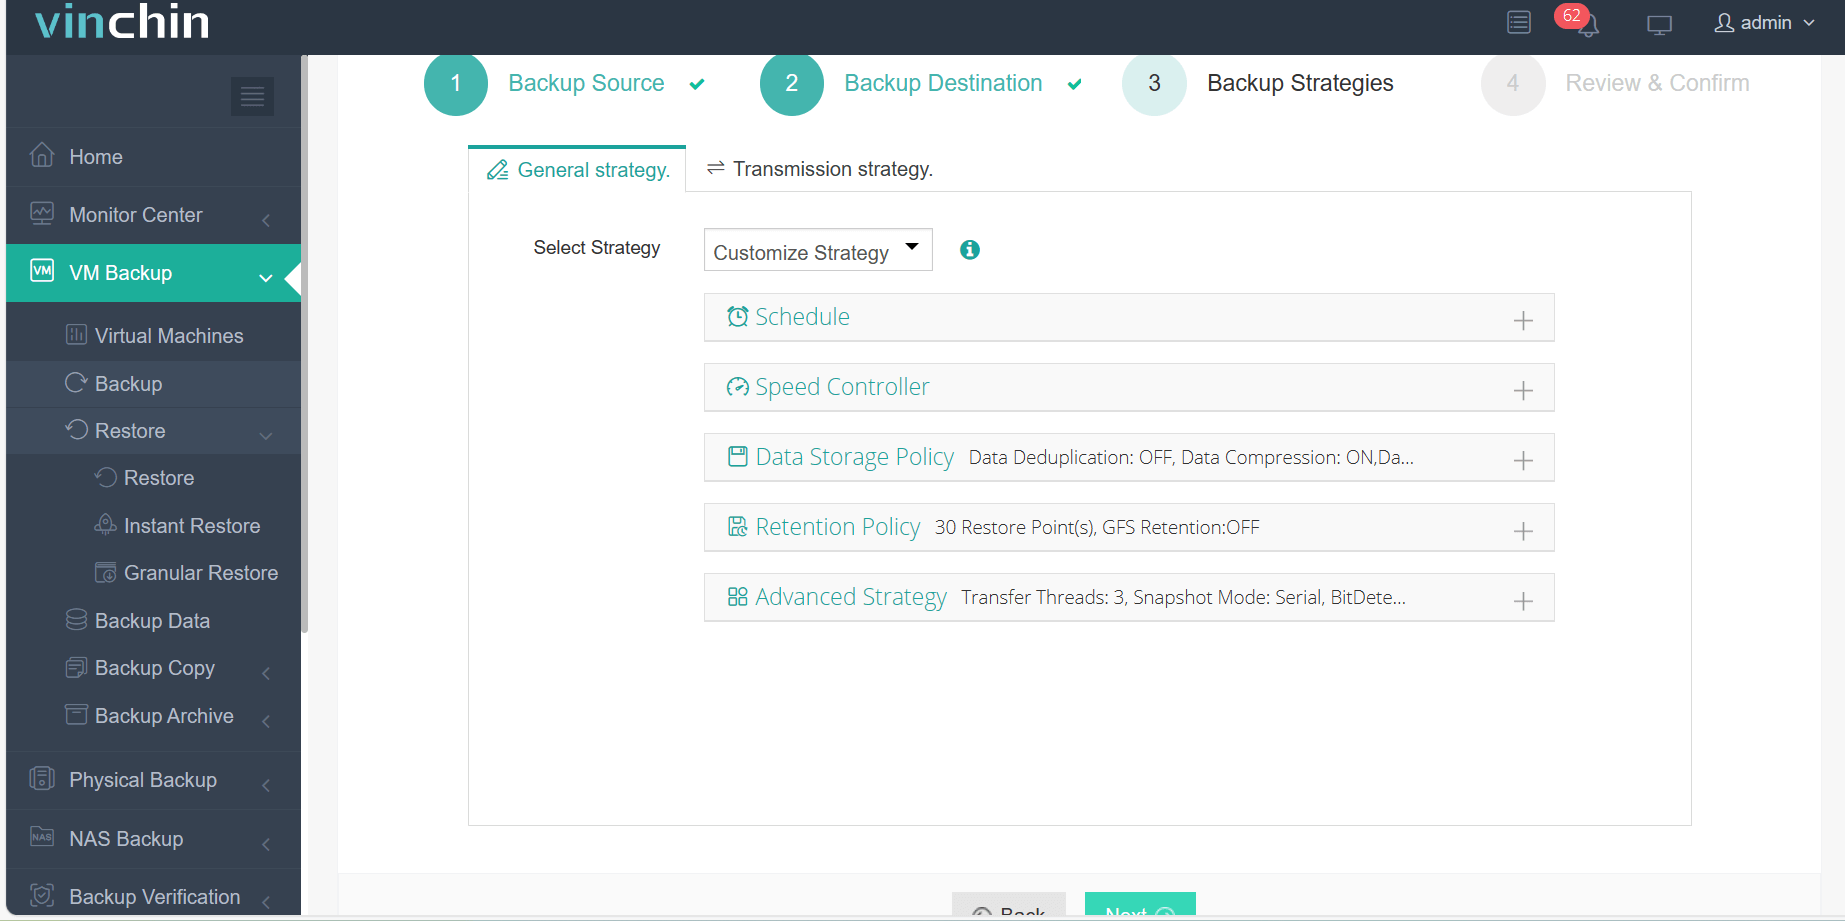
After configuring the job, click Next
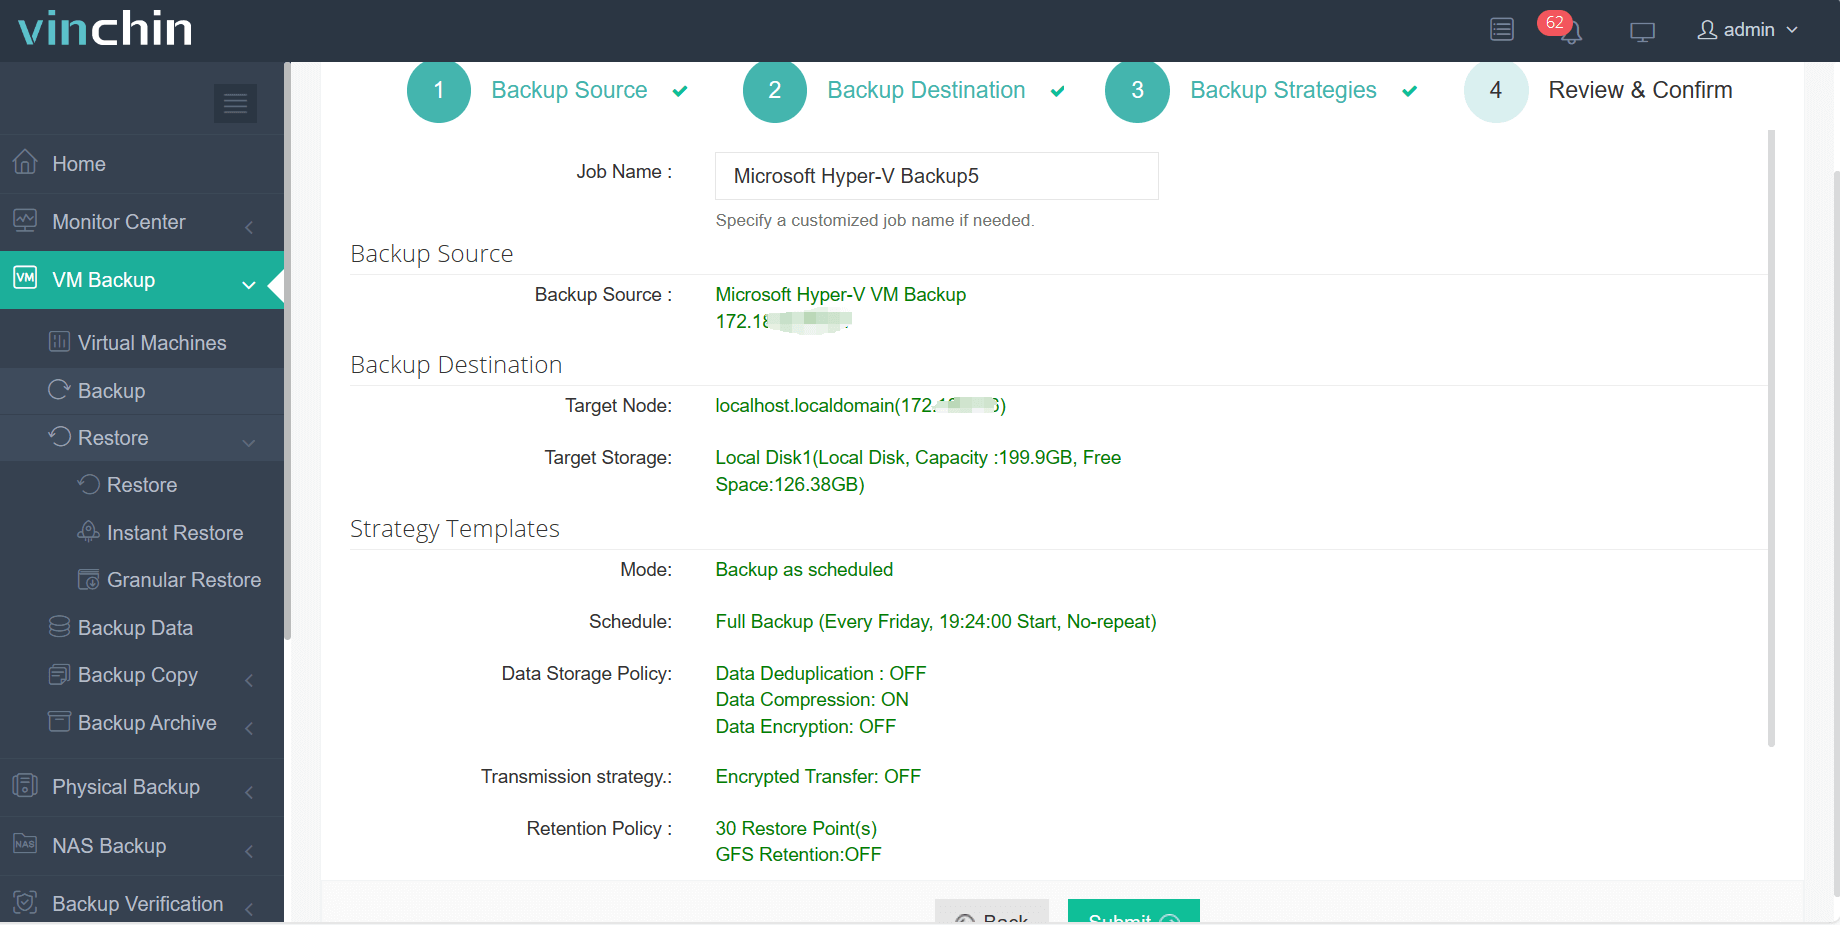
Step 4. Submit the job
to review the summary of the job and then submit it. With the backup file, you can easily recover VM later or move VM to another host.
Vinchin Backup & Recovery has been selected by thousands of companies and you can also start a 60-day full-featured free trial here. Also, contact us, leave your requirements, and then you will receive your tailored solution. We have established partnerships with reputable companies all over the world so if you would like to do a local business, you can select a local partner here.
Hyper- VM Backup FAQs
1. Can you backup running Hyper-V VMs?
You can create snapshots, backup VMs with Windows Server Backup and System Center Data Protection Manager, or export VMs in Hyper-V Manager when the Hyper-V VMs are online or offline.
2. Which tools you can use to backup Hyper-V VMs?
You can create snapshots and VM exports in Hyper-V Manager, set up scheduled backup in System Center Data Protection Manager and Windows Server Backup, or use a professional backup solution like Vinchin Backup & Recovery.
3. How often should you backup Hyper-V VMs?
It depends on your RPO requirements. The shorter the RPO you want, the more frequently you should backup your Hyper-V VMs. For critical business workloads, you can try server CDP to continuously backup VMs.
Sum Up
Hyper-V is one of the mainstream virtualization solutions. Hyper-V VMs are used to support all kinds of business systems so it is necessary to backup them.
There are many kinds of Hyper-V backup tools for you like Windows Server Backup, Hyper-V Replica, System Center Data Protection Manager, Hyper-V Manager, etc. All of them can help you make VM backup, but you can also use Vinchin Backup & Recovery to backup Hyper-V VMs with more choices. Don't miss the free trial.
Share on:


