PCI passthrough is one of the most powerful features in XCP-ng. It allows a virtual machine to use a physical PCI device—like a GPU or network card—almost as if it were running on bare metal. This is essential for high-performance workloads like AI training or high-speed networking.
What is XCP-ng PCI Passthrough?
PCI passthrough allows a VM to control a physical PCI device exclusively. Instead of sharing the device among multiple VMs or letting only the host use it, you dedicate it to one guest system. This is essential when your workload needs direct access to hardware—for example:
-
GPU acceleration for machine learning
-
High-speed storage controllers
-
Specialized network interfaces
In XCP-ng, PCI passthrough relies on Xen hypervisor's virtualization features. The process involves hiding the device from dom0 (the privileged management domain) so that only your target VM sees it. The guest OS then loads its own drivers and uses the device without interference from other VMs or dom0.
Why use XCP-ng PCI passthrough?
If you need maximum performance or must run vendor-specific drivers inside your VM, passthrough is often required. However, there are trade-offs: once passed through, that device is no longer available to dom0 or other VMs; some advanced virtualization features like live migration may not work; and troubleshooting becomes more complex.
You might wonder: Is there an alternative if I want several VMs to share one high-performance card? Technologies like SR-IOV allow sharing by creating virtual functions on supported devices—but true passthrough gives one VM full control over real hardware.
Prerequisites for PCI Passthrough in XCP-ng
Before setting up PCI passthrough in XCP-ng, check both your hardware and software environment carefully.
First off: Your server's CPU and motherboard must support Input/Output Memory Management Unit (IOMMU). On Intel systems this feature is called VT-d; on AMD platforms it's AMD-Vi or simply IOMMU. Most enterprise servers have this enabled by default—but don’t assume! Enter your BIOS or UEFI settings during boot-up and look for options named Intel VT-d, AMD-Vi, or IOMMU. Set them all to Enabled if they aren't already.
1. Boot into XCP-ng.
2. Open a terminal session via SSH or local console.
3. Run:
xl info | grep -i iommu
If output shows “IOMMU enabled,” you’re ready for next steps; Otherwise revisit BIOS settings.
Next up: Identify which physical PCI device(s) you want to pass through using lspci:
lspci
This command lists every detected PCI device along with its Bus:Device.Function address (BDF), such as 04:01.0 for a network card or 03:00.0 for a GPU.
Make sure you're running at least XCP-ng 8.2; newer versions offer better management tools and stability improvements around passthrough features (XCP-ng documentation).
IOMMU Groups and Device Isolation in XCP-ng PCI Passthrough
Devices are grouped into IOMMU groups at the hardware level, and not all devices can be passed through individually. To view how devices are grouped on your system, run the following command:
To see how devices are grouped on your system:
find /sys/kernel/iommu_groups/ -type l
If multiple devices are in the same group and one is critical for host operation, you cannot pass just one device without risking system stability. Consumer-grade motherboards may group multiple devices together, so always check before production deployments.
How to Enable PCI Passthrough in XCP-ng?
Let's break down enabling PCI passthrough step by step using official methods documented by XCP-ng project maintainers:
1. Find Your Device's PCI ID
Start by identifying which physical device will be assigned:
1. Connect via SSH/local console.
2. Run lspci—note down full address including domain prefix (0000:), e.g., 0000:04:01.0.
3. For mapping network interfaces specifically:
find /sys/class/net -exec readlink {} +
4. On XCP-ng 8.3+, list all assignable devices with UUIDs using:
xe pci-list
2. Hide the Device from dom0
This crucial step prevents dom0 from loading drivers against your chosen device—which could cause conflicts later when assigning it elsewhere:
For XCP-ng 8.2
Set kernel parameter so Xen knows which devices should be reserved:
/opt/xensource/libexec/xen-cmdline --set-dom0 "xen-pciback.hide=(0000:04:01.0)"
For multiple devices append addresses within parentheses:
/opt/xensource/libexec/xen-cmdline --set-dom0 "xen-pciback.hide=(0000:04:01.0)(0000:00:19.0)"
For XCP-ng 8.3+
Use new API-based approach instead of kernel parameters:
xe pci-disable-dom0-access uuid=<pci uuid>
Retrieve UUIDs via previous xe pci-list.
3. Reboot Your Host
After hiding targeted devices reboot host so changes take effect fully:
reboot
4. Verify Assignable Devices
Post-reboot confirm that desired cards/controllers now show as assignable—not claimed by dom0 anymore:
On older versions,
xl pci-assignable-list
On newer setups,
xl list-pci-assignable-devices
Your target BDF address should appear here; if not double-check earlier steps especially kernel parameters vs API usage depending on version!
5. Assign the PCI Device to a VM
Now attach selected hardware directly into chosen guest—but remember!
The VM must be powered off before making assignments!
Assign single/multiple devices using slot notation (virtual slot number/BDF) as follows:
Single-device example,
xe vm-param-set other-config:pci=0/0000:04:01.0 uuid=<vm uuid>
Multiple-device example,
xe vm-param-set other-config:pci=0/0000:04:01.0,1/0000:00:19.0 uuid=<vm uuid>
Replace <vm uuid> appropriately (xe vm-list helps retrieve UUIDs).
6.Start Your Virtual Machine
With configuration complete start up target guest again,
xe vm-start uuid=<vm uuid>
Inside guest OS install appropriate vendor drivers as needed—the passed-through card should now appear just like native hardware!
Validating Passthrough Success
After starting your VM with assigned hardware always validate success before moving forward:
For Linux guests run,
lspci -v | grep -i "kernel driver"
Look for expected driver names loaded against relevant BDF entries—not generic pciback stubs!
For Windows guests open Device Manager—your assigned card/controller should show up under correct category without error icons/yellow triangles indicating missing drivers/conflicts.
If anything looks amiss stop here—see troubleshooting section below before proceeding further!
Troubleshooting Common Issues With Passthrough
Even experienced admins sometimes hit snags configuring xcp ng pci passthrough! Here are common symptoms—and what usually fixes them:
Device doesn't show inside guest:
VM fails/crashes at boot:
Performance seems poor:
Ensure Message Signaled Interrupts (MSI/MSI-X) are enabled within guest OS/device driver settings where supported (NVIDIA docs). Also verify latest vendor-provided drivers installed rather than generic ones bundled with operating system images!
Host becomes unstable after enabling:
Check whether attempted pass-through involved multi-function cards still partially claimed by base OS due improper grouping/isolation per earlier section above (“Understanding IOMMU Groups”). Never try passing only part of such bundles unless absolutely sure about downstream effects!
Still stuck? Consult XCP-ng community forums where many similar cases have been discussed—and solved—in detail over years past!
Protecting Your XCP-ng VMs with Vinchin
After configuring advanced features like PCI passthrough in XCP-ng, safeguarding your virtual machines becomes even more critical—especially when direct-attached resources are involved and backup complexity increases.
Vinchin Backup & Recovery stands out as an enterprise-level virtual machine backup solution supporting over 15 mainstream virtualization platforms—including first-class support for XCP-ng alongside VMware, Hyper-V, Proxmox, oVirt, OLVM, RHV, XenServer, OpenStack, ZStack and others.
Vinchin offers a robust set of features, including efficient forever-incremental backups that optimize storage usage, built-in deduplication and compression technologies that significantly reduce backup sizes, seamless V2V migration capabilities between supported environments, flexible file-level restore options, and policy-driven scheduled protection, ensuring comprehensive coverage for demanding IT infrastructures.
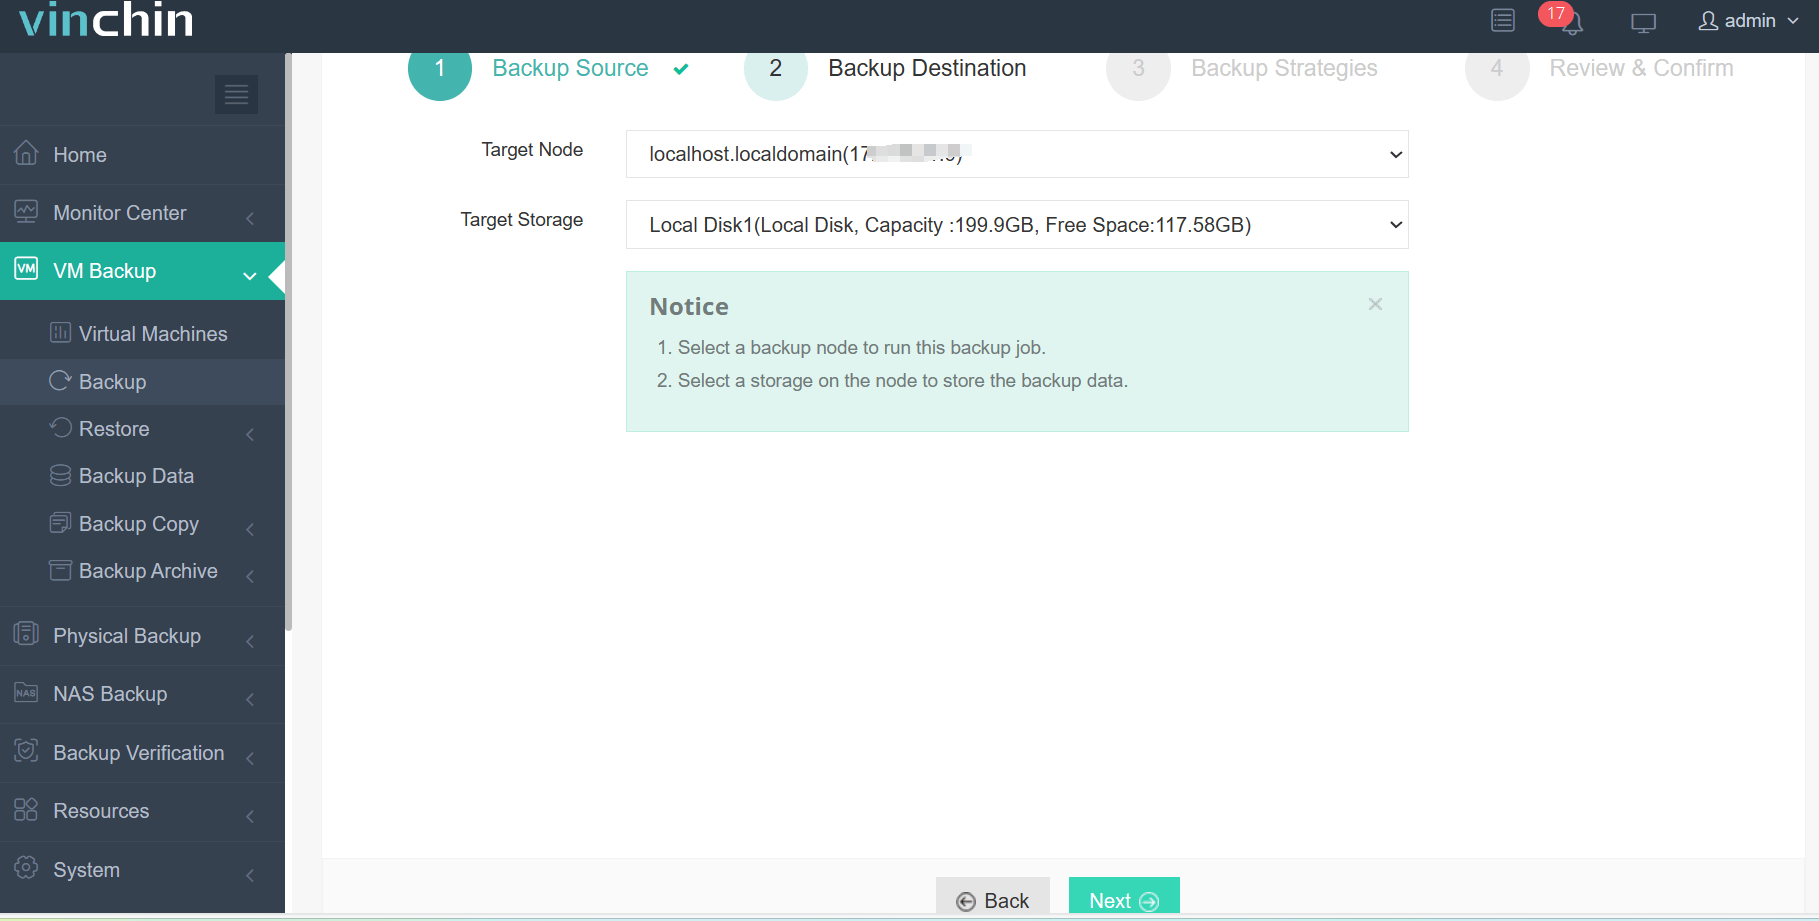
1. Just select XCP-ng VM on the host

2.Then select backup destination
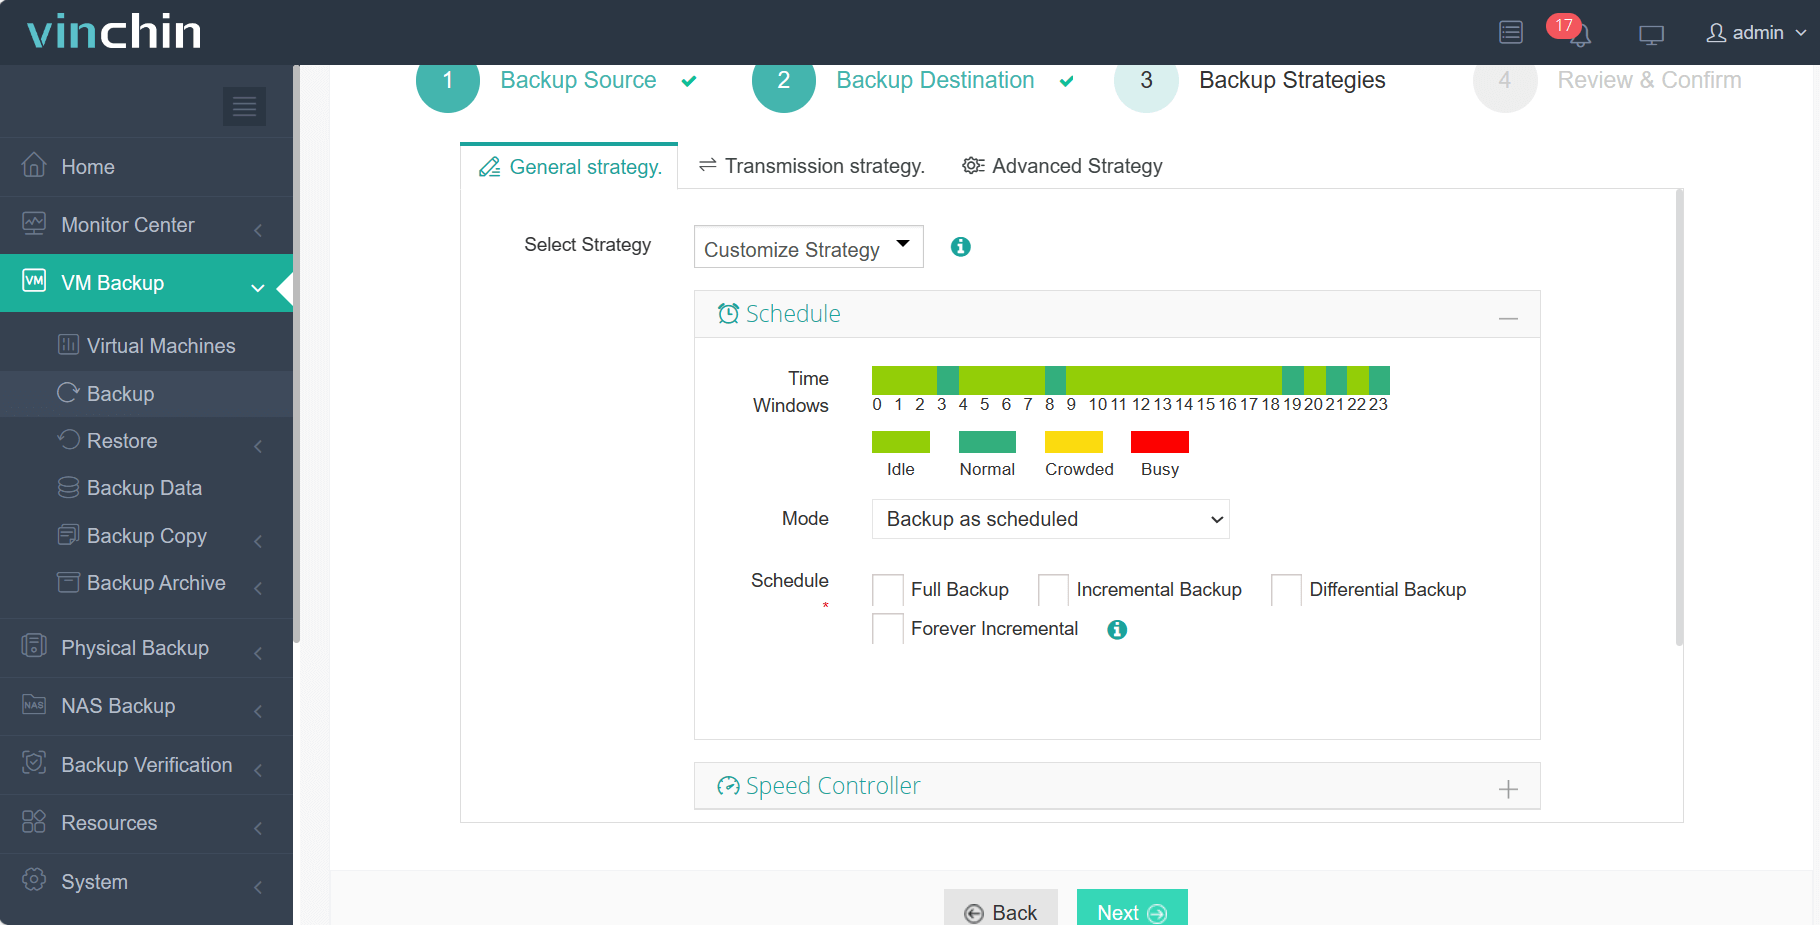
3.Select strategies
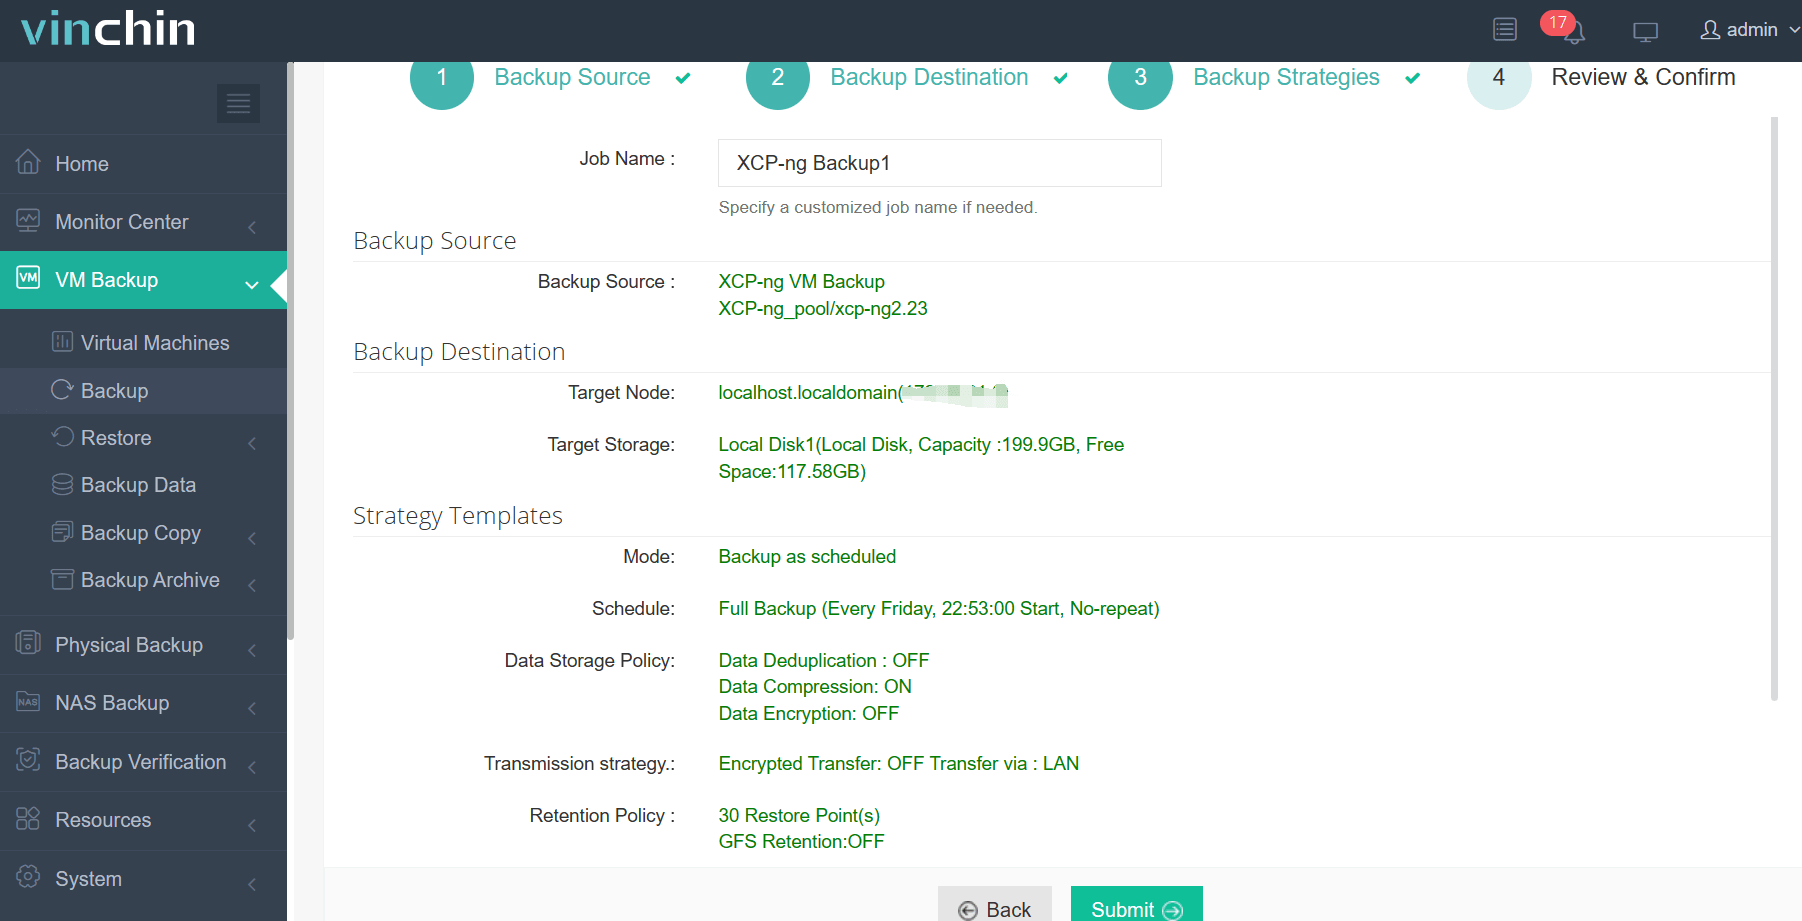
4.Finally submit the job
Trusted worldwide by thousands of organizations—with consistently high ratings—Vinchin offers a risk-free way to experience its power firsthand through a full-featured free trial lasting up to 60 days.
Ready to protect your critical workloads? Click below now to download Vinchin's installer and deploy easily in minutes!
XCP-ng PCI Passthrough FAQs
Q1: Can consumer motherboards reliably support xcp ng pci passthrough?
A1: Yes—but always verify presence/functionality of VT-d/IOMMU options within BIOS first since many entry-level boards lack proper isolation/grouping needed long-term stability/performance guarantees expected enterprise deployments demand;
Q2:My assigned card disappears from host after enabling pass-through—is this normal?
A2: Absolutely yes! Once hidden away from dom0 management plane expect resource unavailable locally until explicitly detached/re-enabled again following outlined procedures above;
Conclusion
PCI passthrough in XCP-ng allows VMs to access physical hardware directly, delivering exceptional performance where it matters most. However, it requires meticulous planning for security, backup, and migration strategies across the entire lifecycle and deployment architecture. Vinchin simplifies the protection of even the most complex setups with a robust feature set designed specifically for modern hybrid datacenter environments.


