-
What Is ESXi VMFSL?
-
Why Use VMFSL in VMware Environments?
-
How to Manage Storage with ESXi VMFSL?
-
How to Backup ESXi VMs with Vinchin Backup & Recovery?
-
Esxi Vmfsl FAQs
-
Conclusion
If you've installed ESXi 7.x or later on your servers, you might have noticed a large partition labeled VMFSL taking up valuable space on your boot device. What exactly is this esxi vmfsl partition? Why does it exist? And how can you control its size or placement to avoid unplanned storage allocation conflicts? Understanding esxi vmfsl is essential for smooth deployments—especially as VMware infrastructure grows more complex with each release.
What Is ESXi VMFSL?
Let's start simple: esxi vmfsl stands for VMware File System Local (VMFS-L). Introduced in ESXi 7.x as part of a major system partition redesign, VMFSL acts as the OSData volume—a single local file system that consolidates several smaller partitions from earlier versions into one logical area.
This partition stores critical host data such as logs (/var/log), configuration files (/etc/vmware), core dumps used for diagnostics (/var/core), persistent states needed across reboots (/scratch), and even some swap data if memory runs low. Unlike traditional VMFS datastores—which are cluster-aware and shared between hosts—VMFSL is strictly local; only the host that created it can access its contents.
You'll see this partition labeled as “VMFS-L” or “OSDATA” when browsing disks in the vSphere Client under Storage > Devices or when running shell commands like esxcli storage filesystem list. If you're curious about how much space it uses or what files live there, these tools are your starting point.
Why Use VMFSL in VMware Environments?
Why did VMware introduce esxi vmfsl? Before version 7.x, ESXi scattered small fixed-size partitions across the boot device—for logs, state files, scratch space—which made upgrades tricky and limited support for new features needing more room (think large modules or third-party drivers).
With esxi vmfsl acting as a unified OSData volume:
All system-critical data sits together in one expandable place.
Upgrades become smoother since there's no risk of running out of log space mid-process.
Endurance-heavy writes (logs/scratch) can be directed onto high-quality devices like SSDs instead of fragile SD cards.
Administrators gain flexibility to allocate just enough space based on their environment's needs—whether running standalone hosts or complex clusters with vSAN enabled.
Security improves because sensitive diagnostic data isn't spread across multiple hidden partitions anymore; everything lives inside esxi vmfsl where permissions are easier to manage.
For anyone deploying vSAN clusters or using local disks heavily (for example with DirectPath IO workloads), understanding how much room esxi vmfsl claims—and why—is vital to prevent headaches down the road.
How to Manage Storage with ESXi VMFSL?
Managing esxi vmfsl means knowing how big it should be before installation starts—and verifying afterward that everything landed where expected. Let's walk through beginner steps first before diving into advanced tuning options.
Step1: Controlling ESXi VMFSL Size
When installing ESXi 7.x+, the installer creates an esxi vmfsl partition sized according to your boot media type (USB stick vs SSD vs NVMe) and any special options you set at boot time. By default this can claim up to 120GB—or even more if left unchecked!
To control its size:
1. Boot from your chosen install media.
2. When prompted by the installer splash screen, press SHIFT+O quickly to open Boot Options.
3. Add one of these flags after existing text:
For smallest supported size (~25GB):
systemMediaSize=minFor moderate size (~55GB):
systemMediaSize=smallFor standard/default (~120GB):
systemMediaSize=defaultFor largest allowed (~138GB):
systemMediaSize=max
For example:
cdromBoot runweasel systemMediaSize=small
Want even finer control? There's an undocumented flag called autoPartitionOSDataSize, which lets you specify exact MBs allocated:
cdromBoot runweasel autoPartitionOSDataSize=8192
Step2: Checking Your ESXi VMFSL Partition
After setup finishes:
1. Log into your host via vSphere Client web UI.
2. Click Storage from left navigation pane.
3. Select the Devices tab at top center.
4. Find your boot disk; look for a partition labeled either VMFS-L or OSDATA under Type column—it should match whatever sizing option you chose earlier!
Prefer command line?
Run:
esxcli storage filesystem list
This lists all mounted volumes including their types; look for lines showing “VMFS-L”.
For deeper hardware mapping—including physical device IDs—try:
esxcli storage core device list
This shows every detected block device along with capacity breakdowns.
How to Backup ESXi VMs with Vinchin Backup & Recovery?
To ensure robust protection of your VMware environments—including those utilizing esxi vmfsl—it is crucial to implement reliable backup strategies tailored for enterprise needs. Vinchin Backup & Recovery is a professional, enterprise-level virtual machine backup solution supporting over 15 mainstream virtualization platforms such as VMware, Hyper-V, Proxmox, oVirt, OLVM, RHV, XCP-ng, XenServer, OpenStack, ZStack and more.
For VMware users specifically, Vinchin delivers key features including forever-incremental backup for efficient long-term protection; CBT technology enabling rapid change tracking; deduplication and compression technologies that minimize storage consumption; granular restore capabilities allowing precise file-level recovery; and instant recovery functionality designed for minimal downtime scenarios—all contributing to streamlined management and enhanced business continuity.
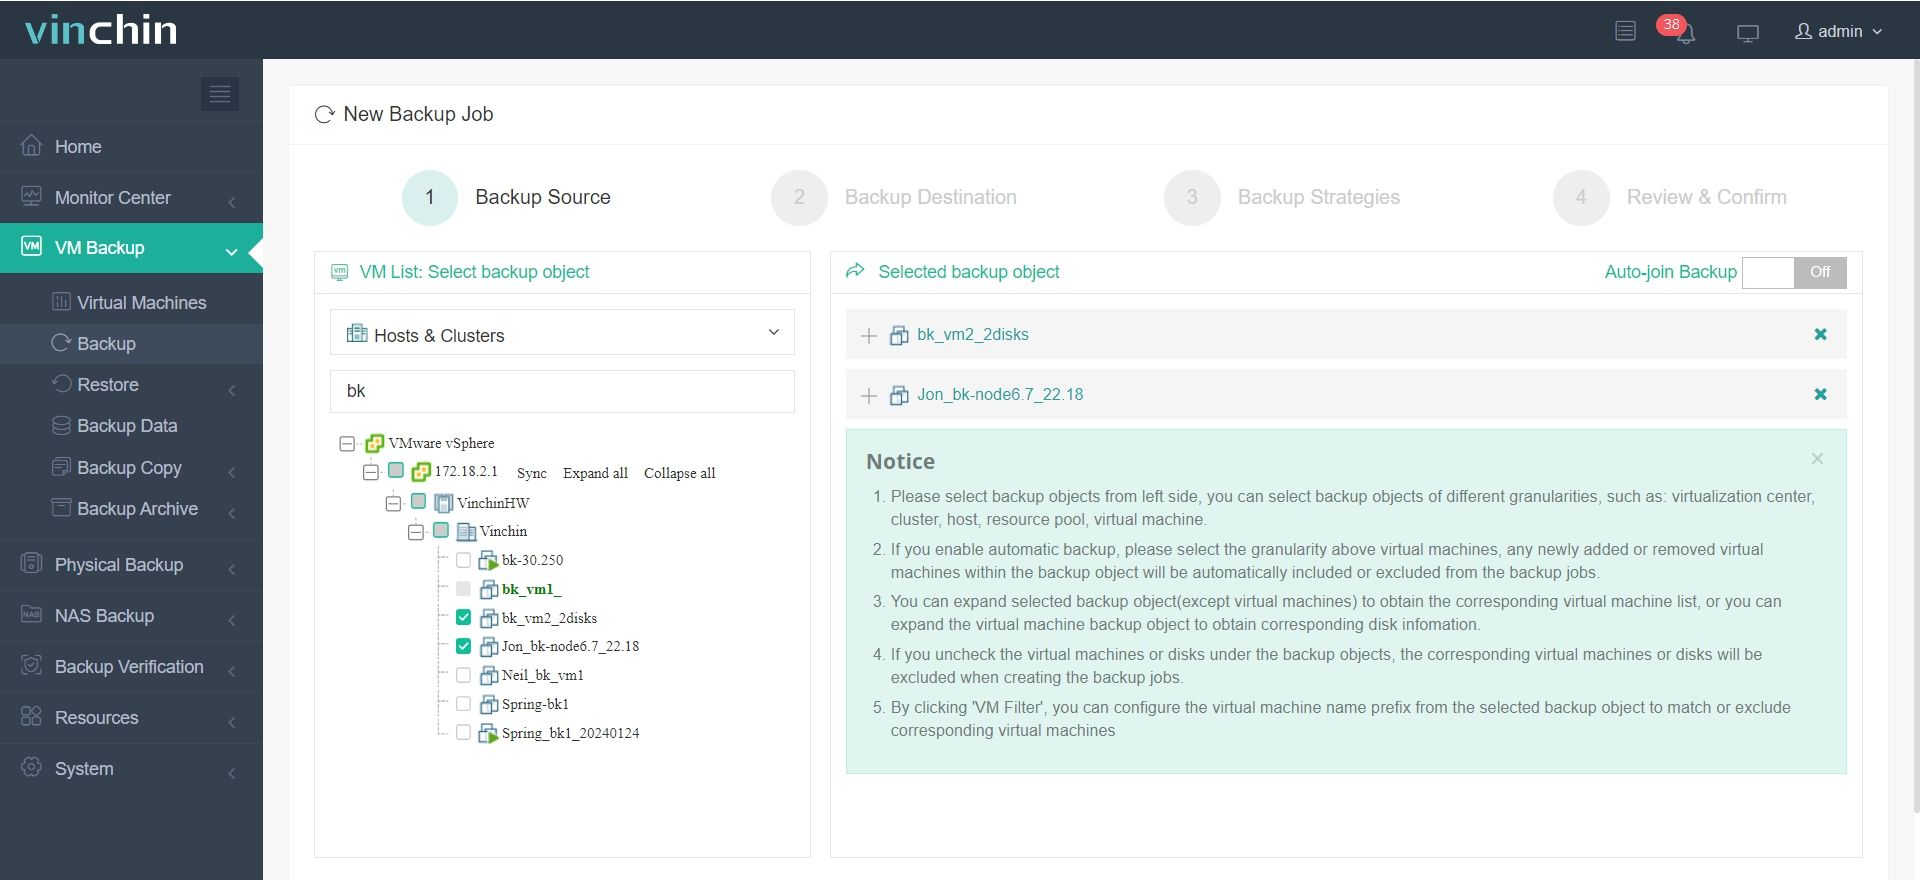
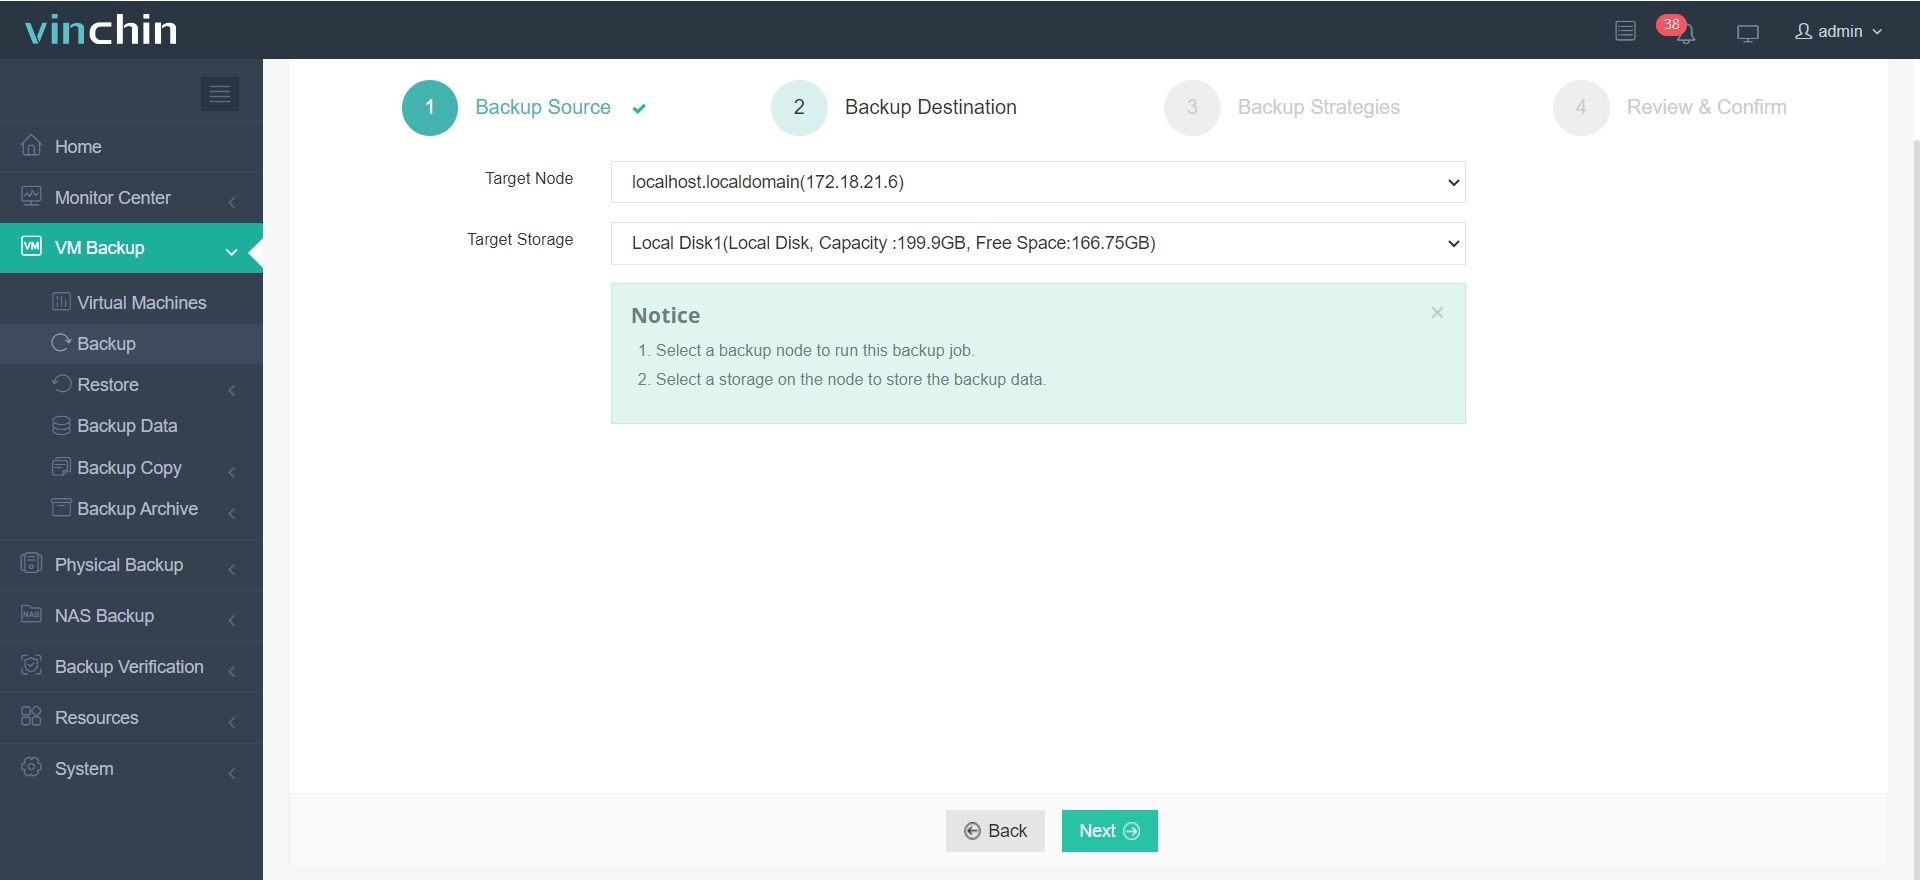
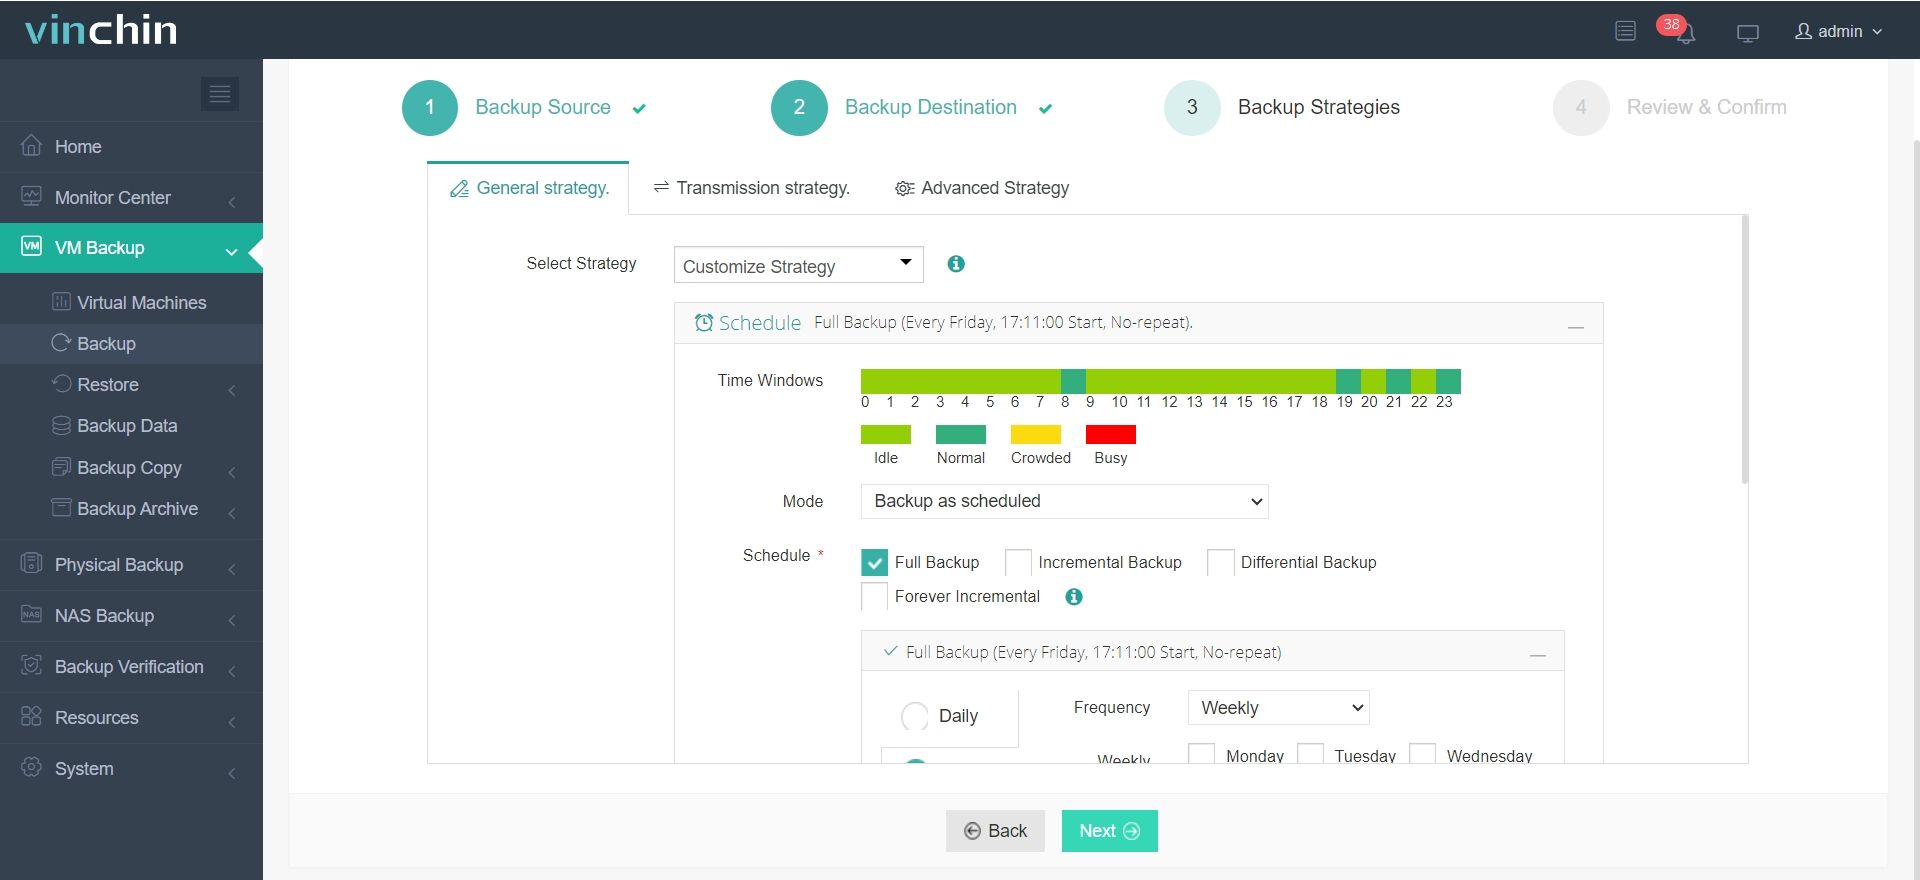
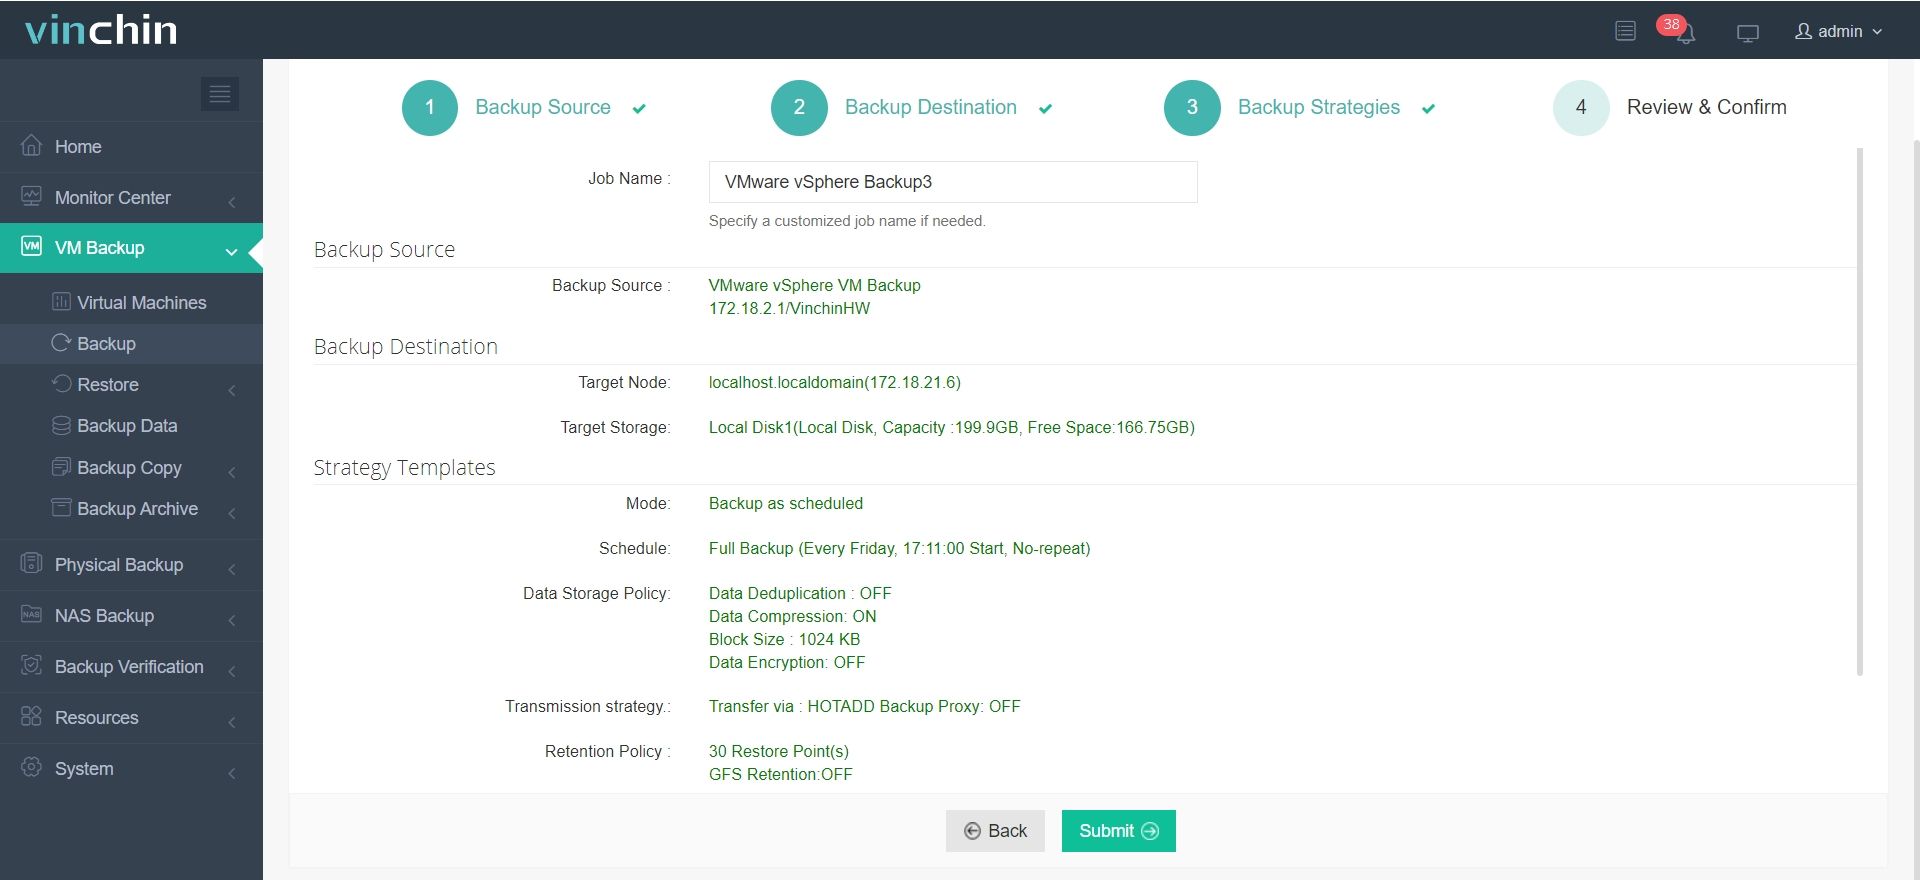
The intuitive Vinchin Backup & Recovery web console makes safeguarding your virtual machines straightforward:
1.Just select VMware VMs on the host

2.Then select backup destination

3.Select strategies

4.Finally submit the job

Thousands of organizations worldwide trust Vinchin Backup & Recovery for secure enterprise data protection—try all features free for 60 days by clicking below!
Esxi Vmfsl FAQs
Q1: Can I use my esxi vmfsl partition as regular datastore?
No—it holds only system/configuration/logging info; never store user VMs here!
Q2: My USB drive filled up fast—is there any way reclaim lost capacity without reinstall?
Not safely; best practice involves backing up config then reinstalling using smaller systemMediaSize flag per above instructions
Q3: Does enabling vSAN change anything about osdata requirements?
Yes—all nodes still need their own healthy osdata regardless of shared storage design; plan accordingly when sizing cluster nodes
Conclusion
Understanding esxi vmfsl helps prevent wasted resources while ensuring stable operations—even in demanding environments like vSAN clusters! If reliable backups matter too,Vinchin delivers powerful protection plus easy management—all backed by expert support teams worldwide.
Share on:


