-
How to restore a single file using Proxmox Backup Server?
-
File-level recovery with Vinchin for Proxmox VE
-
Proxmox Backup Server restore single file FAQs
-
Conclusion
When performing virtual machine recovery, usually we restore the state of the entire virtual machine. However, sometimes we only need to recover a single file or directory within a virtual machine from a backup without recovering the whole virtual machine. Proxmox Backup Server provides a file recovery feature, which allows users to extract the required single file or directory directly from a backup. Next, the article will explain how to use this feature to recover a single file.
How to restore a single file using Proxmox Backup Server?
1. Access the Proxmox Backup Server Web Interface
Log into the Proxmox Backup Server Web interface.
2. Go to the Backup tab under Storage
In the Storage tab, select a storage location and click on Backup. This will display all the backups on that storage.
3. Click the File Restore Button
In the backup item you choose, click the File Restore button.
This will open a file browser, allowing you to explore the contents of the backup.
4. Browse Files or Virtual Machine Images in the Backup
For Container Backups:
The first level of the file tree will show the included pxar archives. You can freely open and browse the files within these archives.
For Virtual Machine Backups:
The first level of the file tree will display the included disk images.
You can open the disk image to view the partition table (labeled as
part) and the entries for each partition found on the disk.Note that not all data may be accessible for virtual machines, especially if they use unsupported guest filesystems or storage technologies.
5. Download Files or Directories
After selecting the files or directories you need to restore, click the Download button.
These files or directories will be instantly compressed into a zip archive, which you can download and extract.
6. Secure Access to VM Images
If you need to access data within a virtual machine image, Proxmox will launch a temporary VM to mount the image. This ensures that the underlying host system is not exposed to potential risks.
The temporary VM will automatically stop after a timeout. The entire process is transparent to the user.
Important Notes:
For virtual machine image restores, only supported storage technologies and filesystems will be accessible.
Although a temporary VM is used for secure access, data from VM backups may still contain untrusted content, so caution is advised when restoring files.
File-level recovery with Vinchin for Proxmox VE
Although Proxmox Backup Server provides an effective method for restoring individual files or directories from a backup, Vinchin Backup & Recovery offers more powerful capabilities, especially for file-level recovery in a Proxmox VE environment. Vinchin's file-level recovery feature allows you to restore specific files or folders from any backup point without needing to restore the entire virtual machine. This not only saves time but also improves recovery efficiency.
Compared to traditional full-system recovery methods, Vinchin's granular restore functionality provides greater flexibility, especially when quickly fixing soft failures or recovering mistakenly deleted files. Vinchin also supports agentless incremental backups, enabling efficient backup and recovery without disrupting the production environment, reducing system load and recovery time. Additionally, Vinchin offers cross-platform recovery capabilities, allowing users to flexibly migrate data between different virtualization platforms.
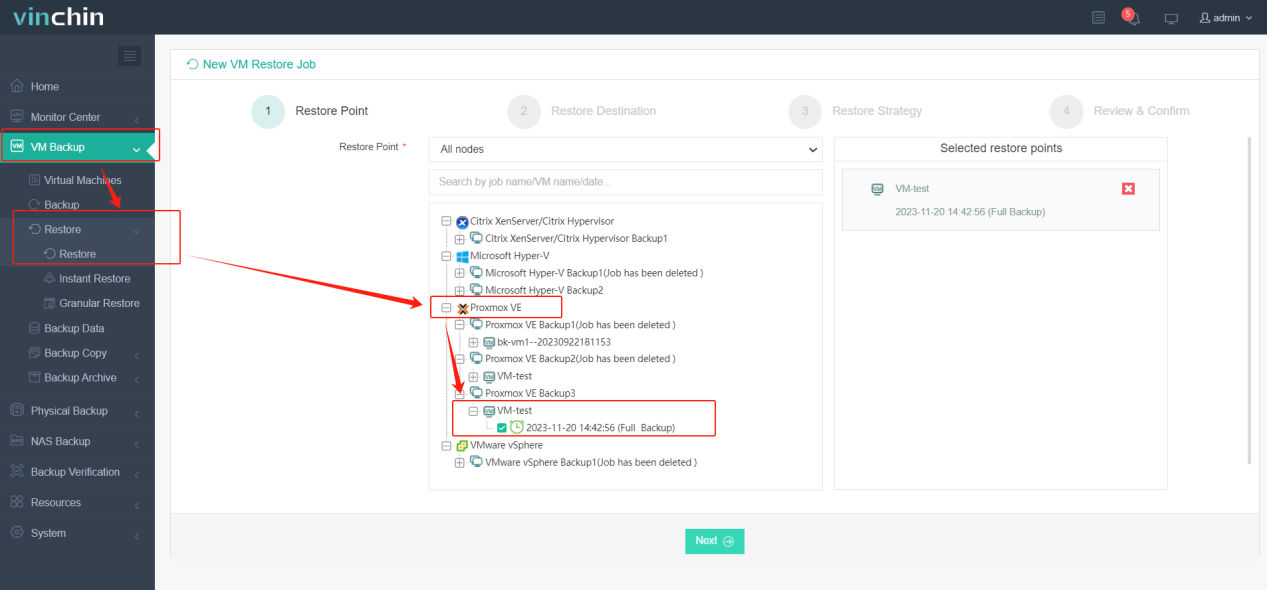
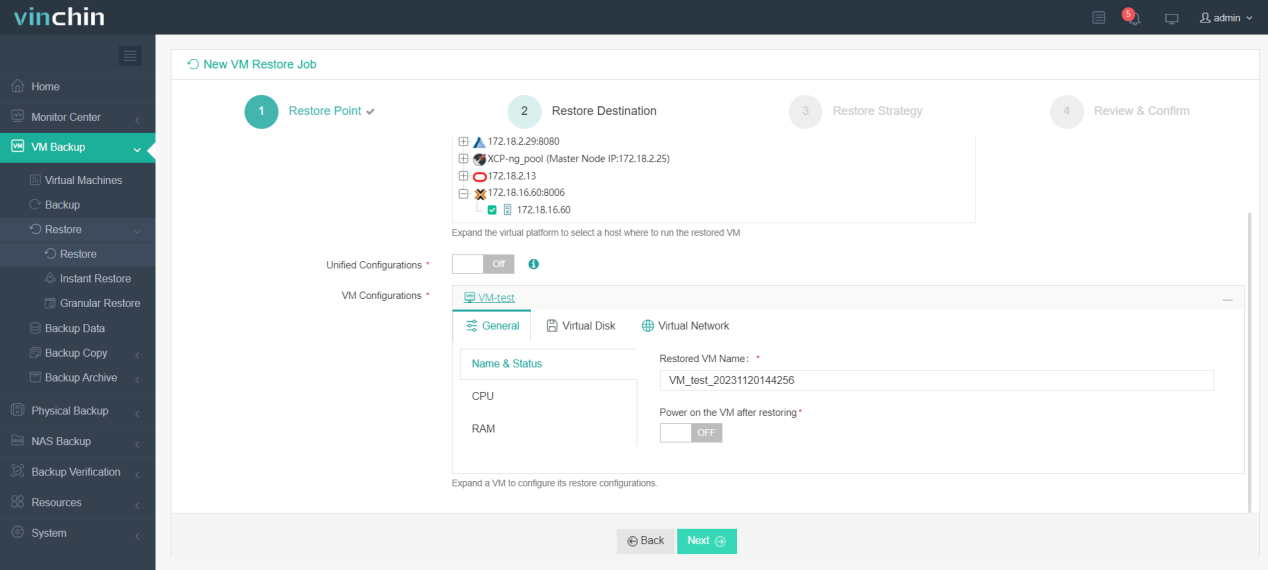
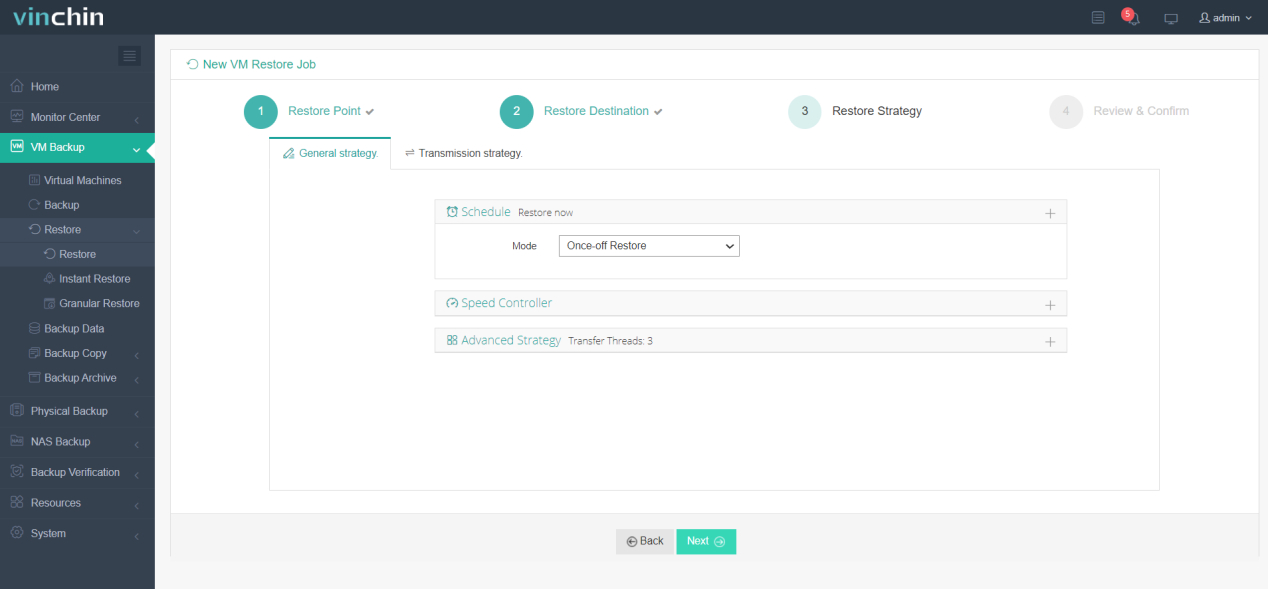
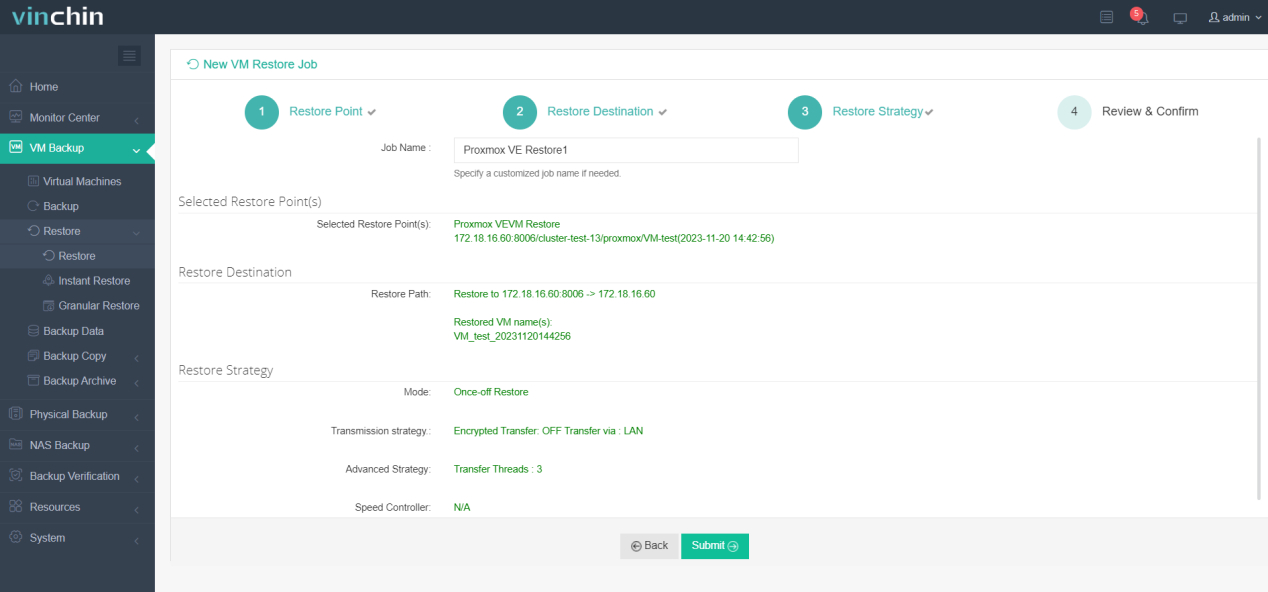
Vinchin Backup & Recovery's operation is very simple, just a few simple steps.
1.Just select VMs on the host(here, select the files you want to restore)

2.Then select restore destination

3.Select strategies

4.Finally submit the job

Vinchin offers a free 60-day trial for users to experience the full functionality in a real-world environment. For more information, please contact Vinchin directly or reach out to our local partners for assistance.
Proxmox Backup Server restore single file FAQs
Q1: Is it possible to restore individual files directly from the command line?
A1: Yes, Proxmox Backup Server also supports operations via CLI if you prefer to use command line tools. You can use the pbrestore command to do this. You need to specify the correct backup ID, snapshot, and path to the file you want to restore.
Q2: Can I select different recovery points during recovery?
A2: Yes, you can select a different backup point in time (snapshot) as the data source when recovering a single file. This allows you to recover files from an earlier backup even if there is a problem with the latest backup.
Conclusion
In conclusion, while Proxmox Backup Server offers a basic file recovery feature, Vinchin Backup & Recovery provides more advanced file-level recovery, with greater flexibility, efficiency, and cross-platform support. Its simple process and incremental backups make recovery faster and less disruptive.
Share on:


