The backup archive feature can be used to move your backup data from the backup storage to more cost-effective storage for long-term preservation.
Your data which is no longer been used or is inactive but still has business values can be archived, this can make sure the data is still accessible when needed.
With Vinchin Backup & Recovery you can archive your backup data to on-premise storage and cloud object storage.
Let’s get started with the on-premise archive.
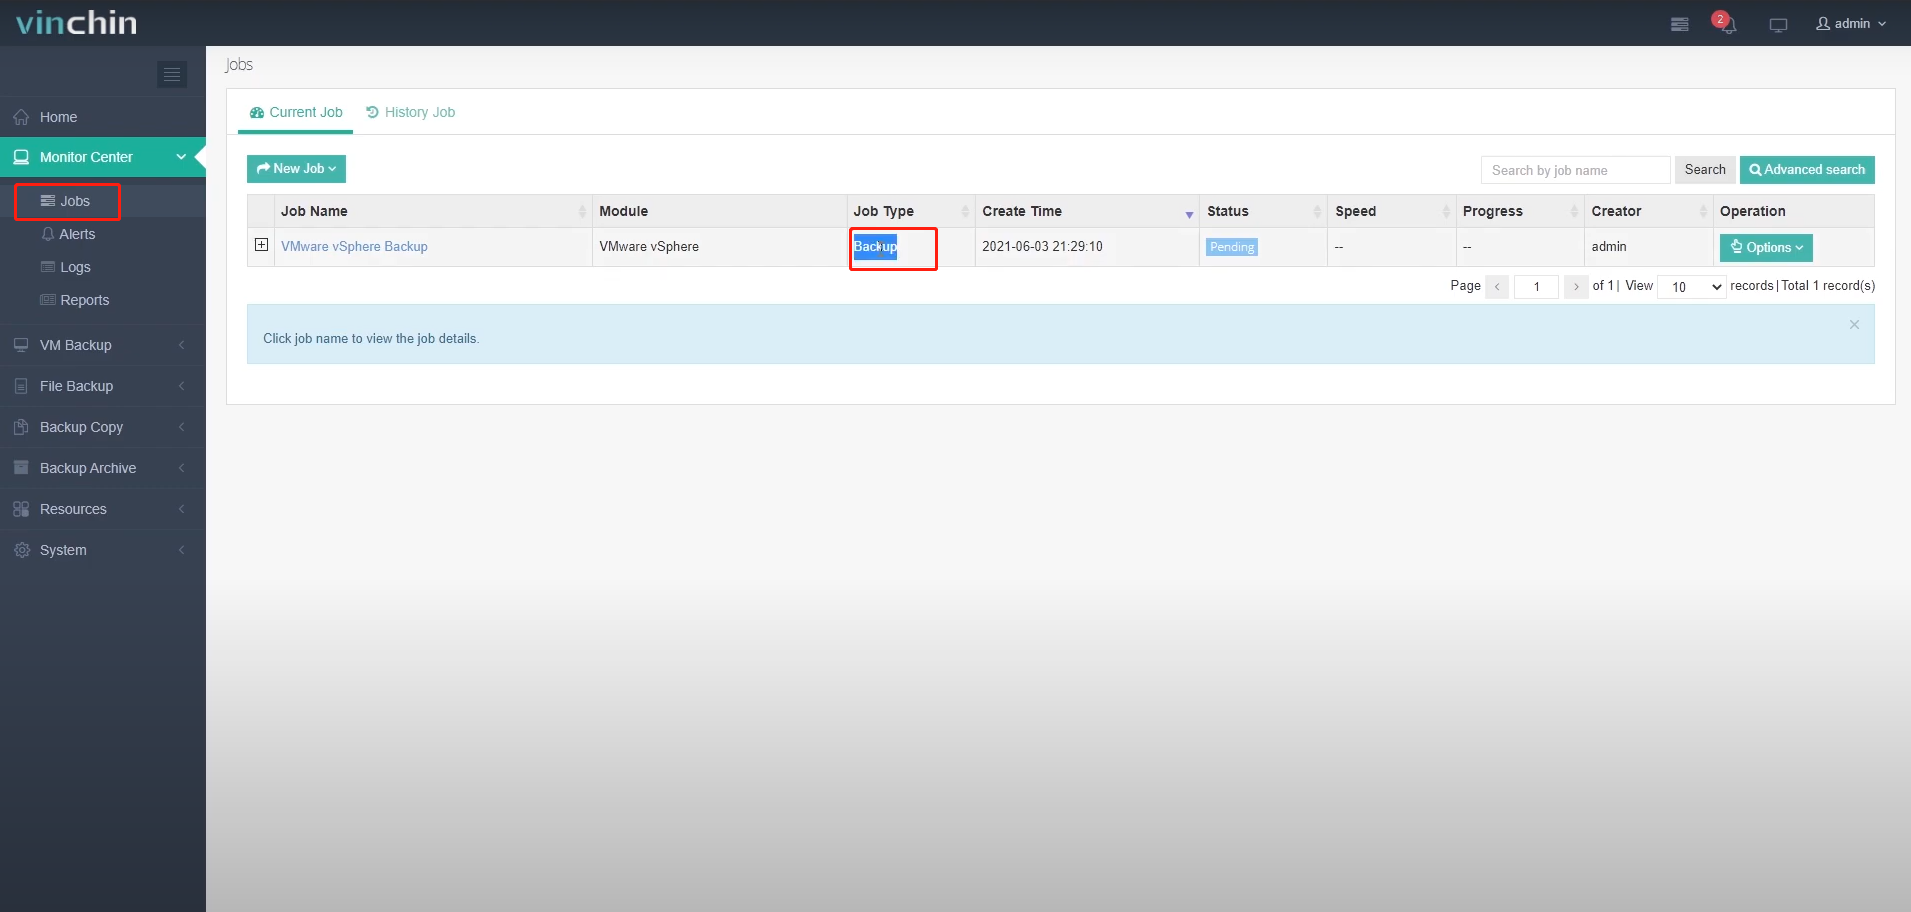
Before creating an archive job, a backup job should be created first, and also make sure there’s storage added for the backup archive.
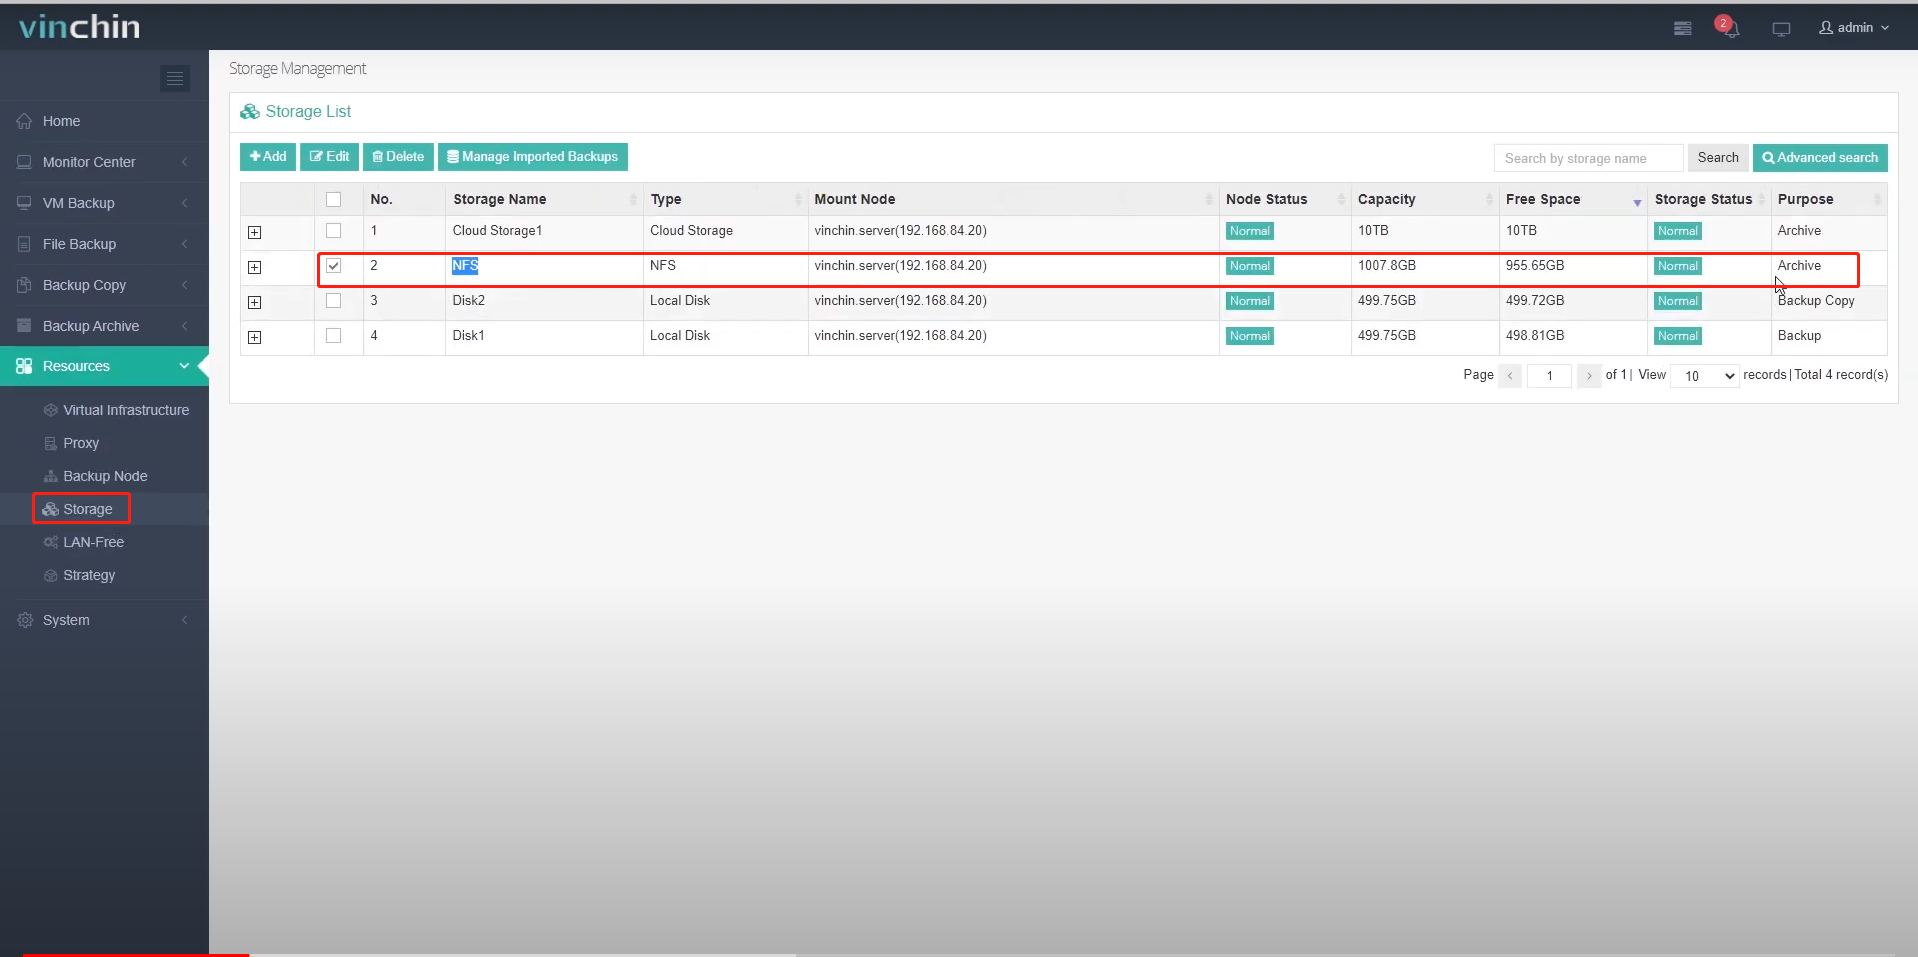
Here I’ve already got a backup job created, and have already added an on-premise NFS storage for the backup archive. Of course, you can use other storage for archiving not just NFS.
Now let’s go to Backup Archive -> Archive page to create a job. Here’s a 4-step wizard for creating a backup archive job.
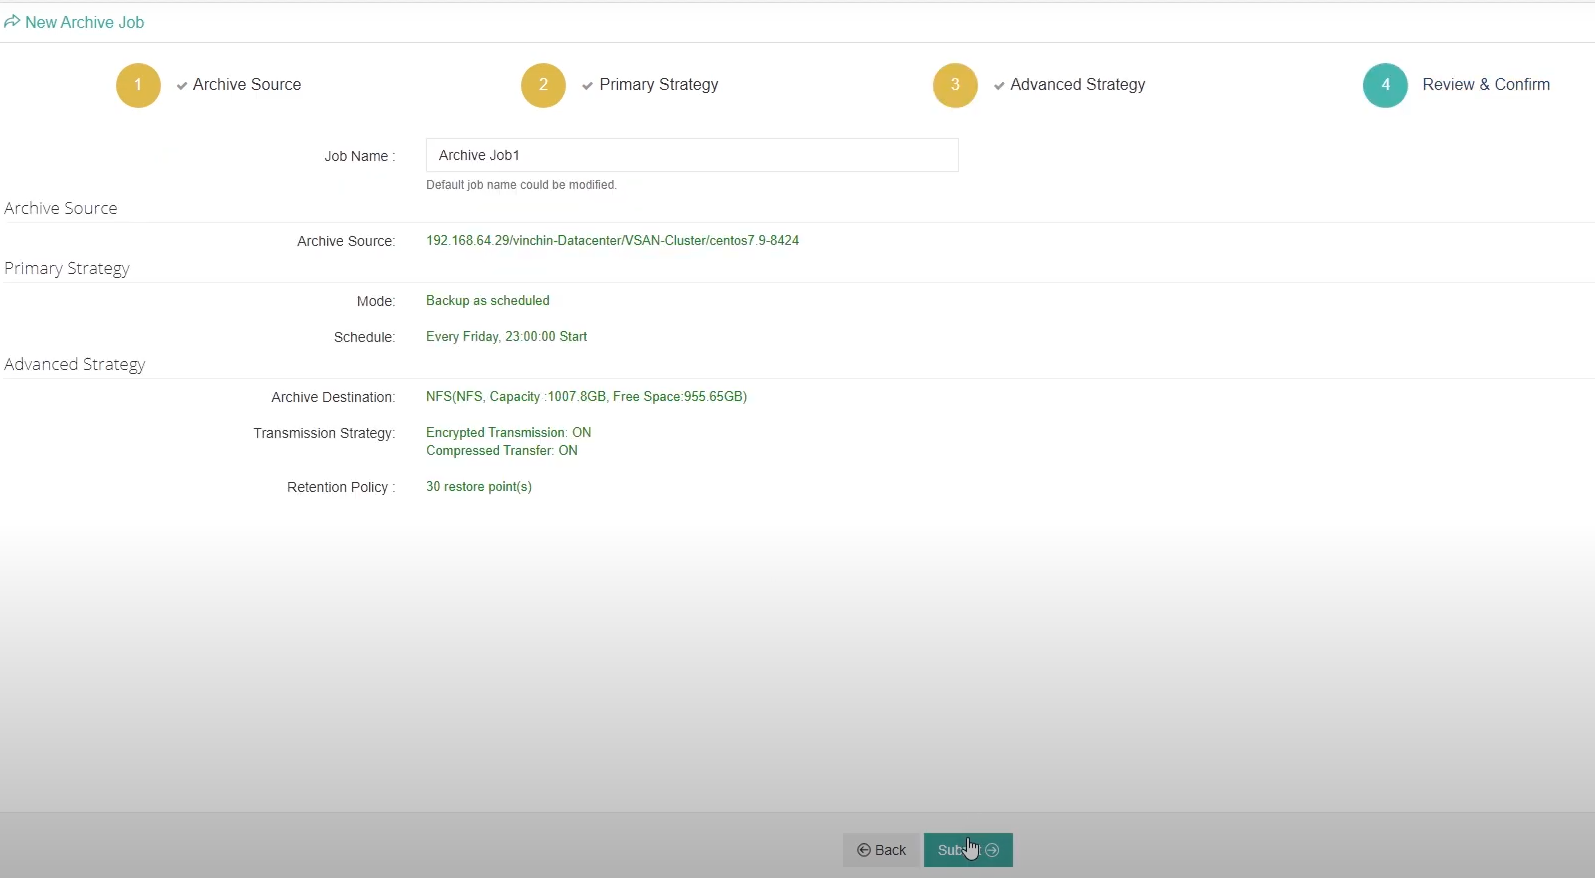
Step 1, selecting the archive source. The archive source can be a backup job or restore points.
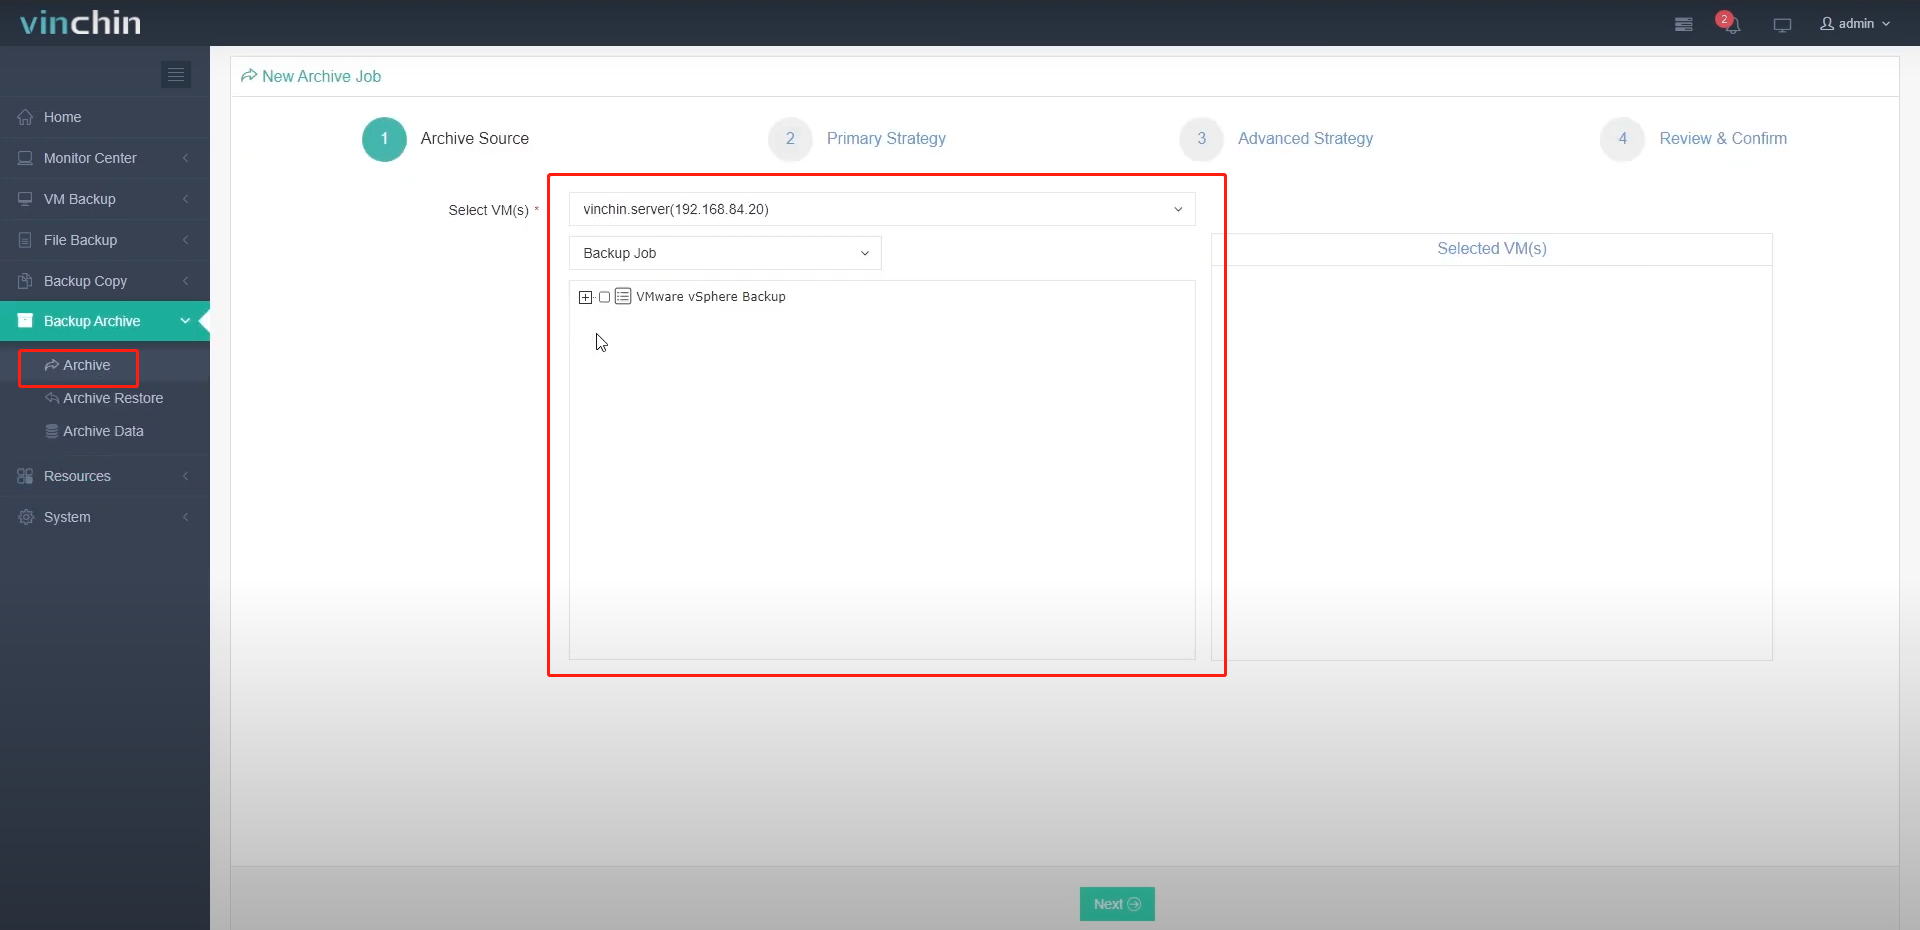
If you select a backup job, the archive job can be scheduled to run regularly;

If you select restore points, the archive job will run only once to archive the selected restore points.
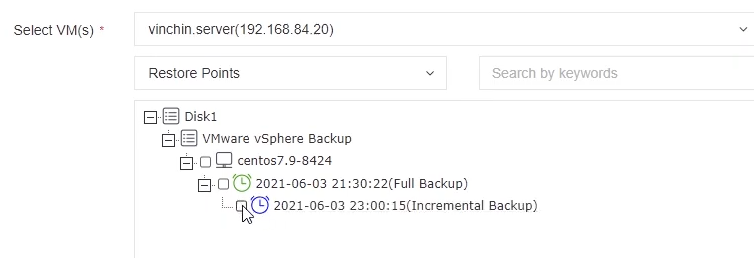
Here I’ll select the backup job as the archive source. And click on Next to proceed to step 2, archive strategies.
In the Job Mode I’ll leave it with “archive as scheduled”, and for the job schedule, it is recommended to archive once a week or once a month. Because each time running the archive job, it will organize the latest restore point into a full restore point and transfer it to the archive storage. So, the archive job schedules should not be too frequent.
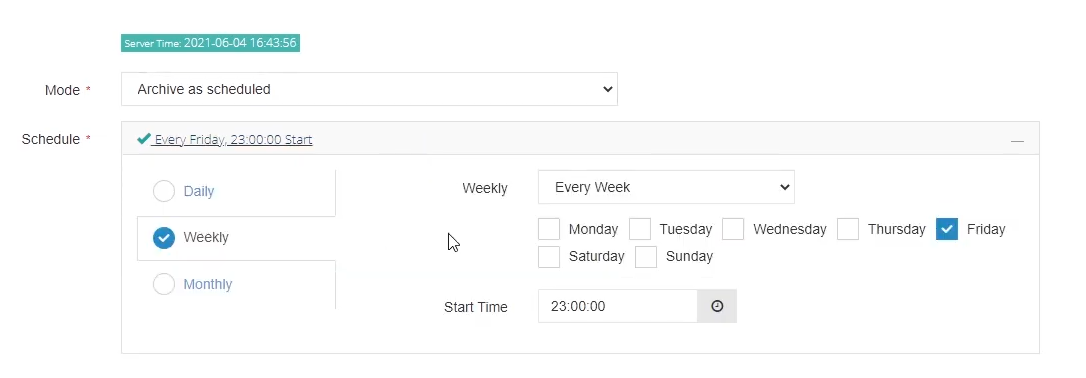
Step 3, choose the advanced strategies.
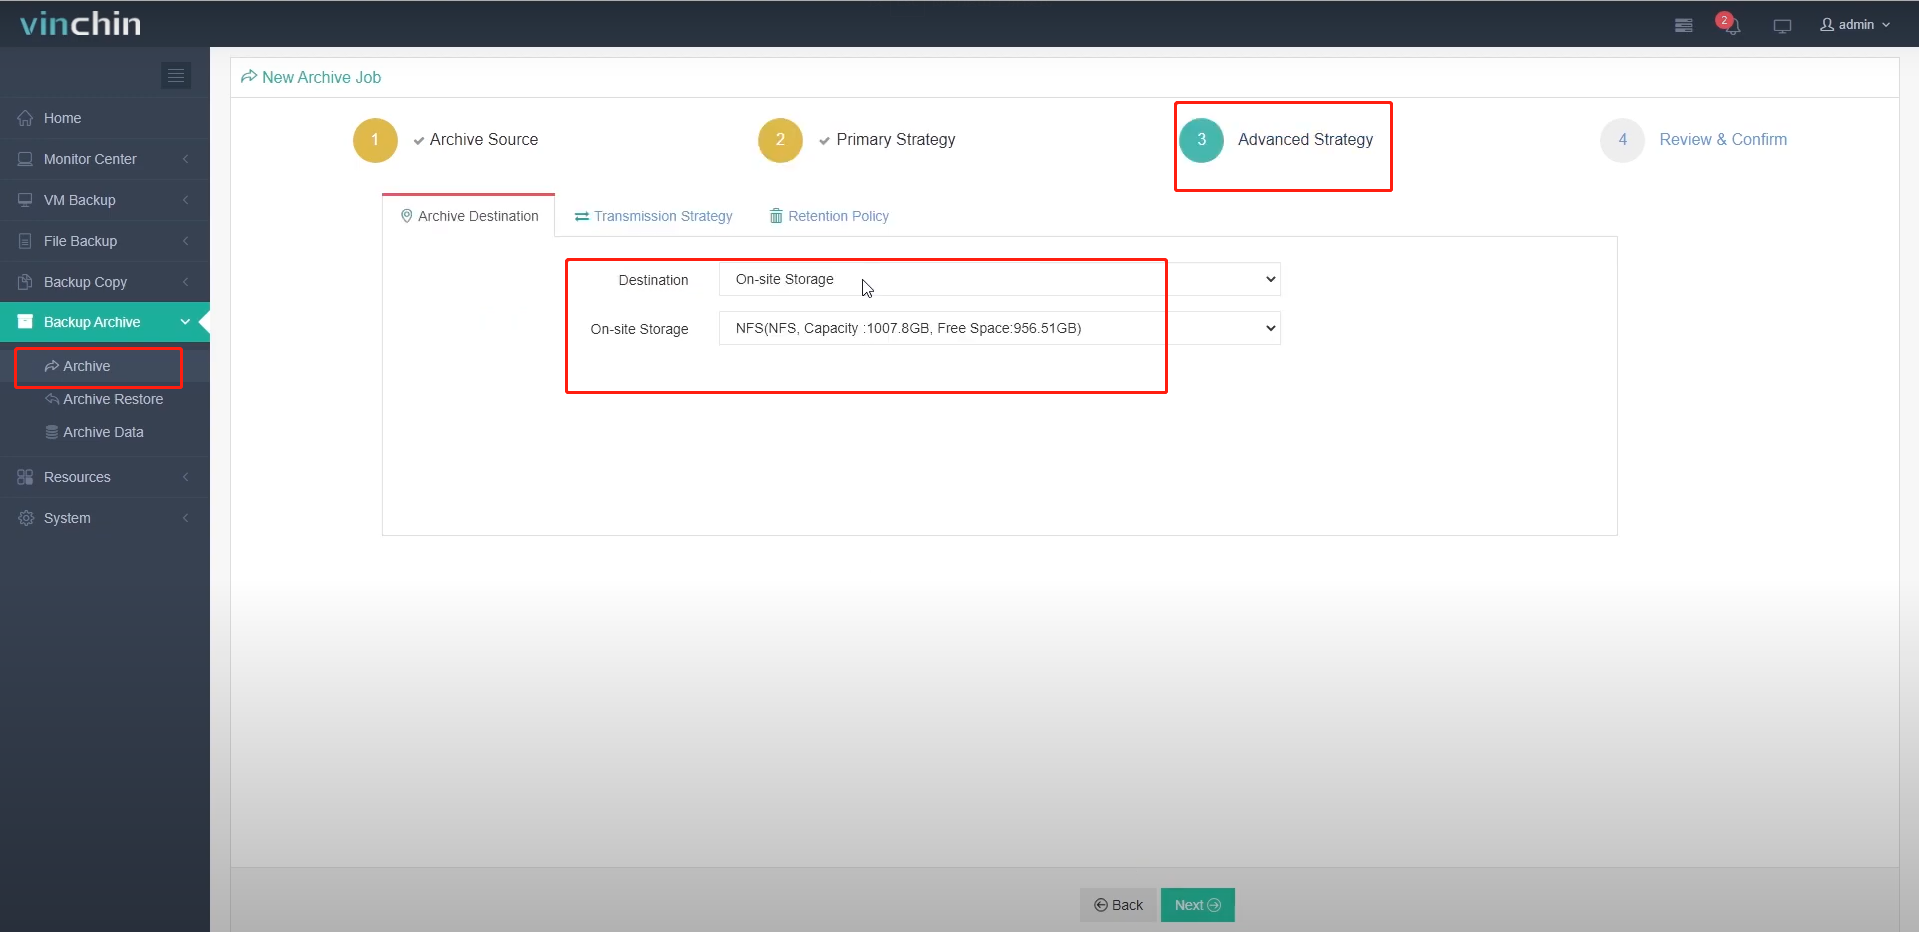
For the archive destination, I’ll use the on-premise NFS storage I added previously.

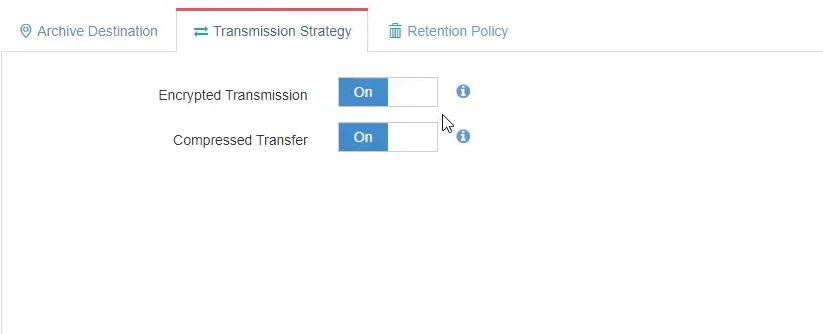
For the transmission strategies, encrypted transmission and compressed transfer are optional.
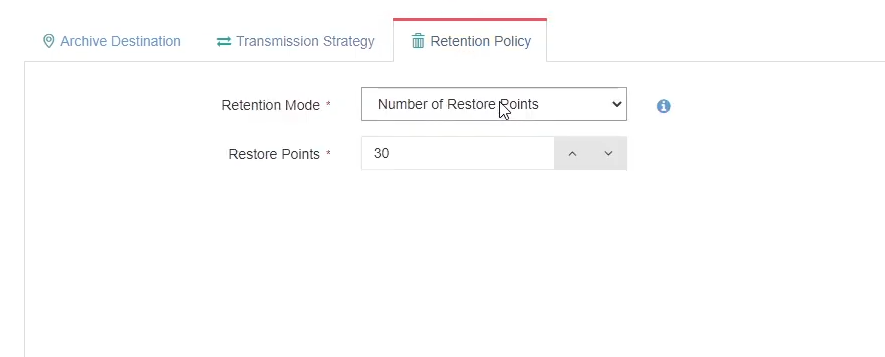
And for retention policy, you can either set by retention time or by restore points as per your actual demands of data retention.
In step 4, you can review the job settings and submit the creation of this job.
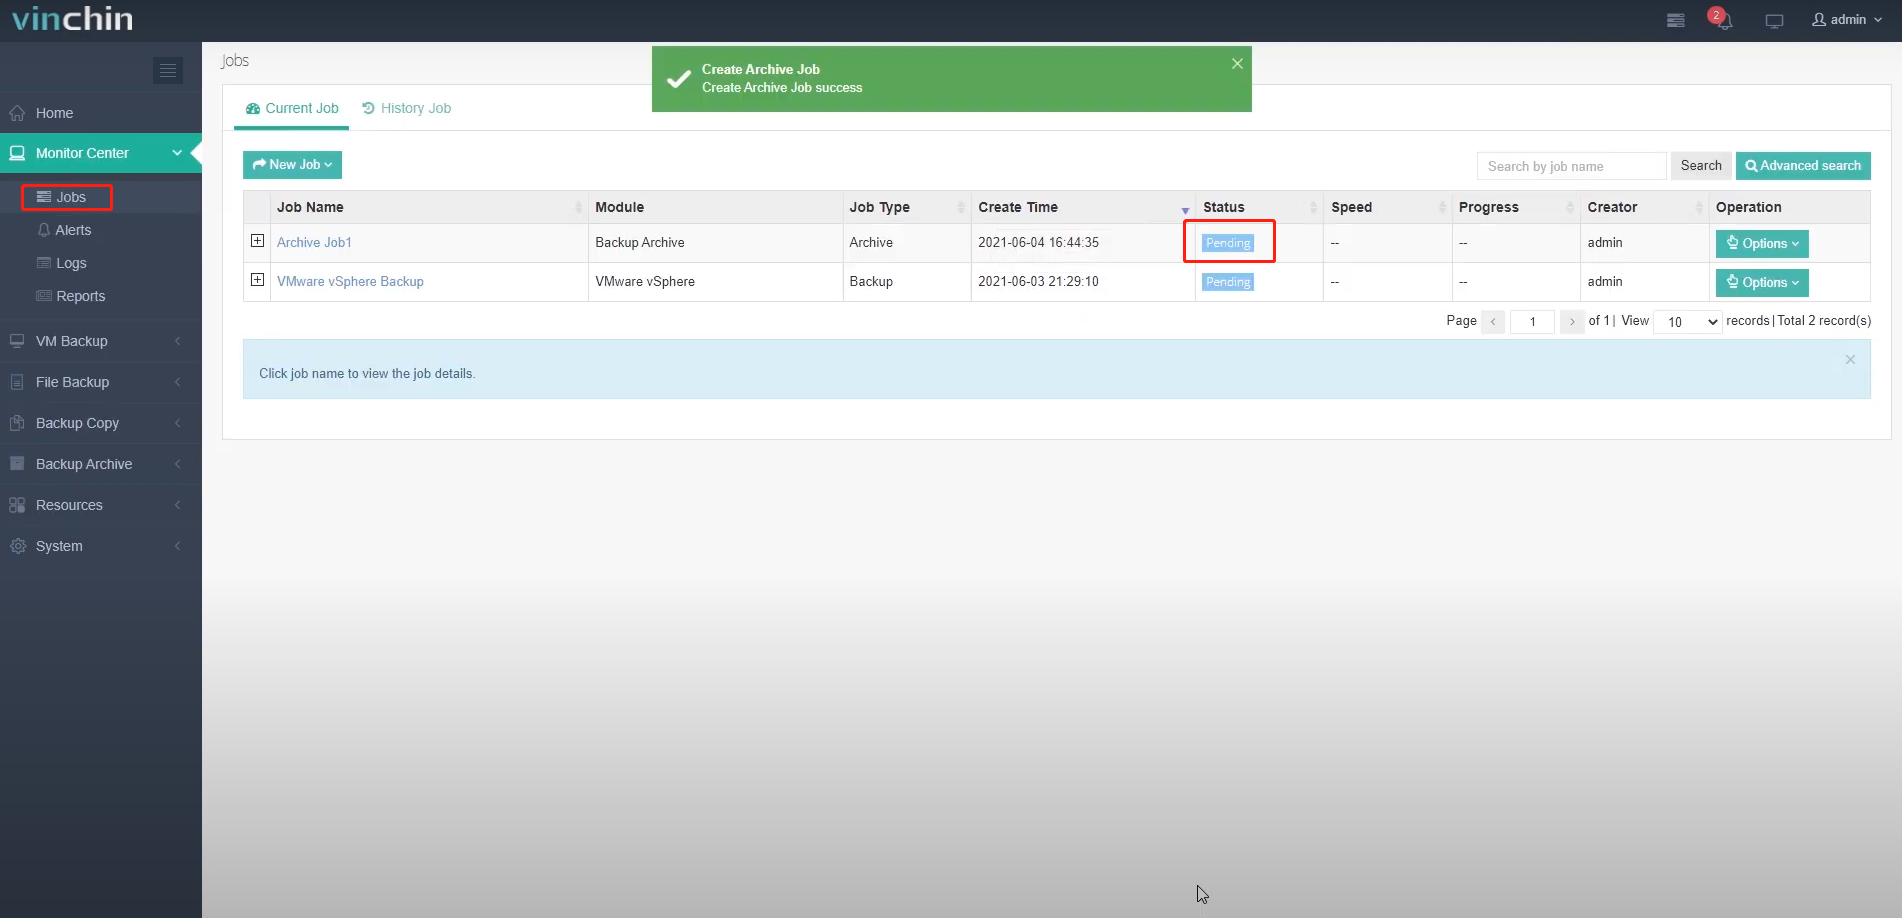
When the job has been created, you’ll be redirected to the job list screen, and the job status will remain pending.
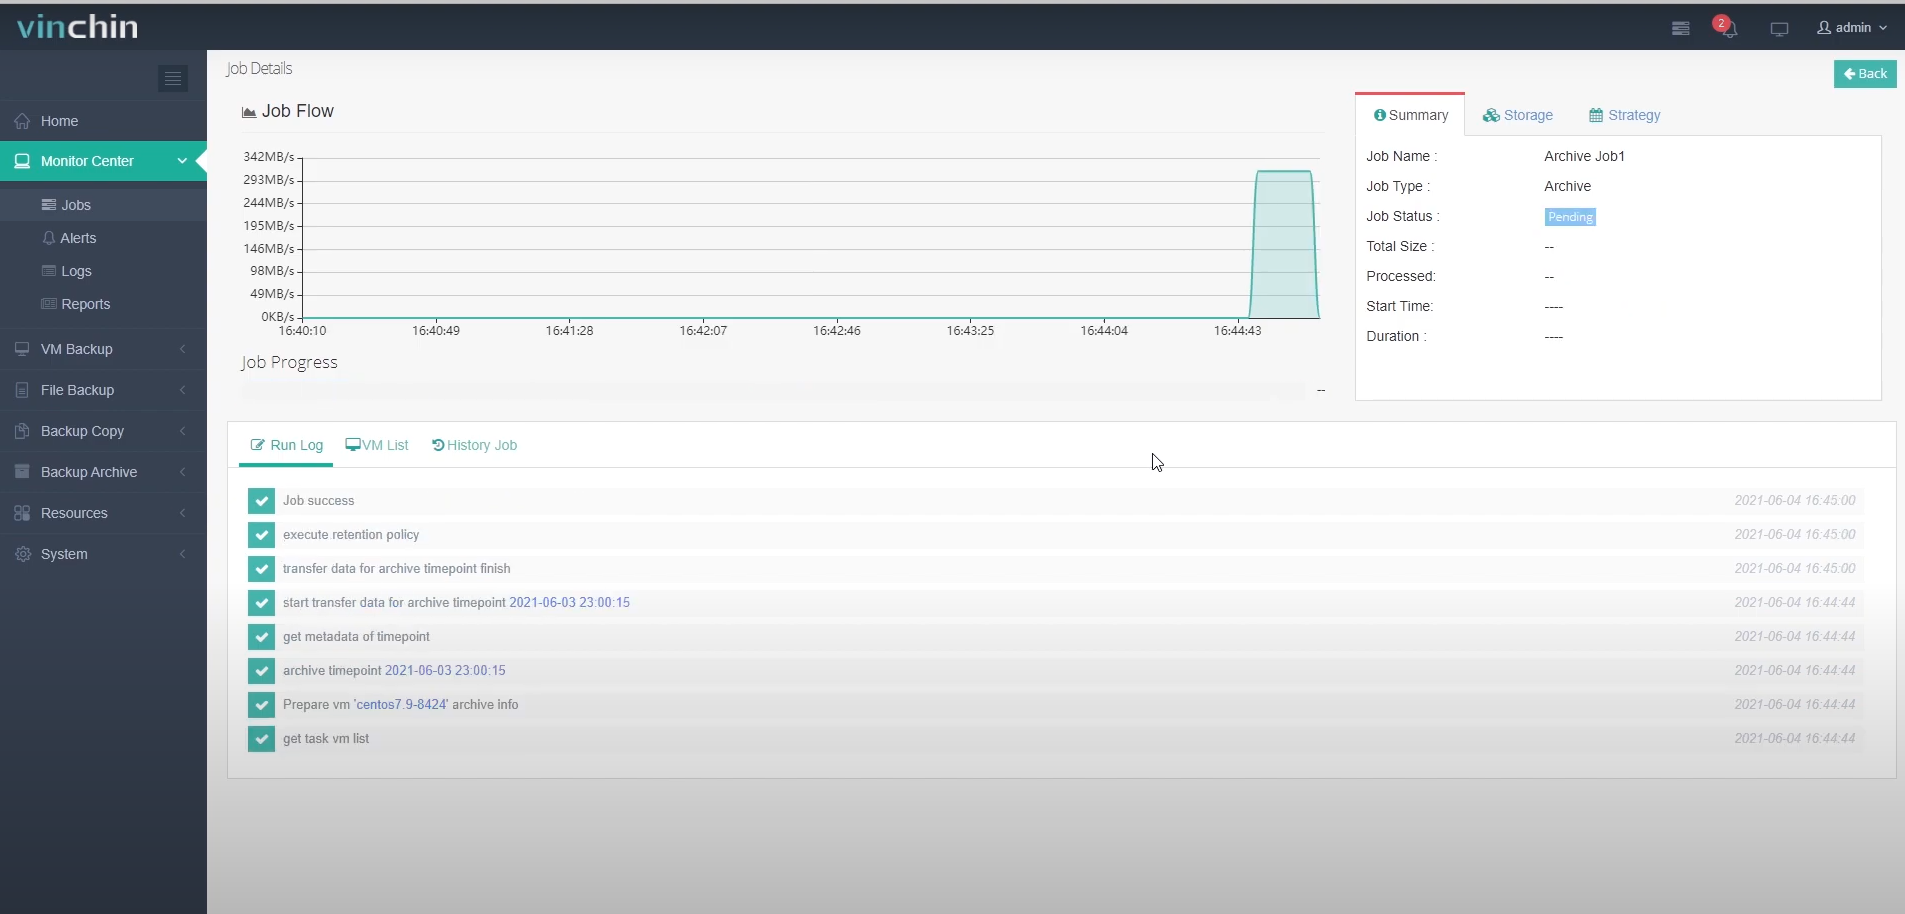
After the job is activated, you can click on the job name to take a look at the job details.
Here are the job running logs, and here’s the job transmission flow. As this is an on-premises archive job, so the transmission is very fast and the job is completed already.
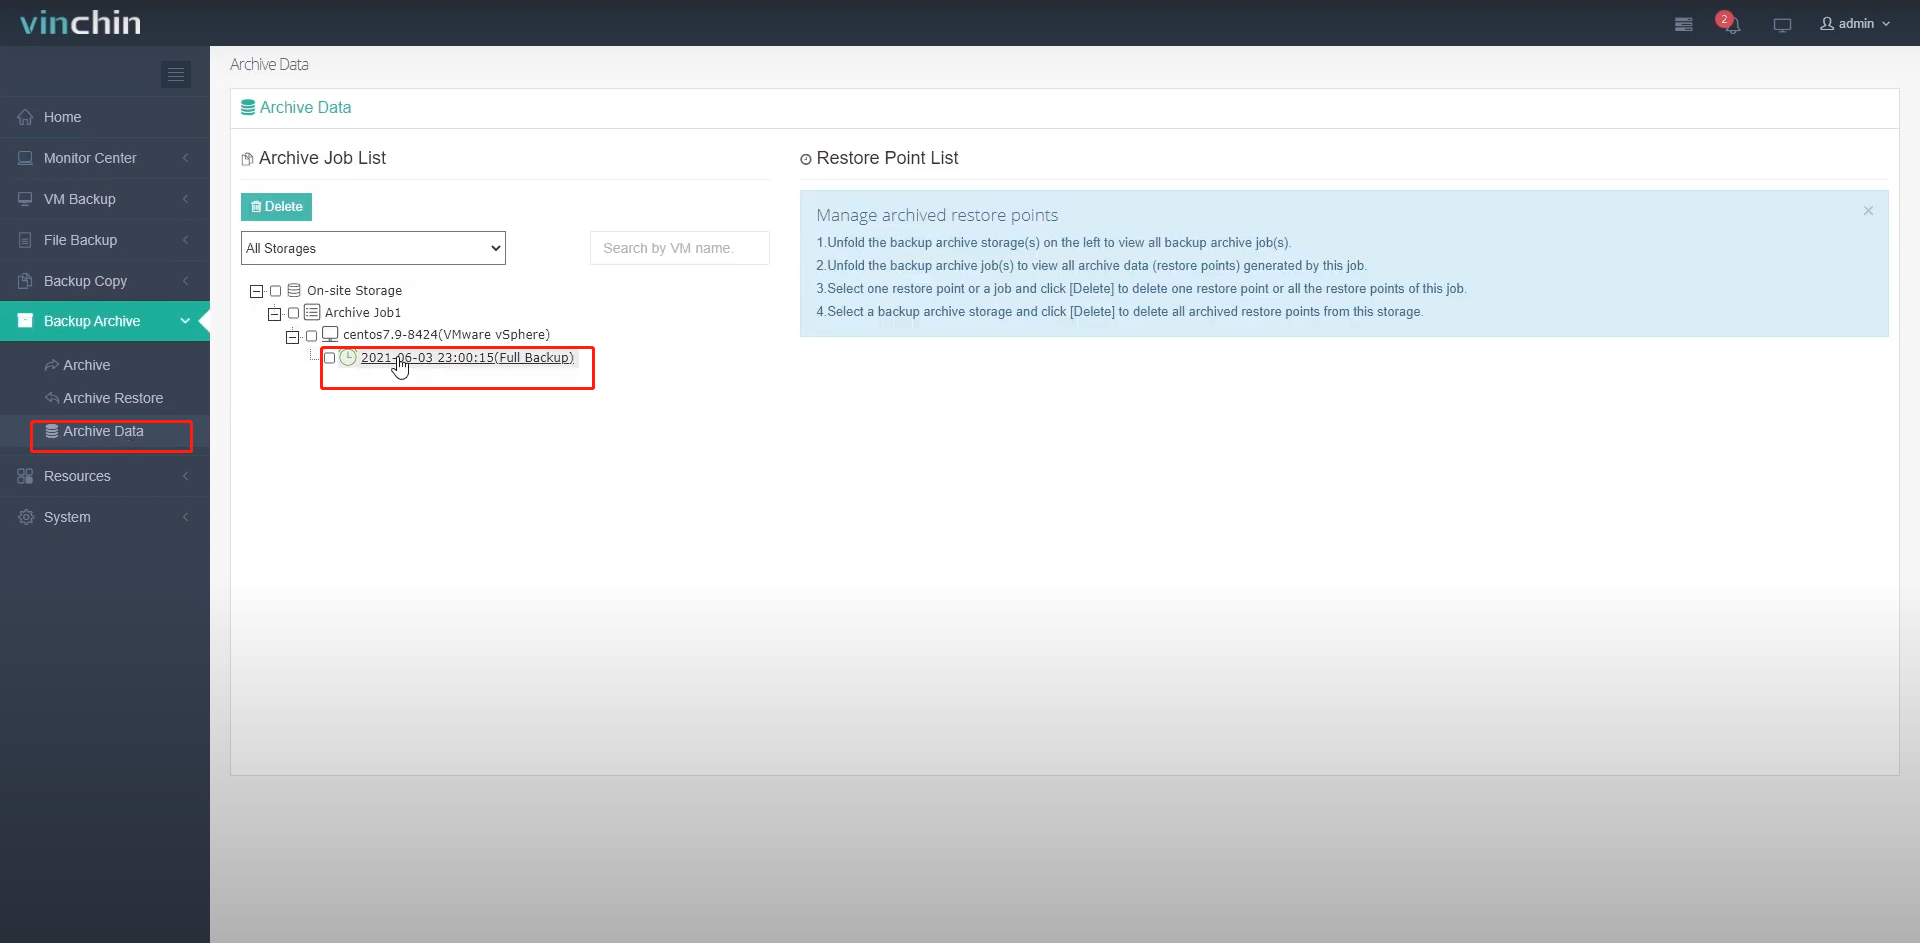
To check the archived backup data, let’s go to Backup Archive -> Archive Data page.
Here’s the full restore point, its timestamp is 23:00:15.
Let’s check from the backup data list, as we can see here’s a backup chain, the restore point at 23:00:15 is an incremental restore point.
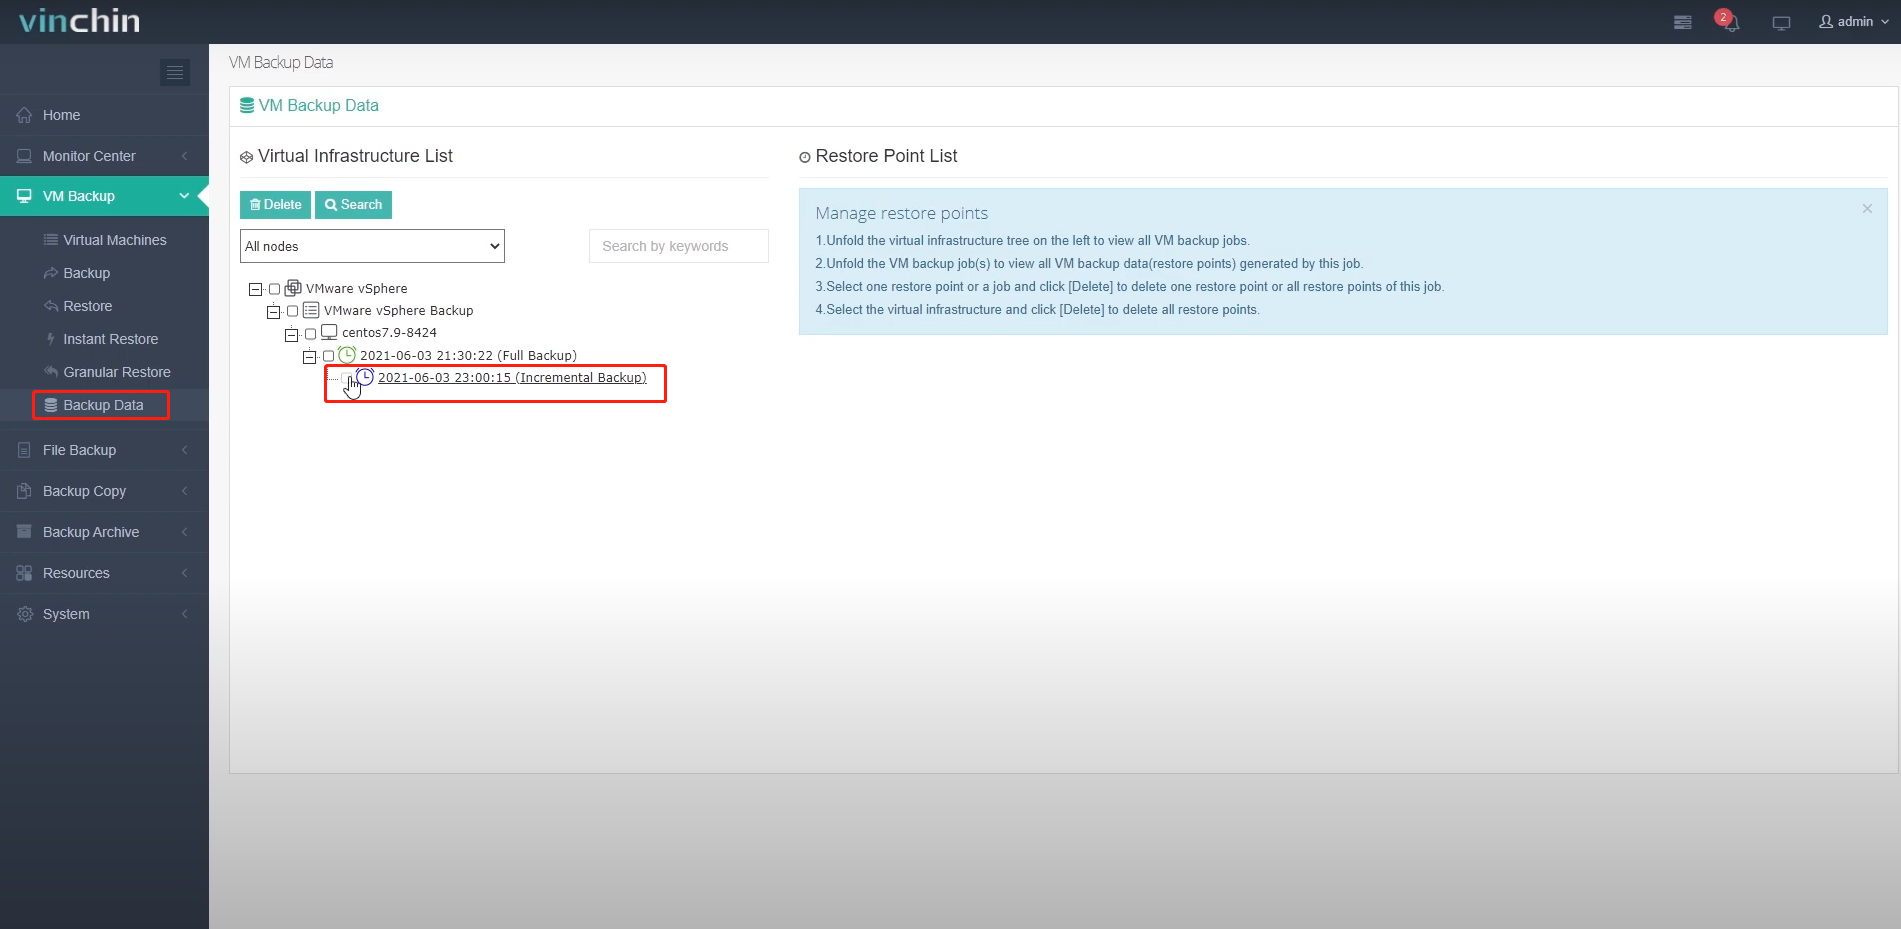
As mentioned previously, Vinchin Backup & Recovery will organize the latest restore point into a full restore point and then write it into the archive storage.
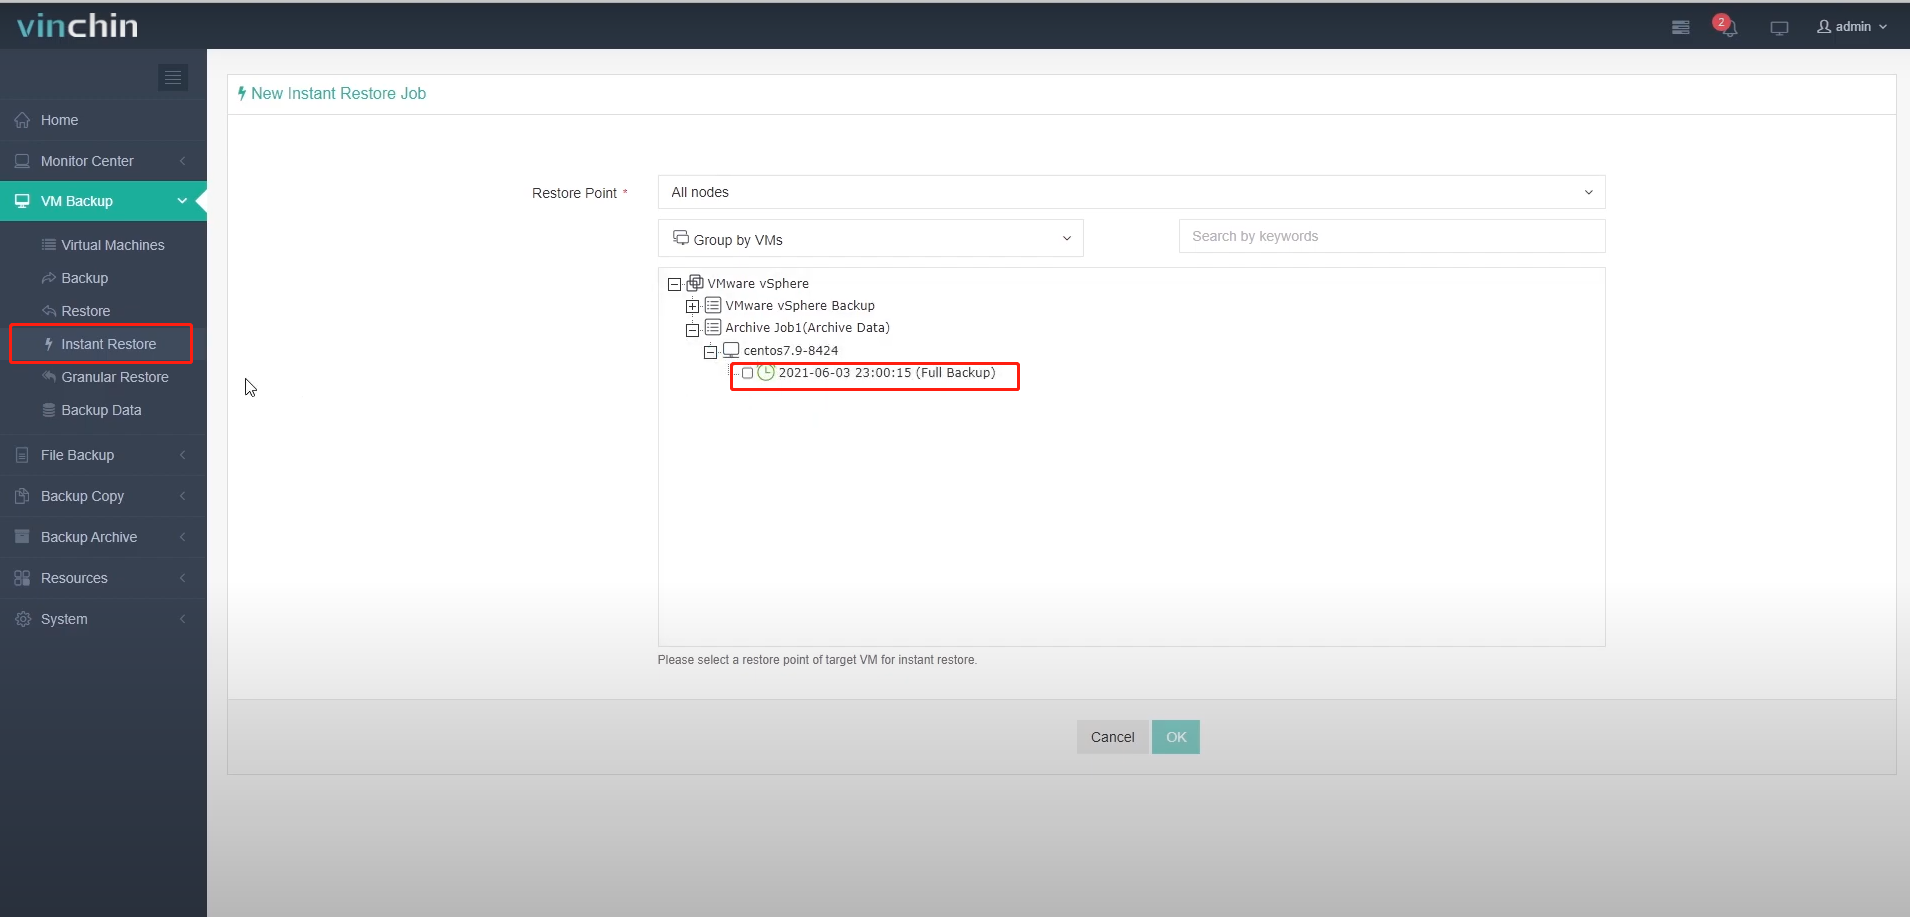
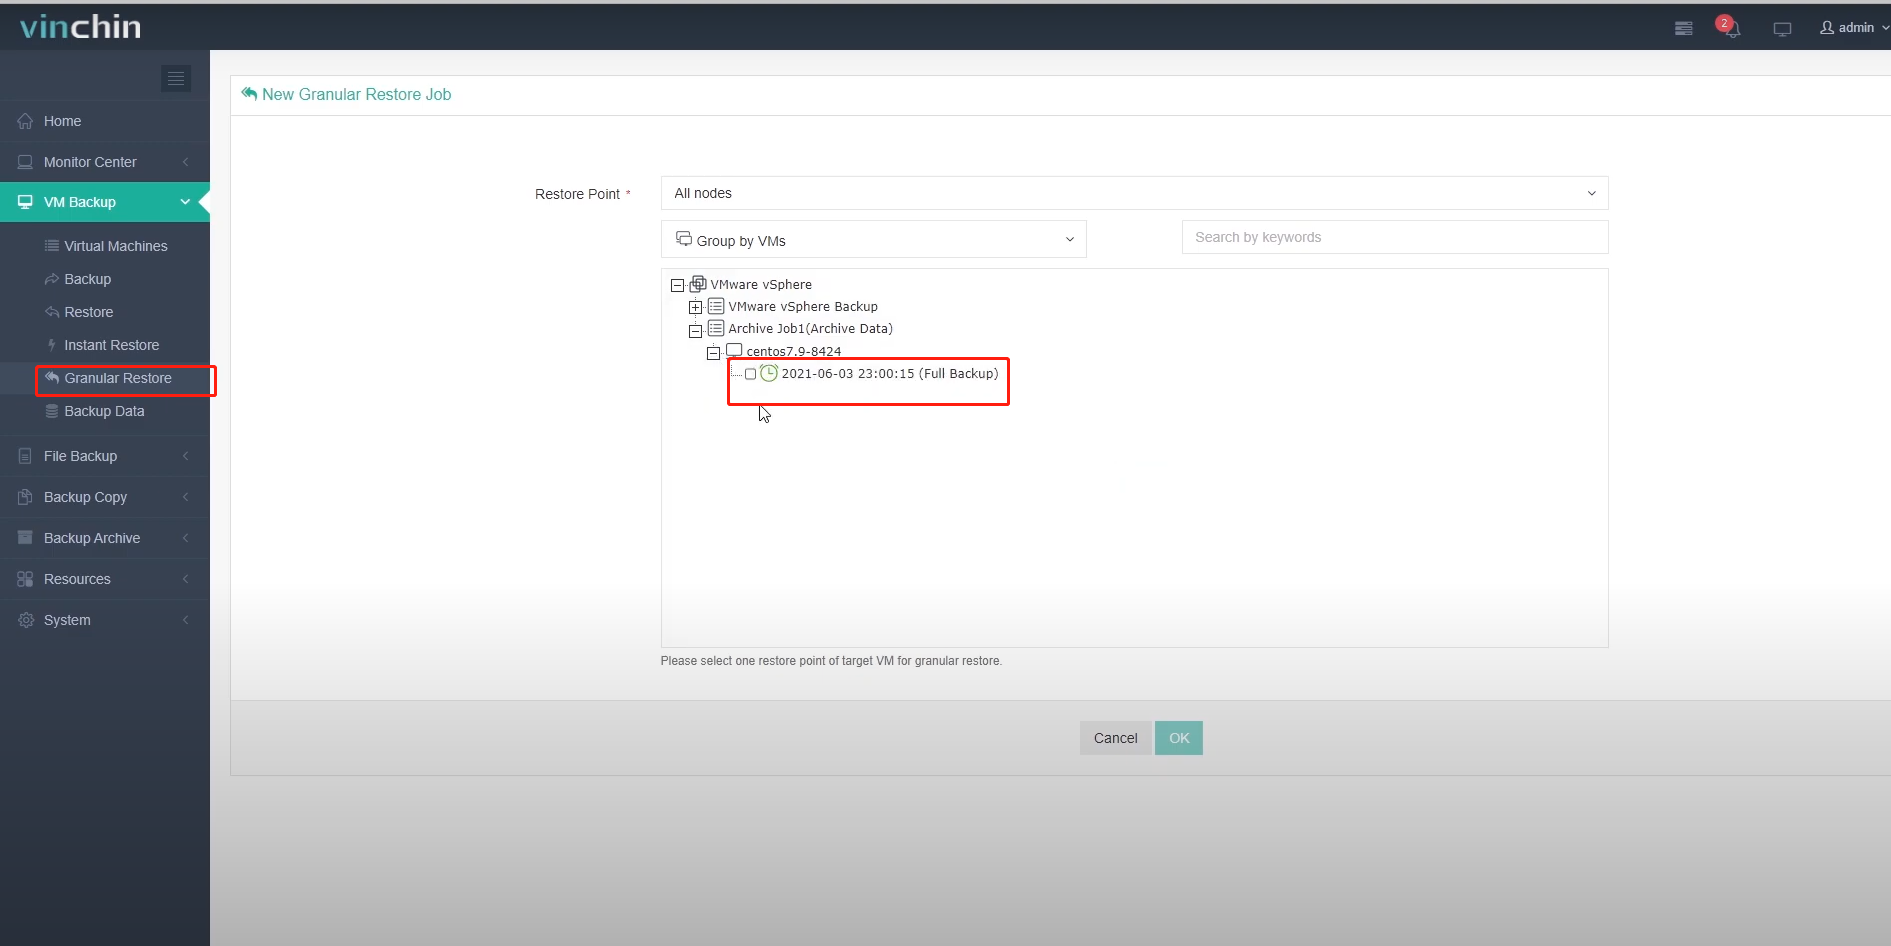
With the on-premise archived restore point, we are able to directly perform:
Full VM restore
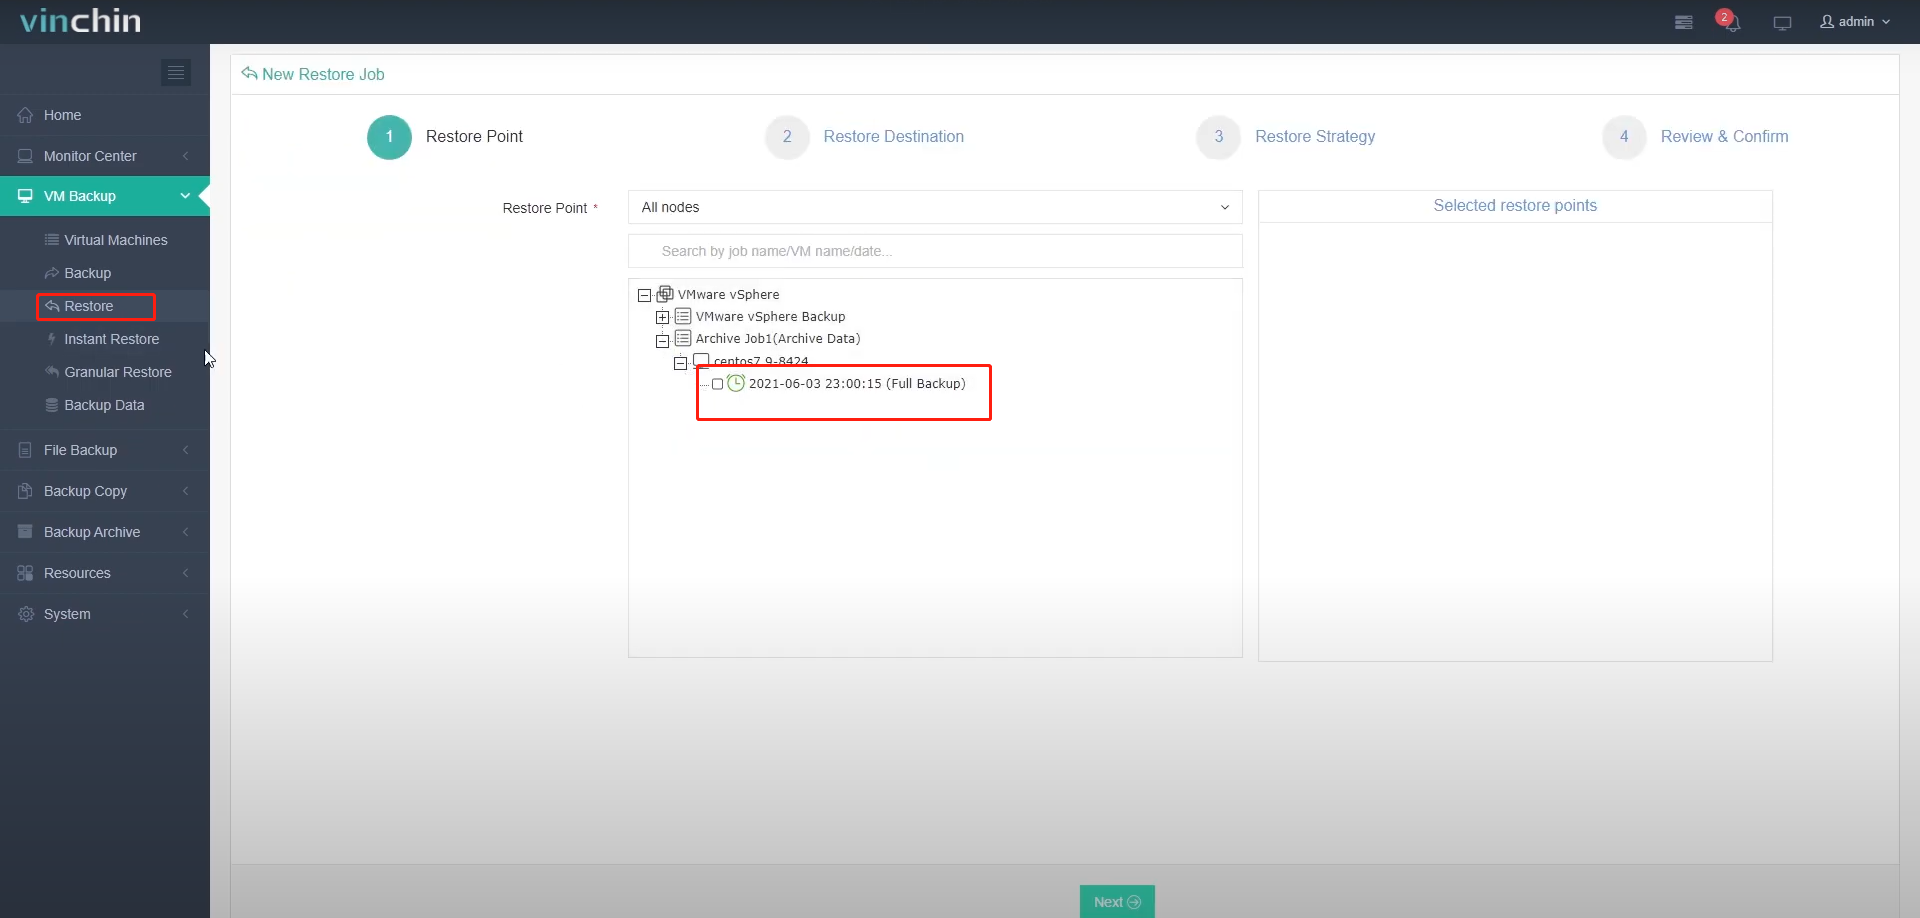
Instant VM restore
Granular Restore
That’s all for the on-premise archive, next I will demonstrate to you how to set up a cloud archive.
It’s similar to setup an on-premise archive, the only difference is the storage should be a cloud object storage.
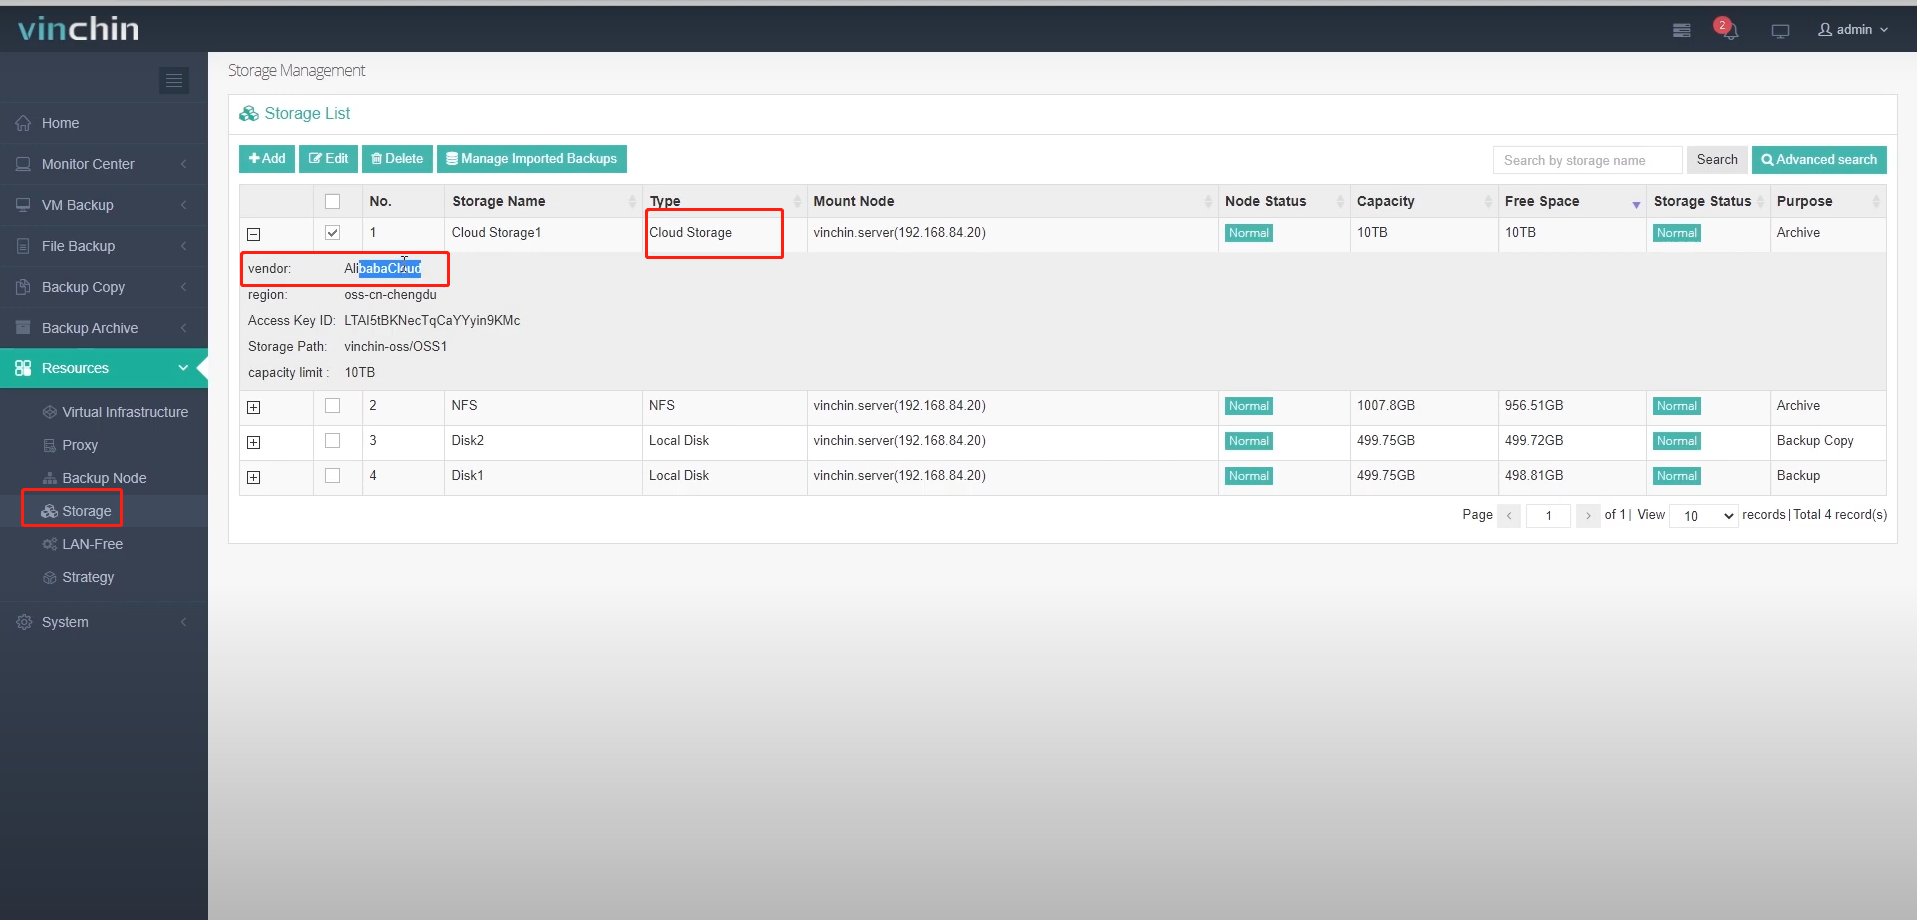
Here I have added Alibaba cloud storage as my cloud archive storage. Except for Alibaba, we also support AWS S3 and other S3 compatible cloud storage, later on, more cloud storage like Microsoft Azure blob storage, Huawei cloud storage, Wasabi cloud storage, and more will be supported.
Let’s take a brief view of how to add AWS S3 cloud storage.

Storage type should select Cloud storage, vender should be AWS S3, in the Region dropdown list please select a region to which you wish to connect to. For service endpoints, it’s optional, you can enter the URL of the entry point for the AWS service, or leave it blank and it will use the default service in an AWS region.
After entering the Access Key ID and Secret Access Key, you can scan the storage bucket or can manually type one.
For the folder field, you can either manually enter a new folder name to be created or you can select an existing folder by clicking on Auto-select.
In the name field, define a name for this cloud storage for identification.
As for the Storage Objective, it will be used for backup archive by default, and cannot be changed.
And for the size, it is a storage quota you defined for this cloud storage.
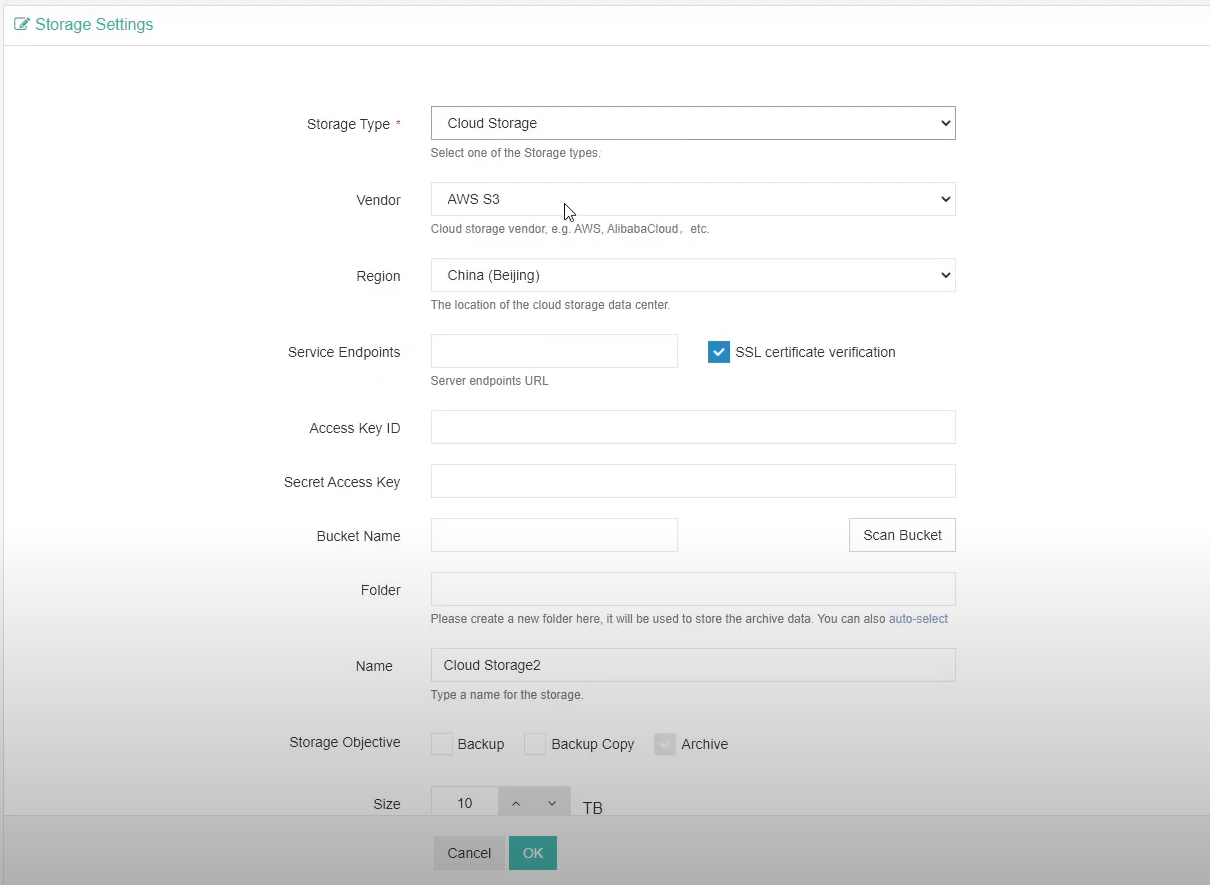
After these settings by clicking on OK to add the AWS S3 cloud storage.
Since we had added the cloud storage, so next we can create a cloud archive job. All settings are the same as creating an on-premise archive job, only in step 3, the archive destination should select the cloud storage.
After the job is completed, we got the restore point stored in the cloud storage.
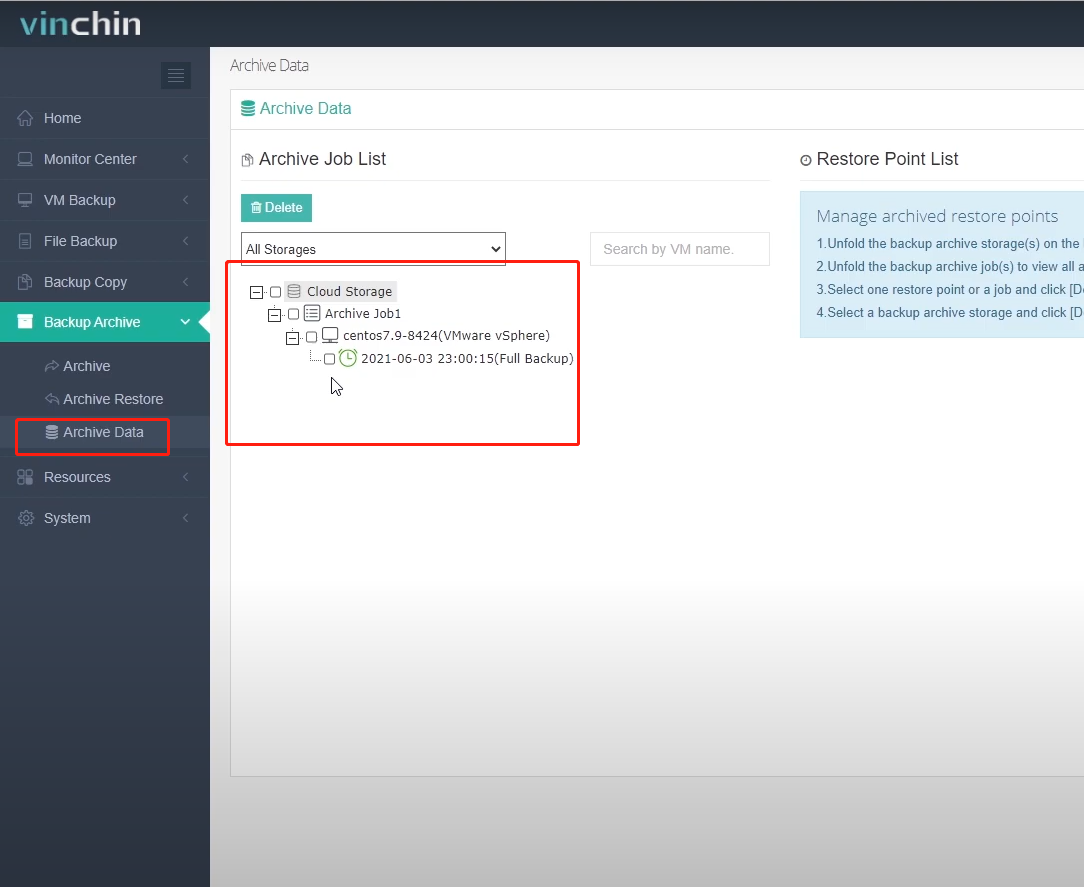
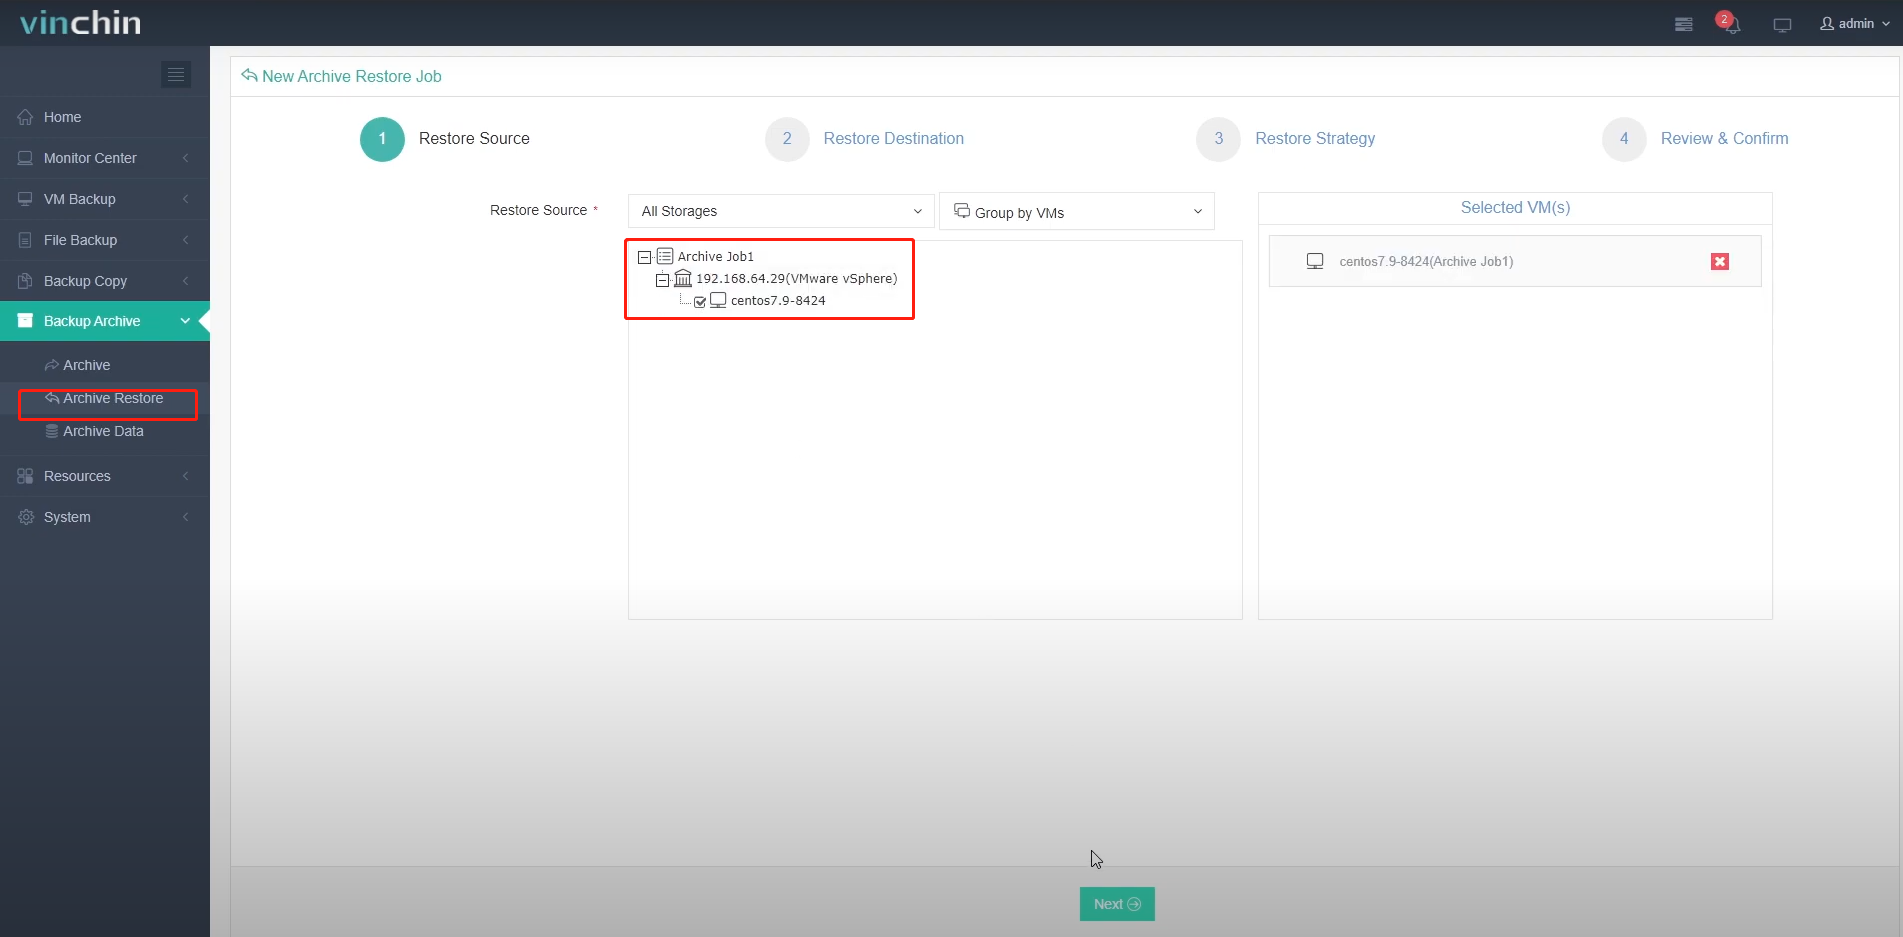
Not like the on-premise archives which can be used to restore VMs directly, to use cloud archives to restore VMs, you need to create an archive restore job to first retrieve the archived restore points to on-premise storage. And then use the retrieved restore points to restore your VMs.

That's all for this video, thanks for watching.
Share on:


