Backing up your Windows operating system is crucial because it ensures that you have a copy of your important data and files in case your system experiences a critical failure or is infected by malware.
There are several ways to back up your Windows operating system, including using built-in backup tools like Windows Backup and Restore, or third-party backup software. You can also use different locations like cloud storage services (Google Drive, Dropbox, or OneDrive), external drives, and network-attached storage (NAS) to store your important files and documents.
In this article, you are going to learn back up Windows 10/11 to NAS, which applies to all brands such as Synology, QNAP, Asustor, and others.

Way1: Windows Backup Using Windows Backup and Restore
Windows Backup and Restore is a built-in backup software included from Windows 7 and inherited by Windows 10/11. You can back up and restore the Windows server with it and copy operating systems, system files, files, applications, and more to the NAS devices.
1. On Windows 10: Type backup in the search bar and click Backup and Restore (Windows 7) from the results.
On Windows 11: Type the control panel in the search box, click System & Security, and choose Backup and Restore (Windows 7).
2. Click Set up backup on the right of the panel and click Save on a network….
3. Click Browse… add the network location of the NAS devices, enter its credentials, and click OK.
Note: Map your NAS to a local system and assign a drive letter if you cannot back up to NAS by inputting the network path directly. After that, you’ll be asked to create a system repair disc or not, click Yes if you have an external drive, which could be used to restore files/folders and the system image.
4. Choose Let Windows choose, or Let me choose (check to Include a system image of drives for this option) to decide the backup items.
5. In the review window, optionally click Change schedule> Run backup on a schedule> set the schedule to automate the backup.
6. Click Save settings and run the backup to start.
Way 2: Windows Backup Using File History
File History is a backup application introduced in Windows 8 that backs up all files in the Libraries, Desktop, Favorites, and Contacts folders. You can save backup versions of local files to either a NAS or external USB hard disk automatically with this tool.
In Windows 10:
1. Click Start> Settings> Update & Security> Backup> More options. Or press Windows key +Q> type backup.
2. Click + Add a drive to select the network location for the backups.
3. Turn on Automatically backup files> More options> choose the backup sources and exclude the undesired items by selecting it and clicking Remove.
4. Scroll down and click Add a folder to filter specific folders under the Exclude these folders, and do the opposite under the Back up these folders.
5. Customize the backup intervals.
6. Click Backup Now.
In Windows 11:
1. Open Settings> type File History in the search box.
Or press Windows key + R> enter control> select Save backup copies of your files with File History under System and Security.
2. Click Select drive on the left and click Add a network location to add your NAS that is connected to your computer.
3. Configure the backup schedule in the Advanced Settings and filter folders in the Exclude folders.
4. Turn on the File History and the job launches.
Way 3: Windows Backup Using Vinchin Backup & Recovery
Backing up Windows 10/11 isn't just copying all system files, it is about a complete image file with all files, configurations, and disk structure to a backup location. Windows users can rely on Windows Backup and Restore, or File History to perform a necessary backup.
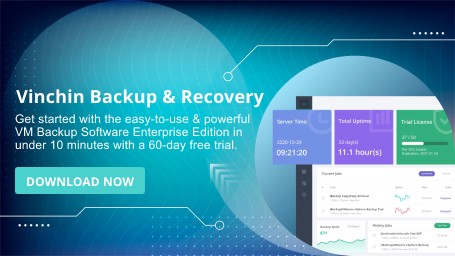
But when it comes to convenience, you may need to find a professional third-party backup solution. Vinchin Backup & Recovery is a reliable backup software for Linux & Windows OS, 10+ virtual platforms, 6 databases, NAS, and massive unstructured files.

Compatible with:
Windows Desktop (64-bit): 7, 8, 10, 11, and XP.
Windows Server (64-bit): 2003, 2008, 2012, 2016, 2019, 2022.
CentOS Linux (64-bit): 6, 7, 8.
Smart backup strategies:
Automatic OS backup under schedule.
Choose from Full, Incremental, Differential, and Forever Incremental backup.
Enable data deduplication and compression and valid data extraction to reduce data size.
Tune up multithread transfer lines for speed.
Complete data protection:
Encrypt data to set passwords for recovery with the AES-256 algorithm.
Encrypt data transmission with SSL to secure the transfer.
Reject any unauthorized visits to prevent ransomware with the real-time I/O monitor.
Save an offsite backup copy to another location in case of emergencies.
Archive data to public clouds for extra insurance.
Download the 60-day full-featured free trial of the new release v7.0 now to explore more.
1. Go to Physical Backup> Server Backup> Backup and select a Windows host. You can tick in the drive box under the selected host to choose specific ones.

2. Select the NAS backup node and storage on it for the job.

3. Customize backup strategies mentioned above.


4. Review and submit the task. It will run based on the time setting.
Conclusion
You can learn how to back up Windows 10/11 to NAS devices in this post with 3 easiest ways, which are Windows Backup and Restore, File History, and the versatile backup software Vinchin Backup & Recovery that not only automates backups, and provide various backup options, but also restore the OS to the point-in-time status, so you don’t have to reconfigure everything.