In this article, I'll tell you how to perform instant VM restore and migration on Vinchin backup & recovery, I'll take VMware virtualization as an example.
Let's first go to VM Backup -> Instant Restore screen.
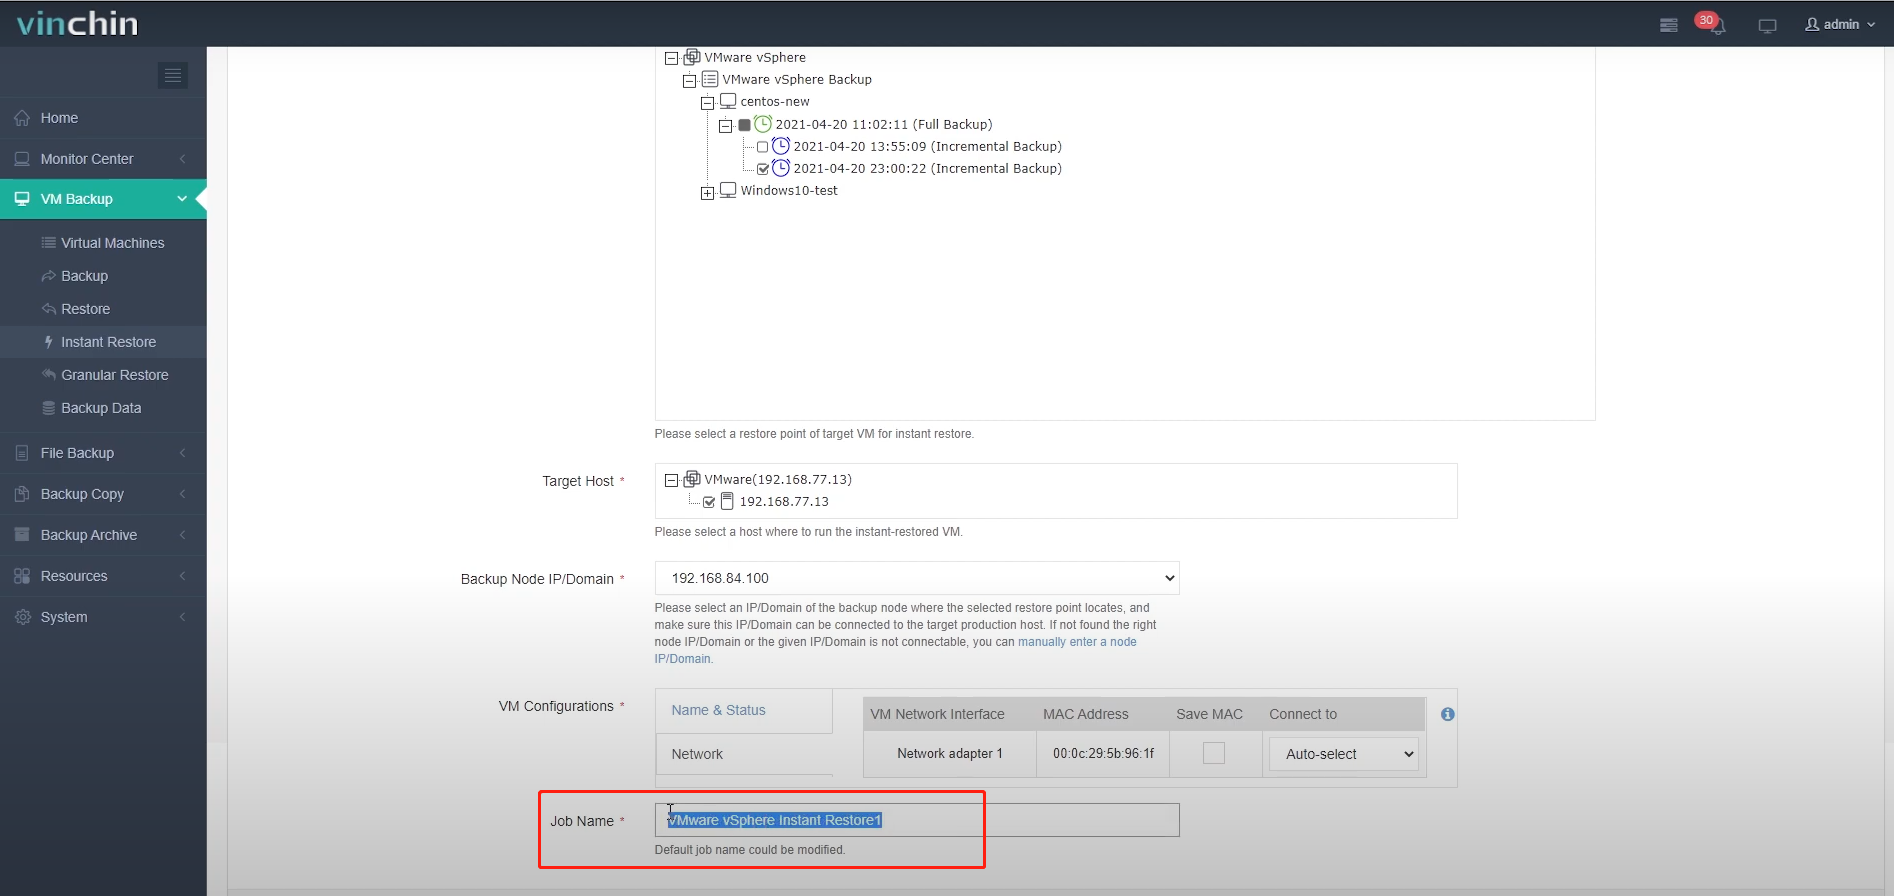
From the restore point selection area, select the restore point of a VM that you want to restore.
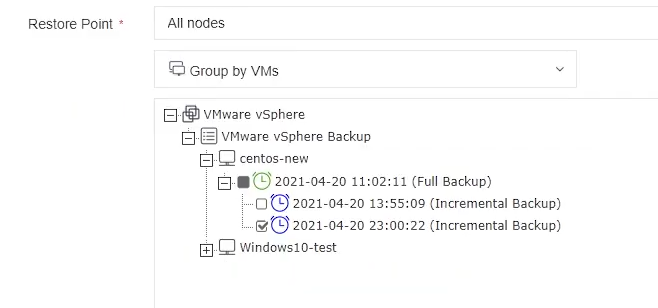
Then expand and select a target host to run the VM.

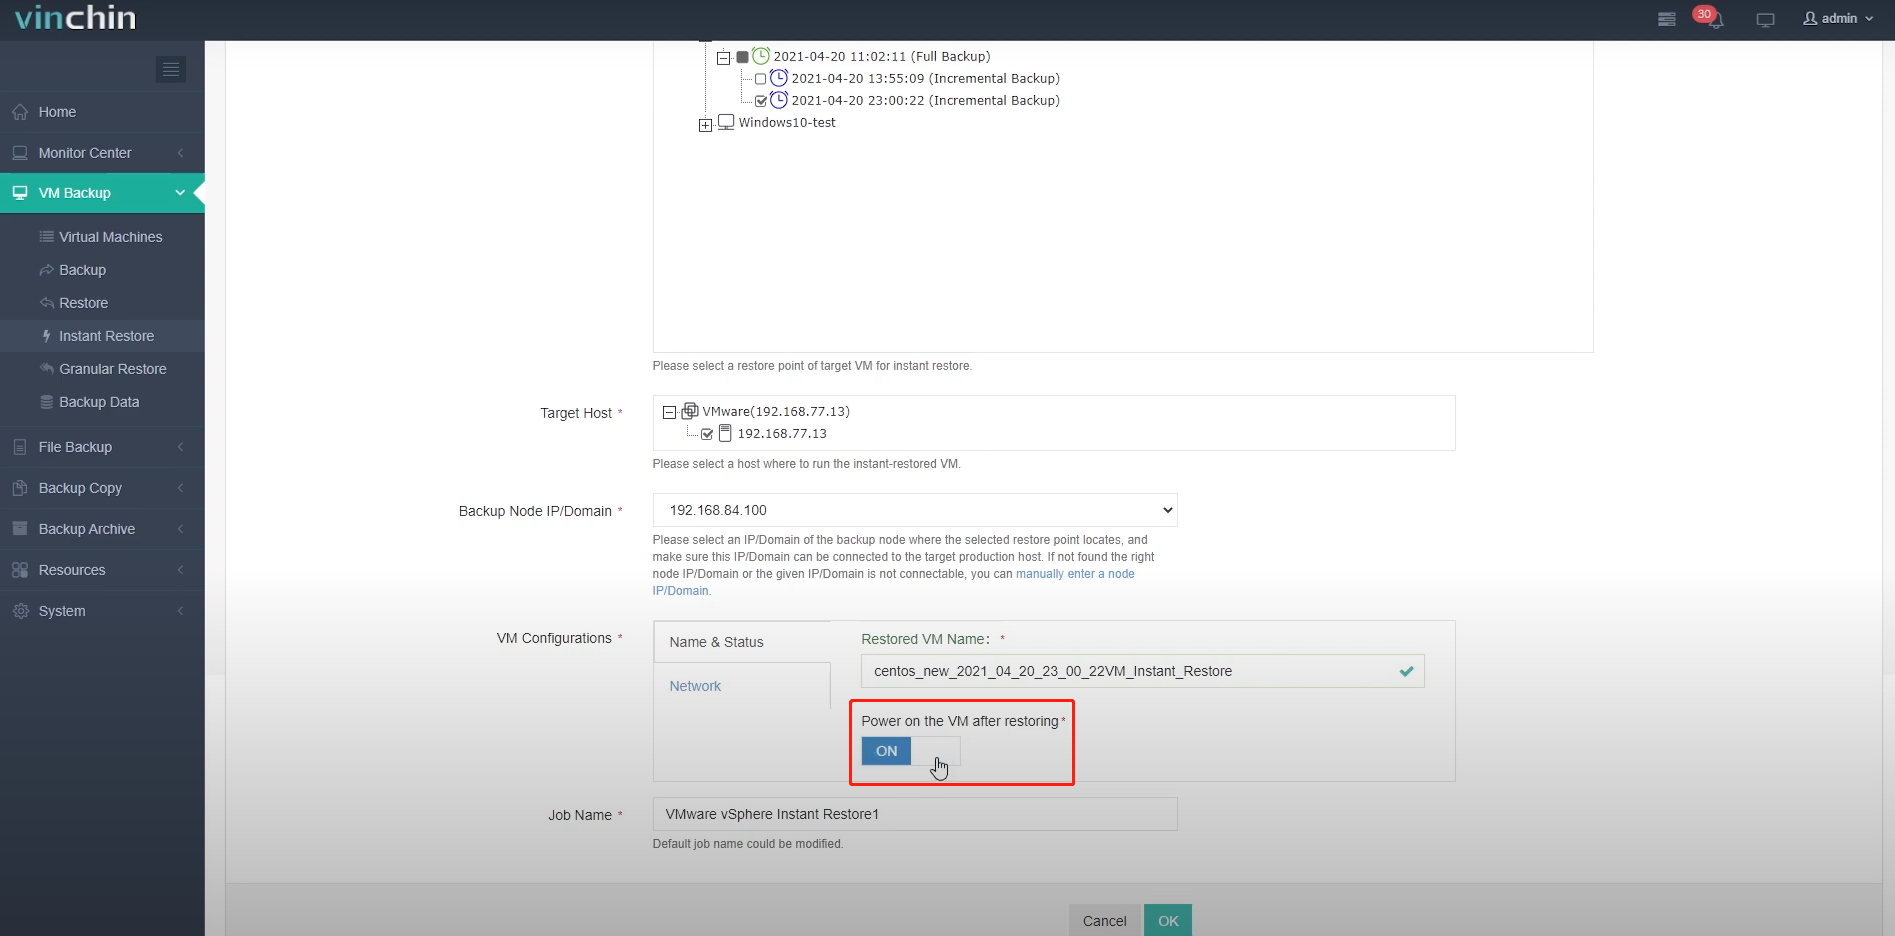
When a Host is selected, Vinchin Backup & Recovery will try to verify the host configurations, it will take a few seconds.

When done, please give the VM a name, and you can choose to power on the VM after instant restore by turning the “Power on the VM after restoring” option on.
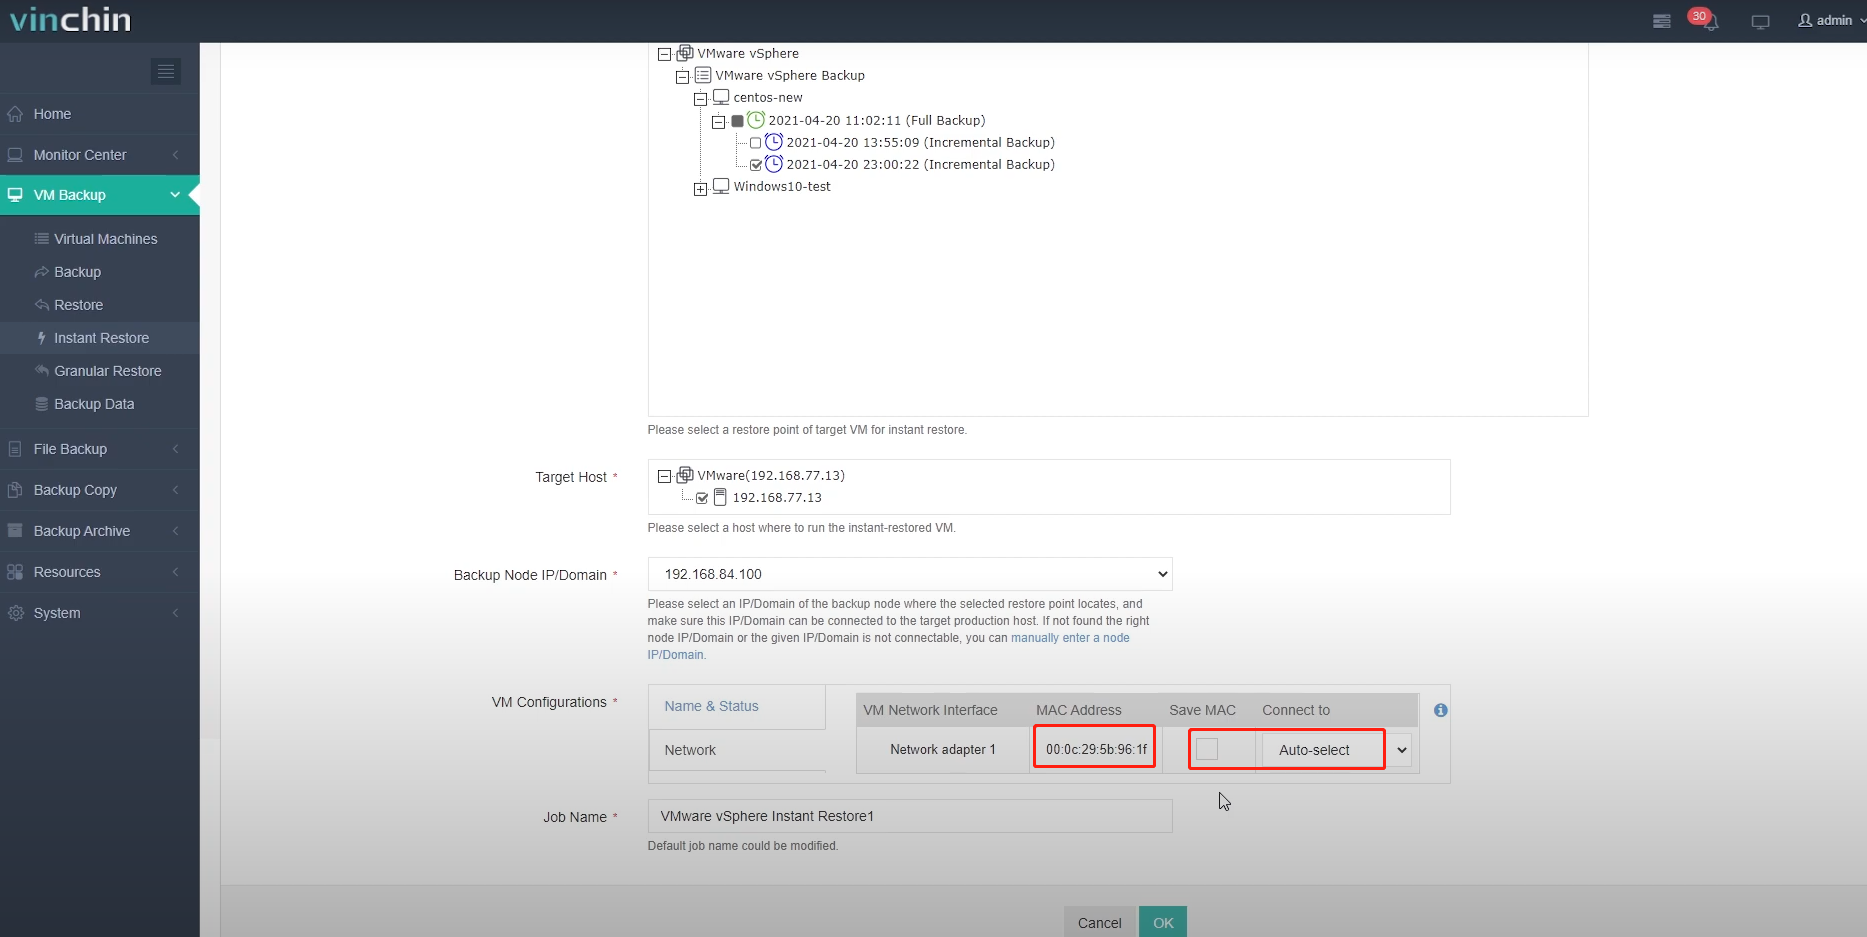
And also, you can choose to keep the mac address of the VM and can choose a network to connect to. Please make sure the original VM is powered off, otherwise, connect the instant restored VM to an isolated network to prevent IP and MAC address conflict.
From the “Job Name” field, you can rename the job if needed, and once done, click on OK to submit the creation of the job.
Once an instant restore job is created, you’ll be redirected to the job list screen.
The newly created instant restore job will remain “Pending” state before you manually start the job, let‘s click on “Options” and then “Start Job” to run the instant restore job.
Let’s click on the job name to check the job details.
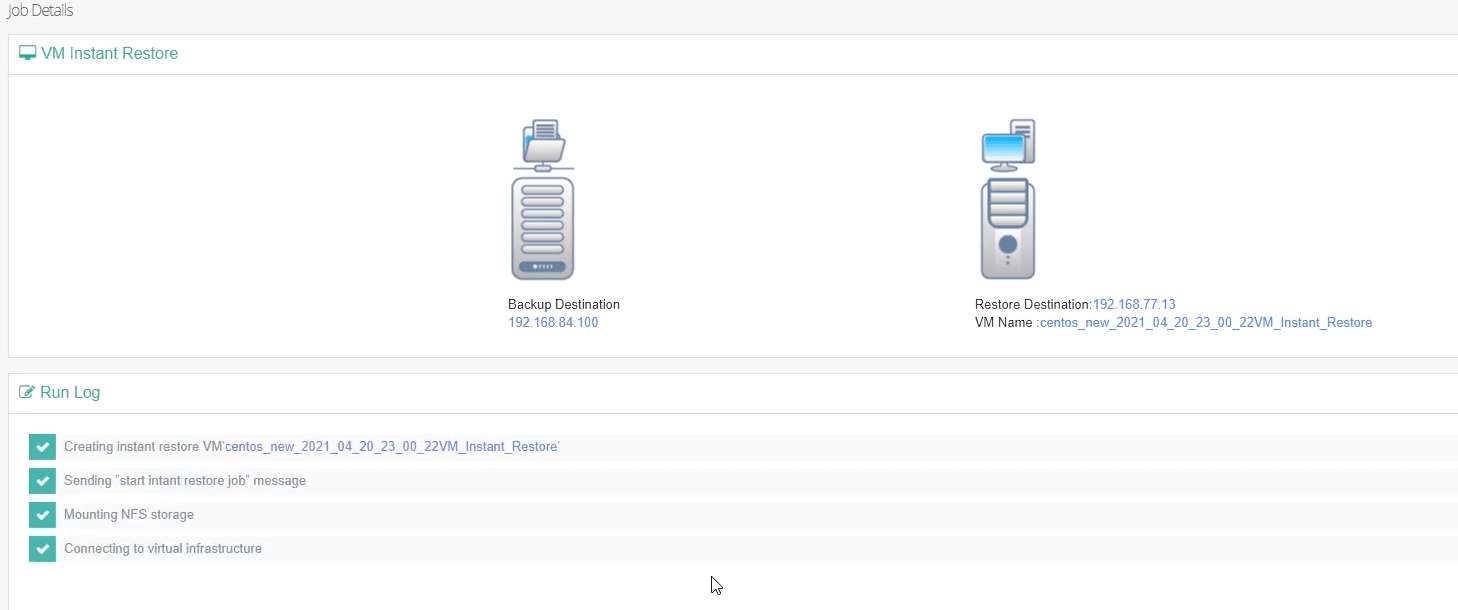
As we can see it only took half a minute to bring the VM back online.
Now let's take a look from the ESXi server, here in the virtual machine list we can see a new virtual machine added by instant restore and it is up and running.

And from the “Datastore” list, we can see an NFS storage mounted by Vinchin Backup & Recovery. That’s where the file system of the instant restored virtual machine resides now.

So next we need to use the live migration feature of Vinchin Backup & Recovery to migrate the virtual machine back to the production storage.
Let's go back to the job list.

Click on “Options” and then “Migration”.

Here we need to select a target host to which the virtual machine will be migrated.
Then configure the virtual machine name, storage, and network, and let’s power on the VMware after migrating.

Next, select a transfer network, or use Vinchin backup proxy if you had deployed one. And configure multithreaded transmission, I’ll use the default 3 threads.

Once done, click on ok to submit, and the migration will begin.
Here you can see the job type changed into migration.

Let's click on the job name again to see some job details.
Here's the instant restored Virtual machine and here's the migrated virtual machine name.

And here are the running logs of the migration process.

The migration will be performed in 3 steps, in order to keep the data consistency of the migrated virtual machine.
In step 1, it will migrate the original backup data to the production storage.
In step 2, it will migrate the cache data during the runtime of the instant restored virtual machine.
In step 3, it will power off the instant restored virtual machine and then migrate some final cache data generated during the powering off process.
When the 3 steps of migration are done, the migrated VM will be powered on. Let’s check from the ESXi server.
As we can see the instant restored virtual machine is powered off, and the migrated virtual machine is up and running.

At this moment, we can go back and terminate the instant restore job.

In the pop-up dialog, there are some important notices about the instant restore and migration features. Click on Ok to confirm.
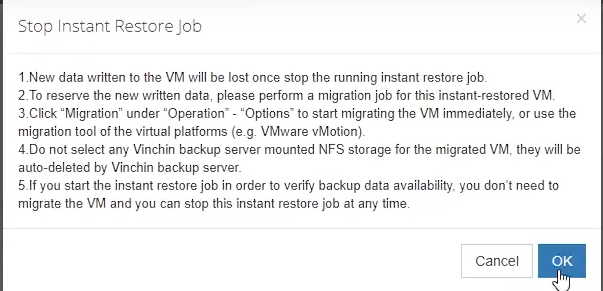
The instant restored virtual machine and the NFS storage will be removed from the ESXi server. Let’s take a look again at the ESXi server.

The instant restored VM had been removed, and also the NFS storage had been unmounted.
That's all for, thanks for instant VM restore and migration on Vinchin backup & recovery.
Share on:


