In this blog, you’ll learn how to install the backup agent of Vinchin Backup & Recovery for Microsoft SQL Server databases protection.
You can now use Vinchin Backup & Recovery to backup SQL Server databases in Windows Server 2008, 2012, 2016, 2017, and 2019 in both virtual machines and physical servers. The first thing we need to do before getting a backup job started, is to install a lightweight backup agent on the source OS that mounts your databases and register it to the Vinchin backup server.
First, open the Vinchin backup server web console from the target Windows system. On the login page, click Download Backup Plugin, select Database Backup Agent from the Type dropdown list, and select Windows from the OS dropdown list. Click Download to get the agent file.
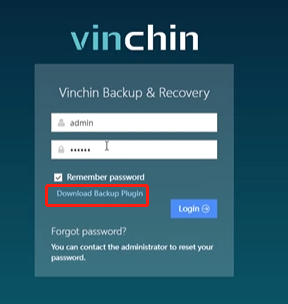
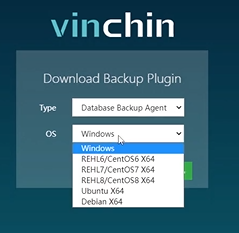
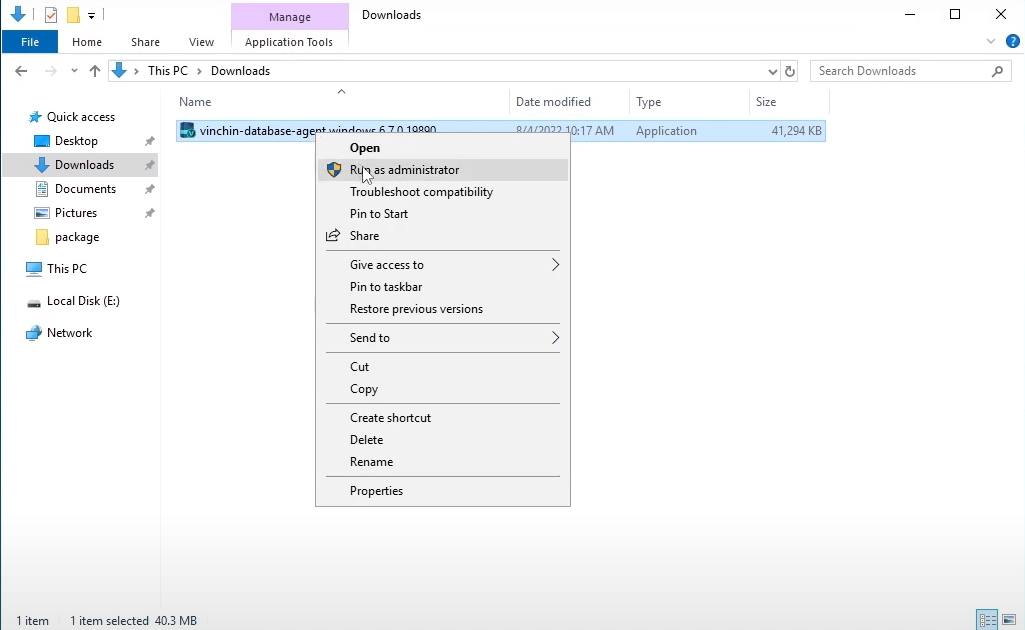
Right click the downloaded executable file, and select Run as administrator to install the backup plugin. You can just follow the wizard to complete the agent installation.
Once completed, you can open the Windows Services screen to check if these 3 services as the demonstration shows are running. If so, it means you have successfully installed the backup plugin on the Windows system.
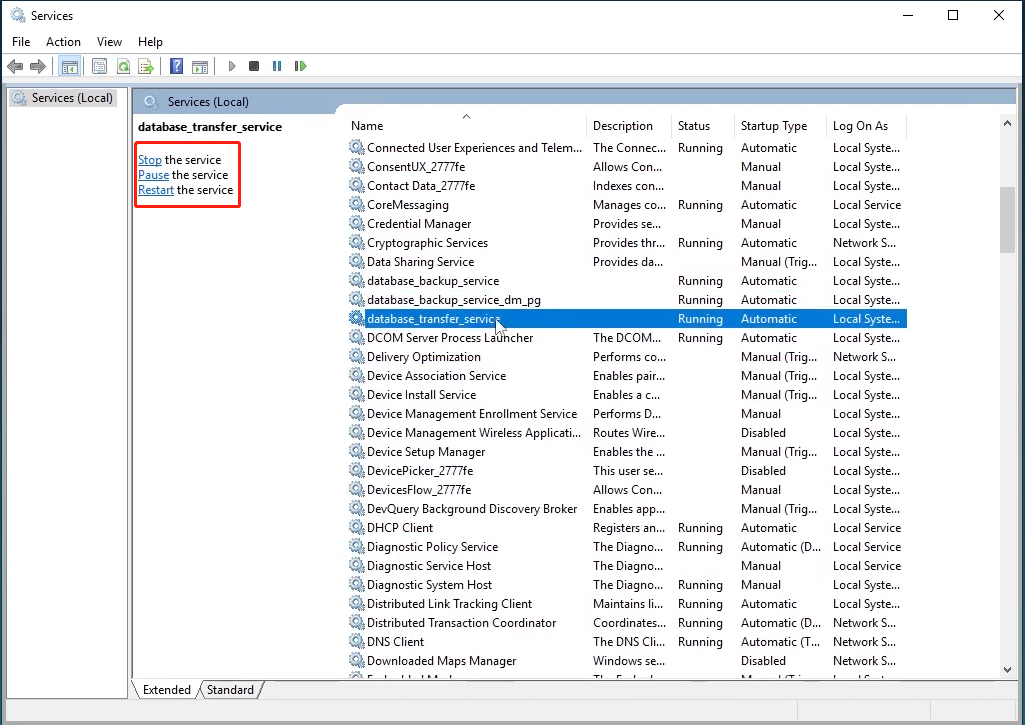
If you want to use Windows administrator to backup the database, you can change to log on to the database backup services as administrator from Windows Services. But first, you need to stop the services “database backup service” and “database transfer service” by right clicking them and selecting Stop. The service “database backup service dm pg” can be left without change.
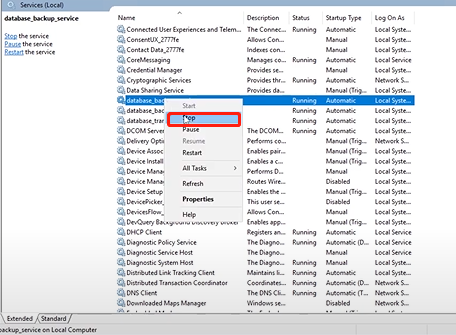
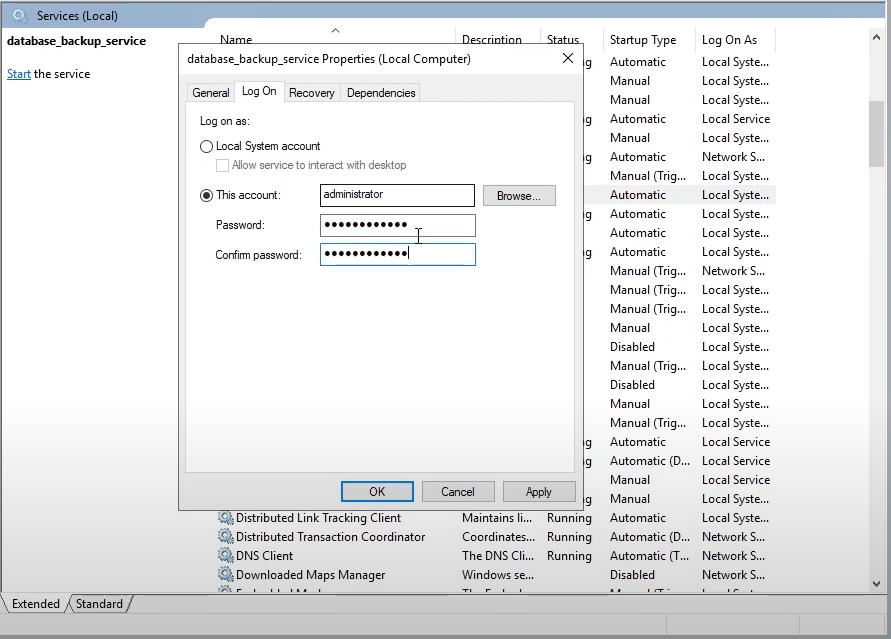
Then, right click on them again to select Properties > Log On > Log on as This account. Fill in the admin account name and password, click Apply and restart each service.

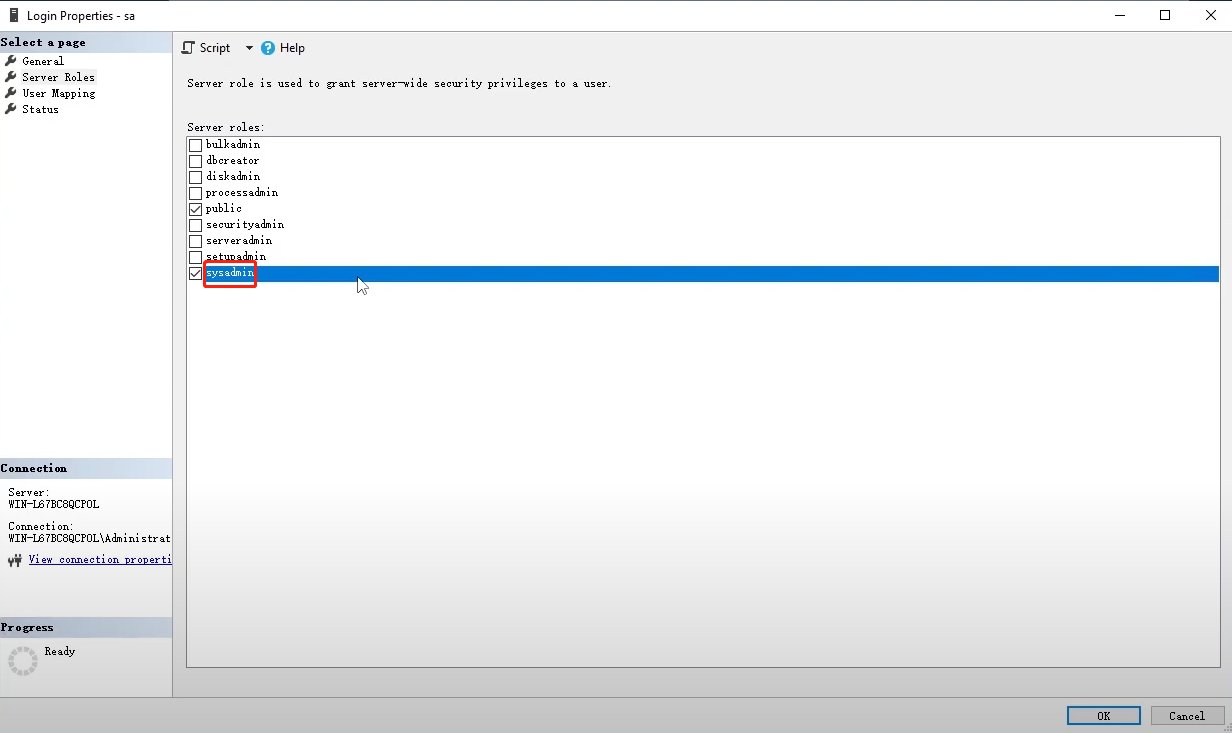
To do a final check here, make sure you have at least sysadmin permission to the SQL Server database you want to backup.
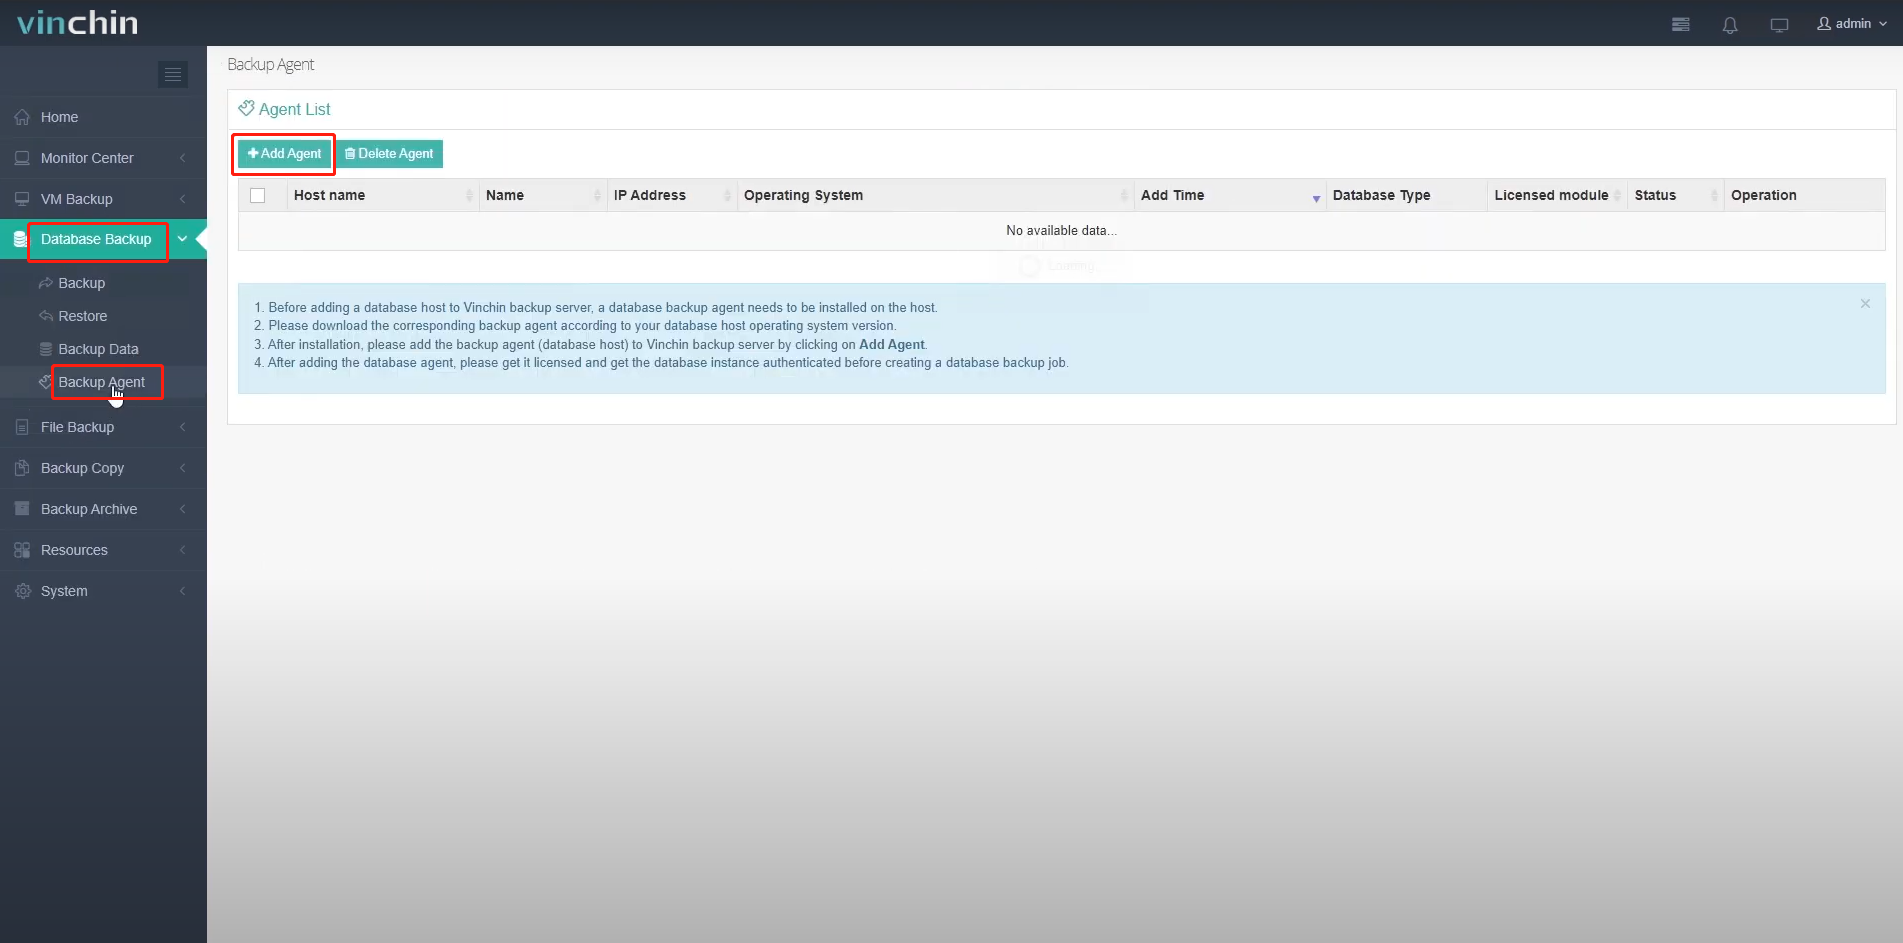
Now, you can re-open and log in the Vinchin backup server web console, go to Database Backup > Backup Agent page. Click Add Agent to register the SQL Server backup agent.
Fill in the IP address and Name of the database server. Please leave the rest 4 port numbers as default and do not change them. Click OK to save the settings.

Click Options, select License, click on the checkbox to get the agent licensed. Then, click Options again, and select Authentication. In the Database Type dropdown list, select SQL Server.


In the Select Instance field, all SQL Server instances on the licensed server will be shown. Select the instance and click Authenticate.

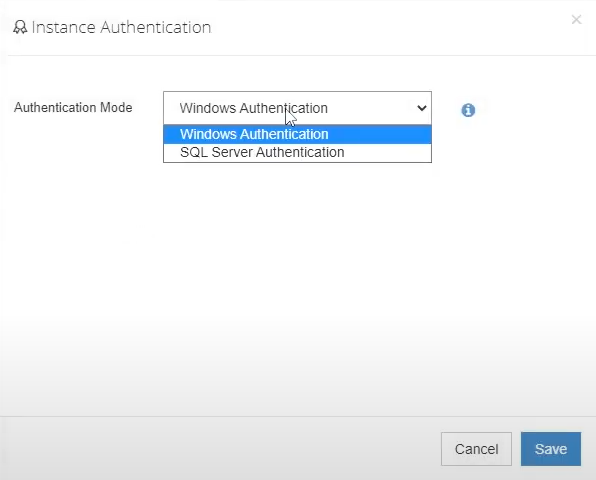
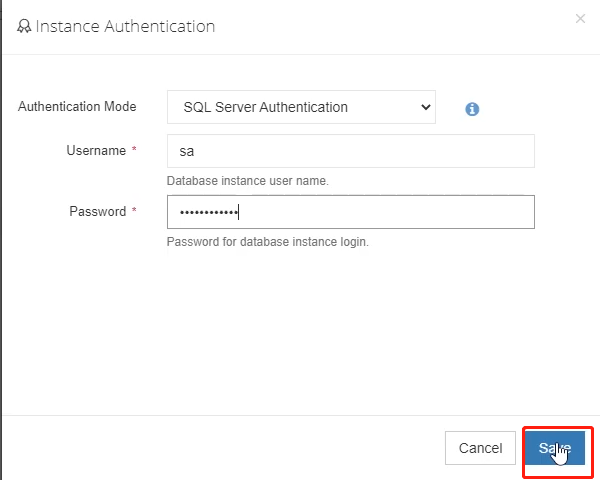
For SQL Server databases, there’re 2 optional authentication modes: Windows Authentication and SQL Server Authentication. If you use Windows Authentication, the backup agent will directly connect the database with your logged-in user permission. If you use SQL Server Authentication, you need to specify the Username and Password of the database that you want to backup. Click Save to submit the settings, and now you’re fully ready for smart SQL Server backups!
That’s all for today’s video! Thanks for watching, and see you next time.
Share on:


