Proxmox VE is a powerful open-source platform for managing virtual machines and containers. Its web-based management interface makes daily tasks simple for IT administrators everywhere. But have you ever wondered why you always type :8006 after your server's IP address? Or maybe you want to change this default port for better security or convenience? In this guide, we’ll explore what the Proxmox default port is, why it matters for your setup, how to change it safely—and what else you should consider along the way.
Understanding Proxmox VE Port Requirements
Before making any changes to network settings or firewall rules in Proxmox VE, it helps to know which ports matter most. Each service in Proxmox listens on specific ports that allow communication between nodes, storage systems, and users.
The main management tool—the web interface—uses a dedicated port with HTTPS encryption by default. Other services use their own ports: SSH provides shell access; VNC and SPICE handle graphical consoles; Corosync manages cluster communication; NFS uses its own standard port if enabled.
According to official documentation, these are key ports used by Proxmox VE:
8006 (TCP): Web interface & REST API over HTTPS
22 (TCP): SSH access for shell login and cluster sync
5900–5999 (TCP): VNC console sessions per VM
3128 (TCP): SPICE proxy for graphical console
5404–5405 (UDP): Corosync cluster communication (requires multicast support)
111 (TCP/UDP): NFS server if used
Each VM console session gets its own dynamic VNC/SPICE port within those ranges. If you run a cluster or expose your node outside a secure LAN, knowing these details helps you set up firewalls correctly—and avoid accidental outages.
What Is the Default Port Number for Proxmox?
By default, the Proxmox VE web interface listens on port 8006, using HTTPS encryption out of the box. To connect from your browser or an API client, enter:
https://your-proxmox-ip:8006
This non-standard port avoids conflicts with common web servers that use 443 (HTTPS) or 80 (HTTP). Using HTTPS ensures all credentials and actions remain encrypted during transmission.
In clusters with multiple nodes, each node’s web interface still uses port 8006 unless changed manually. The REST API also shares this same port number.
Why not just use 443 like most secure web services? Many admins install other applications alongside Proxmox VE—using a unique port prevents accidental overlap with existing sites or dashboards running on standard HTTPS ports.
But remember: obscuring your management portal behind an uncommon port does not provide real security against attackers who scan networks widely—including tools like Shodan that specifically look for open 8006 endpoints worldwide.
Security Implications of Using Default Ports
Changing your management interface away from well-known defaults can reduce noise from automated scans—but it won’t stop determined attackers who know how to find exposed services quickly.
Port 8006 is widely recognized as belonging to Proxmox VE installations; search engines like Shodan index thousands of such endpoints every day. Relying only on “security through obscurity” leaves gaps in protection.
For true hardening:
Combine custom ports with strong passwords.
Use two-factor authentication where possible.
Restrict access at the firewall level so only trusted IPs can reach your admin portal.
Consider fail2ban or similar tools that block repeated failed logins.
Enable geo-blocking if remote access isn’t needed globally.
Deploy client certificate authentication if supported in your environment.
Also note: some software packages may try using common alternative ports like 8080 or even 443—so check carefully before assigning new values to avoid conflicts with other apps such as Graylog or Octoprint running nearby!
How Changing Ports Affects Clustering
If you run a single-node setup, changing the web interface port affects only local browser/API connections. In clustered environments though—where several nodes communicate—it’s important all administrators know which address/port combination applies per node when logging in directly via browser or automation scripts.
Cluster synchronization itself relies mainly on Corosync UDP traffic over ports 5404–5405—not HTTP/S traffic over 8006—but some scripts/tools may expect defaults unless told otherwise! Always update documentation shared among team members when making such changes across multiple hosts.
Method 1. How to Change the Proxmox Default Web Console Port Using iptables Port Redirection?
This approach keeps Proxmox listening internally on its usual port but redirects another external-facing port—often 443—to it transparently using iptables rules at the OS level. This means users can simply visit https://your-proxmox-ip without typing :8006, while backend logic remains unchanged.
Before starting:
1. Make sure no other service already uses TCP/443 on this host.
2. Back up current iptables rules (iptables-save > /root/iptables-backup.txt).
Now follow these steps:
1. Open an SSH session or local terminal window on your server.
2. Redirect incoming TCP/443 traffic to TCP/8006:
iptables -t nat -A PREROUTING -p tcp --dport 443 -j REDIRECT --to-port 8006
For IPv6 addresses:
ip6tables -t nat -A PREROUTING -p tcp --dport 443 -j REDIRECT --to-port 8006
3. To make these rules survive reboots:
   apt-get install iptables-persistent netfilter-persistent
   netfilter-persistent save
After applying these commands:
However—this does NOT close direct access via :8006! To restrict unwanted connections:
ufw deny 8006/tcp && ufw reload
Or limit allowed IPs explicitly using iptables:
iptables -A INPUT -p tcp --dport 8006 ! -s <trusted-IP-or-subnet> -j DROP
Always test connectivity before logging out! Keep a direct console session open until confirmed working.
Method 2. How to Change the Proxmox Default Web Console Port via Setting Up a Reverse Proxy With nginx?
For more control—including SSL certificates from trusted authorities—you might prefer placing nginx as a reverse proxy in front of pveproxy:
First ensure no other service binds TCP/443 locally!
1. Install nginx:
apt-get install nginx
2. Remove any default site configs:
    rm /etc/nginx/sites-enabled/default || true
    rm /etc/nginx/sites-available/default || true
3. Create /etc/nginx/sites-available/proxmgr with contents below:
    server {
        listen 443 ssl;
        server_name proxmox.example.com;

        # Use Let's Encrypt certs if available!
        ssl_certificate /etc/letsencrypt/live/proxmox.example.com/fullchain.pem;
        ssl_certificate_key /etc/letsencrypt/live/proxmox.example.com/privkey.pem;

        location / {
            proxy_pass https://127.0.0.1:8006;
            proxy_set_header Host $host;
            proxy_set_header X-Real-IP $remote_addr;
            proxy_set_header X-Forwarded-For $proxy_add_x_forwarded_for;
            proxy_set_header X-Forwarded-Proto $scheme;
            proxy_http_version 1.1;
            proxy_set_header Upgrade $http_upgrade;
            proxy_set_header Connection "upgrade";
            proxy_buffering off;
            client_max_body_size 0; # Adjust if uploading large ISOs/backups!
            proxy_connect_timeout 3600s;
            proxy_read_timeout    3600s;
            send_timeout          3600s;

            # Avoid SSL verification errors internally if self-signed cert used by pveproxy:
            proxy_ssl_verify off;
        }
    }
4. Enable new config & restart nginx:
    ln -s /etc/nginx/sites-available/proxmgr /etc/nginx/sites-enabled/
    systemctl restart nginx
5. Restrict pveproxy so only localhost can connect directly by editing /etc/default/pveproxy:
     ALLOW_FROM="127..1"
     DENY_FROM="all"
     POLICY="allow"
Then restart pveproxy:
systemctl restart pveproxy
Now only nginx talks directly to :8006 while end-users connect securely via :443—with valid certificates!
Method 3: How to Change the Proxmox Default Web Console Port by Editing Configuration Files Directly?
Some advanced users attempt editing /etc/default/pveproxy or /etc/pve/datacenter.cfg hoping to change listening ports natively—for example adding PORT=8443. However not all versions honor these settings consistently since many values are hardcoded within Perl source files themselves!
If attempting this route anyway,
1) Back up both files first,
2) Make small incremental edits,
3) Restart pveproxy (systemctl restart pveproxy) after each change,
4) Test thoroughly before closing root sessions!
Be aware future upgrades may overwrite manual tweaks—or break them entirely.
Method 4: How to Change the Proxmox Default Web Console Port by Modifying Source Code (Not Recommended)?
Editing Perl source code inside /usr/share/perl5/PVE/API2Tools.pm etc., replacing every instance of 8006 with another value is risky business! Updates will likely revert changes without warning—and mistakes could lock everyone out completely until fixed via rescue mode shell access.
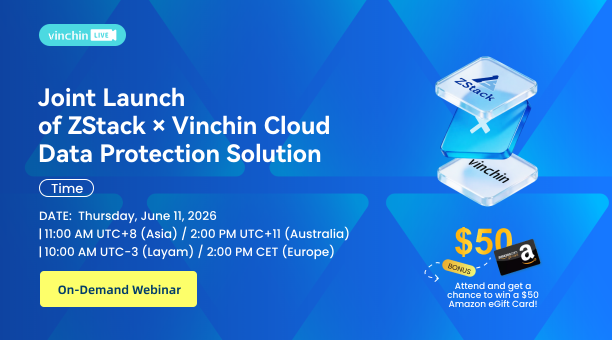
Vinchin – Enterprise‑Level Backup Solution for Your Virtualized Infrastructure
As you enhance security and reliability in your Proxmox environment, robust backup becomes essential for business continuity and disaster recovery planning.
Vinchin Backup & Recovery stands out as a professional enterprise-level virtual machine backup solution supporting more than fifteen mainstream virtualization platforms—including full compatibility with Proxmox VE clusters alongside VMware vSphere, Hyper-V, oVirt, OLVM, RHV, XCP-ng, XenServer, OpenStack, ZStack, and others.
Designed specifically for modern virtualized data centers, Vinchin delivers comprehensive VM protection features such as forever-incremental backup—which minimizes storage usage and speeds up backup cycles—as well as advanced deduplication and compression technologies that significantly reduce backup size without sacrificing performance.
Additionally, Vinchin enables seamless cross-platform V2V migration so you can move workloads between different hypervisors effortlessly whenever needed.
Other highlights include flexible scheduling options, granular restore capabilities down to file level within VMs, instant recovery support, cloud/tape archiving integration, multi-threaded transfer acceleration, data encryption at rest/in transit, GFS retention policy controls, throttling policies for bandwidth optimization, CBT-based fast incremental backups, SpeedKit acceleration modules tailored per platform—and much more.
Managing backups is straightforward thanks to Vinchin’s intuitive web-based console.
To back up a specific VM—for example in your Proxmox infrastructure—simply:
1) Select the desired VM(s);

2) Choose appropriate backup storage;

3) Define suitable backup strategies;

4) Submit the job—all within minutes.

Vinchin enjoys high ratings worldwide among IT professionals seeking reliable data protection across diverse virtualization stacks.
You’re invited to experience Vinchin risk-free—a full-featured free trial is available for sixty days.
Click below now to download the installer and deploy easily:
FAQs About Changing the Proxmox Default Port
Q1: Can I switch my web interface straight onto standard HTTPS (port 443)?
A1: Not directly through native settings—but yes by redirecting traffic via iptables/NAT rules or setting up an external reverse proxy like nginx listening on 443 forwarding requests internally onto Proxmox's default port (usually still 8006).
Q2: What should I do if I'm locked out after changing network settings?
A2: Boot into rescue mode using KVM/IPMI/iLO console access then restore previous copies of /etc/default/pveproxy, revert firewall rules manually—or undo recent NAT entries blocking legitimate logins.
Q3: Will moving my admin portal affect clustering features?
A3: No—as long as corosync UDP traffic remains unblocked between nodes clustering continues unaffected; however always inform teammates about updated login URLs per-node especially when automating tasks across clusters.
Conclusion
The default Proxmox VE management interface runs securely over HTTPS at port 8006—but admins can easily adjust how they connect using NAT redirection firewalls reverse proxies or config tweaks as needed.
Always back up both guests and host configs before experimenting.
For robust backup coverage across all platforms consider Vinchin's proven solution designed expressly around virtual infrastructure needs.