Cloud infrastructure powers today’s IT world. Amazon EC2 gives you flexible virtual machines in the cloud; Terraform lets you manage them as code. When you combine EC2 with Terraform, you gain speed, repeatability, and control over your environment. Curious how to get started—and how to go beyond the basics? Let’s dive in.
What Is AWS EC2
Amazon Elastic Compute Cloud (EC2) is a core service from Amazon Web Services that provides scalable virtual servers on demand. You can launch new instances quickly or stop them when not needed—all through an easy-to-use web console or API calls. EC2 supports many operating systems such as Linux and Windows Server, offers different instance types for various workloads, and lets you attach persistent storage or ephemeral disks as needed.
With features like elastic IP addresses and security groups (virtual firewalls), EC2 forms the backbone of most AWS deployments—from simple web servers to complex distributed applications.
What Is Terraform
Terraform is an open-source infrastructure-as-code tool developed by HashiCorp. It allows you to define cloud resources using configuration files written in HashiCorp Configuration Language (HCL). You can automate provisioning of servers, networks, databases—almost anything supported by your cloud provider.
Terraform tracks changes through its state file so you always know what’s deployed versus what’s defined in your codebase. It works across many platforms including AWS, Azure, Google Cloud Platform—and even on-premises environments via plugins called providers.
Why Use EC2 With Terraform
Managing individual EC2 instances by hand can be slow and error-prone—especially at scale or across multiple environments. That’s where combining EC2 with Terraform shines:
Define your entire infrastructure—including VMs—in reusable code
Apply consistent configurations across dev/test/prod environments
Track every change through version control
Roll back mistakes easily if something goes wrong
Use advanced features like count or for_each to deploy multiple instances efficiently
Organize complex setups using modules for better reusability
This approach saves time while reducing human errors—a win-win for any operations administrator!
Method 1. Deploying EC2 With Terraform
Deploying an Amazon EC2 instance using Terraform is straightforward once you have the right tools installed and credentials set up securely.
First things first: make sure you have an AWS account with permissions to create resources; install Terraform CLI version 1.2 or newer; install AWS CLI; then configure your credentials safely—never hardcode secrets into source files! Prefer IAM roles if running inside AWS itself; otherwise use environment variables or run aws configure.
Setting Up Your Project Directory
Start by creating a dedicated directory for your project:
mkdir learn-terraform-get-started-aws
cd learn-terraform-get-started-aws
Writing Your First Terraform Configuration
Create a file named terraform.tf:
terraform {
  required_providers {
    aws = {
      source  = "hashicorp/aws"
      version = "~> 5.92"
    }
  }
  required_version = ">= 1.2"
}
This block specifies which provider plugin (AWS) to use—and enforces compatible versions of both provider and core tool.
Next create main.tf:
provider "aws" {
  region = "us-west-2" # Specify region here
}

data "aws_ami" "ubuntu" {
  most_recent = true # Always pick latest image
  filter {
    name   = "name"
    values = ["ubuntu/images/hvm-ssd-gp3/ubuntu-noble-24.04-amd64-server-*"]
  }
  owners = ["099720109477"] # Canonical's official owner ID
}

resource "aws_instance" "app_server" {
  ami           = data.aws_ami.ubuntu.id # Use AMI found above
  instance_type = "t2.micro"             # Free tier eligible type
  tags = {
    Name = "learn-terraform"
  }
}
This configuration sets up your provider region; finds the latest Ubuntu AMI; creates an instance tagged “learn-terraform.”
Configuring AWS Credentials Securely
Set credentials via environment variables:
export AWS_ACCESS_KEY_ID=your_access_key
export AWS_SECRET_ACCESS_KEY=your_secret_key
Or run:
aws configure
Avoid storing secrets directly in .tf files! For production use consider IAM roles attached to compute nodes.
Formatting & Initializing Your Workspace
Format all config files for readability:
terraform fmt
Initialize project workspace:
terraform init
Terraform downloads necessary plugins based on your configuration files.
Validating & Applying Your Configuration
Check syntax correctness:
terraform validate
Preview planned changes before applying them:
terraform plan
Apply configuration to create resources:
terraform apply
Type yes when prompted—then watch as your new instance appears!
Verifying Deployment Success
Open the AWS EC2 Console online; confirm that your VM is running as expected under Instances view.
Inspecting State & Outputs
List managed resources tracked by state file:
terraform state list
Show detailed attributes of current deployment:
terraform show
You’re now managing this VM entirely through code!
Configuring Instance Details (Advanced Customization)
Once basic deployment works—it’s time to customize further! Real-world workloads often need secure access rules (security groups), SSH key pairs for login access (key_name), startup scripts (user_data), extra storage volumes (ebs_block_device) or network settings (subnet_id). Here’s how:
Add these arguments inside your resource block:
resource "aws_instance" "app_server" {
  ami           = data.aws_ami.ubuntu.id
  instance_type = "t3.small"

  vpc_security_group_ids = [aws_security_group.web_sg.id] # Attach security group

  key_name      = aws_key_pair.deployer.key_name          # SSH key pair

  user_data     = file("init-script.sh")                  # Run script at boot

  ebs_block_device {                                      # Extra EBS volume
    device_name           = "/dev/xvdb"
    volume_size           = 20
    delete_on_termination = true
    volume_type           = "gp3"
    encrypted             = true
  }

  tags         = { Name="customized-instance" }
}
# Define referenced resources elsewhere in main.tf!
# See https://registry.terraform.io/providers/hashicorp/aws/latest/docs/resources/instance#argument-reference for full list.
Security groups let you control inbound/outbound traffic—think of them as firewalls around each VM . Key pairs enable secure SSH logins without passwords; user data automates initial setup tasks like installing packages or configuring services at boot time; EBS volumes provide persistent disk space beyond root filesystem defaults.
Method 2. Managing Existing EC2 With Terraform
Already have live VMs running outside of code? No problem—you can bring existing infrastructure under management using Terraform’s import feature so future changes are tracked automatically!
Here’s how:
Identifying Your Target Instance
Find its unique ID from within the AWS Console—it looks like i-0123456789abcdef0.
Writing Resource Block For Import
In main.tf, add this placeholder resource definition:
resource "aws_instance" "existing_vm" {}
# Leave arguments empty initially!
Importing The Existing Instance
Run this command from terminal:
terraform import aws_instance.existing_vm i-0123456789abcdef0
Terraform maps that real-world VM into its internal state tracking system—but doesn’t yet know all its settings!
Refreshing And Updating Configuration
Refresh local state info:
terraform refresh
Now update the resource block in main.tf so it matches actual attributes seen via:
terraform show aws_instance.existing_vm
Fill out fields like AMI ID (ami), type (instance_type), tags etc., matching what exists already—or risk accidental replacement next time you run apply!
Handling Import Challenges (Troubleshooting Tips)
Imports sometimes fail due to mismatched attributes between reality vs config file—or because some properties aren’t supported natively by resource blocks yet. If errors occur:
1. Double-check attribute names/types match exactly between console output vs HCL config.
2. Remove problematic items from state using:
terraform state rm aws_instance.existing_vm
3. Re-import after correcting typos/mismatches.
4. For team projects: always store remote backend state files securely—for example S3 + DynamoDB locks—to avoid conflicts during collaborative edits.
Once imported successfully—you can now manage updates just like any other resource defined in code!
Backup EC2 Virtual Machines With Vinchin Backup & Recovery
To ensure robust protection for critical workloads managed with Amazon EC2 and other mainstream virtualization platforms, organizations turn to enterprise-level solutions such as Vinchin Backup & Recovery. This professional backup software supports more than fifteen environments—including VMware vSphere/ESXi & vCenter Server, Microsoft Hyper-V clusters & standalone hosts, Proxmox VE clusters/nodes, oVirt/RHV/OLVM/XCP-ng/XenServer/OpenStack/ZStack clouds—as well as Amazon EC2 itself—delivering comprehensive coverage across hybrid infrastructures.
Vinchin Backup & Recovery offers a rich feature set tailored for enterprise needs: forever-incremental backup technology maximizes efficiency by only transferring changed blocks after the initial full backup; inline deduplication and compression reduce storage requirements and bandwidth usage; scheduled backups with GFS retention policies ensure reliable restore points are always available; granular restore enables recovery down to individual files within a VM image; cross-platform VMs migration simplifies transitions between heterogeneous environments—all accessible through an intuitive web-based interface designed for operational simplicity.
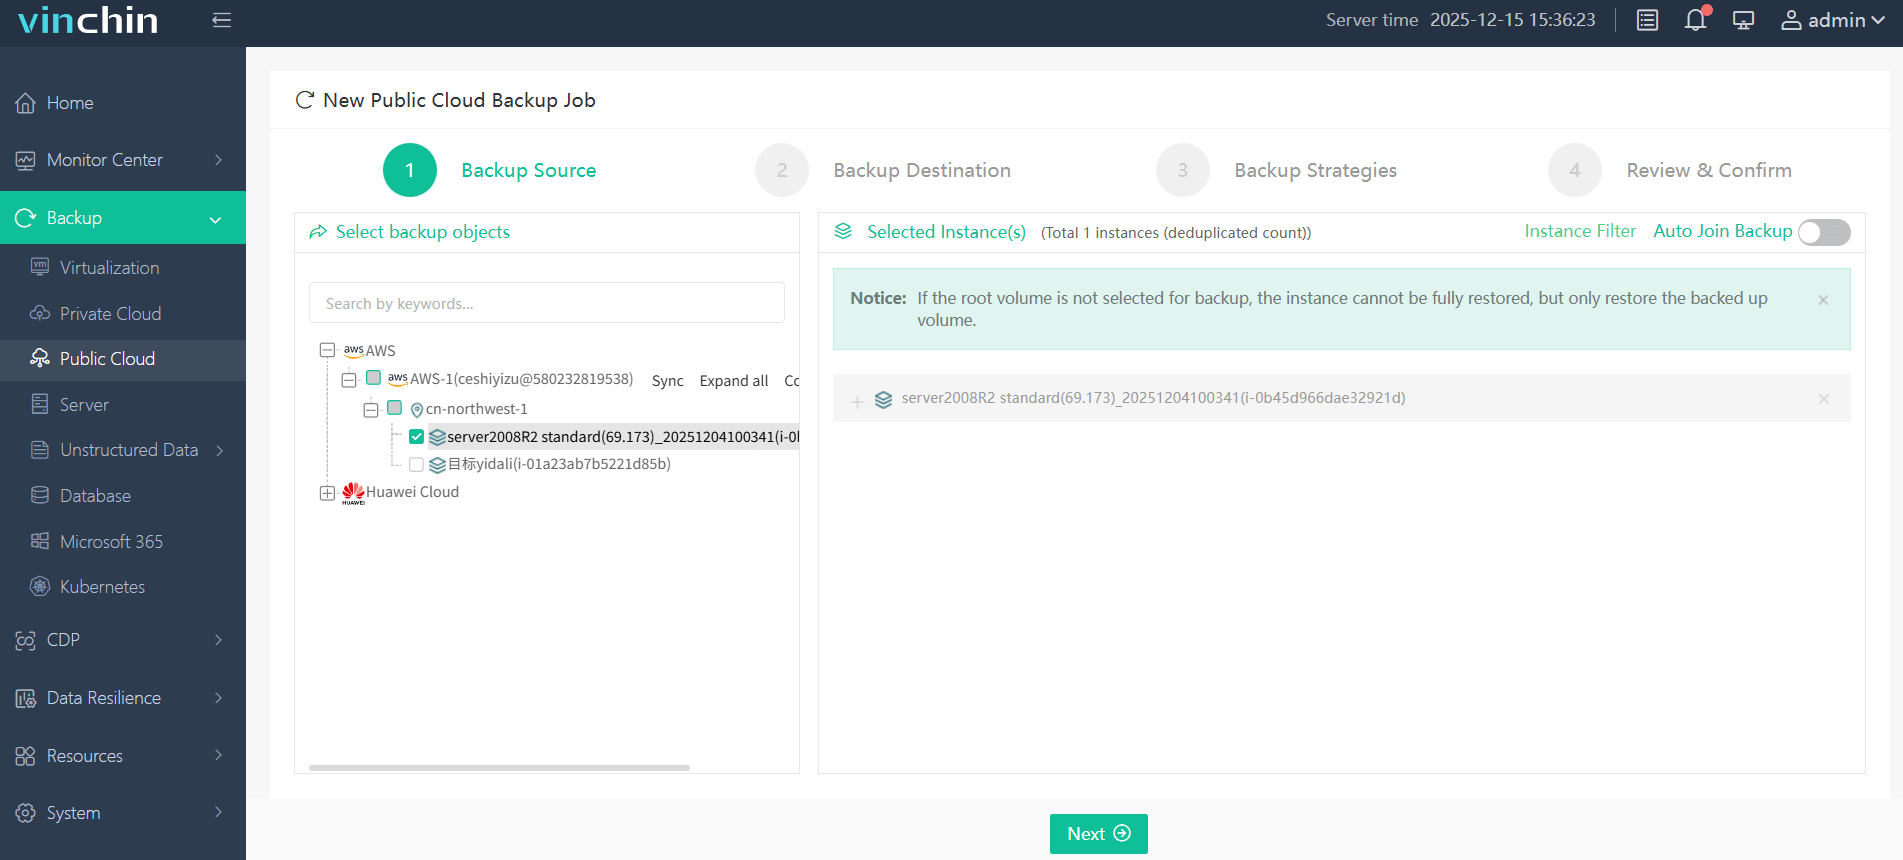
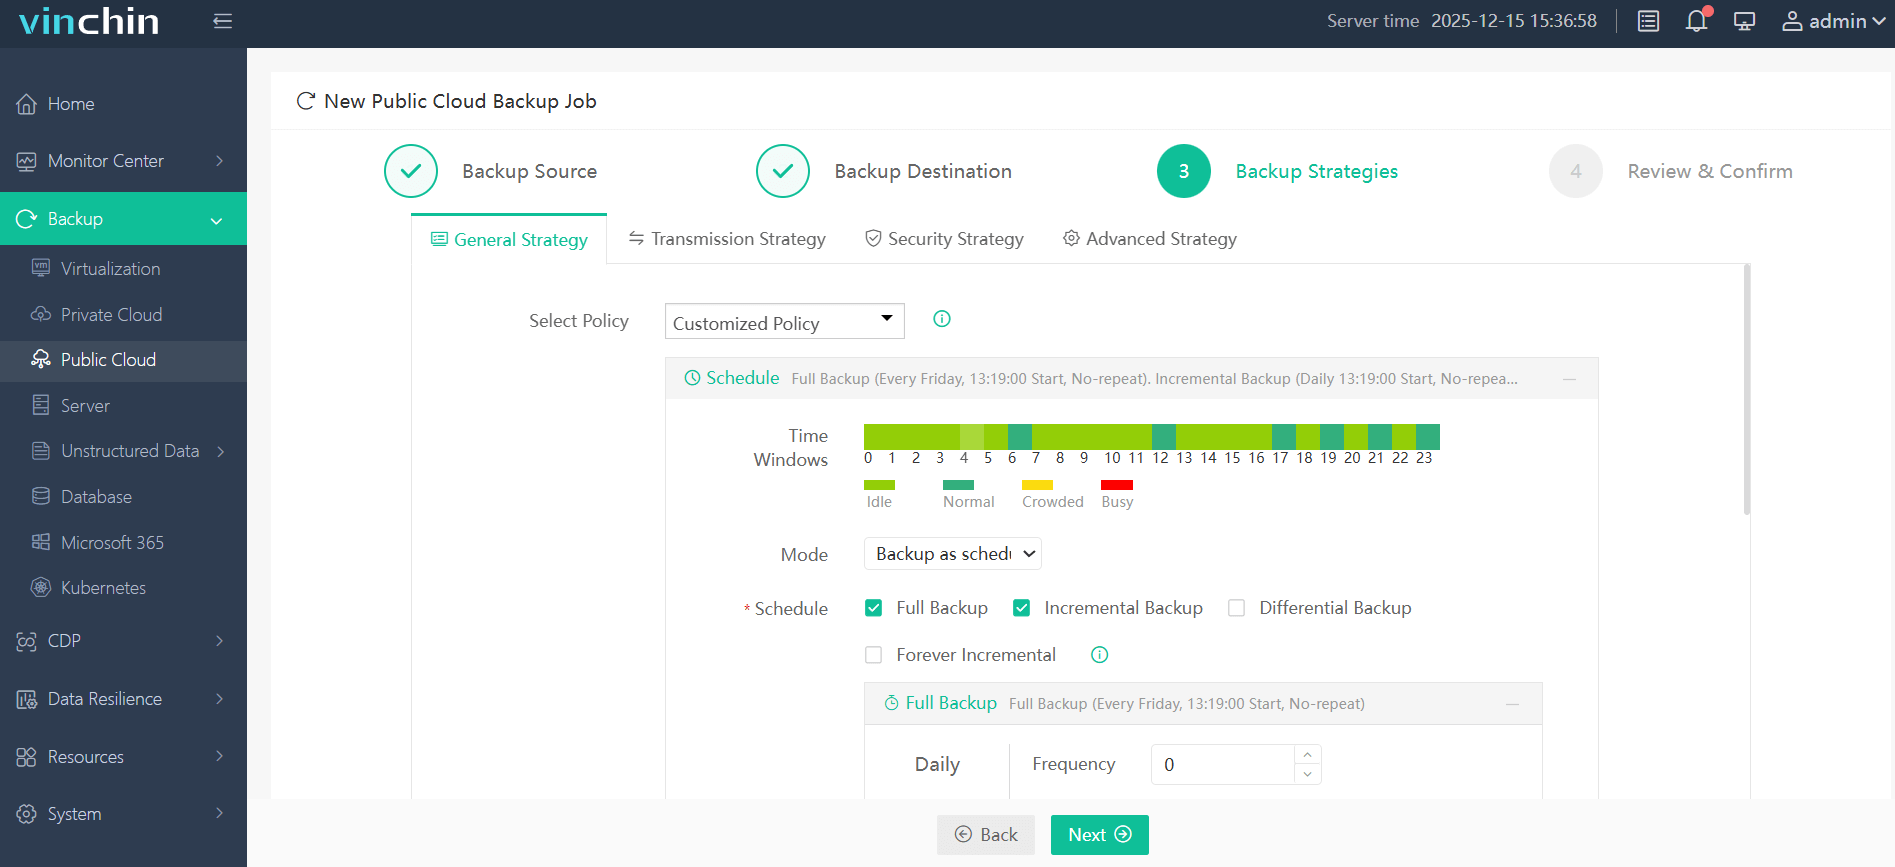
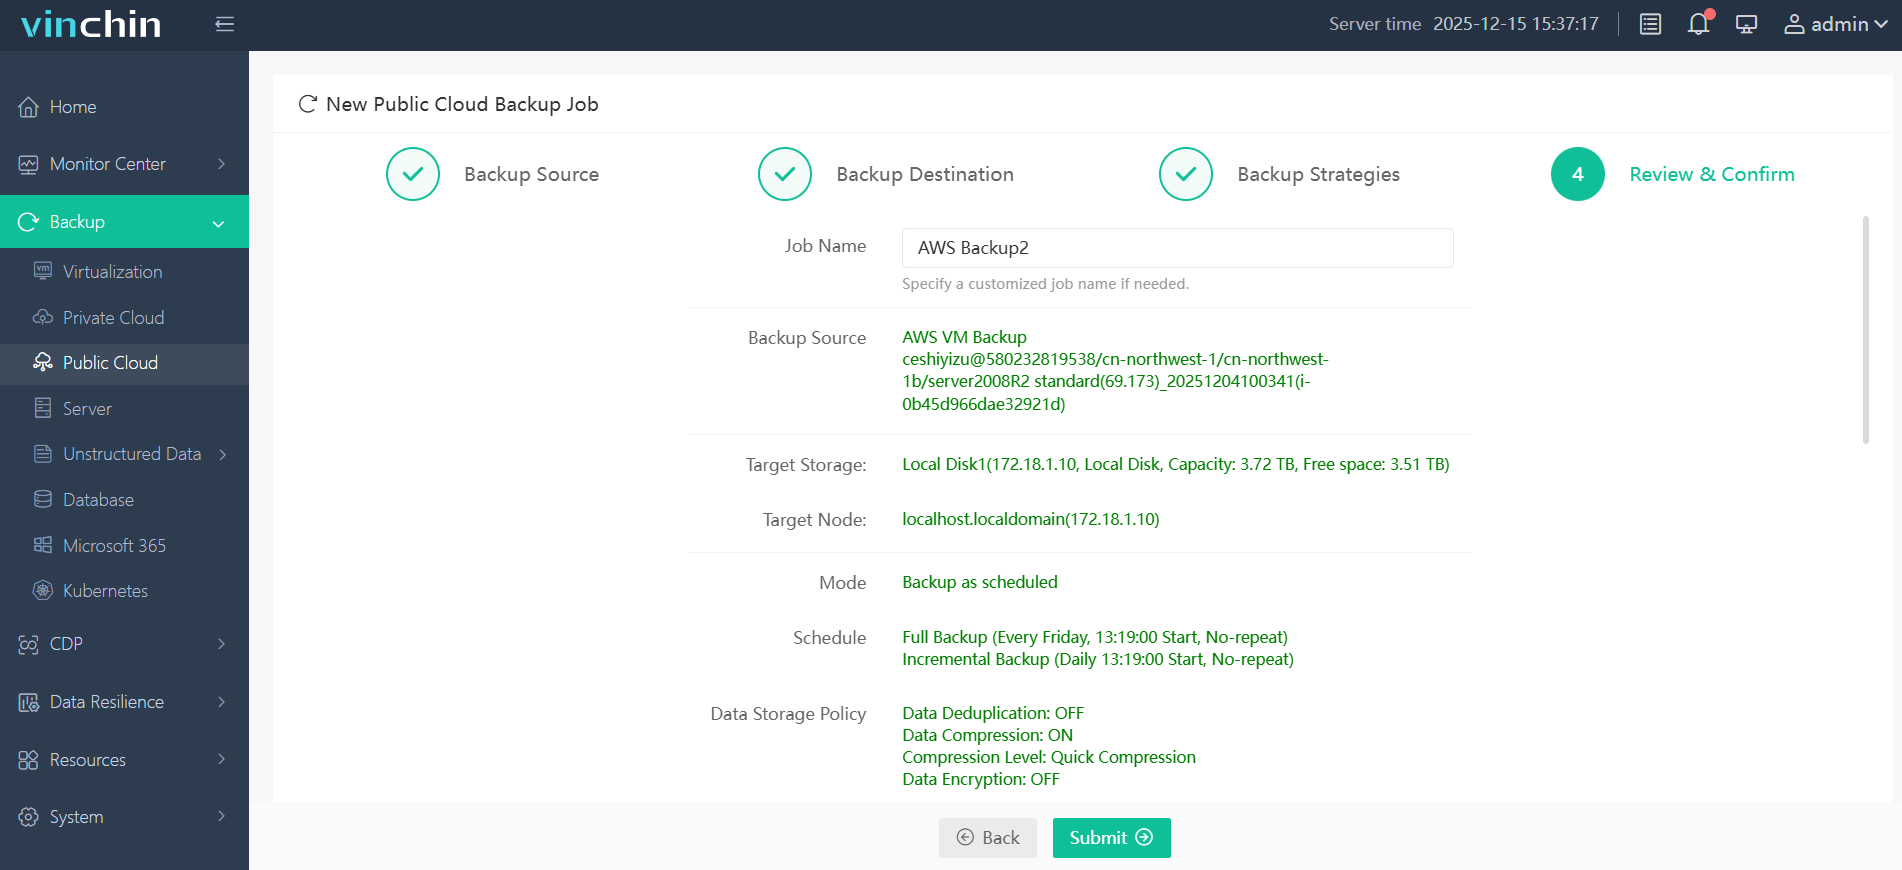
To backup EC2 instance with Vinchin Backup & Recovery, follow these steps:
1. Select the EC2 instance to be backed up.
2. Select the backup destination.

3. Select the backup strategies.
4. Review and submit the job.
Start your 60-day free trial of Vinchin Backup & Recovery to experience its secure, resource-efficient backup solutions. Or, contact us for a customized plan tailored to your IT needs.
EC2 Terraform FAQs
Q1: Can I automate stopping multiple idle VMs nightly using ec2 terraform?
A1: Yes—define several resources using either count or module patterns plus scheduled Lambda triggers outside TF if needed.
Q2: How do I rotate SSH keys across all my ec2 terraform-managed servers?
A2: Update each resource's key_name; upload new public keys via AWS Console/API then rerun terraform apply.
Q3: What should I do if my team gets frequent “state lock” errors during collaborative work?
A3: Move backend state tracking into S3/DynamoDB combo so only one person edits at once.
Q4: Can ec2 terraform help me auto-scale based on CPU load spikes?
A4: Yes—combine Auto Scaling Groups plus policies/resources managed via TF configs then preview/apply changes normally.
Conclusion
Combining ec2 terraform unlocks powerful automation while keeping cloud operations safe and predictable—even at scale! For reliable backups of every critical workload—including Amazon VMs—Vinchin delivers advanced protection made easy with just a few clicks.


