English


How to Migrate Hyper-V VM from One Datacenter to Another in 2 Methods?
2024-03-01 | Dan Zeng
Migrating virtual machines to a different datacenter is not supported in Hyper-V. Datacenter is a logical concept in Hyper-V for organizing and managing virtualization resources. Hyper-V virtual machines can not be migrated not across datacenters.
If you need to migrate Hyper-V virtual machines from one datacenter to another, you usually need to use other tools or methods to do so, such as using the virtual machine export and import feature, or using third-party virtualization management software.
Here are two methods for moving virtual machines from one datacenter to another:
How to export and import VM via Hyper-V Manager?
With Hyper-V Manager's export and import capabilities, virtual machines can be seamlessly moved from one datacenter to another. Below, a step-by-step process for efficiently executing a migration is outlined.
Step1: Export the virtual machine
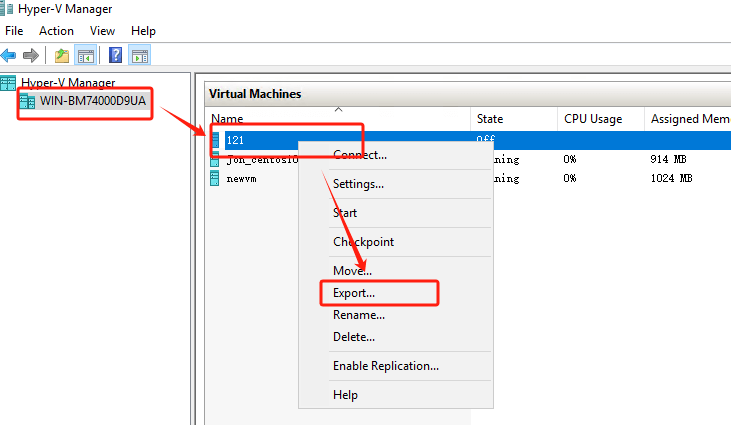
On the Hyper-V host in the source datacenter, perform the following steps through Hyper-V Manager to export the virtual machines you want to migrate. This step creates a copy of the virtual machine for import in the target datacenter.
Hit the host in datacenter1> right-click the VM > select Export Virtual Machine > specify the Location(remember this path here) > hit Export
Step2: Import the virtual machine
If you have previously exported a VM, remember to delete it before re-importing it to the same machine to avoid duplicate VMs (with the same UUID). Now, let's proceed with the import operation.
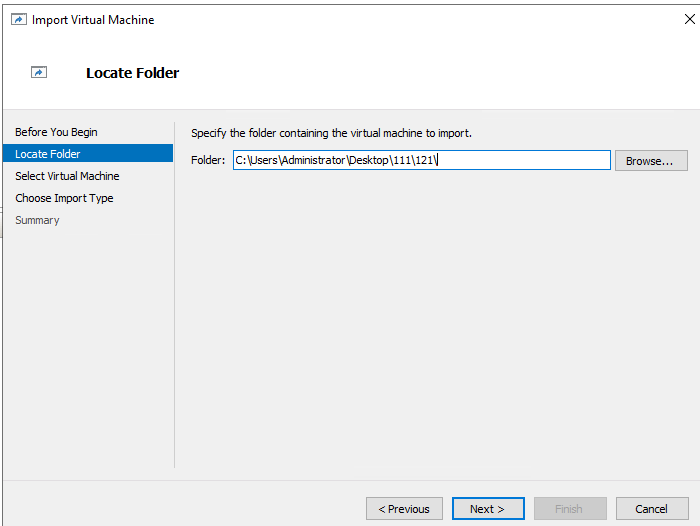
Choose the host in datacenter2> Import Virtual Machine > find the Locate Folder > select the VM to import > choose Import Type > hit Finish
Here you can see that the migration of the Hyper-V virtual machine from one datacenter to another has been completed successfully!

How to export and import Hyper-V VM with PowerShell Scripting?
By harnessing the command-line capabilities of PowerShell, users can execute precise instructions to export and import Hyper-V virtual machines seamlessly.
Step1: Connect to the Hyper-V server
Type PowerShell in the search box on the Windows taskbar > Press Enter > Enter the following command to link to Hyper-V.
Enter-PSSession -ComputerName YourHyperVHostName -Credential Get-Credential
Enter-PSSession -ComputerName 172.xxxx -Credential Get-Credential
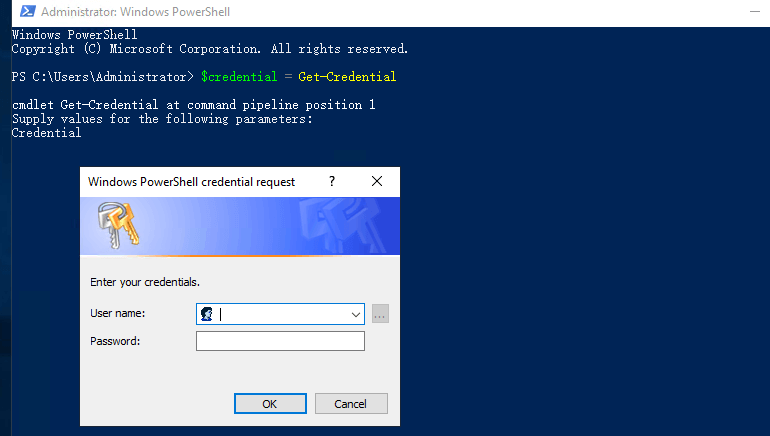
Enter the appropriate username and password in the pop-up window to connect to the Hyper-V server.
Step2: List available virtual machines
This will show all virtual machines running on the Hyper-V host.
Get-VM

Step3: Export the VMs to be migrated
Export-VM -Name YourVirtualMachineName -Path "C:ExportPath"
Export-VM -Name 121 -Path "C:UsersAdministratorDesktop444"
Step4: Disconnect the session with the source Hyper-V host
Remove-PSSession $sourceSession
Step5: Connect to the target Hyper-V host
Same as step one. Type the following command:
Enter-PSSession -ComputerName YourHyperVHostName -Credential Get-Credential
Enter-PSSession -ComputerName 172.xxxxx -Credential Get-Credential
Step6: Import Virtual Machines
Import-VM -Name YourVirtualMachineName -Path "C:ImportPath"
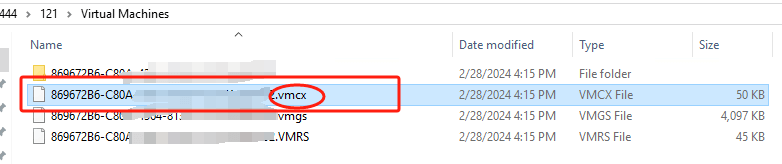
Import-VM -Path "C:UsersAdministratorDesktop444121Virtual Machines869672Bxxxxxxx.vmcx"
When importing a virtual machine, make sure that the ImportPath parameter points to a file with a .vmcx extension. And that the file is located in the path of the exported virtual machine. The path provided must be a correct GUID-formatted filename, otherwise PowerShell will not recognize the path and import the virtual machine. Make sure that the path provided is correct and contains the correct filename and .vmcx extension.
The virtual machine has been successfully imported and its name is "121 and the status of the imported virtual machine is normal (Operating normally)

How to migrate Hyper-V VM in Vinchin Backup & Recovery?
While it is possible to utilize the import and export features of Hyper-V virtual machines, the process can be relatively cumbersome and requires a lot of time and effort. However, you can make VM backup and recovery easier by using third-party virtualization management software, Vinchin Backup & Recovery, a powerful backup and recovery solution designed for virtualized environments.
Vinchin Backup & Recovery is a backup solution designed for VMware, Hyper-V, XenServer, XCP-ng, oVirt, RHV, Proxmox and other VMs. When using Vinchin Backup & Recovery for VM migration, you can choose to restore VMs directly from backups to the target datacenter, saving time and effort. In addition, Vinchin supports not only same-platform migration, but also V2V migration, providing you with a wider range of migration options.
Transporting a Hyper-V VM in Vinchin Backup & Recovery is very simple, just a few simple steps.
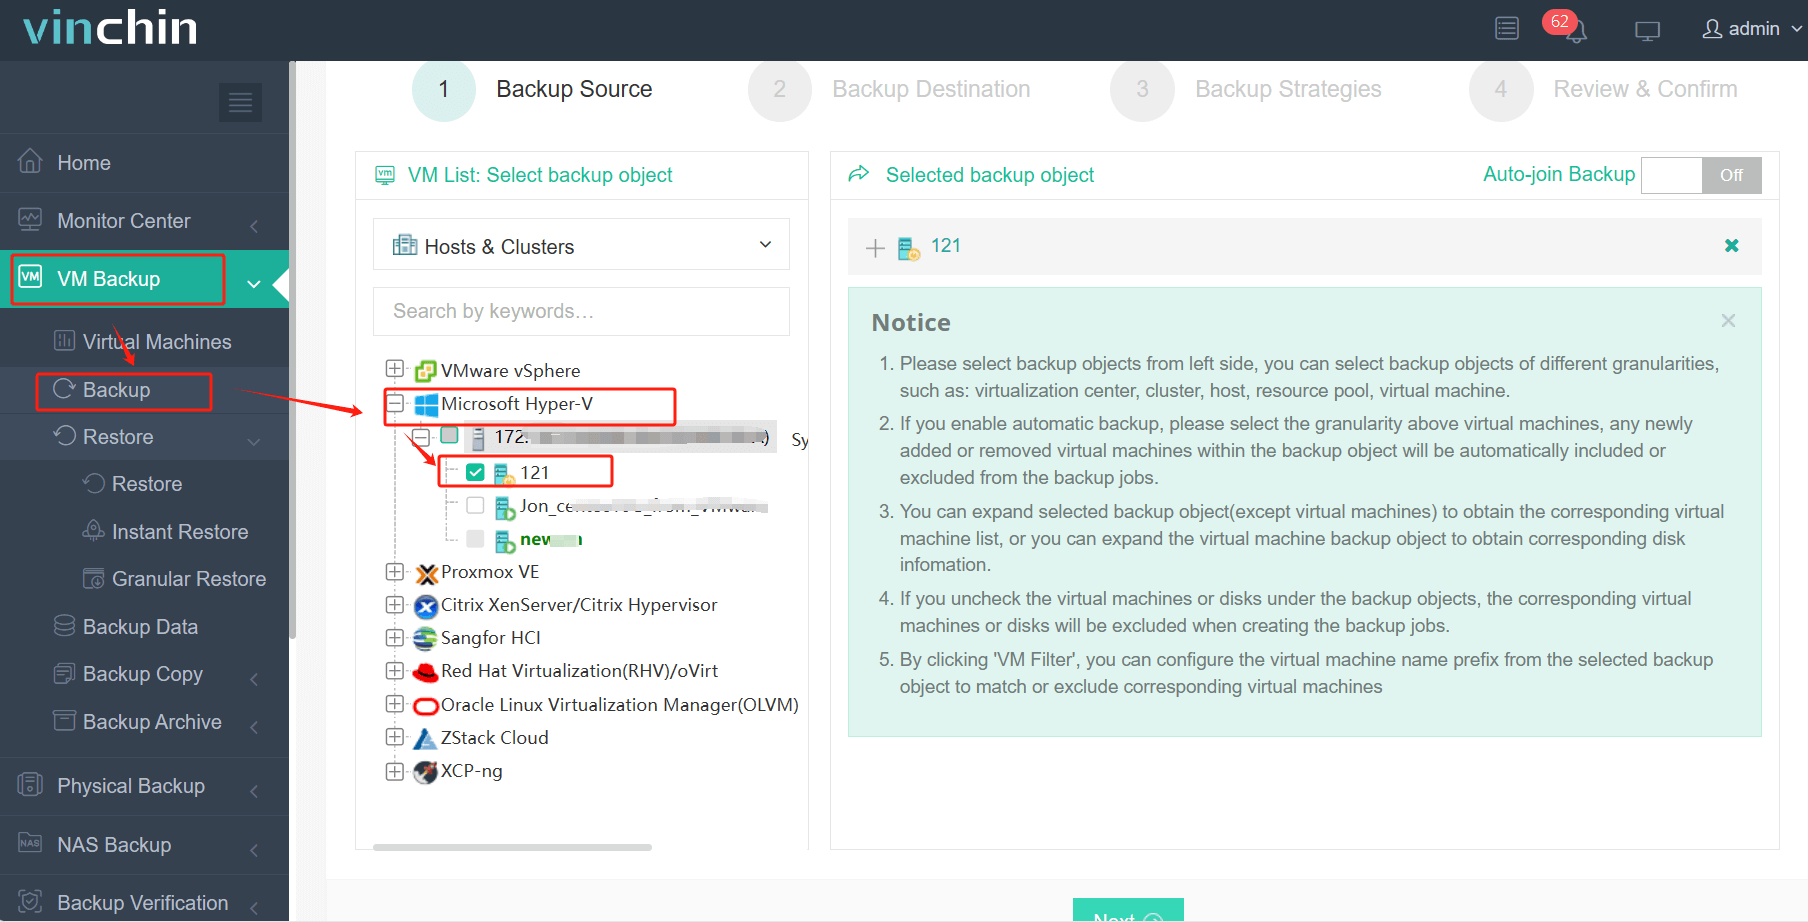
Backup a Hyper-V VM
1. Just select VMs on the host
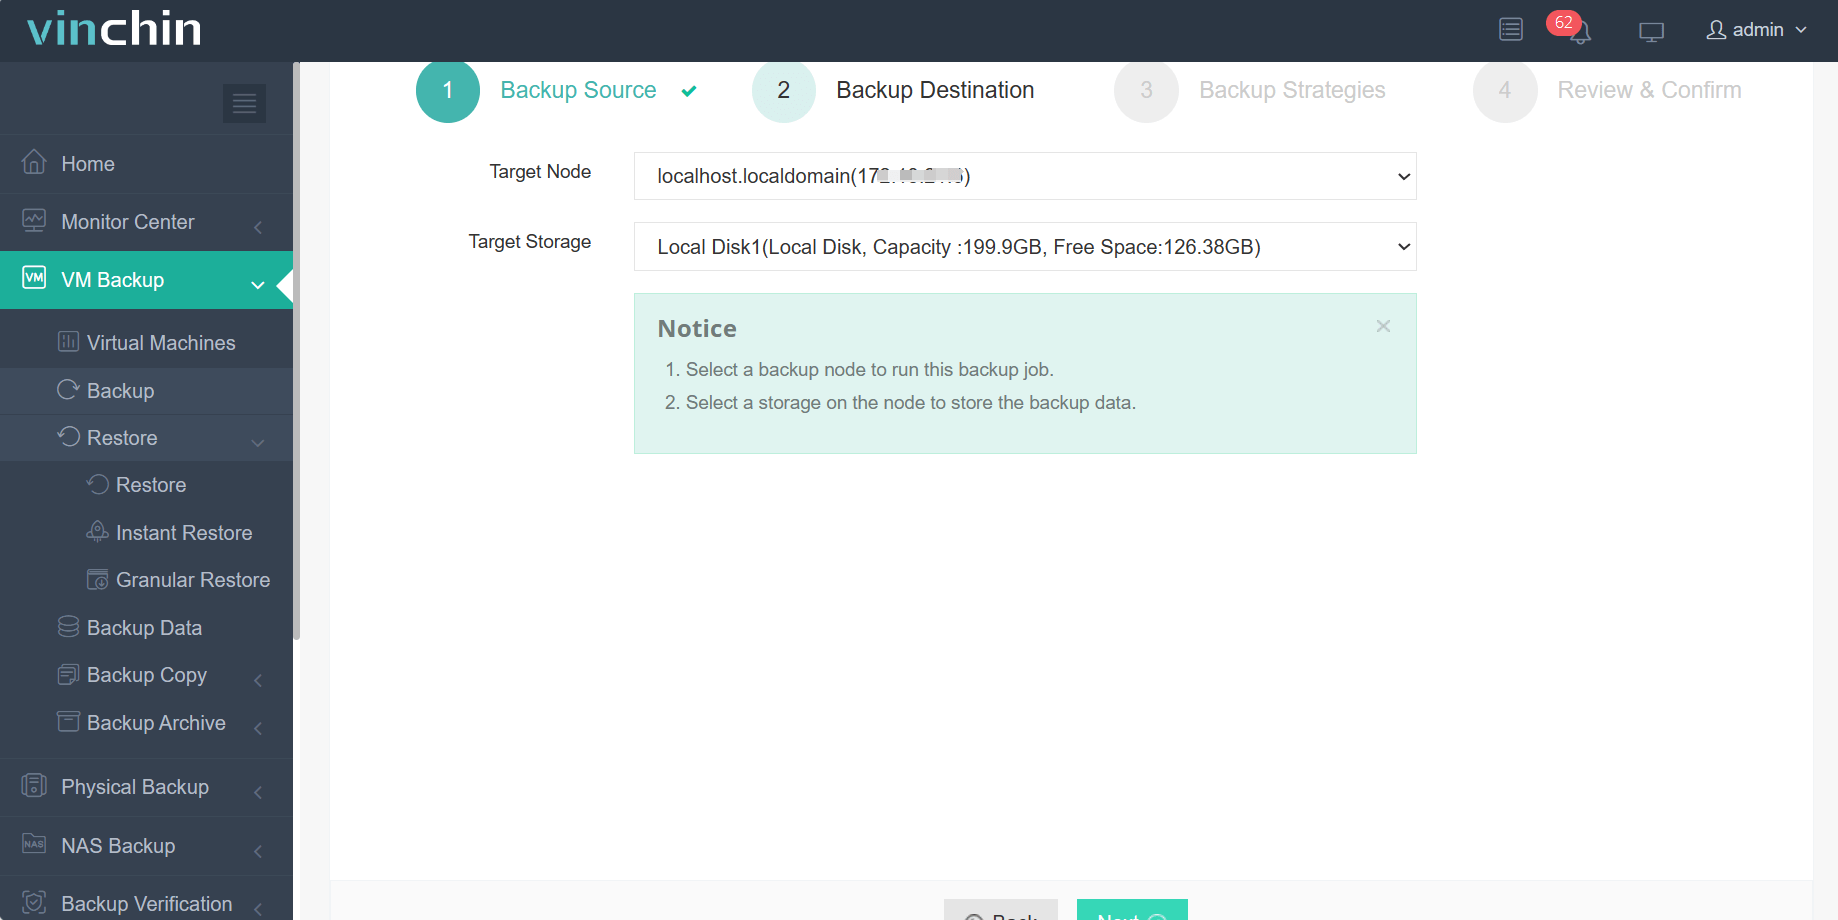
2.Then select backup destination
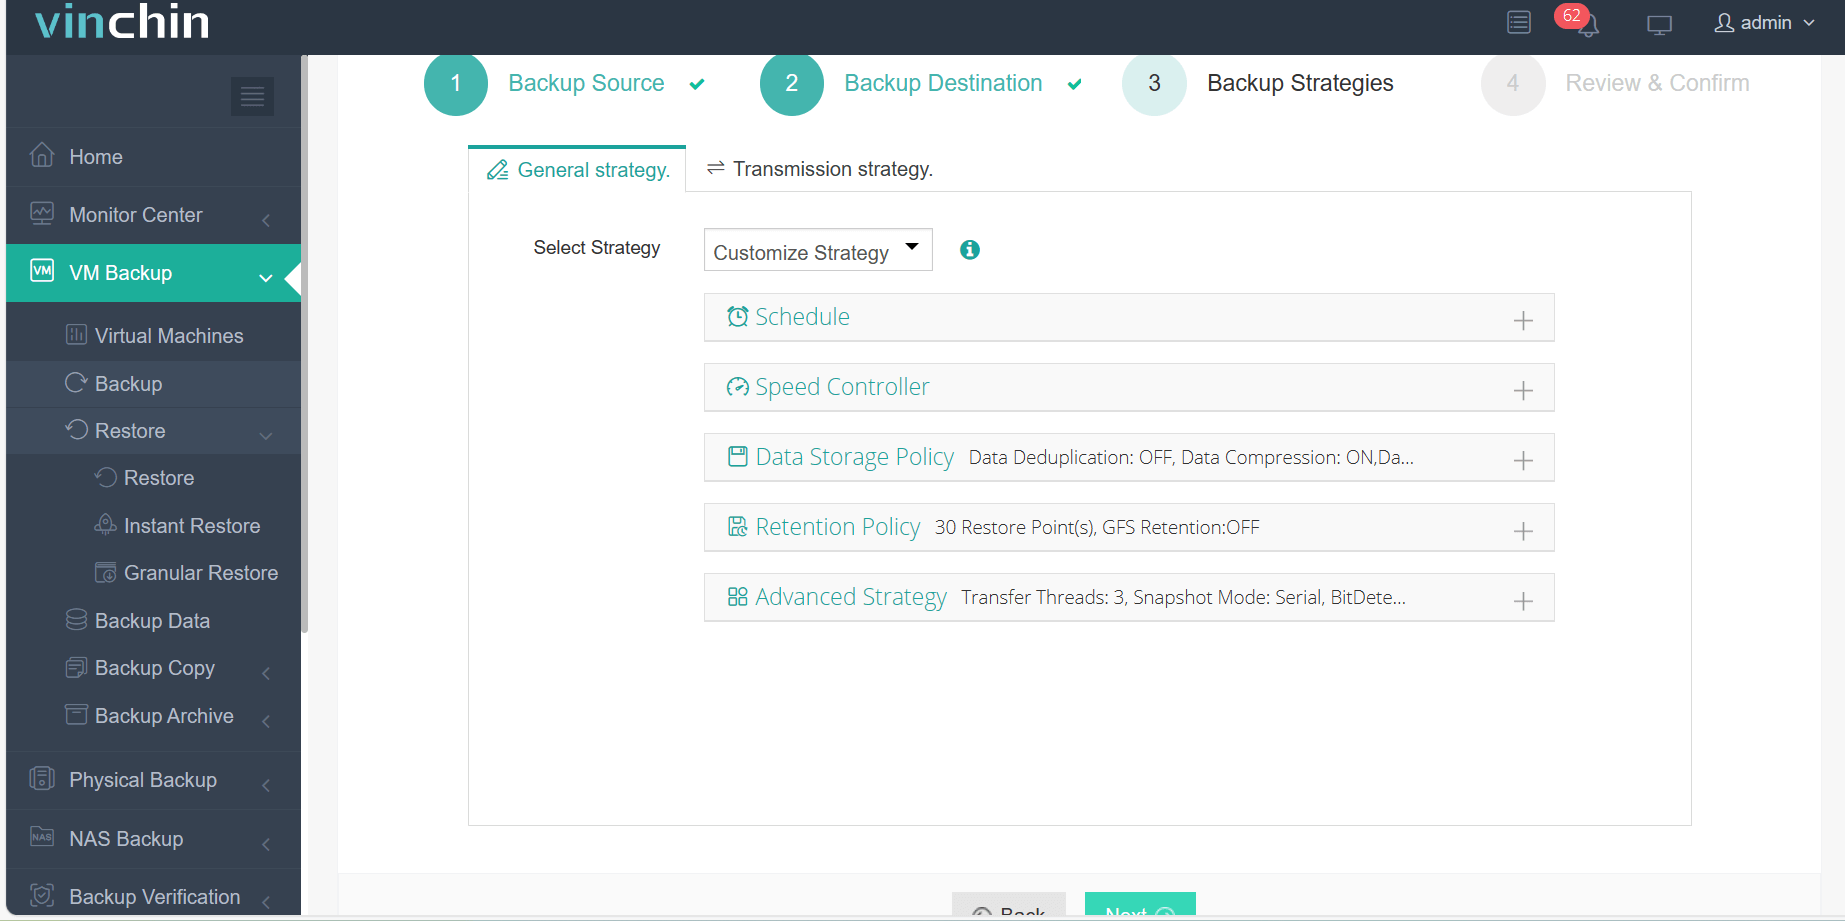
3.Select strategies
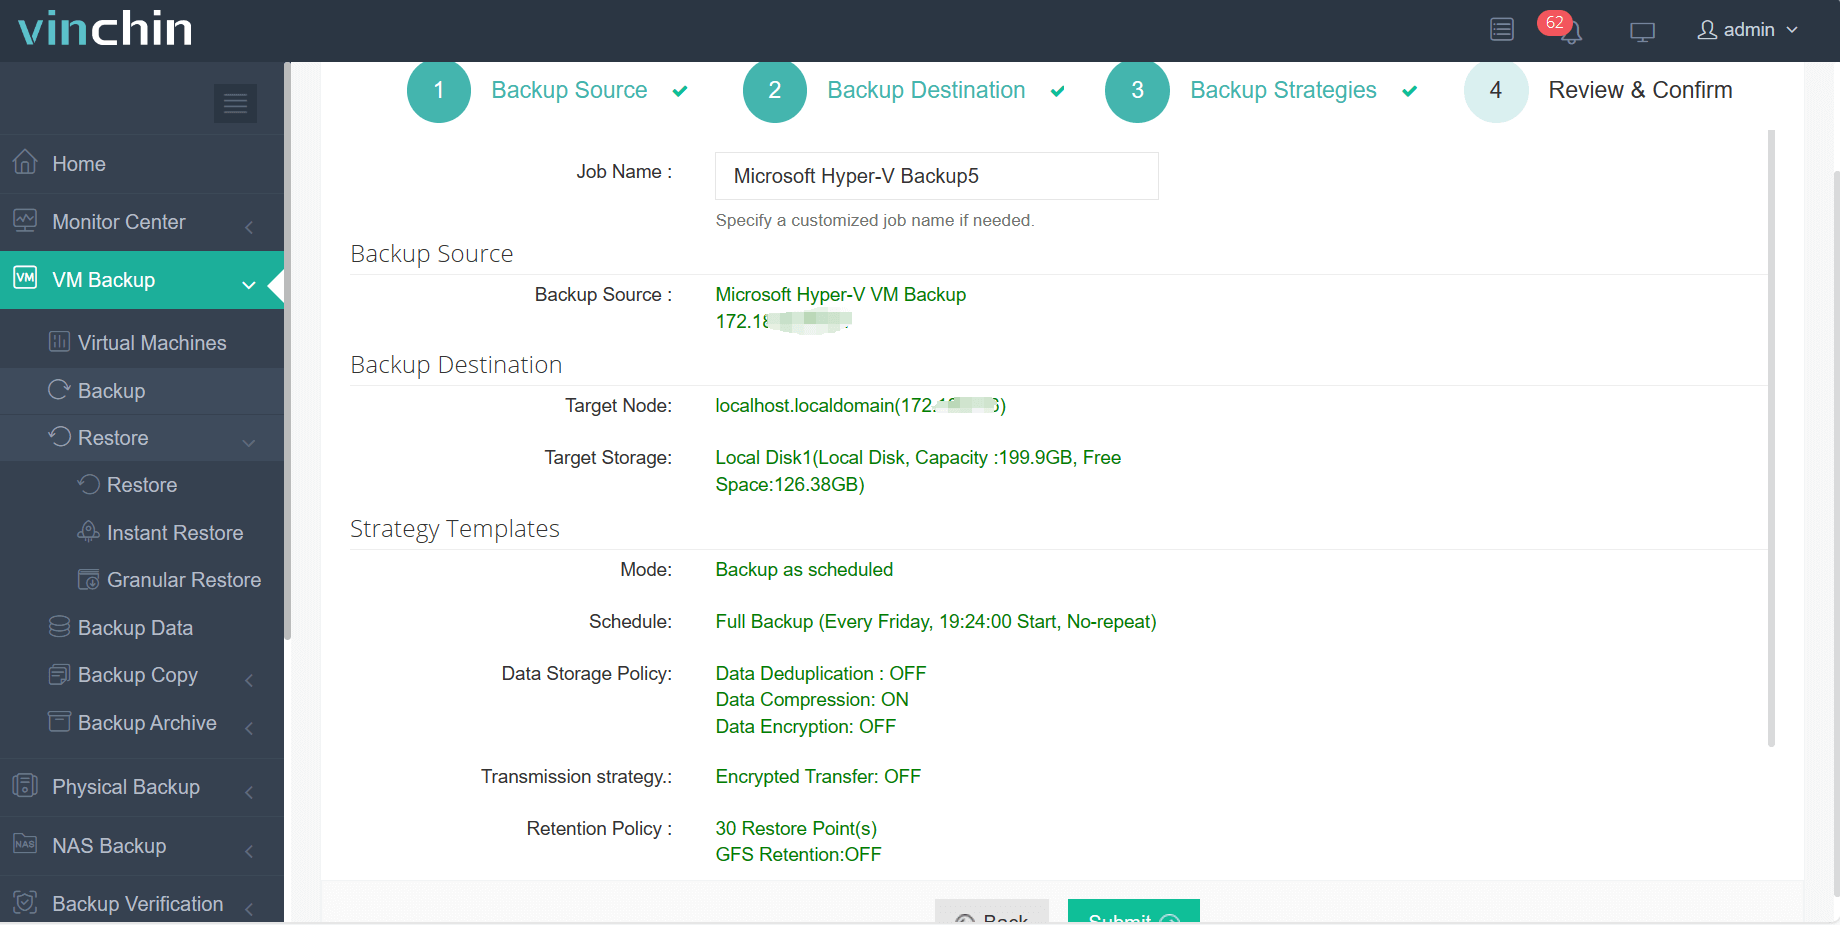
4.Finally submit the job
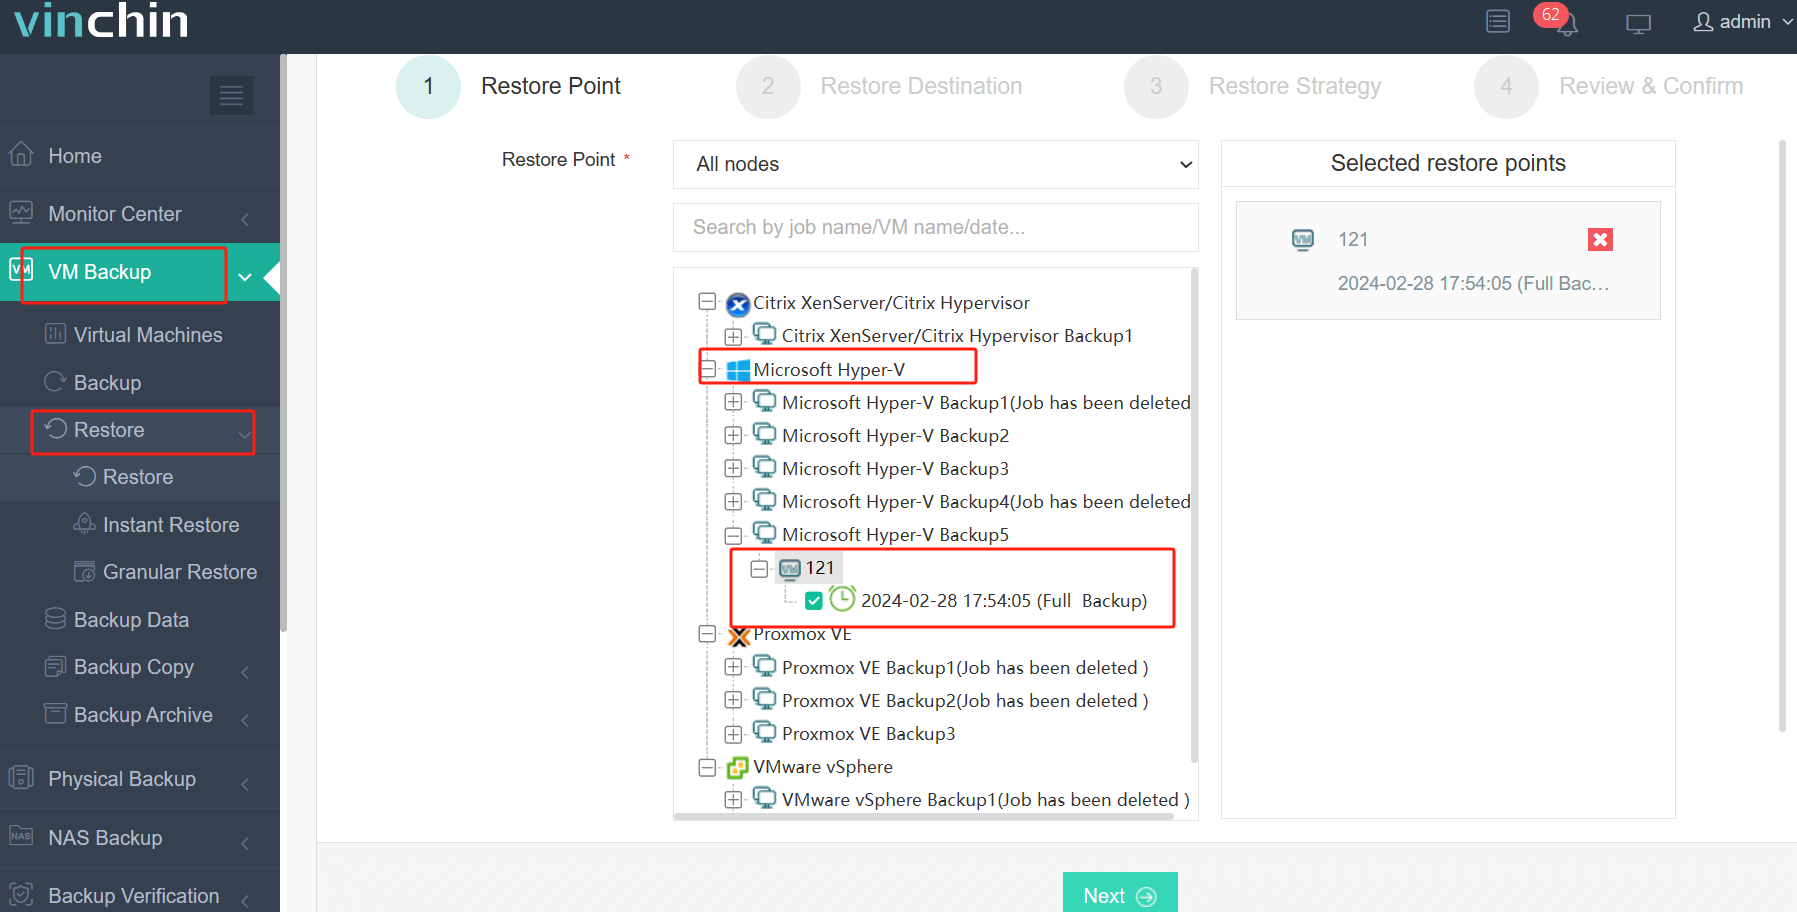
Restore the Hyper-V VM
1. Choose the VM you want to restore
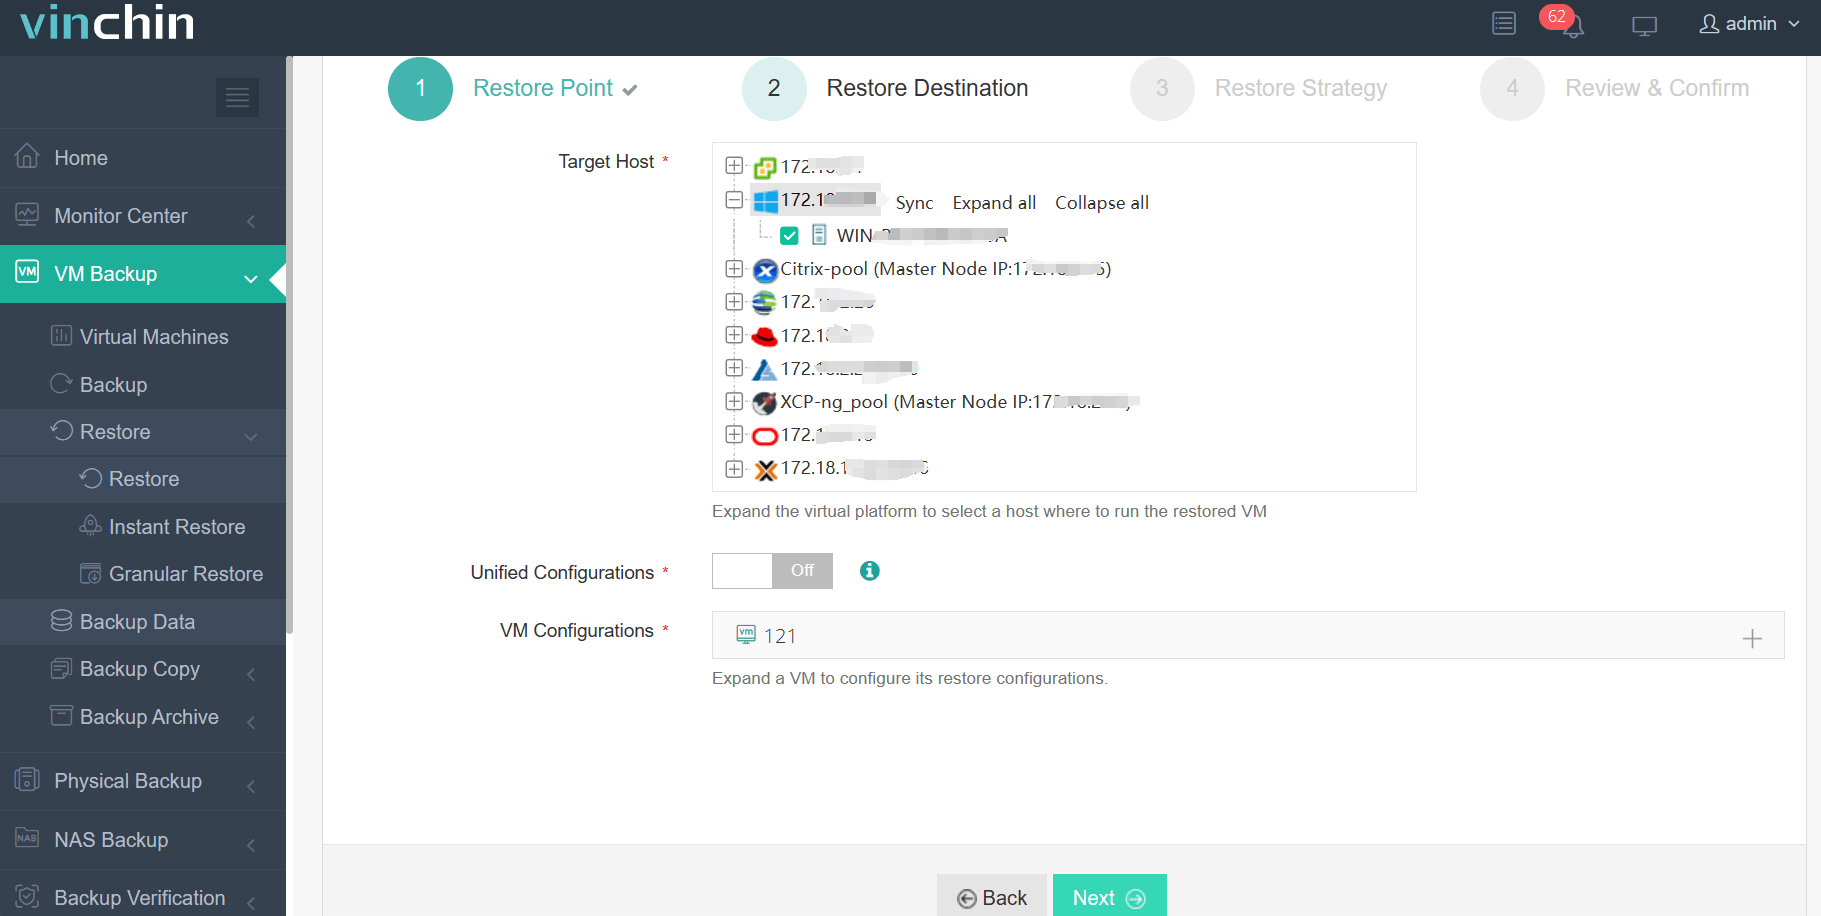
2. Select the Hyper-V host to run the restored VM
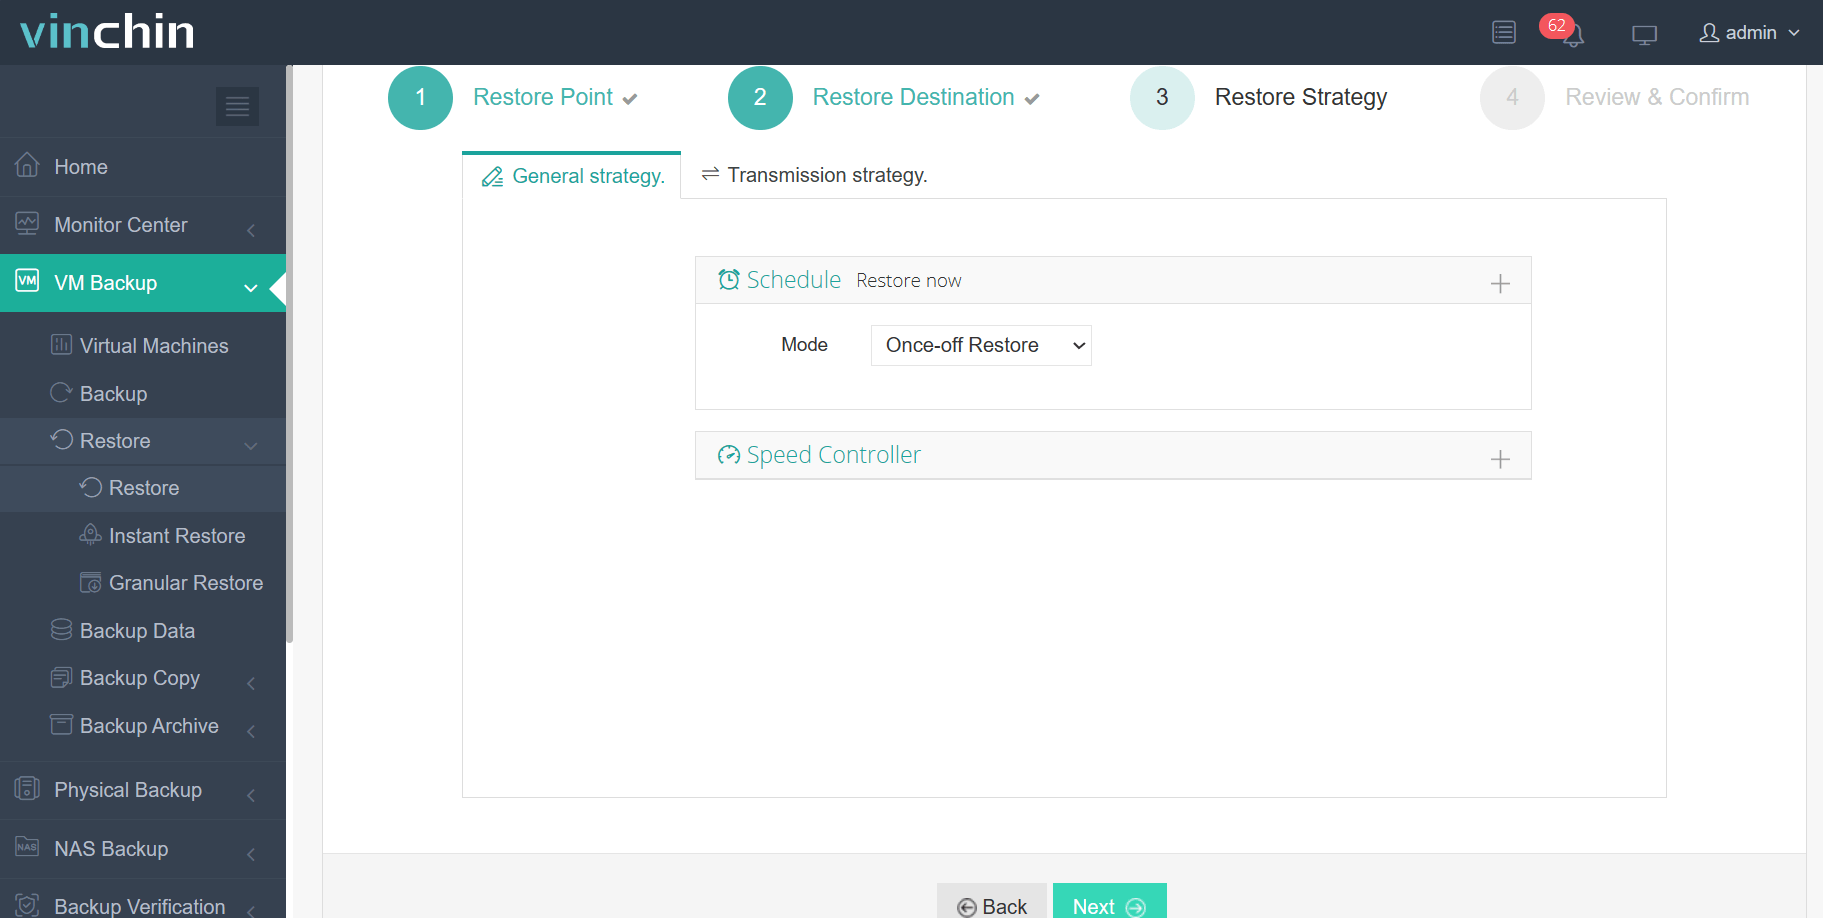
3. Select the restore strategy
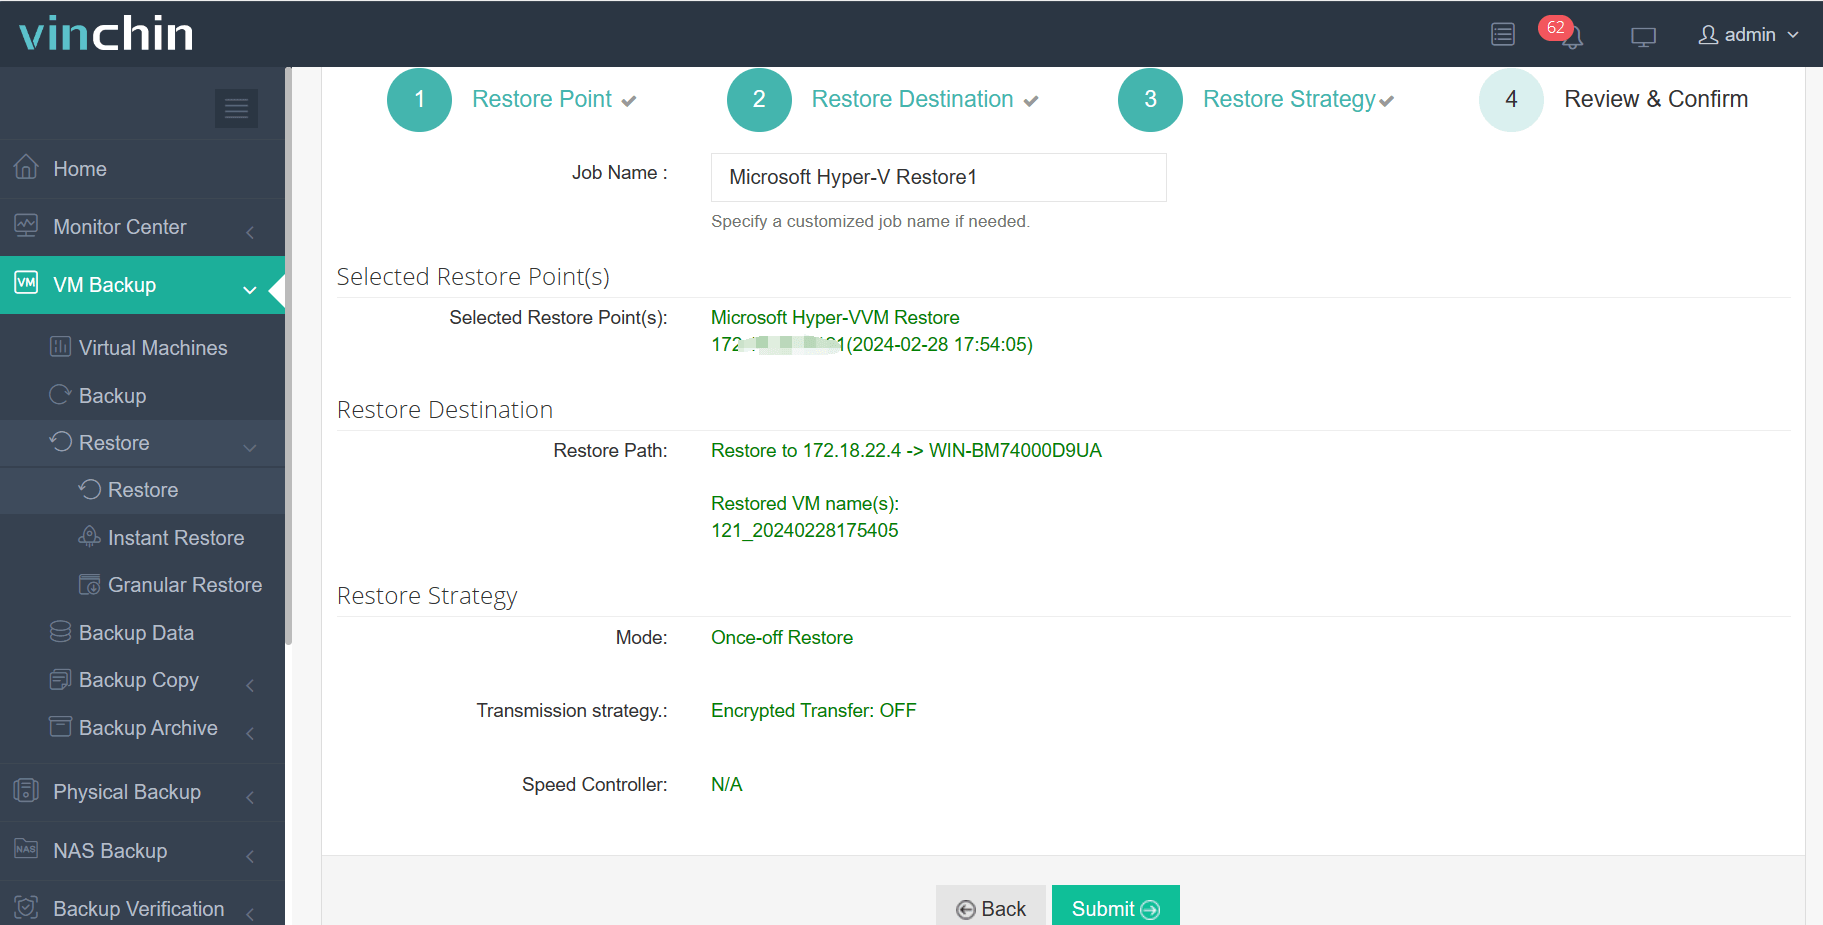
4. Review and submit the job
To experience the functionality firsthand, Vinchin offers a free 60-day trial. For more information, feel free to contact Vinchin directly or reach out to our local partners.
Hyper-V VM migration FAQs
Q1: My Hyper-V virtual machine has a lot of data, will this affect the migration speed?
A1: Yes, large amounts of data can affect migration speed. You can use techniques such as compression and optimized data transfer to minimize migration time.
Q2: Can virtual machines be migrated from Hyper-V to Proxmox?
A2: Yes, you can migrate virtual machines from Hyper-V to Proxmox. One method is to manually convert the virtual hard disk files of Hyper-V virtual machines (usually in VHD or VHDX format) to a format recognized by Proxmox (such as qcow2), and then copy the virtual hard disk files and configuration files to the Proxmox host and import the virtual machine. Another more convenient method is to use Vinchin Backup & Recovery for the migration from Hyper-V to Proxmox. This eliminates the need for manual conversion and copying steps, making the migration process more convenient and efficient.
Conclusion
In conclusion, migrating virtual machines from one datacenter to another in Hyper-V is not directly supported. However, you can achieve this by exporting and importing VMs via Hyper-V Manager or PowerShell scripting. Alternatively, using third-party solutions like Vinchin Backup & Recovery simplifies the process, offering efficient VM backup, recovery, and migration capabilities across different platforms.
Share on: