How to install PostgreSQL database backup agent of Vinchin Backup & Recovery
2022-07-22 | Nick Zhao
In this blog, you’ll learn how to install the backup agent of Vinchin Backup & Recovery for PostgreSQL databases protection.
You can now use Vinchin Backup & Recovery to backup PostgreSQL 12, 13, and 14 databases in both virtual machines and physical servers. The first thing we need to do before getting a backup job started, is to install a lightweight backup agent on the source OS that mounts your databases and register it to the Vinchin backup server.
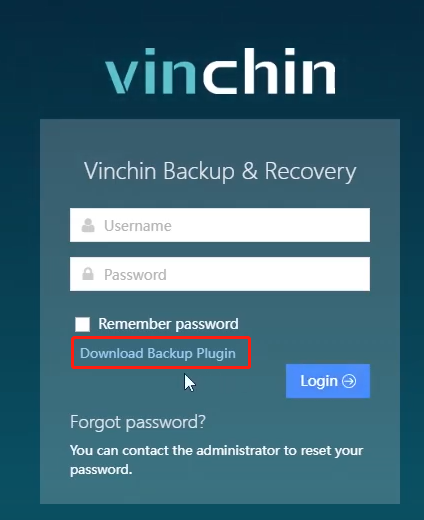
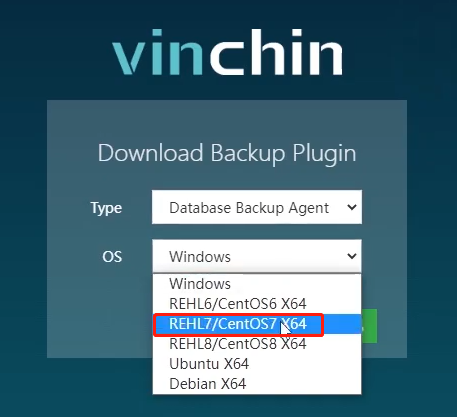
First, open the Vinchin backup server web console. On the login page, click Download Backup Plugin, select Database Backup Agent from the Type dropdown list, and select the source operating system where your databases are deployed from the OS dropdown list. For PostgreSQL backup, the software currently supports RHEL/CentOS 7 and 8 x64 system versions. Here, we choose RHEL/CentOS 7 as the target OS and click Download to get the agent file package.
Upload the downloaded file to the source server where you store the PostgreSQL databases using any tool that supports remote file transfer like WinSCP or PSCP, and enter the Linux system command line interface to type the following commands:
Step 1. Decompress the package
tar -zxvf vinchin-database-backup-agent-xxx.tar.gz

Step 2. Enter the package folder
cd vinchin-database-backup-agent-xxx

Step 3. Install the backup agent
./db_backup_agent_install

Step 4. Check service use after an agent installation
ps -aux | grep database | grep -v 'grep

If the output shows 4 services as the demonstration screen shows, it means that the database backup agent has been successfully installed.

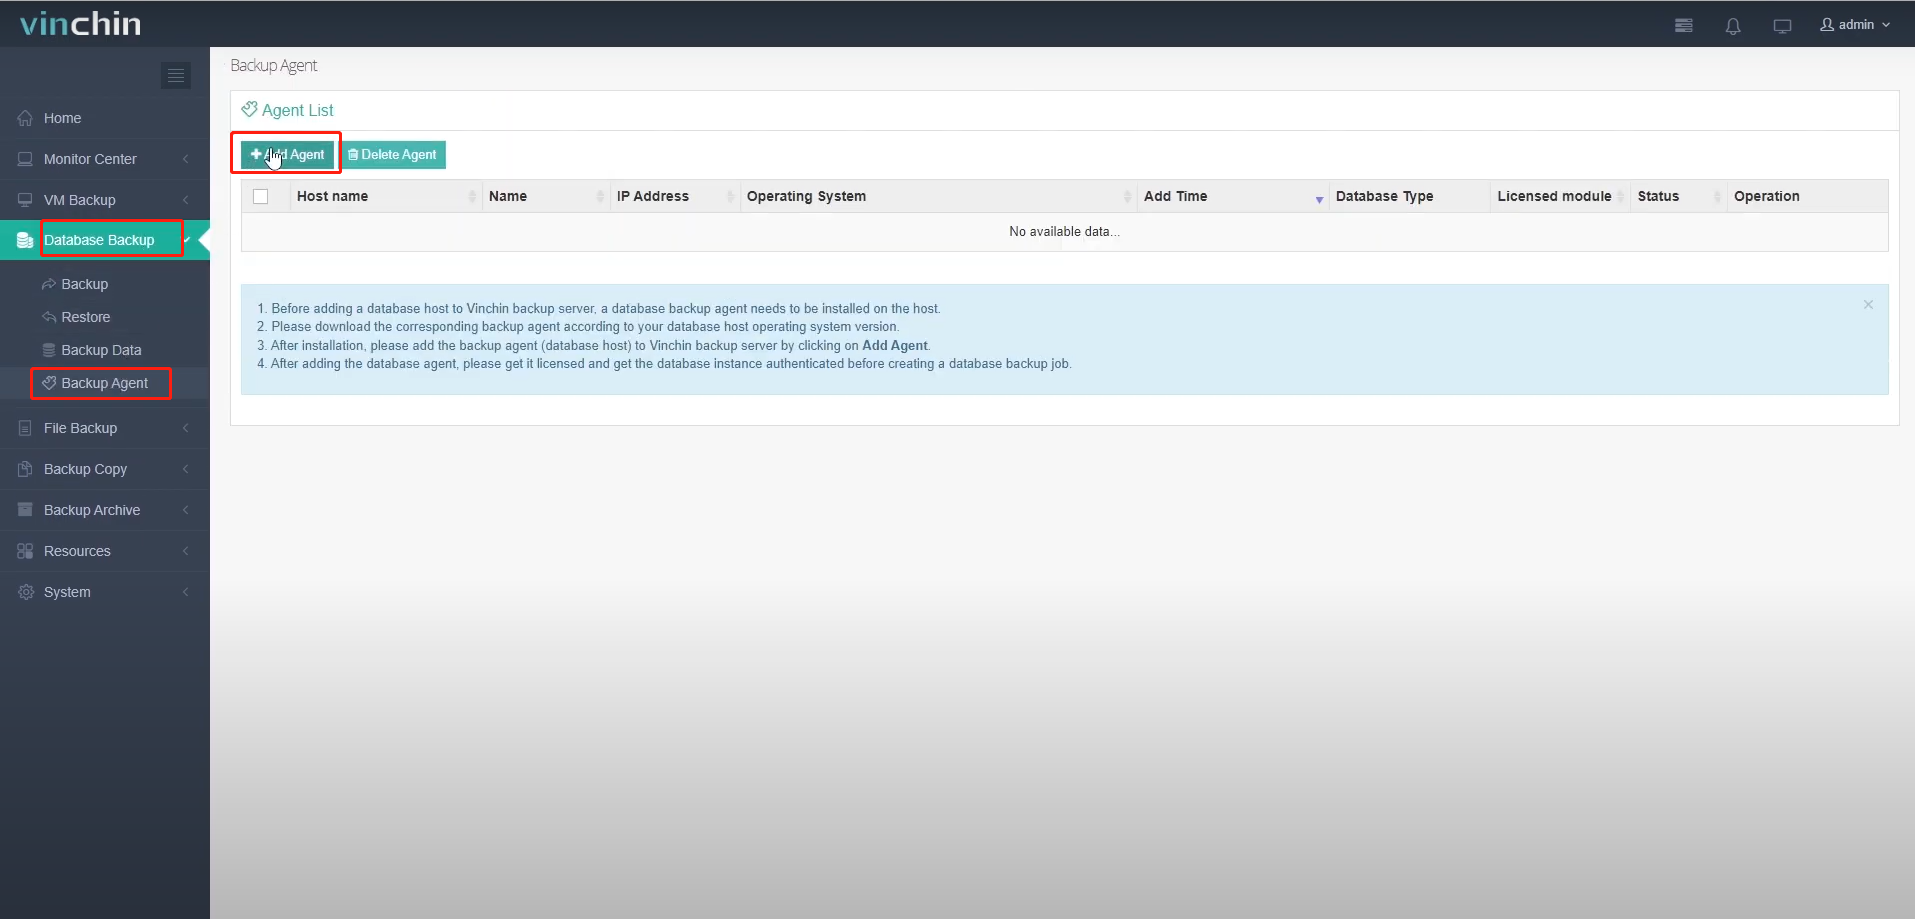
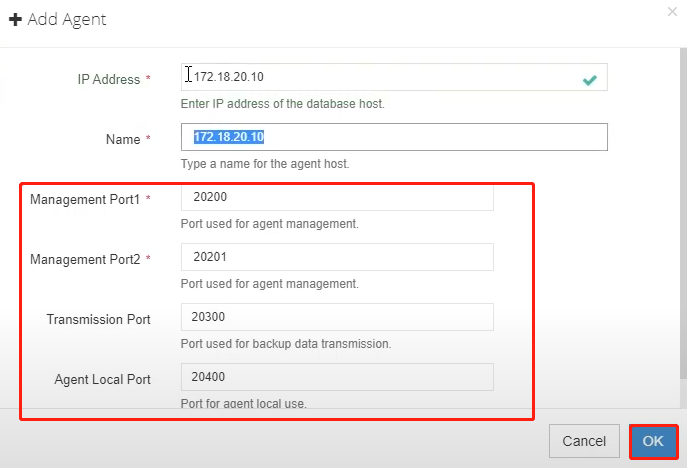
Now, you can re-open and log in to the Vinchin backup server web console, and go to Database Backup > Backup Agent page. Click Add Agent to configure the agent registration.
Fill in the IP address and backup agent Name. Please leave the 4 port numbers as default and do not change them. Click OK to save the settings.
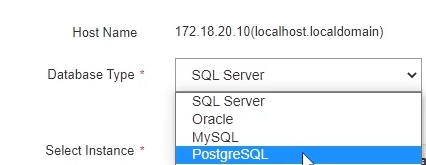
Click Options, and select License to get the backup agent licensed. Then, click Options again and select Authentication. In the Database Type dropdown list, select PostgreSQL.


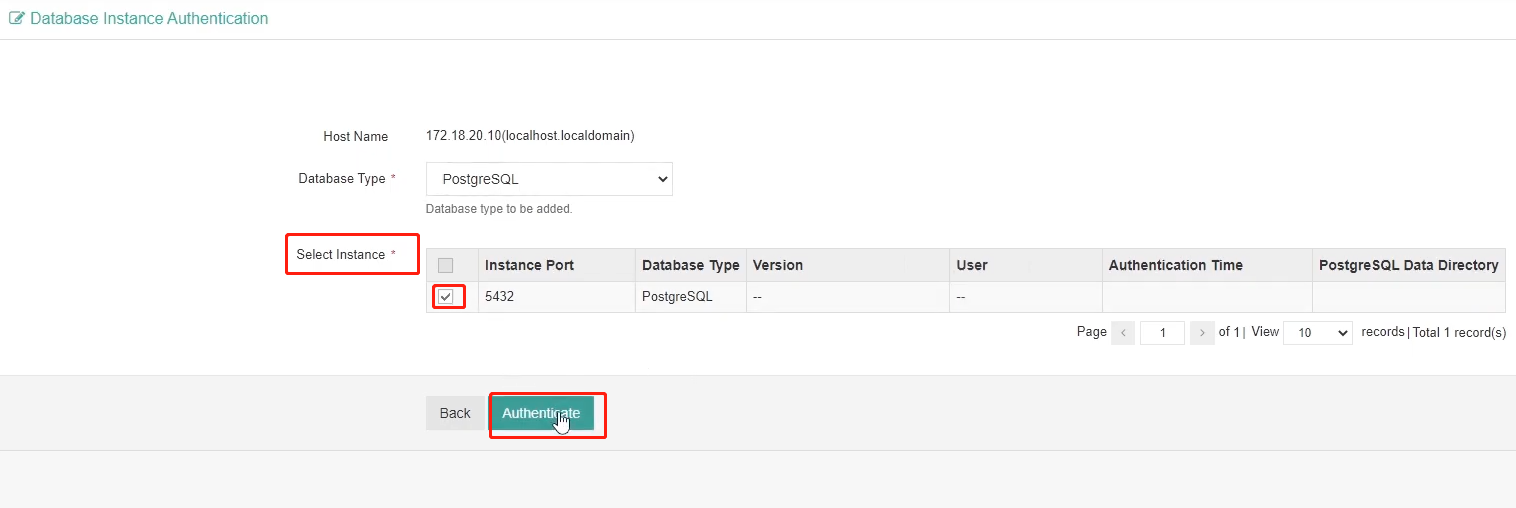
In the Select Instance field, all PostgreSQL instances on the server with a licensed backup agent will be shown. Select the instance and click Authenticate to get it authenticated for backup.
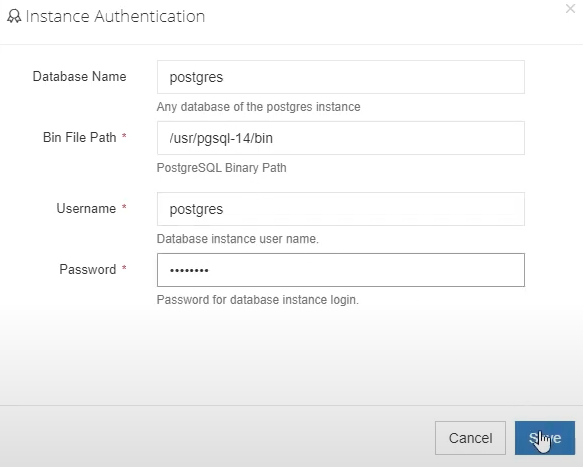
Fill in the Bin File Path, Username, and Password, and click Save to complete it. Now, you’re fully ready to get the backup journey started!
Share on:


 English


